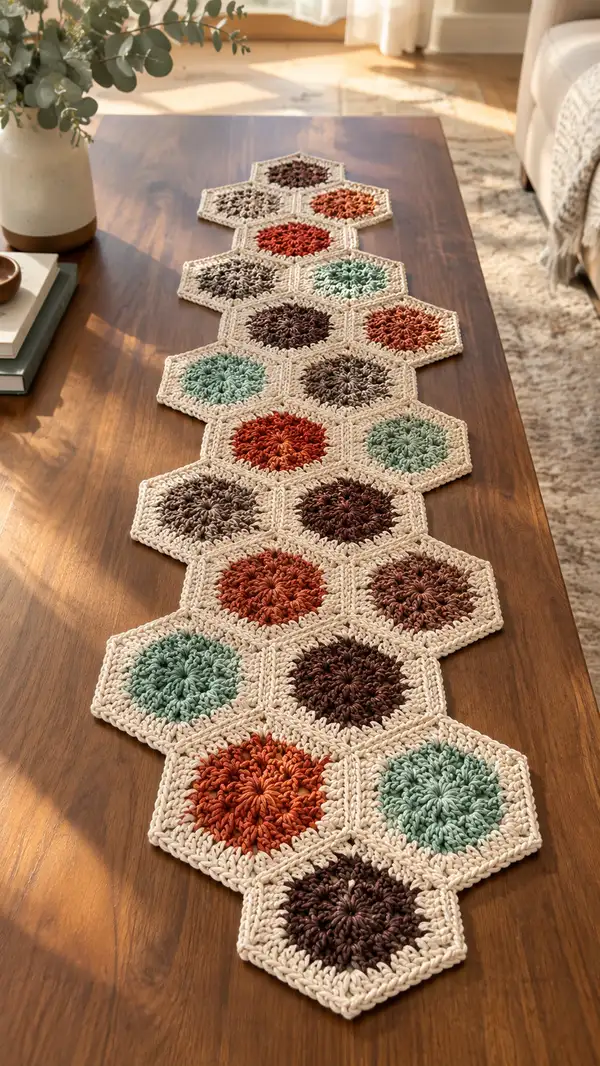
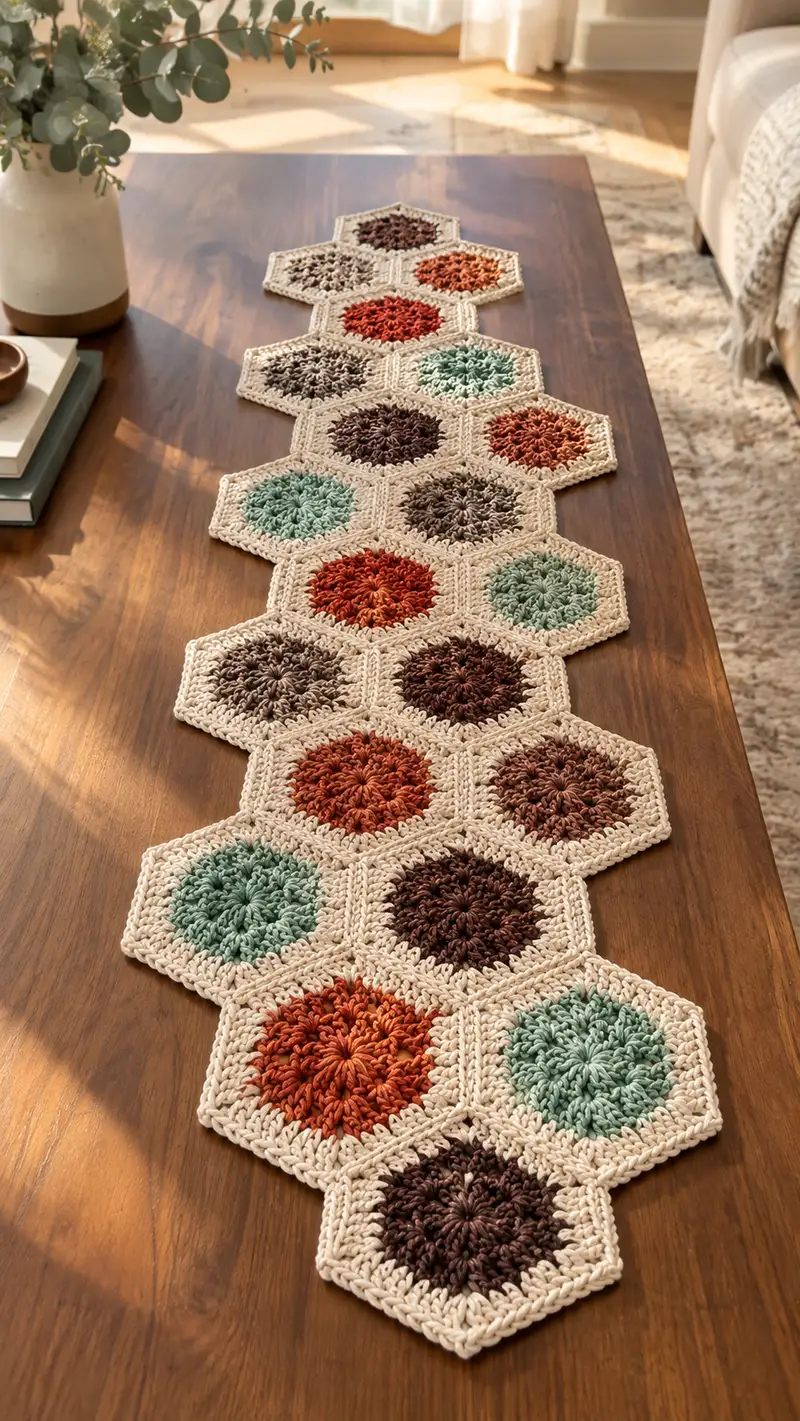
A warm, textured hexagon table runner made from chunky textured centers and a neutral cream hex border. This runner features puff-cluster centers in autumn greens, rust and chocolate tones joined into a honeycomb layout. The finished piece lays flat, with a soft raised center texture and a solid neutral edge that highlights each hex motif.
Progress Tracker
0% Complete
— Special Stitches & Notes :
Info :
This pattern uses a 3-loop puff stitch frequently for a plush textured center. Puff: yarn over, insert hook, pull up loop; repeat 3 more times (4 loops pulled up on hook total), yarn over and pull through all loops, ch1 to close puff. For a firmer puff use 3 repeat loops (3 partial pulls) for stronger definition. Work tightly for amigurumi-like solidity; here we want a dense, textured surface so use recommended hook.
Info :
When working rounds, do not join with a long sl st unless specified. Join rounds as indicated. Use stitch markers for round starts or place a contrasting thread through first stitch then slide as you work.
— Hexagon Motif (Make 15 motifs total) :
Round 1 :
Using accent color of choice, make a magic ring. Work 12 puff stitches into the ring, each puff separated by ch1. (12 puff clusters)
Round 2 :
Join with a sl st to the top of first puff's ch1 space, ch3 (counts as dc here and throughout), *3 dc in the ch1 space between puffs; rep from * around (3 dc in each ch1 space x12 = 36 dc). Join with sl st to top of starting ch3. (36)
Info :
Keep stitches even and place your join to the base of the first dc for a neat row start. This round converts the textured puffs to a working foundation of dc stitches.
Round 3 :
Ch3 (counts as dc), *5 dc in next 5 dc, 2 dc in next dc; rep from * around. (This is (5 dc, inc) x6 - work 6 repeats, total becomes 42) (42)
Round 4 :
Ch3, 1 dc in each st around. Join. (42)
Round 5 :
Ch3, *6 dc in next 6 dc, 2 dc in next dc; rep from * around. (This is (6 dc, inc) x6 = 48) (48)
Info :
At this stage the work will be a round; the increases are establishing the hexagon shape by adding stitches evenly at six points. If you see slight ruffling, it's fine; it will flatten when corner chain spaces are added next.
Round 6 :
Ch3, 1 dc in each st around. Join with sl st. (48)
Round 7 :
Switch to main neutral color here (cream). Ch1, sc in same st, *sc in next 6 sts, (sc, ch2, sc) in next st; rep from * around (this places a ch2 corner at six evenly spaced points). Join with sl st to first sc. Count: the number of sc stitches equals previous dc stitches minus consumed corner sts; total remains 48 sc around plus 6 ch2 corner spaces (effective stitch count recorded as 48 sc + 6 ch2 corners).
Info :
Change to the neutral color with the last pull-through of the final dc to avoid a visible knot. Carry or weave ends in as you go for a neat finish. The ch2 corners create six points for a true hexagon shape.
Round 8 :
Ch3 (counts as dc), *dc in each sc for the next 6 sc, (2 dc, ch2, 2 dc) in each ch2 corner; rep from * around. (Each corner now has 4 dc, and the sides preserve dc groups. Calculation: sides = 6 sides x 6 dc =36 plus corners = 6 corners x 4 dc =24; total = 60 dc). Join with sl st. (60)
Round 9 :
Ch3, 1 dc in each st around. Join. (60)
Round 10 :
Ch1, sc in same st, *sc in next 9 dc, (sc, ch2, sc) in next ch2 space; rep from * around. Join with sl st to first sc. This creates a sturdy single crochet frame; the stitch count = 60 sc plus preservation of ch2 corners (six corners remain present as spaces).
Info :
If you prefer a slightly smaller border around each motif, work fewer sc along each side (for example sc in next 8 instead of 9), but maintain regular spacing so corner placement stays even. This will alter counts for later rounds but is an acceptable customization.
Round 11 :
Ch2, hdc in same st, *hdc in next 9 sc, (2 hdc, ch2, 2 hdc) in corner space; rep from * around. Join with sl st to top of starting ch2. This bulks the neutral frame to match the chunky center. Expected stitch total: sides 6 x 9 =54 hdc + corners 6 x 4 =24 = 78 hdc total. (78)
Round 12 :
Ch1, sc in each st around working evenly; work 2 sc in each corner ch2 space for reinforcement. Join and fasten off leaving a 12-14 inch tail if you will use this tail to seam motifs when using whip-stitch join; otherwise weave in ends and clip. (Final count will be approximately 78 sc with corner reinforcements.)
Info :
Fasten off securely and weave in ends if you are not using the join-as-you-go method. For a clean runner, we recommend making all hex motifs and then using the join-as-you-go (JAYG) technique described in the next section to connect motifs with the neutral color round.
— Motif Color Layout (based on photo) :
Info :
Make a total of 15 hexagon motifs in the following colors for the textured centers (use accent color for Rounds 1-6 and neutral for Rounds 7+): Motifs: 1 rust orange, 2 sage green, 3 chocolate brown, 4 taupe brown, 5 rust orange, 6 sage, 7 deep chocolate, 8 rust orange, 9 taupe, 10 sage, 11 chocolate, 12 rust, 13 taupe, 14 sage, 15 chocolate. Adjust to your desired length; this sample layout yields a runner similar to the pictured honeycomb chain.
Info :
Repeat the Motif rounds (Rounds 1-12) exactly for each of the 15 motifs. Keep the neutral color rounds (Round 7 onward) consistent to make joining and final edging easier.
— Join-As-You-Go (JAYG) and Runner Assembly :
Round 13 :
After you have completed the neutral frame (Round 12) on the first hexagon, position motif 2 adjacent to motif 1 and prepare to join along one side. With neutral color on motif 2 and right sides facing, attach yarn at the first corner sc on the side you will join. Ch1, sc in same st; working across the side, *sc in next sc of motif 2, then insert hook into corresponding sc of motif 1 and sl st to join through both layers; ch1 to secure between joins; rep across until you reach the corner. In corner, work (sc, ch2, sc) in motif 2 corner and sl st into motif 1 corner ch2 for a firm corner join. Fasten off and weave tail. This attaches motifs 1 and 2 with a neat seam of alternating sc and sl st joins.
Info :
The ch1 between join steps leaves a tiny decorative space which helps the pieces sit flat. Use a smaller hook (4.5mm) for tighter joins if you notice gaps. Pin the motifs before joining to maintain even tension.
Round 14 :
Join motif 3 to motif 2 in the same manner along their adjacent side. Where motifs meet at a point (three-way junction), work a reinforced slip stitch through all three corresponding corner ch2 spaces to lock them together. Continue joining motifs sequentially following the physical layout printed or pinned on your working surface. For each joined side use the sc-then-sl-st-through-adjacent-motif technique described above. Repeat for entire runner layout until all 15 motifs are connected in your chosen formation.
Info :
At three-way intersections (where a single hex corner meets two adjacent motifs), ensure the corner ch2 spaces of all motifs are aligned. Join them by inserting your hook through all corner loops and working a sl st or sc through all loops to secure the junction.
Round 15 :
Once all motifs are joined in a single runner strip, inspect seams and weave in all remaining ends. At this stage the runner will be flexible and honeycomb-shaped; block lightly if needed to even out hex edges. If you prefer a firmer runner, consider adding a finishing border that is worked continuous around the entire assembled piece (next section) to square the outer edge and add weight.
Info :
Blocking: Lightly wet-block or steam the assembled runner and pin each outer hexagon edge straight. Allow to dry fully before the final border to ensure tidy edges.
— Continuous Outer Border (Add stability and final finish) :
Round 16 :
With neutral yarn and right side facing, join in any outer corner ch2 space. Ch1, sc in the corner ch2 space, work 2 sc in the corner (to round the corner), then continue working 1 sc in each outer-most stitch along the side. When you reach an outer corner ch2 of the next motif, work (2 sc, ch2, 2 sc) in that corner. Continue this pattern all the way around the outside edge until you return to the starting corner. Count of sc depends on number of outer edge stitches; work evenly to maintain a flat border. Join with sl st and do not fasten off if you plan to continue to next round.
Info :
This round creates a solid, continuous perimeter ensuring the runner will hold shape. If there are small gaps at joins, add an extra sc or decrease one sc on short edges to keep tension even.
Round 17 :
Ch2 (counts as hdc), hdc in each sc around; when you reach corner groups (2 sc, ch2, 2 sc), work 2 hdc in each corner st and 2 hdc in ch2 space to bulk the corner; join. This will expand and firm the outer border and blend seams into the border.
Round 18 :
Switch to a textured round to echo the centers: ch1, *sc in next 3 hdc, 1 fpdc (front post double crochet) around next hdc to create a vertical ridge, rep from * around. At corners, place fpdc consistently around corner hdc to maintain pattern repeat. Join and fasten off. This creates a subtle ridge echoing the puff texture inside each hexagon.
Info :
If your runner is long and requires weight in the center, add an extra round of hdc or a reverse sc round to build more thickness. You can also add corner tassels or weighted inserts under the runner to keep it in place.
— Optional Decorative Edging (3 quick rounds) :
Round 19 :
Using neutral color, join at any border stitch. Ch3 (counts as dc), *skip 2 sc, 5 dc cluster (shell) in next sc, skip 2 sc, sl st in next sc; rep from * around to create lobed scallops. Work shells evenly across long edges and shorten shell repeats along short edges to avoid bunching. Join and fasten off.
Info :
Shell spacing can be adjusted for a more or less ornate finish. If you prefer a cleaner, modern look skip this edging and stop after Round 18.
Round 20 :
If you added the scallop, work a tiny sc round in a contrasting accent thread across the shells' tips (1 sc in each shell's middle dc) to add a delicate outline. Fasten off and weave ends.
Info :
Optional: use accent thread for picked out edges only at the long sides for a visually lighter finish rather than all the way around.
— Finishing Touches :
Round 21 :
Weave in all remaining ends neatly on the wrong side. Use a yarn needle and thread tails through several stitches in a zigzag to lock them. Trim close to fabric. Do a final gentle blocking to flatten any small ripples and encourage a smooth honeycomb layout. Let dry fully before use.
Info :
To add additional weight or protection, stitch a thin layer of felt to the underside of the runner at the center line using a ladder stitch or fabric glue. This is especially useful if the runner will be used on a very smooth surface.
Round 22 :
Care instructions: hand-wash cool and lay flat to dry. If using cotton yarn, you can machine wash on a gentle cycle in a laundry bag but always reshape and lay flat to dry to prevent stretching.
Info :
Adjust the number of motifs to make a shorter or longer runner. Add or subtract motifs from the center line and rework the outer border to suit the new perimeter. Keep the neutral joining round consistent to make assembly predictable.
This textured hexagon table runner combines cozy, tactile puff centers with clean neutral frames to create a warm, modern honeycomb look. Each motif is a small handcrafted jewel and when joined together they form a beautiful statement piece for any table. I hope you enjoy making every hexagon and seeing the runner come together in rich autumn tones. 🧶✨ Place it proudly on your table or gift it to someone who loves handmade home touches! 🍂