About This Toadstool Keychain Amigurumi Pattern
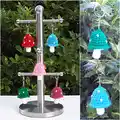
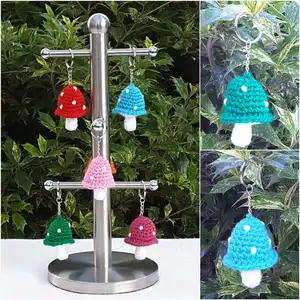
This pattern makes a tiny toadstool keychain with a crocheted cap and stalk, perfect for gifts or decorations. It includes step-by-step rounds for both the base (stalk) and the cap, plus finishing instructions. You can make multiple color variations quickly using small amounts of yarn.
Both UK and US terms are provided for clarity and convenience. The finished piece is small, portable, and ideal for using up yarn scraps.
Why You'll Love This Toadstool Keychain Amigurumi Pattern
I absolutely love this pattern because it is fast to make and endlessly customizable. I enjoy how a few simple rounds transform into a cute, tactile object that fits on a keyring. The small size makes it perfect for trying out color combos without committing to large amounts of yarn. I also love that you can make a bunch in an evening and gift them to friends or use them as bag charms.
Switch Things Up
I love changing the cap colours to make a set of coordinating keychains; try pastel shades for a softer look or bright primaries for playful charms.
I often experiment with yarn weight to change the size — bulky yarn and a larger hook gives you a chunky charm while fingering yarn makes a dainty mini.
I sometimes replace the embroidered white spots with tiny sewn-on felt circles for a textured, appliqued look.
I like to add a tiny ribbon loop or a bead on top of the cap before attaching the keyring for a decorative accent.
Try embroidering a tiny smile or eyes on the stalk for a cute character version of the toadstool.
For a festive feel, use metallic or variegated yarns to make seasonal keychains that stand out on bags and presents.
I occasionally add a short length of wire inside the stalk for a posable charm that holds a curved shape.
Make a whole garland by crocheting several toadstools and stringing them together instead of using keyrings.
I recommend testing spot placement before sewing them down — try several layouts until you find the most appealing arrangement.
Use contrast-coloured yarn for the cap's edge to give a neat finished rim and extra visual interest.
Common Mistakes & How to Fix Them
✗ Skipping the stitch marker when working in continuous rounds leads to lost counts; place a marker at the end of each round to track your rounds accurately.
✗ Overstuffing the stalk or cap causes lumps and distorted shapes; stuff gradually and only until the part can be squeezed slightly when pinched firmly.
✗ Pulling yarn too tightly when joining layers can pull the cap out of shape; secure with a couple of small stitches and avoid over-tightening during finishing.
✗ Not tucking or weaving ends through the cap starting circle can cause unraveling; weave the tail through the coloured section and secure with small stitches before trimming.