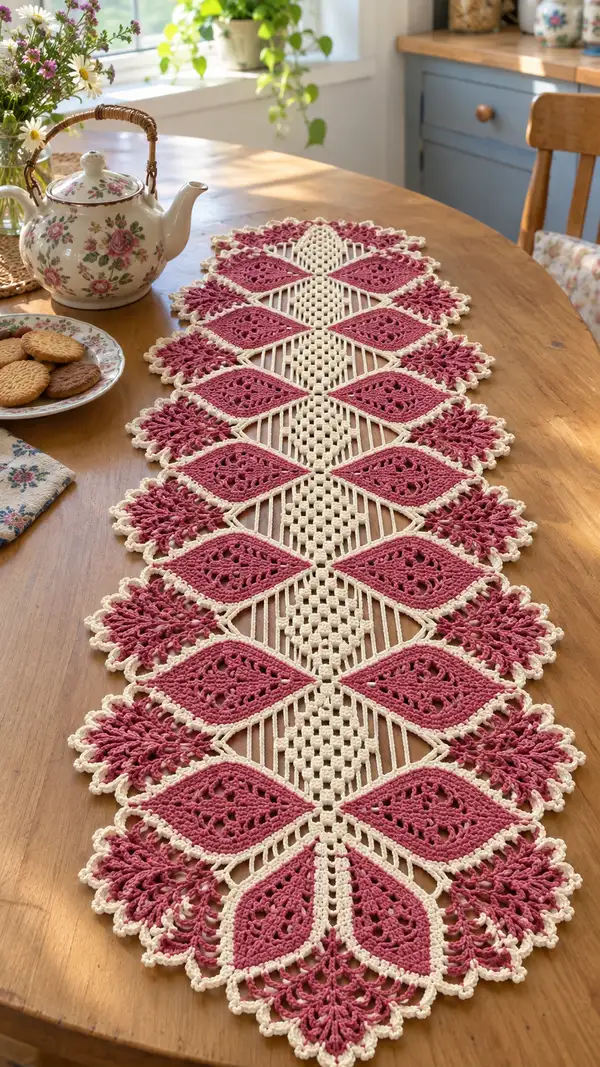
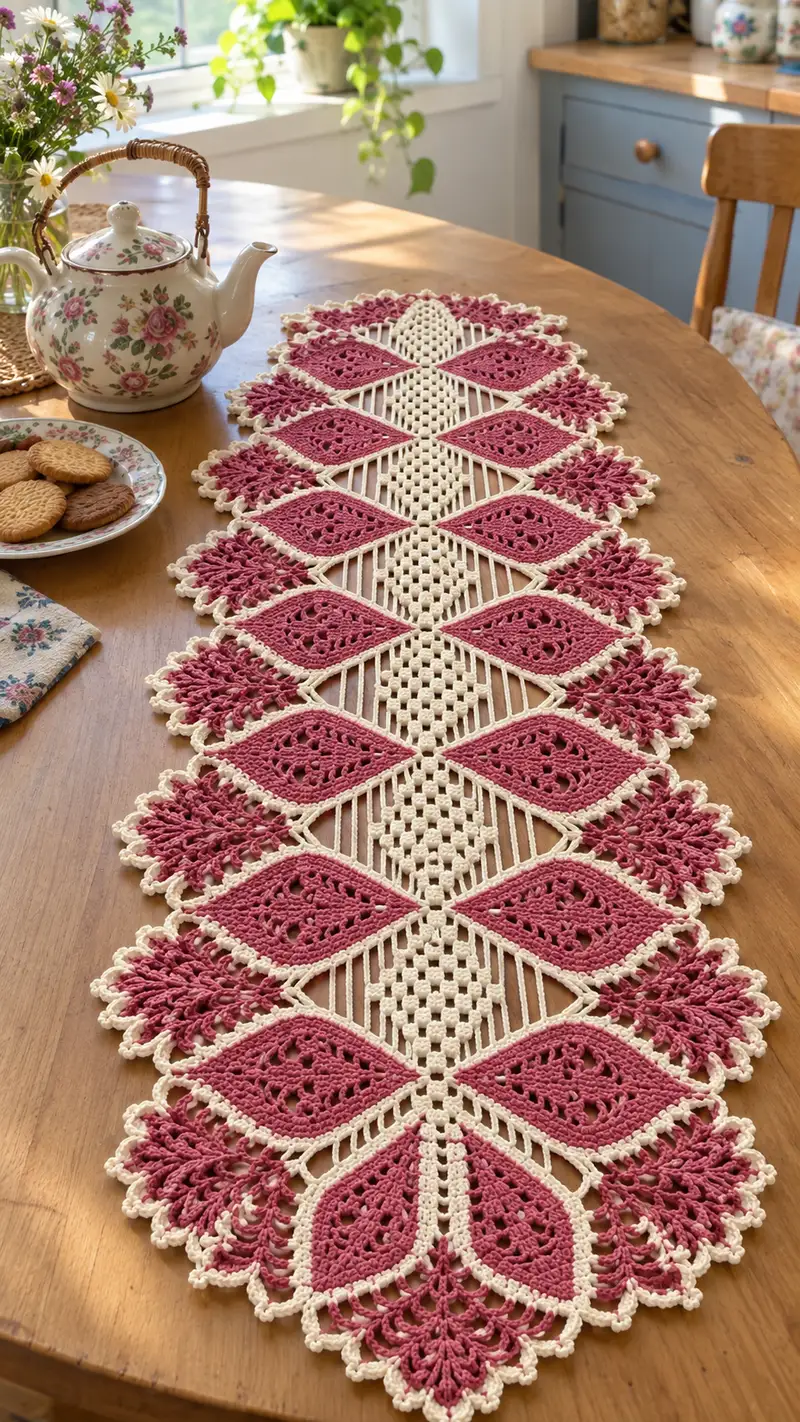
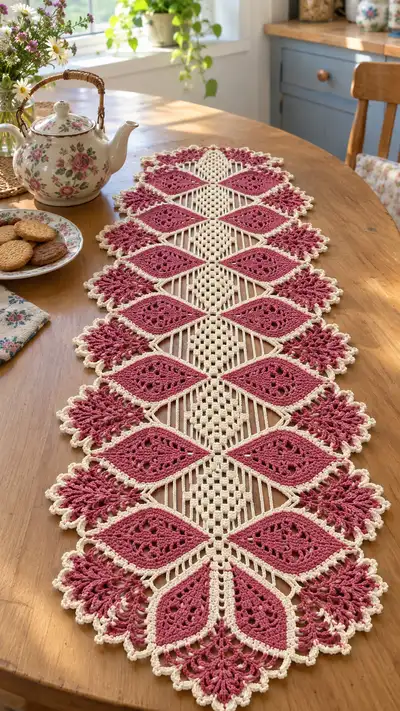
This elegant vintage-style table runner features alternating dusty rose diamond motifs framed in creamy ivory lattice and delicate scalloped edges. The long, narrow runner is rich in texture—open filet lattice, clustered fan petals and picot trims—perfect for a tea table or dresser. The design is worked in motifs joined to a central filet panel and finished with a framed scalloped border for a refined, handmade heirloom.
Progress Tracker
0% Complete
— Notes & Preparation :
Info :
Pattern is modular — you will make 18 diamond motifs and a central lattice panel that joins them. The runner photographed measures approximately 16" wide by 54" long after blocking using sport/fingering cotton and a 3.5mm hook. Adjust number of motifs to change length. Work tightly enough that the fabric will hold attached long bars without sagging; blocking is essential to reach final dimensions.
Info :
Throughout the pattern, counts shown at end of rounds are total stitches around the piece or row. Work in continuous rounds unless instructed to join with sl st. When making multiple identical motifs, keep a small scrap of contrasting waste yarn threaded through the last round to prevent unravelling while you complete others.
— Diamond Motif (Make 18) :
Round 1 :
Make a magic ring, ch3 (counts as first dc), 11 dc into ring, pull ring closed (12 dc)
Round 2 :
Ch3, 1 dc in same st, (1 dc in next st, 2 dc in next st) x4, 1 dc in last st, join with sl st to top of ch3 (18 dc)
Round 3 :
Ch3, 1 dc in same st, 1 dc in each of next 2 sts, (1 dc in next 2 sts, 2 dc in next st) x4, 1 dc in last 2 sts, join (24 dc)
Round 4 :
Ch3, 1 dc in same st, 1 dc in each of next 3 sts, (1 dc in next 3 sts, 2 dc in next st) x4, 1 dc in last 3 sts, join (30 dc)
Info :
These first rounds build a compact circular base. We will begin to shape the diamond by working corners with chain-arcs and clustered stitches in following rounds. Keep tension even and do not over-tighten joins to allow later blocking.
Round 5 :
Ch3, dc in same st, dc in next 4 sts, ch4, skip next 4 sts, dc in next 6 sts, ch4, skip next 4 sts, dc in next 5 sts, join (30 dc + 2 ch-4 arches)
Round 6 :
Sl st to middle of first ch4 arch, ch3, 3 dc into arch, ch3, 4 dc in next st (corner), dc in next 5 sts, 4 dc in next st, ch3, 3 dc into next ch4 arch, dc in next 6 sts to complete round, join (38 dc + 2 ch-3 arches)
Round 7 :
Ch1, sc into same st, sc across next 6 sts, (sc, ch3, sc) in center of corner 4-dc cluster, sc across next 8 sts, (sc, ch3, sc) in next corner cluster, sc remaining sts, join (44 sc with 2 ch-3 corner arches)
Info :
Begin to see diamond points forming at the four corners due to the chain arches and corner clusters. If your piece feels loose, switch to 3.0mm hook for next round to tighten the edge for a crisp point.
Round 8 :
Ch3, dc in same st, dc in each sc across until you reach corner (approx 11 dc), (2 dc, ch2, 2 dc) in corner ch-3 arch, dc across next side to next corner, repeat corner shell, finish and join (approx 56 dc & 4 corner shells)
Round 9 :
Ch1, sc in same st, sc across 13 sts, (sc, ch5, sc) in corner ch2, sc across next 14 sts, repeat corner ch5 shell on all corners, join (tight sc border with 4 ch-5 corner arches)
Round 10 :
Change to BLO for next round to create a framed ridge: ch1, sc in BLO in each st around including sc in each chain space as a stitch equivalent (approx 64 sc). Join.
Info :
Working in BLO on this round creates a raised frame around the diamond's face which gives a crisp framed look after blocking. Count carefully—treat each chain-5 or chain-3 space as one stitch when working sc into it.
Round 11 :
Ch3, (dc, ch1, dc) in every 3rd stitch across the long sides to create decorative openwork; in corner arches work (dc, ch3, dc, ch3, dc). Join (openwork sides with evenly spaced dc-ch1-dc clusters)
Round 12 :
Ch1, sc in same st and around working sc into each dc and ch-space to solidify motif face, keeping extra sc into corner spaces so corners remain pointed (approx 72 sc). Join.
Info :
At this point the diamond face is complete. The next rounds create the decorative petal fan on two opposing sides and a framed rope on the other two to alternate the runner edges. Work the fan on the short ends (top/bottom points) of the diamond.
Round 13 :
For top fan: sl st to center top point, ch3, (2 tr, ch2, 2 tr) all into the same top-point st to form fan center, *sk 2 sts, (3 tr, ch2, 3 tr) in next st* repeat across fan span (usually 5 fan shells depending on size), ending with sl st back to motif edge. For bottom fan repeat on opposite point. Join.
Round 14 :
Edging round in contrasting cream if desired: join cream yarn with sl st, ch1, sc in each st around (including each chain space and around fans add sc evenly to shape), *picot on every 6th sc along fan edges: (ch3, sl st into first ch)* continue until join. Fasten off and weave ends (approx 100 sc including picots).
Info :
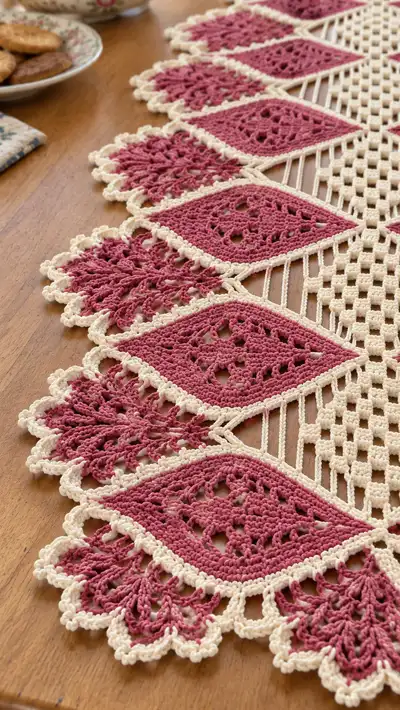
Block each diamond motif fully: pin to pointed diamond shape, fan shells fanned and spread, steam or wet-block and leave until dry. Repeat motif rounds 1-14 to make 18 identical diamonds. Using two colors: if you change to cream for round 14, carry yarn neatly or join new yarn and weave tails inside final edging.
— Central Filet Lattice Panel :
Info :
The central panel is a stacked diamond-filet square worked in continuous rows to produce a long rectangle the same length as the motif chain when joined. This panel provides the airy center seen as alternating solid-checkered squares and long vertical bars.
Foundation Row :
With cream yarn ch 110 (this number will determine length — adjust to match motif count). Turn, sc in 2nd ch from hook and across (109 sc).
Row 1 :
Ch4 (counts as tr + ch1), *(tr in next st, ch1) x4, sk next 5 sts, repeat across ending with tr in last st; turn — creates long spaced treble groups for the lattice spine (approx 18 tr groups)
Row 2 :
Ch1, sc in each tr and ch-space across, treating ch-1 spaces as single stitch equivalents, turn (approx 109 sc)
Row 3 :
Ch5 (counts as dc + ch2), *sk 2 sc, (2 dc, ch2, 2 dc) across to form filet squares every 6 sts, continue to end, turn — building stacked filet blocks (approx 18 blocks across)
Row 4-6 :
Repeat Row 2 and Row 3 pattern sequence to build 6 rows of filet (solid blocks) then switch to vertical bar rows: Ch15, sk 14 sts, sl st into next st to create long chain bars across — this will create the vertical open bars seen between diamonds. Repeat the filled/filet and bar sections so the central panel alternates between dense filet squares and airy vertical bars every 6 rows. Work a total of 28 rows to reach panel height matching motif width.
Info :
Measure against blocked motifs. The panel should sit flat when motifs are pinned alongside it. Adjust foundation chain length before continuing if necessary. The chained bars should be worked on an even gauge so they don't sag; keep chains firm and use a slightly smaller hook if needed.
Row 7-14 :
Continue alternating 2 rows solid sc (Row 2 style) with 1-2 rows of filet (Row 3 style) and incorporate long chain bars every 6th row. By Row 14 you should have formed a repeating diamond-shaped center mesh that will visually align with the points of diamonds when attached (total approximate width 110 sts).
Row 15-28 :
Repeat the established filet and bar pattern until the panel reaches the required length. Finish with a neat sc border: ch1, sc in each st across; fasten off and weave in ends.
Info :
If your yarn has a slight stretch, steam-block the panel to open the filet squares. The vertical bars will tighten slightly with blocking—pin them straight to maintain evenly spaced bars.
— Long Connecting Bars & Join Strips :
Info :
These are the long chained bars connecting the central filet panel to the diamond motifs. They are worked as long chain strips anchored with sc columns on both edges, forming the linear columns visible between diamonds.
Strip Round 1 :
Join cream at a side stitch on central panel, ch1, sc into same st, ch16, sk 16 sts on panel, sc into next st — repeat across the side to create evenly spaced ch-16 bars (the ch length can be adjusted to match your scale). Fasten off at end of row. Repeat for opposite side.
Strip Round 2 :
With cream, attach at the base stitch of first bar, ch1, sc into that base, then sc along top of chain across (about 16 sc across each chain), join to the next base with sl st, create a sc line across each bar to create a tidy vertical column. This creates a rope-like bar that is sturdy for joining motifs.
Info :
Work these strips for both sides of the panel. If ch16 creates too much sag, reduce to ch12–14. Use a smaller hook for the sc-over-chains to tighten the bars. Make enough strips to match the number of diamond sides you will attach (one strip row per motif side).
— Attaching Diamonds to Center Panel :
Info :
Lay out diamonds along the central panel pinned in place, alternating point-to-point across both long edges. The image shows diamonds mounted with their long points toward the runner center, and fan ends forming the outer scalloped edge. Pin motifs so the BLO framed ridge (Round 10) sits directly adjacent to the panel's sc border.
Attach Step 1 :
Using cream yarn and a tapestry needle, sew motifs to the central panel by ladder stitch through the sc ridge created in Round 10 of the motif and the sc border of the panel at every 4th stitch to create an even connection. Stitch from the center outward to avoid puckering.
Info :
When attaching, leave the bars slightly loose—tension with pinning so motifs are not pulled inward. Sew through both motif and panel stitches, inserting needle into the center of each sc so joins stay flat. Alternate stitches across motifs to maintain alignment.
Attach Step 2 :
For the long ch-bar connections, align the sc-over-chain columns to meet the motif sides. With cream yarn, sc through the sc stitches of motifs and sc-over-chain stitches of the panel strip at 6–8 evenly spaced points along each bar to secure. Knot and weave ends tightly.
Info :
Work slowly and pin every motif before sewing. Double-check symmetry by measuring equal distances between motif points along the runner width and length.
— Outer Scalloped Edging (worked after all motifs are joined) :
Round 1 :
With cream yarn, join at a seam where two motif edges meet, ch1, sc evenly around the entire runner edge — work 1 sc for each motif sc and 2 sc in each corner point to avoid tight corners. Join with sl st.
Round 2 :
Ch3, *skip 2 sc, (5 dc cluster in next sc), skip 2 sc, sl st in next sc* repeat around to create the outer fan clusters. At inner joins between pairs of diamonds, add an extra sl st to maintain edge shape. Join.
Info :
These clusters create the feathery petal edge seen in the photo. Keep tension consistent so each scallop is the same size. If your runner flares, tighten the fan clusters by using a smaller hook for Round 2.
Round 3 :
Ch1, sc in each st and 3 sc in apex of each fan cluster, *picot on the outer tip of each fan: (ch3, sl st into first ch) then sl st to next sc base of fan* continue around. Fasten off and weave tails.
Round 4 :
Optional decorative border: join rose yarn, ch2, hdc in each sc around the inner sc border for contrast, finish with sl st and weave ends.
Info :
The final white picot-edged scallops will pop against the dusty rose motif faces. Block the entire runner pinned to target dimensions and steam or wet-dry until crisp. Trim any stray ends and lightly starch if you prefer a stiffer runner.
— Alternative Smaller Motif Variation (if you prefer narrower runner) :
Info :
To make a narrower version, reduce foundation chain of the central panel by 30–40 chs and make 12 diamond motifs instead of 18. Adjust number of panel rows proportionally so diamonds align with central filets.
Tip :
For a longer runner, repeat the motif+panel repeat sequence until desired length is achieved. Keep the central panel pattern consistent for symmetry.
— Finishing & Blocking :
Info :
Weave in all ends with a yarn needle. Soak the runner in lukewarm water with a little mild detergent, gently squeeze out excess water and pin flat onto blocking mats to the final size—pull each diamond point to a crisp angle and fan petals apart while damp. Allow to dry completely. Optionally press lightly with a cool iron through a cloth or use a light starch for extra stiffness.
Info :
Final measurement will vary with yarn and hook. After blocking, the runner should lie flat with pointed diamond tips aligned and airy vertical bars visible in the center. Store flat or rolled to preserve shape.
This heirloom-style table runner is a wonderful blend of geometry and lace — every diamond and scallop adds a story to your table. The modular construction makes the project satisfying as each motif joins to form the full, elegant composition. Blocking brings the runner to life, with crisp points and airy bars that catch the light beautifully. 🧵✨ Make one for special occasions or everyday charm — it’s a project that becomes a treasured keepsake. 🌸