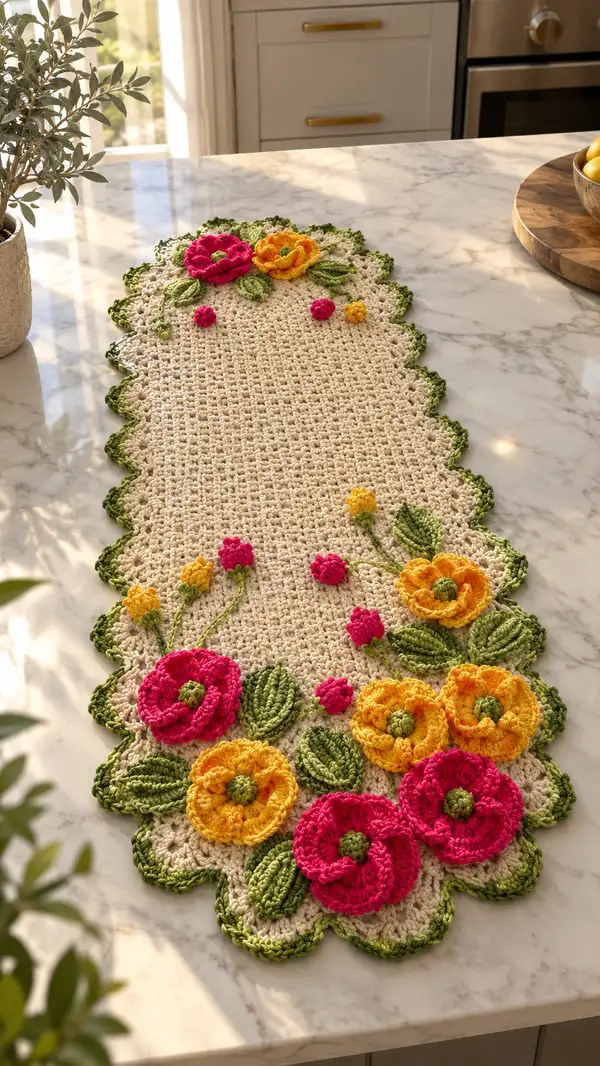
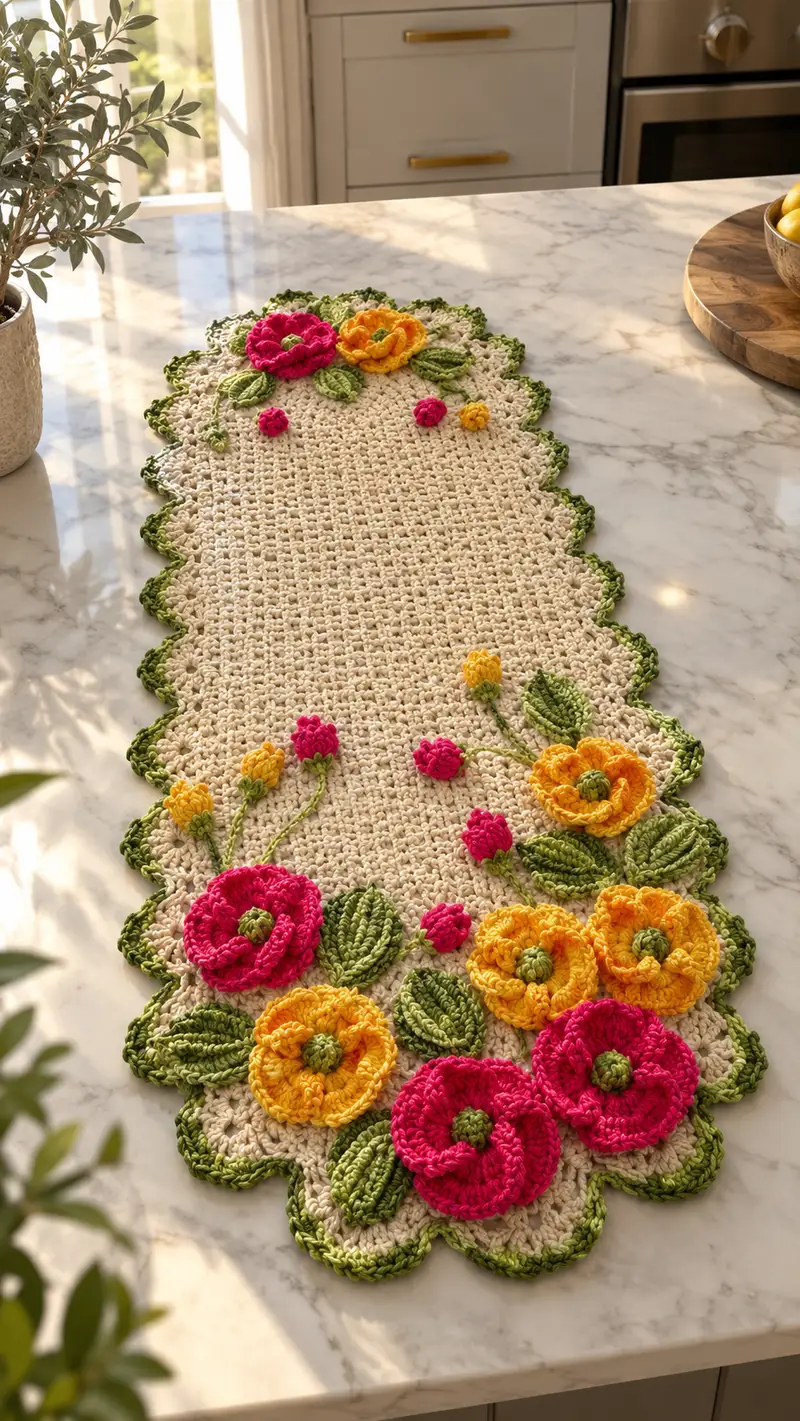
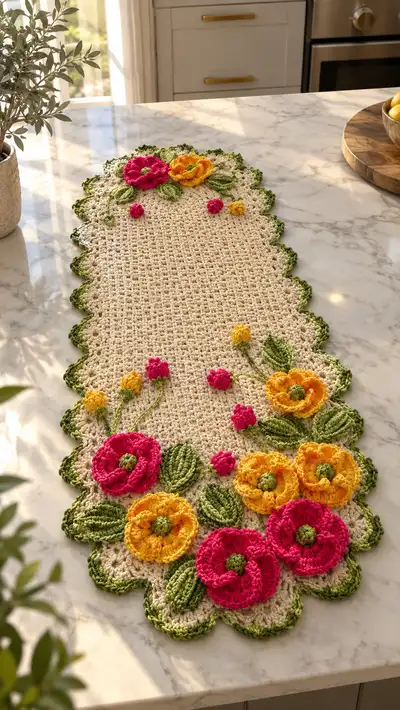
A charming scalloped-edge table runner decorated with layered crochet flowers and textured leaves. This pattern features a neutral woven center, olive green scalloped border, and bright fuchsia and golden-yellow layered blossoms for a cheerful, hand-crafted centerpiece. The runner is worked in rounds for a smooth oval shape and finished with appliqued flowers and embroidered stems for a 3D effect.
Progress Tracker
0% Complete
— Main Center Panel :
Round 1 :
Using Ivory yarn and 4.0mm hook, ch 44. Work 1 sc in 2nd ch from hook and in each ch across (43 sc). In last ch work 3 sc, now working on opposite side of foundation chain work 1 sc in each ch across (43 sc). In last (first) chain work 3 sc, join with sl st to first sc. Total = 43+3+43+3 = 92 sc (92)
Info :
This forms your starting oval. Keep the chain loose enough to prevent twisting but not so loose that the first round has big gaps. Place a stitch marker in the first stitch to mark the beginning of the round.
Round 2 :
Ch 1, 1 sc in same st as join, *1 sc in each of next 21 sts, 1 inc (2 sc in next st)*, rep from * to * twice, 1 sc in each remaining sts to finish round, join. We have added 4 increases at both rounded ends (96)
Round 3 :
Ch 1, 1 sc in each st around (96)
Round 4 :
Ch 1, *1 sc in next 22 sts, 1 inc* rep 4 times evenly across the four corner zones to maintain oval shape (100)
Info :
Maintain even stitch counts by keeping increases distributed at the four rounded ends of the oval (two at each long end, two at each short end). Use markers at the center of each short end to locate where increases should fall.
Round 5 :
Ch 1, 1 sc in each st around (100)
Round 6 :
Ch 1, *1 sc in next 23 sts, 1 inc* rep 4 times (104)
Round 7-10 :
Ch 1, 1 sc in each st around; work 4 even rounds to build body height (104)
Info :
These rounds create the flat woven center. Keep tension even and check that the oval lies flat. If the runner begins to ripple, remove one set of increases at the ends in the next increase round; if it cups, add an extra increase cluster.
Round 11 :
Ch 1, *1 sc in next 24 sts, 1 inc* rep 4 times (108)
Round 12-15 :
Ch 1, 1 sc in each st around (108)
Round 16 :
Ch 1, *1 sc in next 24 sts, BLO 1 hdc in next st, 1 inc in next st* rep 4 times, 1 sc in remaining sts (112)
Info :
Work a BLO hdc as a subtle ridge row to introduce a woven texture. The hdc BLO rows add visual interest and mimic the woven look seen in the photograph. Continue to keep counts consistent.
Round 17-20 :
Ch 1, 1 sc in each st around (112)
Round 21 :
Ch 1, *1 sc in next 25 sts, 1 inc* rep 4 times (116)
Round 22-26 :
Ch 1, 1 sc in each st around (116)
Info :
Measure the runner now to ensure you have reached desired center length. For a longer runner, repeat the sequence of 6-8 even rounds then one increase round (every 6-8 rounds) until you reach your preferred length. The sample pictured has 28 center rounds before border placement; continue repeating rounds 21-26 pattern until you reach that length (approx. 28-36 rounds total depending on desired final size).
Round 27 :
Ch 1, *1 sc in next 26 sts, 1 inc* rep 4 times (120)
Round 28-32 :
Ch 1, 1 sc in each st around (120)
Info :
At this stage your center panel is complete and measures approximately 30-36 inches long depending on length choices. Fasten off and weave in any long starting tail if you used it. Do not block yet; add scalloped border first to shape the edges.
— Scalloped Border :
Info :
Switch to Olive/Green yarn. We will create a scalloped picot-scallop border that accentuates the oval. Work into the edge of your last round of the center panel; place joins at the center of short ends to keep scallops even.
Round 1 :
Attach green yarn with sl st at a chosen point. Ch 1, *sc in next 3 sts, ch 2, 3 dc in next st, ch 2, sc in next 3 sts, sk 2 sts* rep around following the edge, adjusting spacing so the scallops sit evenly around the curved ends. Join with sl st. (approx 120 sts plus scallop clusters)
Round 2 :
Ch 1, 1 sc in each sc and in top of each scallop cluster across. Where you worked 3 dc cluster, work sc across those dc tops evenly (approx 120)
Round 3 :
Ch 1, *sc in next 2 sts, (picot: ch 3, sl st into 1st ch), 5 dc in next st (center of previous cluster), sl st in next sc* rep around. This creates defined scallop points with small picots. Join. (maintain approximately 120 shell points)
Info :
Blocking at this stage will help the scallops to relax into their final shape. Pin scallops to a blocking mat or flat surface and mist lightly to allow the shells to lay flat. If your scallops feel tight, try switching to a 4.5mm hook for the border and rework to make a slightly larger border.
Round 4 :
Ch 1, 1 sc in each st around to tidy the edge and hide any gaps. Fasten off and weave in ends. (120)
— Large Layered Flower (Make 6) :
Info :
Large layered flowers are worked in the round and then stacked with a small center disc. Use Fuchsia or Golden Yellow yarn depending on desired color. Work 6 identical large flowers for two clusters of three at each end (or as pictured: clusters of 3-4 per end).
Round 1 :
With 3.5mm hook and main flower color, mr, 6 sc in mr (6)
Round 2 :
Inc in each st around (12)
Round 3 :
(1 sc, inc) x 6 (18)
Round 4 :
(2 sc, inc) x 6 (24)
Info :
These rounds create a small disc foundation for the petals. Fasten off color or continue directly into petal rounds depending on your preference for a seamless look.
Round 5 :
Join yarn with sl st at any stitch of round 4. Ch 1, *skip 1 st, 7 dc around next st (work petals as 7 dc cluster), sk 1 st, sl st into next st* repeat 12 times to create 12 petals. (The number of petals depends on your st count; if you have 24 sts you will form 12 petals) (24 petals bases)
Round 6 :
Ch 1, *sl st to center of next petal, ch 3, 1 tr, ch 3, sl st to same petal center* around to give each petal a raised ruffle. Join and fasten off. (12 ruffled petals)
Info :
For a more pronounced layered look, make two identical petal rounds and stack them offset by 6 petals so the petals sit between each other. Make one petal disc for the base and one for the top if you want more volume.
Round 7 (optional layering) :
Make a second petal round by repeating rounds 1-6 using the same color or a slightly darker shade. Fasten off and block slightly so petals open.
Flower center (Make 6) :
With small amount of green, mr, 6 sc in mr (6), sl st to join, ch 1, *inc* x6 (12), sl st. Fasten off leaving tail to sew to flower center; stuff lightly or leave flat depending on look. Sew center disc onto layered petals, offsetting to create a 3D bloom.
Info :
Use small gathering stitches through the base of petals to slightly cup them for the look seen in the photo. If you want extra puff, place a tiny bit of fiberfill under the center before sewing the center disc in place.
— Small Rosebud (Make 6) :
Round 1 :
With 3.5mm hook and bud color, mr, 6 sc in mr (6)
Round 2 :
(1 sc, inc) x 3 (9)
Round 3 :
Ch 1, *3 dc in next st, 1 sc in next st* rep around to make small curled petals (9 petal bases)
Round 4 :
Ch 1, sl st around petal ridges to anchor, fasten off leaving long tail to sew. Optionally, add a 2-3 inch embroidered stem by chaining 20-30 and sl stitching back along chain for a firm cord. (bud ready)
Info :
Buds are positioned between large flowers as little accent pops. Sew with long tails and secure to the runner with hidden stitches through back of appliques and the base of the bud.
— Leaf (Make 10-12) :
Round 1 :
With Olive yarn and 3.5mm hook, ch 10, sc in 2nd ch from hook, hdc in next, dc in next 3, hdc in next, sc in next 2, ch 1 turn to work on other side of chain, sc in next 2, hdc in next, dc in next 3, hdc in next, sc in last 2, sl st to first sc. (leaf foundation, approx 16 sts)
Round 2 :
Ch 1, work 1 sc around entire edge into corresponding sts, at tip (center top) work 3 sc to create pointed top, continue sc on other side. Fasten off. (leaf edge tidy)
Round 3 (vein detail) :
With contrasting or same green, embroider central vein: bring yarn up at base, run surface slip stitches or embroidery stitches along the center to the tip and back, secure. This creates the raised vein visible in photo.
Info :
Make leaves slightly cupped by placing a few gathering stitches across the base of the leaf and pulling gently. Pin and steam-block lightly if needed to shape. Leaves in the photo are slightly three-dimensional and layered under petals.
— Flower Stem Cords and Attachment :
Stem Cord :
For stems, use Olive yarn and 4.0mm hook. Ch 40-60 (length varies), sl st back along chain for twisted cord, or use i-cord technique (3-4 stitches worked in rows) to create a thick stem. Make stems in varying lengths for natural placement. Fasten off leaving long tails for sewing.
Info :
Stems in the pictured runner are thin cords sewn onto the surface and slightly twisted to look organic. If you want sturdier stems for draping, insert a piece of thin wire wrapped in yarn and leave ends secured inside appliques to prevent scratching tabletop.
— Small Details & Puff Centers :
Small Puff Centers (Make 6) :
Using green, mr, 8 hdc in mr but do not join; pull tail to close, leaving a small puff. Sew to the center of each large flower to give that raised center look. Alternatively, work 6 sc in mr, ch 2 and sl st into next for a tiny knot.
Info :
Secure puff centers tightly; these are focal points for the layered blooms. If adding stuffing, use a tiny pinch of fiberfill to create a gentle dome and keep puff centers small so the flowers remain flat enough to lie on table surfaces.
— Repeat & Make Notes :
Info :
Make 6 large layered flowers (3 for each end cluster), 6 small buds, and 10-12 leaves. Arrange as seen in the photo: one end cluster with 4 large flowers overlapping slightly and the other end with 2-3 flowers. Add buds and leaves to fill negative space and create balance. Use photos for reference when pinning before sewing.
— Finishing Techniques :
Info :
Weave in all loose ends securely. Block the entire runner: pin to shape on blocking mats with scallops evenly spaced, mist lightly and allow to dry fully. This helps the scalloped border lay flat and the appliques to meld gently into the background.
Final Touch :
Trim any stray fibers, inspect underside for secure attachments, and place a non-slip mat or light felt pads under heavier appliques if you plan to keep the runner on delicate surfaces. Your runner is complete!
Completing this floral scalloped table runner is a delight — watching the center grow and then bringing it to life with layered flowers is so rewarding! The contrast of neutral woven texture with bright fuchsia and golden blooms makes for a cheerful focal point. Block, sew, and place on your table to instantly refresh a room with handmade charm. 🧶🌼 Happy stitching and enjoy your beautiful new centerpiece! ✨