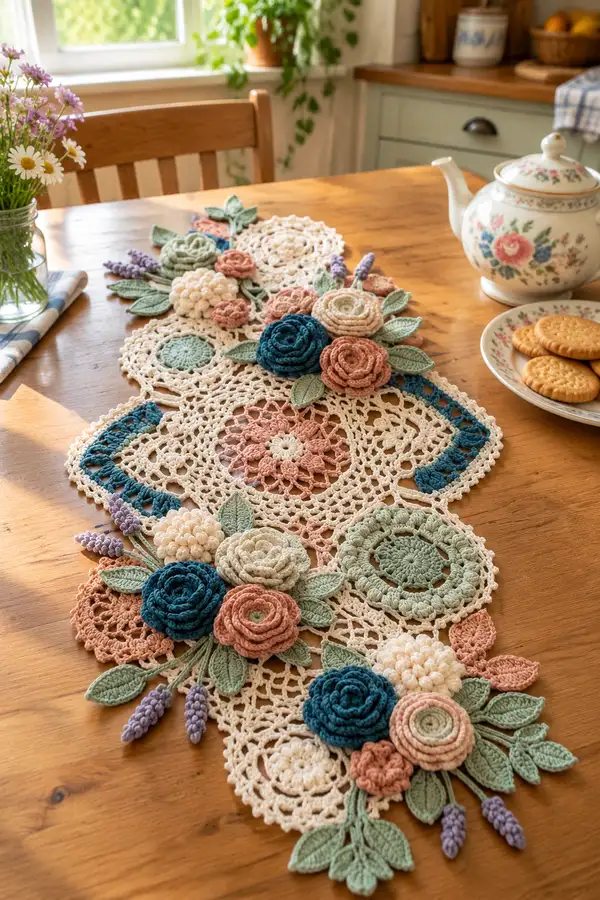
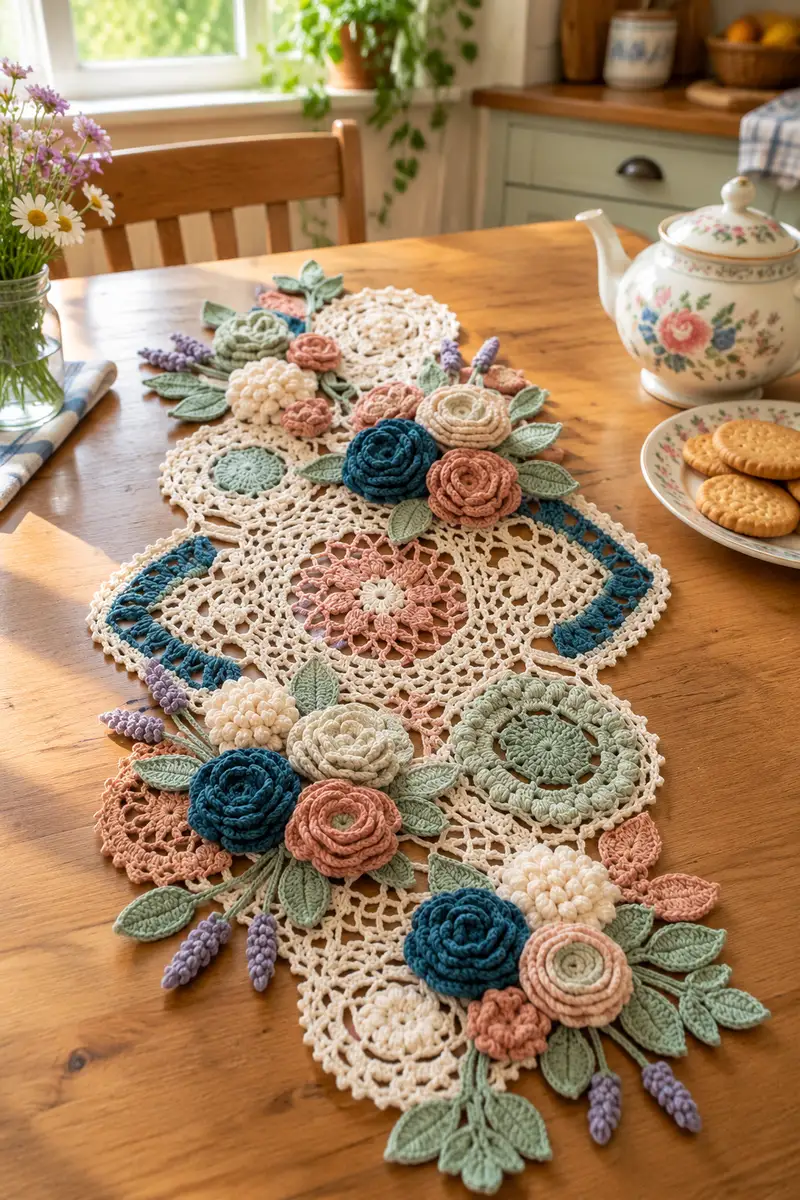
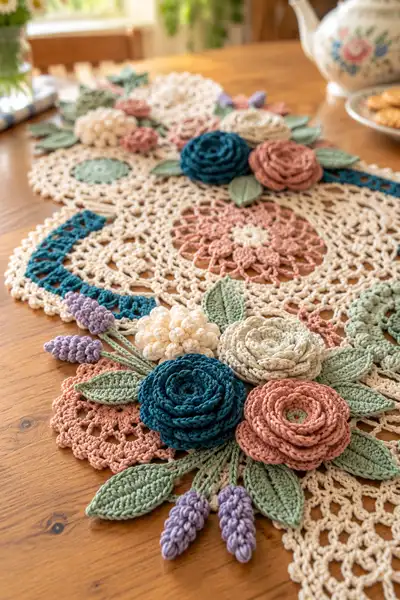
A beautifully textured vintage-style table runner made from layered crochet medallions, 3D spiral roses, bobble clusters, leaves and lavender sprigs. Soft cream lace motifs form the base while dusty rose, teal, sage and lavender yarns create lush floral clusters. This decorative runner adds a romantic, handmade touch to any table and combines lacework with sculptural blooms for a charming heirloom look.
Progress Tracker
0% Complete
— Large Lace Medallion (Make 3) :
Round 1 :
6 sc in magic ring (6)
Round 3 :
(1 sc, inc) x 6 (18)
Round 4 :
(2 sc, inc) x 6 (24)
Round 5 :
(3 sc, inc) x 6 (30)
Round 6 :
(4 sc, inc) x 6 (36)
Info :
Work these first rounds tightly to create a stable center. Use cream yarn for the medallion base. Keep stitch marker in first stitch.
Round 7 :
1 sc in each st (36)
Round 8 :
(5 sc, inc) x 6 (42)
Round 9 :
1 sc in each st (42)
Round 10 :
*Ch3, skip 2, sc in next; rep around to create small arches (42 arches)
Info :
When creating arches, keep tension even; these arches will later host picot/shell rounds, so make sure they are not too tight or they will pucker.
Round 11 :
In each ch-3 arch: (3 dc, ch2, 3 dc) shell, sl st to next arch (12 shells)
Round 12 :
Ch1, sc in top of shell, *ch4, sc in center of next shell; rep around (12 ch-4 loops)
Round 13 :
Into each ch-4 loop: (1 sc, 2 dc, 1 sc) to form lacy fans (12 fans)
Round 14 :
*Ch5, sl st in next fan top; rep making long picot-like loops around (12 loops)
Info :
At this stage measure medallion diameter; aim for approx. 15-18 cm blocked. Block each medallion flat to shape before joining.
Round 15 :
Slip stitch into loop, *(3 dc, ch2, 3 dc) in loop to make outer shell; sl st to next loop; rep (12 shells)
Round 16 :
Ch1, sc around shells evenly (72 sc)
Round 17 :
(7 sc, inc) x 8 (80)
Round 18 :
1 sc in each st (80)
Round 19 :
*Ch3, skip 2, sc in next; rep around to create longer arches that define outer lace (80 arches)
Round 20 :
In each arch: (2 dc, ch1, 2 dc) small shell, sl st to next arch (80 small shells)
Round 21 :
Ch1, sc in each st around to tidy edge (approx 320 sc)
Round 22 :
Picot edging: *sc 3, picot (ch3, sl st in first ch), sc 3; rep around. Fasten off and weave in ends.
Info :
Finish edges carefully; block again after weaving ends to open lace pattern. These rounds assume moderate tension and worsted cotton yarn — counts are approximate at outermost rounds and depend on your gauge.
— Medium Round Motif (Make 6) :
Round 1 :
6 sc in magic ring (6)
Round 3 :
(1 sc, inc) x6 (18)
Round 4 :
(2 sc, inc) x6 (24)
Round 5 :
1 sc in each st (24)
Round 6 :
*Ch4, skip 2, sc in next; rep around forming 8 arches
Round 7 :
Into each ch-4 arch: (1 sc, 3 dc, 1 sc) fan (8 fans)
Round 8 :
Ch1,*sc in fan center, ch3; rep around (8 ch-3 loops)
Info :
These motifs are used to tuck beneath rose clusters and fill gaps. Work in dusty rose, sage green centers or teal depending on placement plan.
Round 9 :
Into each ch-3 loop: (5 dc) cluster, sl st to next (8 clusters)
Round 10 :
Sc around cluster edge evenly to smooth shape (40 sc)
Round 11 :
Optional scallop: *(sc, ch2, sc) in next st; skip 2; rep around to form small scallops
Round 12 :
Fasten off and block motifs. Make 6 or more and arrange under rose clusters for a layered effect.
— Spiral Rose (Rolled Rose) (Make 8-10) :
Round 1 :
Using dusty rose or teal, ch 60 (or adjust for desired diameter). Turn, sc in 2nd ch from hook and across (59 sc)
Round 2 :
Ch1, turn, sc in BLO across the strip (59 sc)
Round 3 :
Ch1, turn, *(1 sc in next 3 sts, inc) repeat across to create gentle widening. Count should increase to approximately 74 sc depending on length.
Round 4 :
Ch1, sc in each st; fold strip in half lengthwise and work a decorative outer row: *sc 2 tog across edge to tidy; fasten off leaving long tail for sewing
Info :
The width and number of chains determine rose fullness. A longer chain and gentle increase create a fuller, layered rose. Work strips for 8-10 roses in a mix of dusty rose, teal and cream.
Round 5 :
Roll the strip tightly from one end forming the rose center; tack with 3-4 whips of yarn every 0.5-1 cm to hold each spiral turn.
Round 6 :
Continue rolling and tacking until the strip is fully rolled. For fullness, create a second narrower strip to wind around the outer edge and tack in place.
Round 7 :
Sew the rose base securely to a small flat circle (make a 6 - 8 round circle in matching color: 6 sc in MR, inc to 12, inc to 18, sc rounds to flatten) to provide a stable sewing surface.
Round 8 :
Fasten off and weave tail through base, securing spiral with small stitches through several layers so the rose will not unroll. Trim excess yarn.
Info :
Tack frequently when rolling; the innermost stitches see the most stress. Use a strong yarn tail and multiple passes to anchor the base. For a neater rose, press lightly under a damp cloth before final placement.
— Rosette (Flat Rolled Rose Variation) (Make 6-8) :
Round 1 :
6 sc in magic ring (6)
Round 3 :
In back loops only, sc around (12)
Round 4 :
Ch 1, *sc 2, inc; rep around (16)
Round 5 :
Ch 1, sc around in BLO to create a raised ridge (16)
Round 6 :
Fasten off leaving a 40-50 cm tail. Wind the small flat rosette into a shallow spiral and secure with the tail by sewing through the base at three equidistant points to hold spiral shape.
Info :
This rosette produces a compact layered bloom that sits flatter than the long-strip spiral. Use for tighter clusters and smaller accents.
— Bobble Cluster Flower (Pom-Pom Bloom) (Make 4-6) :
Round 1 :
6 sc in magic ring (6)
Round 2 :
Ch1, work 8 bobble sts into ring (8 bobbles)
Round 3 :
Ch1, in between bobbles sc 8 to stabilize cluster (8 sc)
Round 4 :
Round of sc around entire cluster (approx 24 sc) to create a tidy base
Info :
Bobble stitch: (yarn over, insert hook, pull up loop) 4–5 times in same st, yarn over and draw through all loops, ch1 to secure. Use creamy neutral for a tactile pom-pom bloom.
Round 5 :
Sew cluster to a flat 4-5 round circle base for stability and to make sewing onto lace easier. Fasten off securely.
— Leaf (Make 28-36) :
Round 1 :
Ch 11, sc in 2nd ch from hook and across (10 sc)
Round 2 :
Ch1, turn, (sc in next 2, hdc, dc, tr, dc, hdc, sc, sc) across to shape leaf (10 sts shaping)
Round 3 :
Sl st to outer tip, work 3 sc along edge back towards base to create pointed end, sl st across base to first sc to finish leaf outline
Round 4 :
Optional: Ch1, work 'vein' on top: *sl st to center of leaf, ch1, sc along center (3-4 sc), fasten off
Info :
Leaves are made in sage green with a slightly smaller hook (3.0mm) for a firmer shape. Block leaves over pins to create a flat yet slightly cupped shape so they sit well under blooms.
Round 5 :
For larger leaves: Ch 13, follow same shaping adding one extra dc section in center for length; make several sizes to create layered foliage.
Round 6 :
Edge finish: sc around entire leaf to tidy edge and prevent curling. Fasten off and weave in ends.
— Lavender Sprig (Make 12-16) :
Round 1 :
With lavender yarn ch 20 (or 12-30 depending on desired length) - this chain is the stem
Round 2 :
Slip stitch back along chain to create a flat, thin stem (19 sl st). Fasten off and leave long tail for sewing.
Round 3 :
Using same lavender yarn, make small bobble clusters: ch 6, join into a ring with sl st, in ring work 6 bobble sts around; fasten off leaving tails. Make 4-6 small lavender heads per sprig.
Round 4 :
Sew these small bobble heads along the stem at 4-6 evenly-spaced intervals using long tapestry needle and matching thread so the heads sit closely packed like a lavender stalk.
Info :
Trim stems to appropriate length and stiffen lightly with a small dab of fabric glue inside the stem if you want them to hold shape; avoid over-gluing which makes stems hard to sew.
— Small Doily Fillers (Make 8-12) :
Round 3 :
(1 sc, inc) x6 (18)
Round 4 :
*Ch5, sl st into next st; rep around to make airy loops (18 loops)
Round 5 :
Into each loop: (1 sc, 1 hdc, 1 dc, 1 hdc, 1 sc) to form small rosettes; finish and block flat
Info :
These small fillers tuck behind larger flowers and fill negative space. Use blush, sage, cream, or teal for a coordinated look.
— Connecting Lace Panel (Work 3 panels, join) :
Round 1 :
With cream yarn ch 60, join to form a ring carefully aligning ch edge (ch 60 join) then ch 3 to act as first dc
Round 2 :
Work alternating shells: *3 dc in next ch, skip 2, sc in next ch; rep to end to create a solid grid (approx 40 shells)
Round 3 :
Ch1, sc across into each top of shell and each sc to flatten grid (approx 200 sc)
Round 4 :
Form lacy arches along both edges: *ch5, skip 3, sc in next; rep along each long side creating 20 arches each side
Round 5 :
In each ch5 arch: (1 sc, 3 dc, 1 sc) fan to make an airy connecting edge (40 fans)
Round 6 :
Sc around entire panel to tidy edge (approx 360 sc). Make three panels and block them rectangle flat so they will sit flat when motifs are sewn.
Info :
These panels are the structural backbone of the runner. Ensure your gauge matches medallions so edges align. Use pins to align motifs prior to sewing.
Round 7 :
Optional decorative stripe: Change to teal or dusty rose and work a short band along each panel: 3 rows of dc across selected center chs. Fasten off carrying yarn neatly or burying tails.
— Assembly and Joining Motifs :
Info :
Layout all motifs on a flat surface, placing three large medallions down the center with medium motifs and small fillers offset between them. Place spiral roses and bobble flowers in clusters at either end and midpoints.
Round 1 :
Sew medallions to the connecting lace panels: position medallion edge over panel edge, tack with 6 evenly spaced basting stitches, then securely stitch with whip or mattress stitch through the outer shell and panel arches.
Round 2 :
Join medium motifs to medallions and panel corners by sewing through both motif edges and panel loops. Use small running stitches to keep attach subtle and neat.
Round 3 :
Pin spiral roses into desired cluster locations on the medallions and medium motifs; once satisfied, sew through rose base and flat motif and secure with multiple passes ensuring rose sits up from base.
Info :
When sewing 3D flowers on, go through the center base circle and then take several stitches through underside layers of the spiral to anchor it strongly. Sew through the underlying motif several times to distribute stress.
Round 4 :
Add bobble clusters and small rosettes to fill gaps; stitch leaves around clusters with needle and yarn, inserting leaf tip slightly under adjacent motifs so seams are hidden.
Round 5 :
Attach lavender sprigs by tacking stems to the underside of the base medallion and then sewing the small lavender heads on top; hide stems under leaves and filler motifs.
Info :
Take frequent breaks to check balance and symmetry. Move motifs slightly if necessary to keep runner flowing organically. Make extra leaves and fillers to adapt while assembling.
— Edging and Final Scallop :
Round 1 :
Work a uniform border around whole runner in cream: sc evenly around entire perimeter to even out raw edges (approx 400-500 sc depending on final size)
Round 2 :
Ch3, skip 2, sc in next to make arches around whole edge (approx 120 arches)
Round 3 :
In each arch: (2 dc, ch1, 2 dc) shell to form decorative outer scallop (120 shells)
Round 4 :
Finish with tiny picots between scallops: *sc 2, picot (ch3, sl st in first ch), sc 2; rep around. Fasten off and weave in thoroughly.
Info :
Blocking the entire assembled runner is essential: pin on wide blocking boards, use plenty of pins to open scallops and flatten clusters slightly so the runner lies pleasantly on the table.
— Decorative Detail: Stems and Veining :
Round 1 :
With sage green, embroider or crochet thin stems between clusters: ch 40-60 and sew into place on underside then tack along top to sit like a raised stem.
Round 2 :
Stitch central veins on leaves using backstitch or a thin strand of yarn to add realism. Make 2-3 veins per large leaf to create natural appearance.
Info :
Do not over-stuff stitches when embroidering; delicate surface stitches add definition without creating bulky seams that show through the base lace.
— Final Finishing :
Round 1 :
Check all joins: reinforce any areas that feel loose with three additional passes of yarn when sewing. Trim and weave all ends at least 4-6 cm into motifs.
Round 2 :
Lightly spray-block the assembled piece and allow to dry fully. If you prefer a stiffer runner, mix a little fabric stiffener in water and apply sparingly during blocking.
Info :
Store flat or rolled with acid-free tissue to preserve shape. If planning to launder, spot clean gently and re-block as needed; avoid machine washing which can distort cotton yarn shapes.
Finishing this vintage floral table runner is such a satisfying moment — seeing flat lace and sculpted roses come together is pure joy! Each stitch adds personality and texture, and the pastel color palette gives a timeless, romantic touch. Whether you use it for daily charm or special gatherings, this runner will bring warmth and handmade beauty to your home. 🧶🌸✨