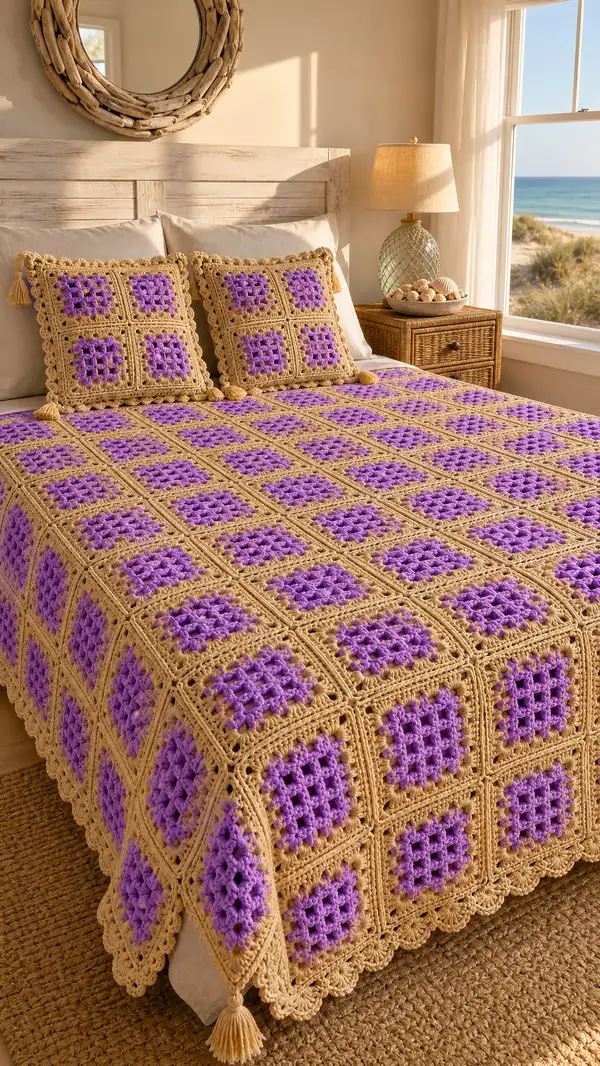
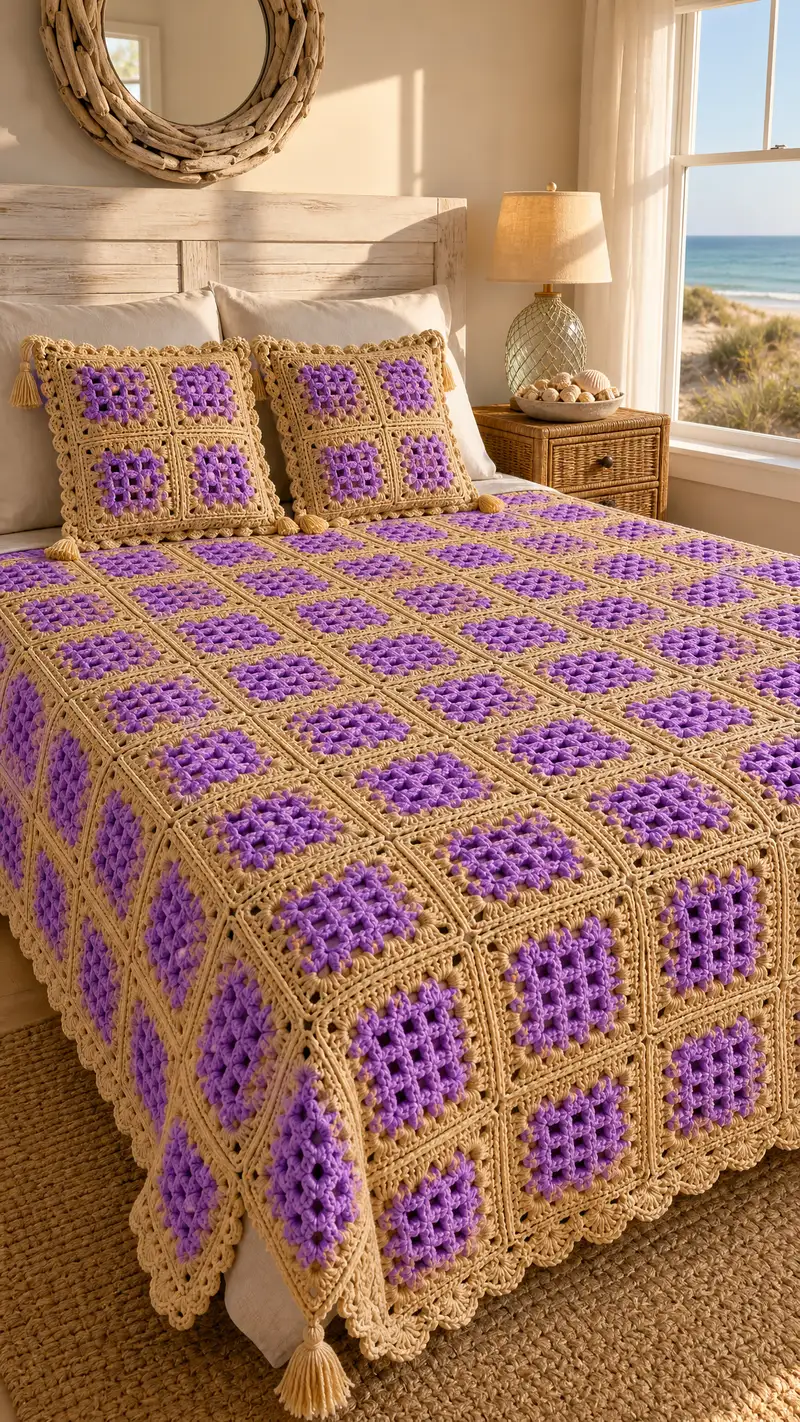
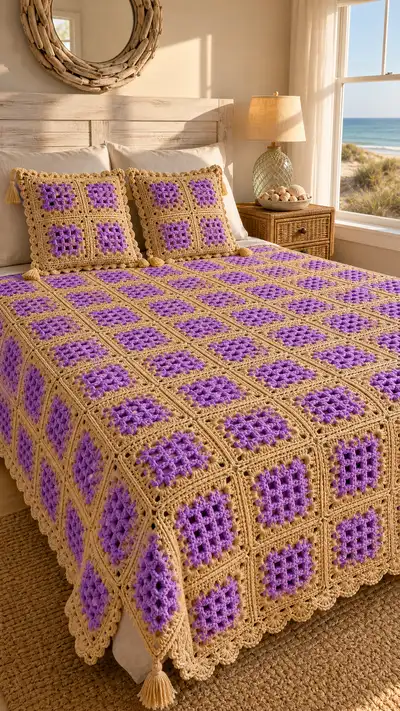
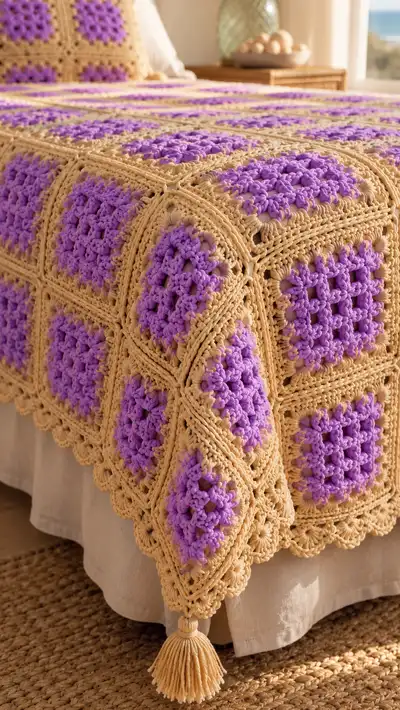
A warm, vintage-inspired bedspread made from textured purple granny centers framed in a soft tan mesh and finished with a scalloped border and tassels. The finished spread shown uses grid-style joining and a decorative shell edge for a cottage-chic look. Instructions include motif construction, join-as-you-go and seamed assembly, detailed edging rounds, and pillow sham instructions to match. Great for a cozy bedroom refresh or a gift with handmade charm.
Progress Tracker
0% Complete
— Special Stitches & Notes :
Info :
Before starting, read all sections. This pattern uses bulky (#5) yarn and a 6.0mm hook for a dense, cozy fabric. Where you see 'sc' in the purple center rounds, substitute a 3-loop puff cluster to recreate the puffy textured look (full instructions below). Use a stitch marker at the first stitch of each round. Block squares flat before joining for best seam alignment.
Special Puff Stitch :
Yarn over, insert hook into specified stitch, pull up a loop (repeat 3 times so there are 7 loops on hook including the original). Yarn over and pull through all 7 loops, chain 1 to close the puff. This puff counts as 1 stitch for stitch counts below. Keep loops even.
Gauge :
One finished square (after rounds 1-12 motif + frame rounds 13-20) measures approximately 10" (25 cm) square using bulky yarn and 6.0mm hook. Adjust hook size to match your desired finished blanket size.
— Motif (Purple Center) :
Round 1 :
8 sc in magic ring (8)
Info :
For the textured look work puff clusters in place of each 'sc' in Round 1 and Round 2 if you prefer a completely puffy center. Puff clusters count as one stitch in subsequent rounds.
Round 3 :
(1 sc, 1 inc) x 8 (24)
Round 4 :
(2 sc, 1 inc) x 8 (32)
Round 5 :
(3 sc, 1 inc) x 8 (40)
Info :
Change to purple yarn now if you worked Rounds 1-4 in a neutral or if you plan the purple block only in the inner section. When changing color, finish the last stitch of the previous round with the new color to join seamlessly.
Round 6 :
(4 sc, 1 inc) x 8 (48)
Round 7 :
(5 sc, 1 inc) x 8 (56)
Round 8 :
1 sc in each st (56)
Info :
At this point you have a rounded square of purple stitches. If you want a tighter, puffier center, replace every other sc worked in Rounds 6-8 with a puff cluster worked as described earlier. Keep counts by treating each puff as one stitch.
Round 9 :
(6 sc, 1 inc) x 8 (64)
Round 10 :
1 sc in each st (64)
Info :
Fasten off purple if you are changing to the tan frame now. Leave a 6" tail for weaving if you prefer to sew, or finish and weave later if joining-as-you-go.
— Frame & First Tan Rounds (Turn Purple Center into Square) :
Info :
Join tan yarn in any stitch at the edge of your purple center. We'll create a square frame in tan using corner chain spaces to generate crisp 90-degree corners. Work loosely enough so corners lie flat but not so loose that gaps appear.
Round 11 :
Join tan: ch1, sc in same st, *sc in next 15 sts; (sc, ch3, sc) in next st for corner; rep from * 3 more times, sc in remaining sts to end (count depends on previous round but expect (sc 15 per side + 4 corners) total groups)
Info :
After Round 11 you will have four defined corners (ch3 spaces). Count your sc along each side to confirm even distribution. If you have more or fewer than expected, adjust by adding or skipping a stitch evenly between corners.
Round 12 :
Ch2 (counts as hdc), hdc in each sc across to corner ch3 space; in corner work (hdc, ch3, hdc); rep around (maintain hdc across sides) — keep stitch count even per side (approx 18 hdc per side after working into corners)
Round 13 :
Ch3 (counts as dc), dc in each hdc across to corner; in corner work (dc, ch3, dc); rep around (approx 20 dc per side)
Info :
These rounds square up the motif — if your purple center is slightly rounded you can ease it into corners by stretching while sewing or by using a blocking spray to flatten before adding more tan rounds.
Round 14 :
1 dc in each st around keeping corners as (dc, ch3, dc) (approx 20 dc per side)
Round 15 :
1 sc in each st BLO to create a ridge for joining later (approx 20 sc per side)
Info :
Working in the BLO (back loops only) on Round 15 creates a nice channel for the join and reduces bulk when squares are seamed or joined-as-you-go. Fasten off and weave in ends if you are planning to seam later.
— Decorative Raised Ridge & Corner Shell (Tan) :
Round 16 :
Join tan if needed. Ch3, *skip 1 st, 3 dc in next st, ch1, 3 dc in same st (cluster shell), skip 1 st, dc in next st; rep around placing the corner shells centered over the corner ch3 spaces (approx pattern repeats so each side gets 5 shell clusters)
Round 17 :
Ch1, sc in each st and ch-space across; in corner sc work (sc, ch3, sc) (maintain even stitch counts per side, approx 30 sc per side)
Info :
Round 16 creates raised shell clusters that visually pop and help the square read as a framed motif. Keep the shells evenly spaced; adjust slightly to keep symmetry if you need to.
Round 18 :
Ch3, dc in each sc across to corner, (dc, ch3, dc) in corner; rep around (this increases final square width slightly, making squares easier to join with a small seam)
Round 19 :
Ch1, sc in each st BLO to create a neat joining surface (final frame approx 10" square; stitch counts per side will vary by tension)
Info :
Fasten off and weave ends. Block squares flat. Repeat motif and frame to create the number of squares necessary for your bed size (below are layout counts and joining instructions).
— Making Multiple Squares & Layout :
Info :
Standard shown layout creates a grid 6 squares across by 7 squares down for a generous throw-sized bedspread (6 x 7 = 42 squares). Each finished square measures roughly 10" (25 cm) so you can scale by adding or subtracting squares. For a twin bed use 6x8 or 7x9 depending on drape preference. Use the same motif size for pillow shams (4 squares per sham in a 2x2 arrangement).
Info :
Count how many squares you plan to make and work in batches so color changes and yarn joins are efficient. Label stacks to keep track of orientation for consistent joins and corner placement.
— Join-As-You-Go Method (JAYG) — Seamless Grid :
Info :
JAYG is recommended for a flat, seamless look. We'll join squares on their final tan BLO round (Round 19 above). Work the first row of squares completely. When adding the second square in a row, work the BLO round and join along the adjoining side by slip-stitch or single-crochet into the adjacent square's BLO stitches instead of working the full stitch: the counts below show joining a full side of approx 30 BLO stitches.
Round 20 :
Join tan at corner ch3 of square being added, ch1, sc in first corner, *sc in next 30 BLO sts, when you reach the adjoining side instead of sc into the side stitch work sc3tog with the matching BLO of the already-placed square to join (or work sc in next st of current square and sl st into next st of adjacent square), rep to complete side; finish corner as (sc,ch3,sc) and continue to remaining sides normally (joining only along earlier-placed neighbors)
Info :
Use pins to align squares and keep corners matched before joining. Work loosely at joins initially, then tighten up with a consistent pull to match tension of existing fabric. Keep a count of stitches joined (approx 30 stitches per side for an average square).
Round 21 :
When joining two sides (a square that sits between previously-joined squares) join both sides using the same method. After joining the last side of a square, continue to finish the square's remaining exterior sides as usual.
Info :
JAYG tips: work the join side-by-side and always join into the BACK LOOP of the adjacent square’s BLO ridge to create a flatter seam. When working sl st joins, use a shorter tail and weave it back across the seam before trimming.
— Seamed Assembly Method (Alternative) :
Info :
If you prefer to seam after making all squares, place squares face-down in the desired layout and whip stitch through the back loops of the BLO ridge to create an invisible ladder-style join. Use a length of yarn and mattress stitch-style sewing for a flat seam.
Round 22 :
Sew squares into rows first, then join rows together. When sewing, ensure corners align and maintain a consistent number of whip stitches per 1" for even seams (approx 8-10 small stitches per 3" depending on tension).
Info :
Block each finished row to keep it straight before joining the next row; pin carefully at corners to prevent drift. Press lightly with a steam iron on low and a damp cloth for cotton blends only.
— Wide Border & Joining Rounds (After Grid Is Assembled) :
Round 23 :
With the whole grid assembled and lying flat, attach tan yarn at any outer BLO ridge. Ch2 (counts as hdc), hdc evenly around the entire perimeter working 2 hdc in each corner ch3 space; total stitch count will equal the perimeter length in hdc (measure as you go)
Round 24 :
Ch3, dc in each hdc around; place (dc, ch3, dc) at corners (this creates a wide framed perimeter) — keep counts even and use markers every 10" to help division
Info :
These two rounds begin the outer border; measure and ensure even coverage. If you get to a corner and the next side is too short or long, adjust by adding/subtracting dc evenly across the preceding side to distribute the extra stitches.
Round 25 :
Ch1, sc in each dc around; in corner (sc, ch3, sc) — use sc in BLO for a defined ridge if desired
Round 26 :
Ch3, *skip 2 sts, 5 dc in next st (shell), skip 2 sts, sc in next st; rep around; in corners center a shell over corner ch3 (this begins the scallop look)
Info :
Be mindful of shell spacing; shells should read evenly down each side. If a side ends with a half-shell area, add an extra sc or remove a sc earlier to balance the side visually.
Round 27 :
Ch1, sc in each st and in center of each 5-dc shell; in corner work (sc, ch3, sc) to preserve corner shape
Round 28 :
Ch3, 2 dc in next st, skip 1 st, (3 dc, ch1, 3 dc) in center of shell to create larger scallop, skip 1 st, 2 dc in next st; rep around — this will create a deep scalloped edge for a finished vintage look
Info :
Count shells and scallops per side and add a marker at the midpoint of each side to ensure symmetry. If desired, add one more repeat round of larger scallops for an even more ornate edge.
Round 29 :
Ch1, sc in each st and ch-space; fasten off and weave ends into the border for a seamless finish
Round 30 :
Optional: Work one round of slip stitches through the back loops of the scallops to create a subtle ridge that visually frames the scallops (sl st through BLO in each sc and shell peak)
Info :
Light blocking after the border will help scallops even out and give a professional finish. Use a steam iron with a pressing cloth on cotton-blend yarns if necessary.
— Extra Decorative Rope Ridge (Optional Decorative Band) :
Round 31 :
Join tan at the base of shell scallops, ch5 (counts as tr+ch2), *tr in next 3 sts, ch2; rep around forming a decorative rope-like row across scallop valleys (stitch counts vary with perimeter)
Round 32 :
Ch1, sc in each tr and ch2 space to tidy rope row; finish and fasten off
Info :
This decorative band is optional but highlights the scalloped edge and gives a vintage rug-like look. If you want a thicker border, repeat rope and sc rounds another time.
— Pillow Sham (2x2 Squares) :
Info :
Each sham uses 4 finished squares joined in a 2x2 grid. Make 8 squares per sham (4 for front, 4 for optional back) if you plan removable covers; alternatively make one front panel and use solid fabric for backing.
Round 33 :
Assemble 4 squares in 2x2 using JAYG or seaming method. Join along two seams to create the front panel and finish outer edges with 2 rounds of sc in tan; keep corners neat.
Round 34 :
Work 1 round of sc in BLO around the entire sham front to create a neat lip for zipper or envelope closure (approx 3 rows of sc if backing included)
Info :
To make an envelope-style sham: make a plain tan back square large enough to overlap the front by 4" and sew or sc three sides, leaving an overlap opening. Add tassels to corners following tassel instructions below.
— Tassels & Corner Fringes :
Round 35 :
Make tassels using 4 folded loops of 8" yarn each (or length desired). Attach to each corner of the bedspread and pillow shams by doubling the loop through the corner and securing with a tight wrap of matching yarn. Add a decorative knot or bead if desired.
Info :
For a robust tassel, use 5-6 strands folded; trim evenly and comb for a fluffy look. Position tassels widely to match the corner scallop spacing shown in the image.
— Finishing Touches, Blocking & Care :
Round 36 :
Check all joins and weave in any remaining ends along the back of the work using a yarn needle. Use hidden stitches to anchor tails into the seam allowance.
Round 37 :
Lightly block the entire spread flat, pin scallops to even spacing. Allow to dry completely before using. For cotton blends, hand wash gently and lay flat to dry to preserve shape and tassels.
Info :
For a bedspread destined for daily use, consider adding a lightweight cotton backing sewn on to protect joins and prevent stretching over time. This also hides woven-in tails for a tidy underside.
This violet mesh granny square bedspread is a joyful mix of texture and color—the puffy violet centers pop against the warm tan frame, creating a timeless, cozy piece you’ll treasure. The modular design means you can scale up or down to fit any bed size, and the scalloped border with tassels gives a handmade heirloom finish. I hope you enjoy the mindful, rhythmic crochet of each square and the satisfaction of joining them into a beautiful whole. 🧶💜