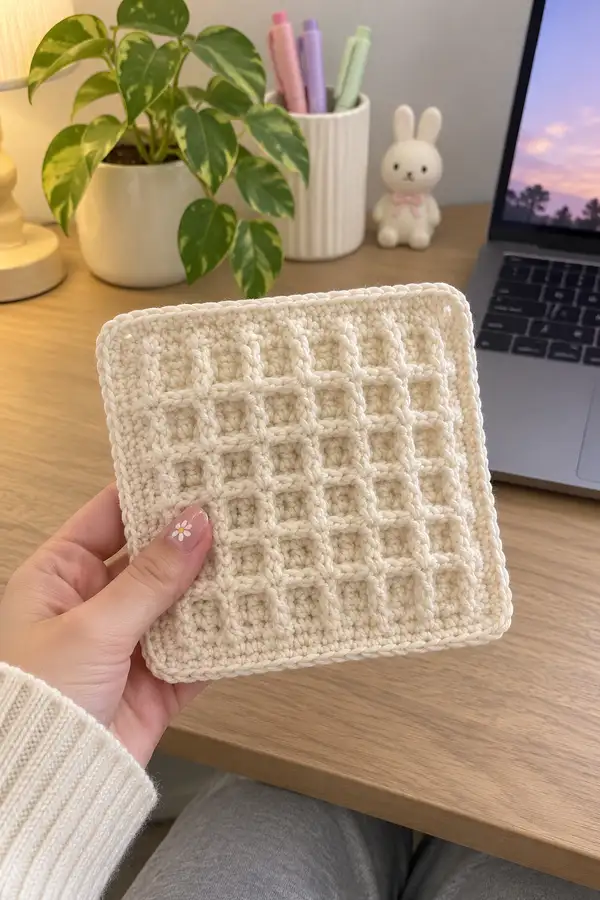
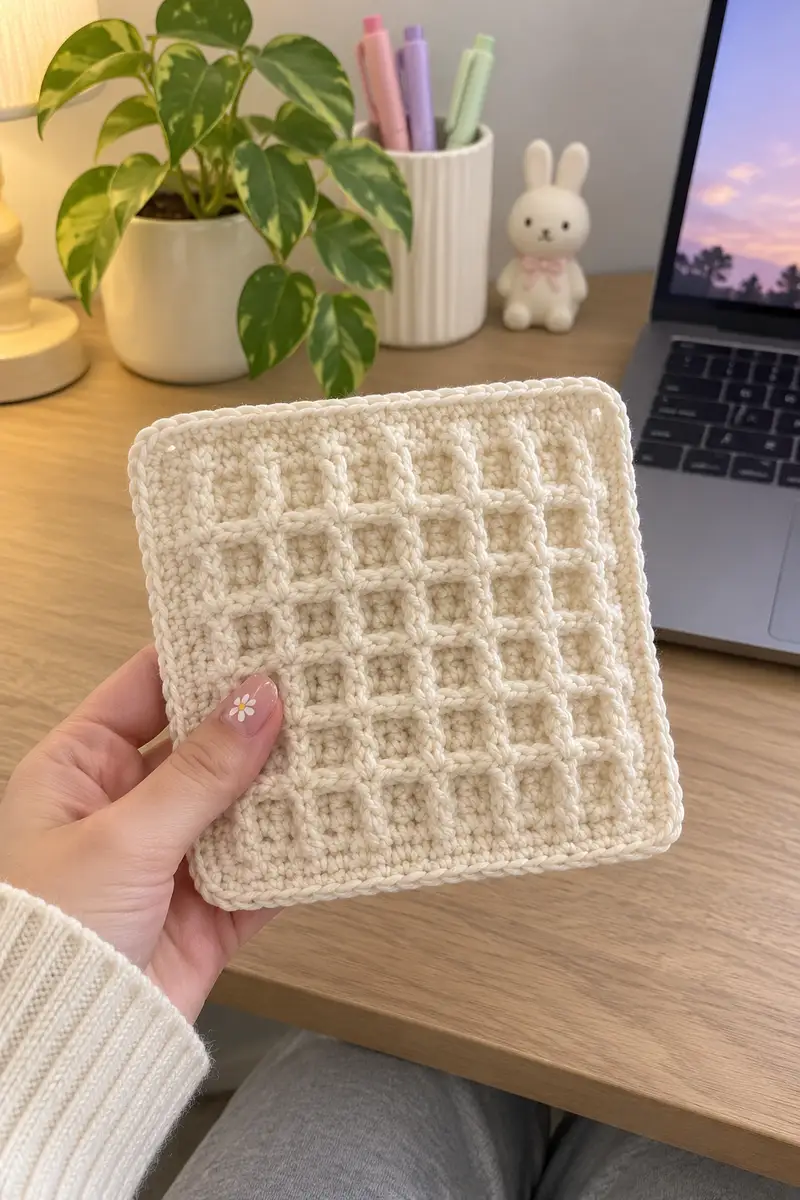
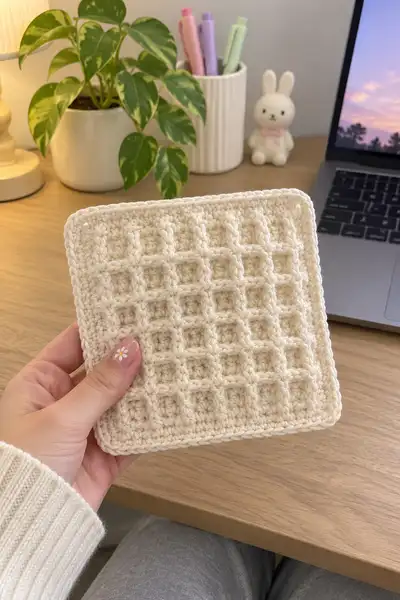
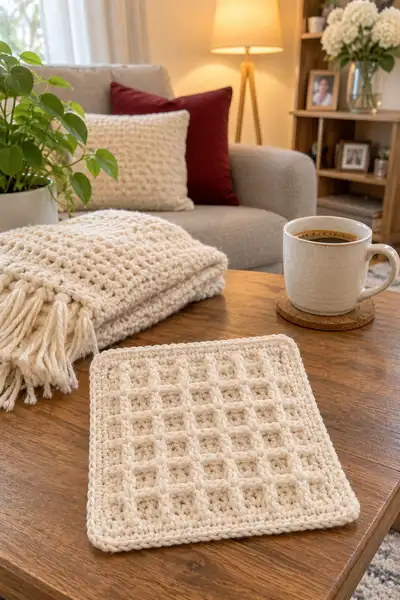
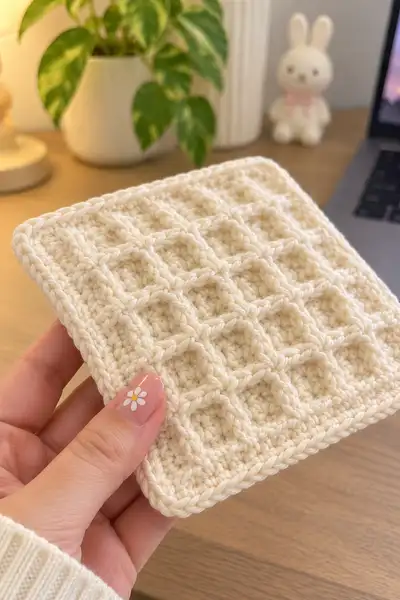
A squishy, modern waffle-structured granny square worked in a soft cream worsted yarn. This pattern teaches the classic waffle stitch texture built in rounds/rows to create a tidy square coaster, cushion cover square, or blanket panel. The pattern includes detailed row-by-row instructions, repeated waffle pattern rows, clear border and join guidance, and tips for scaling up to blankets. Finished piece shows an elevated grid of raised ridges forming little square pockets and a neat twisted edge.
Progress Tracker
0% Complete
— Gauge & Notes :
Info :
Gauge: 14 dc and 12 rows of the waffle pattern = 10 cm (4") using worsted weight yarn and 5.0 mm hook. This sample uses a foundation multiple of 3 + 2 chains (we use ch 32 in this pattern sample). Adjust chain to your preferred multiple if scaling.
Info :
Pattern can be worked flat in rows (turning each row) or in joined rounds - instructions use 'round' numbering but these are rows turned for a flat square. Counts are shown at end of each round in parentheses.
— Foundation Row & Base Dc Row :
Round 1 :
Ch 32. (Foundation chain: 32 chains; this is multiple of 3 + 2 for waffle repeat)
Round 2 :
Turn, ch 2 (counts as first dc), dc in 3rd ch from hook and in each ch across to end. (32 dc)
Info :
This first dc row establishes your baseline. Count to verify you have 32 dc. If you prefer a larger square, adjust foundation chain by adding multiples of 3.
— Establishing the Waffle Pattern (Rows 1-8 of the waffle repeat) :
Round 3 :
Turn, ch 2, *fpdc around the next dc of the previous row (work around the post from the row below), dc in next 2 dc; rep from * across to last st, dc in last st. (32)
Round 4 :
Turn, ch 2, dc in each st across (32)
Info :
When working fpdc, insert hook from front to back then around the post of the dc in the row below and complete a dc. This raises that column and creates the waffle pockets.
Round 5 :
Turn, ch 2, *fpdc around the next dc (the posts created two rows ago), dc in next 2 dc; rep from * across to last st, dc in last st. (32)
Round 6 :
Turn, ch 2, dc in each st across (32)
Info :
Rows 3-6 form one complete waffle ridge unit. You will repeat Rows 3-4 (fpdc row + dc row) to build the depth and well-defined pockets. Keep the same stitch count which preserves a straight edge.
Round 7 :
Turn, ch 2, *fpdc around the next dc, dc in next 2 dc; rep across to last st, dc in last st. (32)
Round 8 :
Turn, ch 2, dc in each st across (32)
Info :
At the edges you may find the first fpdc slightly awkward; push the turning chain gently to the back and ensure your fpdc wraps the post and not the stitch top.
— Repeating the Waffle Units (Rounds 9-80) :
Round 9-12 :
Repeat Round 3-6 (fpdc row, dc row, fpdc row, dc row) two more full times. Maintain (32) stitches each row. (32)
Info :
Check your work every 6 rows: pockets should form a uniform 3-st wide cell separated by raised post ridges. If pockets are flattened, increase fpdc height slightly by inserting hook a little deeper into the post.
Round 13-20 :
Continue repeating the waffle unit (Round 3 and Round 4) for eight more rows (four waffle ridges). Maintain (32) stitches each row. (32)
Info :
Work with a consistent ch-2 turning chain that counts as first dc. If your edges draw in, try a slightly looser initial edge dc on the first and last stitch of the row to square up corners.
Round 21-28 :
Repeat the waffle pair (fpdc row, dc row) for another eight rows. Maintain (32) stitches each row. (32)
Info :
By now you will see the grid forming clearly; press lightly with steam if the ridges are timid — a tiny steam will help the waffle pockets pop. Do not saturate the yarn.
Round 29-40 :
Repeat waffle rows (Round 3 & 4) for twelve more rows. Maintain (32) stitches each row. (32)
Info :
If you are making a coaster or small square, stop when you reach desired size (for a coaster about 8-12 waffle rows). For a cushion or blanket panel continue to the desired dimensions. Our photos show a 12" square which uses approximately 36 waffle repeat rows total.
Round 41-56 :
Continue repeating the waffle pair for sixteen more rows to build thickness and height. Maintain (32) stitches each row. (32)
Info :
Keep track of total repetition counts if you plan to make many identical squares for a blanket. Use a row counter or mark with a sticky note for each completed waffle unit.
Round 57-80 :
Repeat waffle rows (fpdc row, dc row) for twenty-four more rows or until your square measures the target dimension. Maintain (32) stitches each row. (32)
Info :
When you reach your intended size, stop repeating waffle units and move to a finishing edge sequence to tidy up corners before working the border. For reference: our sample 12" square used 72 total rows including foundation and border rows.
— Squaring Up & Final Dc Row (Prepare for Border) :
Round 81 :
Turn, ch 2, dc in each st across (32). (32)
Info :
This even dc row helps square the edges and gives a clean line for the border. Make sure corners are not pulling by evening out tension on the first and last stitches if needed.
Round 82 :
Turn, ch 1, sc in each st across for one neat sc row to anchor the border. (32)
Info :
The sc round rounds off the raw edge and provides a slightly firmer base to hold corner increases when you work the turning border in rounds.
— Round Border: Rounds 83-92 (Working Around All Four Sides) :
Round 83 :
Rotate work to begin working in joined rounds for a neat continuous border. Join with sl st to any sc on the last row, ch 2 (counts as first hdc for border), hdc in each st across to corner, when you reach corner work (hdc, ch 2, hdc) into corner stitch to create a turning corner; continue around, working (hdc) in each edge st and (hdc, ch 2, hdc) in each corner. End with sl st to top of ch 2. (Perimeter stitch counts will be approx 32 hdc plus 4 corner ch-2 spaces)
Info :
Use hdc for a slightly chunkier border. If you prefer a slimmer border use sc in the round instead. The corner (hdc, ch 2, hdc) keeps corners square so the border lays flat.
Round 84 :
Ch 1, sc in each hdc around, working (sc, ch 2, sc) in each corner ch-2 space. Join with sl st to first sc. (Approx the same perimeter stitch count)
Info :
Check that all four corners sit flat after this round. If any corner curls, add one extra sc in the corner ch-2 space to widen the corner slightly.
Round 85 :
Ch 2, fpdc around the back loop only of each sc from previous round to create a subtle raised ridge along the border; work (fpdc, ch 2, fpdc) in each corner ch-2 space. Join with sl st to top of ch 2. (Perimeter unchanged)
Round 86 :
Ch 1, sc in each st around, working (sc, ch 2, sc) in each corner. Join and fasten off if desired or continue to the twisted-looking rope border below. (Perimeter unchanged)
Info :
The fpdc in the border enhances the waffle ridges and frames the square. Fasten off here for a simple edge or continue with the final braided/rope border for the look in the photos.
— Decorative Rope/Braided-Look Border (Rounds 87-94) :
Round 87 :
With RS facing, join yarn at any corner, ch 3 (counts as dc), dc in same corner sc, *skip next 2 sc, trc in next sc, dc in next sc, repeat from * around arriving at corners work (dc, ch 2, dc) in corner. Join with sl st to top of ch 3. (Perimeter approx same)
Round 88 :
Ch 1, sc in each st around to neaten the tall stitches. Work (sc, ch 2, sc) in corners. Join and fasten off. (Perimeter unchanged)
Info :
This two-round decorative border gives the slight twisted rope look seen on the sample. If you prefer a simple look, do a single reverse sc round instead.
— Blocking & Finishing :
Round 89 :
Weave in ends with a yarn needle: thread the tail, weave through 4-6 sts on the wrong side, then trim close. Repeat for all ends.
Info :
Block the square to shape: dampen slightly and pin to a square blocking board, pin corners evenly to square and allow to dry. Light steaming with an iron set to wool setting held 3-4" above surface can also help set the waffle pockets.
— Making Multiple Squares for a Blanket (Instructions & Joining) :
Info :
Make as many identical squares as required for your blanket. For a 48" x 60" blanket using 12" squares you need 4 x 5 = 20 squares. Keep tension and row count identical for each square for easier joining and even edges.
Round 90 :
Make Repeat Squares: Work foundation and waffle repeat sequence on each square until all squares match the same size and border finish. Label squares as A1-A20 to keep track in a joining map. (No stitch count)
Info :
Block all squares before joining — this makes seaming easier and more accurate. Trim any stray loops and check corners line up.
Round 91 :
Option 1 - Join-As-You-Go (JAYG): With RS of a finished square facing you and RS of next square facing you, work the final border round of square 2 and slip stitch into corresponding border sts of square 1 at each corner and along edges to join seamlessly. (Follow border stitch mapping)
Round 92 :
Option 2 - Mattress Stitch Join: Lay squares WS together, whipstitch through back loops only along adjoining edges using matching yarn and yarn needle. Invisible seam produces a clean look; pad stitch at corners twice for durability. (No stitch count)
Info :
JAYG produces a continuous look; mattress stitch gives a flatter seam. Choose based on how you want the waffle grid to appear across seams.
Round 93 :
To join large numbers of squares into rows: join squares left to right, then join rows from top to bottom. Secure corners first to ensure proper alignment. (No stitch count)
Round 94 :
When all squares joined, work a continuous joining round around the entire blanket: sc in each border st, working (sc, ch 2, sc) in the four outer corners to square up edges. (Perimeter depends on blanket size)
Info :
For a blanket, add two to four rounds of the decorative rope/braided border (as in Rounds 87-88) around the entire joined piece to echo the single-square sample.
— Expanded Blanket Border & Extra Rounds (Rounds 95-112) :
Round 95 :
Join yarn at any corner, ch 2, hdc evenly around entire blanket edge, making (hdc, ch 2, hdc) in each corner. Maintain even spacing and keep stitch count even per side. (Perimeter variable)
Round 96 :
Ch 1, sc in each st around, (sc, ch 2, sc) in corners. Join. (Perimeter unchanged)
Info :
For larger throws, repeat rounds 95-96 one or two times to create a sturdy edge able to withstand use and laundering.
Round 97-100 :
Optional: Repeat the rope/braided-look sequence around the blanket: Round A (dc/trc combination), Round B sc tidy round. Repeat twice for a dramatic edge. (Perimeter unchanged)
Info :
Edge styling: pick a simpler sc border for a minimal look or the rope/braid for a decorative finish that matches the sample photos.
Round 101-104 :
Final neat rounds: Ch 1, sc in each st around for two rounds to create a firm finishing border that resists stretching. Fasten off and weave ends. (Perimeter unchanged)
Info :
A final sc round yields a tidy, durable finish that sits well on a coffee table or cushion. If making a cushion cover, add button loops or a zipper on the back before attaching backing fabric.
— Optional Cushion Back & Assembly (Rounds 105-118) :
Round 105 :
Make a second square to match the front if making a cushion. Work all waffle repeats the same number as the front. (32 sts per row as above)
Round 106 :
Join front and back: With RS together, whipstitch or sc around three sides leaving top open for insert; or leave one side with ch-loop closure. Work 1 sc in each sc around and 3 sc in corner spaces to maintain shape. (Perimeter dim.)
Round 107 :
Turn cushion RS out and insert cushion pad; for a neat finish sc closed or add buttons on the opening side. Close with neat invisible mattress stitch if using a zipper. (No stitch count)
Info :
When using a cushion pad, stuff gently and adjust to keep the waffle texture visible. A slightly overfilled pad will cause the grid pockets to flatten; choose a pad that gives gentle fullness.
— Care, Washing & Troubleshooting (Rounds 119-130) :
Round 119 :
Washing: Machine wash gentle cycle cold with mild detergent and dry flat. For natural fiber yarns, hand wash cold and dry flat to avoid felting. (No stitch count)
Round 120 :
To restore waffle pop: re-block while damp and pin square pockets open slightly to re-form texture. Steam lightly for stubborn spots. (No stitch count)
Info :
Troubleshooting flattened pockets: add one extra fpdc row in the pocket centre to boost height if your yarn is soft and drapey. Alternately, work FPdc a touch looser on the post stitch row.
Round 121-124 :
Common fixes: If edges ripple work one additional sc round; if corners pull add 1 or 2 sc into corner ch-2 spaces; if seams show gaps, join squares with mattress stitch to hide gaps. (No stitch count)
Round 125-130 :
Final tips wrap-up: Label your squares, block consistently, and use matching yarn and hook for all pieces. Store finished pieces flat to preserve waffle texture. (No stitch count)
Info :
This full pattern covers how to make one square and scale it to a cushion or blanket, how to finish edges like the sample, and optional joining techniques. Use the repeating Rows 3-4 to expand length — each two-row repeat adds roughly 6-8 mm of height depending on tension and yarn.
This waffle structured granny square is a peaceful little project that turns ordinary yarn into a lush, tactile grid perfect for home accents. Whether you stitch a set of coasters, a cushion cover, or a roomy throw, the repeatable waffle motif is satisfying to work and lovely to touch. Each square builds into a modern classic for cozy living spaces — enjoy the rhythm of the stitches and savor the finishing block! 🧶🏡