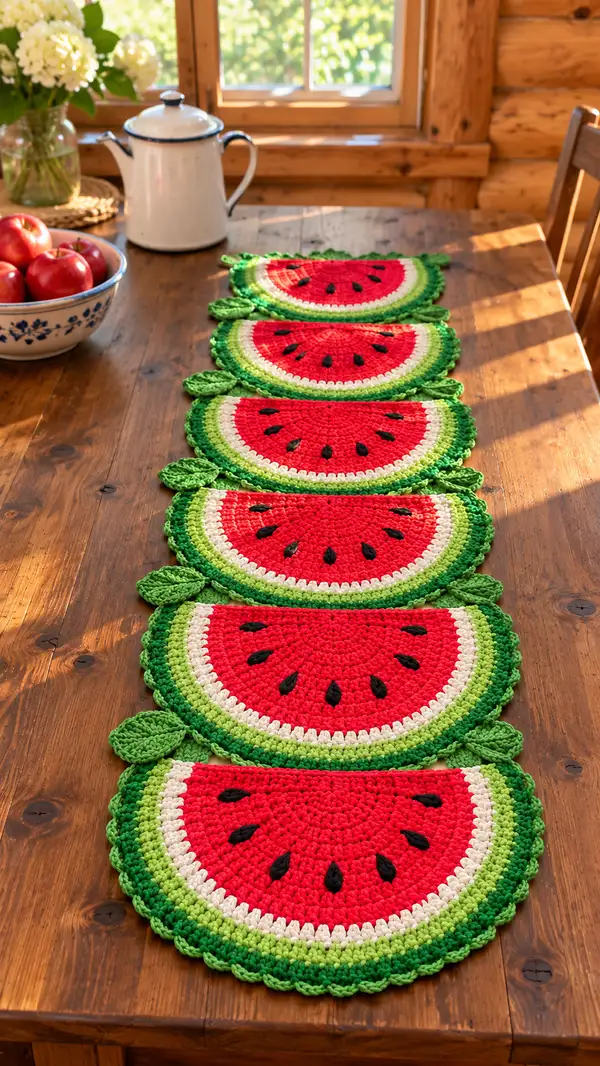
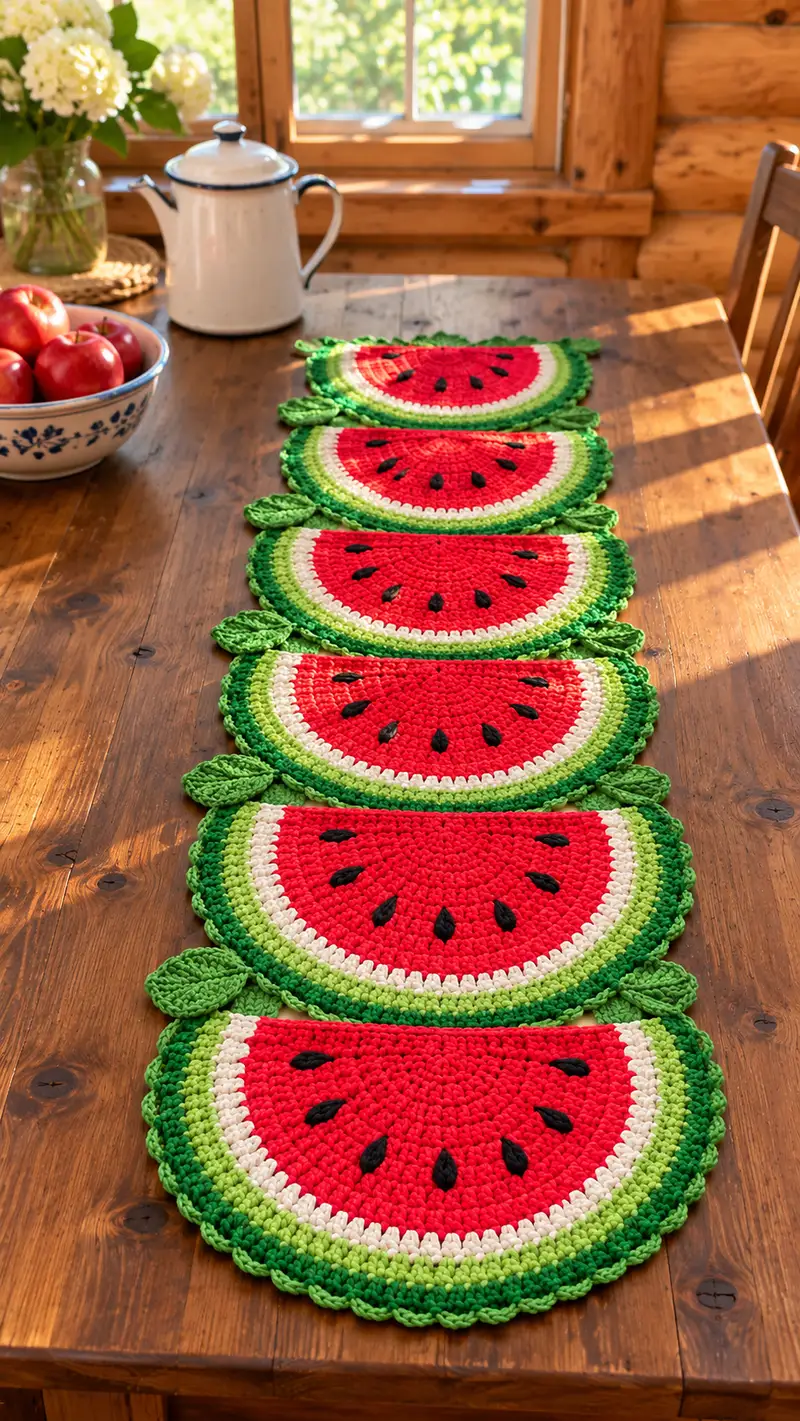
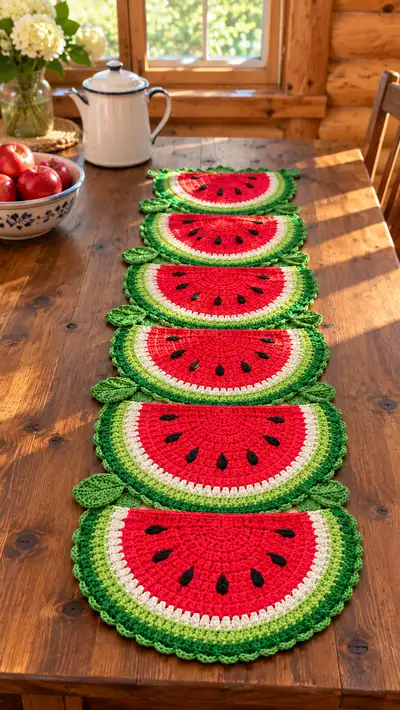
Bright, summery watermelon slice motifs join to form a long, cheery table runner — perfect for picnic tables and kitchen tables alike. Each half-slice features a bold red center, a narrow white pith, layered light and medium green rinds, a decorative dark green scalloped edge and embroidered black seeds. Small leaf accents between slices give an organic, finished look. This pattern includes detailed stitch-by-stitch instructions, finishing tips and joining methods so you can recreate the runner exactly as shown.
Progress Tracker
0% Complete
— Watermelon Slice (Make 6 for runner, can make more or fewer)
Round 1 :
6 sc in magic ring (6)
Round 3 :
(1 sc, 1 inc) x 6 (18)
Round 4 :
(2 sc, 1 inc) x 6 (24)
Round 5 :
(3 sc, 1 inc) x 6 (30)
Round 6 :
(4 sc, 1 inc) x 6 (36)
Round 7 :
(5 sc, 1 inc) x 6 (42)
Round 8 :
(6 sc, 1 inc) x 6 (48)
Info :
These first 8 rounds create the full circular base geometry. We will convert this round-based, circular geometry into a half-circle motif by working additional even rounds, then flattening and finishing along the diameter. Place a stitch marker at the beginning of every round.
Round 9 :
1 sc in each st around (48)
Round 10 :
1 sc in each st around (48)
Round 11 :
1 sc in each st around (48)
Round 12 :
1 sc in each st around (48)
Info :
At this point the motif is a flat disc. To create a clean half-slice shape that matches the photo, we will define a diameter line and work across the diameter back-and-forth to flatten and shape a clean semicircle while keeping the round counts for reference. Mark 24 consecutive stitches across the circle to designate the straight edge (the future flat, cut edge).
Round 13 :
Change to red yarn if not already in red. Working into the round but only across the arc portion (the 24-stitch outer arc), sc in next 24 stitches, then ch 1, turn work to work back across those arc stitches as a short-row (see Info) (24)
Info :
Short-row technique: After turning on Round 13, work back across the same arc stitches in sc so you form a visible straight edge (diameter). This converts the circular disc into a dense semicircular panel. Keep your tension consistent; use stitch marker to mark ends of each short-row pass.
Round 14 :
Continue working sc across the arc only (do not work into the 24 diameter stitches on subsequent passes), 1 sc in each of the 24 arc stitches (24)
Round 15 :
Repeat Round 14 to build thickness and flattening (24)
Info :
By building several passes across the arc-only stitches, you form a semicircular shape. You will continue these short-row passes until the depth of the semicircle visually matches the photo (usually 4–6 short-row passes). Keep the remaining 24 diameter stitches unworked so they will form the straight edge across the base.
Round 16 :
1 sc in each of the 24 arc stitches (24)
Round 17 :
1 sc in each of the 24 arc stitches (24)
Round 18 :
1 sc in each of the 24 arc stitches (24)
Round 19 :
1 sc in each of the 24 arc stitches (24)
Info :
Now that you have a solid semicircular red panel, tidy the straight edge (diameter) by working along the 24 unworked stitches on the previous rounds: join yarn at one end of the diameter and work a tidy finishing row across the straight edge to make the base neat. This creates the half-slice shape.
Round 20 :
Join yarn at one end of the straight edge, sc evenly along the 24 diameter stitches to close and tidy the flat edge (24)
Round 21 :
Even round in red: 1 sc in each st around the full semicircle border (counting arc + diameter = 48) (48)
Info :
From this point we will add the thin pith (white/off-white) and two rind bands (light green then medium green). We will work full rounds around the semicircle perimeter; stitch count remains 48 for these single crochet rounds unless stated otherwise.
Round 22 :
Change to cream/white yarn. 1 sc in each st around (48)
Round 23 :
Still cream/white, 1 sc in each st around (48)
Round 24 :
Change to light green yarn. 1 sc in each st around (48)
Round 25 :
Light green, 1 sc in each st around (48)
Round 26 :
Change to medium green yarn. 1 sc in each st around (48)
Round 27 :
Medium green, 1 sc in each st around (48)
Info :
The two green bands can be worked in simple sc rounds to create the graduated rind. For a subtle texture, work the first medium-green round in BLO to create a thin ridge that suggests the rind's curve.
Round 28 :
Medium green, work 1 sc in each st BLO (48)
Round 29 :
Even round in medium green: 1 sc in each st (48)
Info :
Next we add the decorative dark green scalloped edge that appears in the photo. We'll work a scallop/shell round followed by a picot or slip-stitch decorative finish to mirror the photo. The base count remains 48; shells are worked across multiple base stitches but the number of starting points equals 24 shells for an even look.
Round 30 :
Change to dark green. *Skip 1 st, (sc in next st, ch 3, 3 dc in next st, ch 3, sc in next st), skip 1 st* around to form scallop clusters. Place shells every 2 base stitches so you will have 24 scallop points around (48 as base reference)
Round 31 :
Decorative finishing round: sl st into the center of each scallop cluster, ch 1, sl st to secure and create a scalloped raised rim (work to taste) (48 decorative anchors)
Info :
Take a moment to count scallop anchors and ensure there are 24 evenly spaced scallops. If your counts differ, adjust by adding or omitting one shell where necessary to maintain symmetry. Blocking now will help the scallops sit flat and even.
Round 32 :
Optional additional decorative round: Repeat a small picot or sl st edge in dark green to firm up the scallop edges (48 decorative anchors)
Round 33 :
Fasten off dark green and weave in ends. The basic motif is now complete — you should have a semicircular watermelon slice with layered rind and scalloped outer edge.
Info :
Make 6 identical slices for the runner shown, or as many as needed for your table. Lay them out and ensure consistent orientation of scallops and straight edges for easy joining. Light blocking or steam blocking each slice will make the joining and final edge work much neater.
— Seed Appliques (Make 7 per slice or adjust as desired)
Round 1 :
Using black yarn, ch 2, 4 sc in 2nd ch from hook, pull tight (4) — small magic loop alternative: mr, 4 sc in ring (4)
Round 2 :
sc around the small ring (4) then ch 1, turn and work 2–3 hdc into a single stitch on top side to lengthen into a tiny teardrop shape (no count increase required; each seed is built to be a short teardrop)
Round 3 :
Work 1 sl st at base to form a pointed teardrop, fasten off leaving long tail for sewing
Info :
Alternatively, you can embroider seeds directly using satin stitch; however crocheted teardrop appliques give added texture and a slightly raised seed look. Make 7 seeds per slice and lay them out symmetrically.
Round 4 :
Make 7 seeds total for one slice (repeat Rounds 1-3 seven times), leaving long tails on each to sew to the red center
Info :
Space seeds evenly across the red half, about 3–5 stitches inward from the white pith band depending on how deep your semicircle is. Typically you will place seeds spaced ~6–8 stitches apart along the arc, creating a pleasing fan pattern.
— Leaf Accent (Make 12: two per join for 6-slice runner)
Round 1 :
With dark green yarn, ch 8 (or length to suit leaf size), sc in 2nd ch from hook, hdc in next, dc in next, tr in next (peak), dc in next, hdc in next, sc in last (7) — turn to work down the other side of chain for leaf body
Round 2 :
Working down the opposite side of the foundation chain: sc in next, hdc in next, dc in next, tr in next, dc in next, hdc in next, sc in last. Sl st to join at base and fasten off leaving long tail for sewing (approx 14 stitches worked across both sides)
Info :
To create a raised spine, use a slip stitch or surface slip-stitch along the center from base to tip after the leaf is sewn in place. Make two leaves for each join so they peek between slices as shown.
Round 3 :
Optional center ridge: re-attach yarn at base, ch 1, *sl st up center of leaf to tip*, fasten off (no added stitches)
— Joining Slices & Runner Assembly (Join 6 slices end-to-end)
Info :
Layout: Place your semicircular slices in a straight line with the straight diameter edges touching. The scallop rims should face outward. Leaves will be added between slices: two small leaves at the join — one on each side of the seam pointing opposite each other.
Round 1 :
With medium green yarn, align two semicircles (Slice A and B) with right sides up. Starting at the straight edge, match stitch-for-stitch along the 24-stitch diameters. Using a yarn needle and medium green yarn, whip stitch or mattress stitch through the straight-edge loops, sewing 24 evenly spaced stitches to join the pair. Fasten off and weave ends.
Info :
Pin slices together before sewing to ensure the scallops and arc stitches align. Use a running whip stitch snugly but not overly tight so the seam lies flat. Repeat for all pairs to assemble a continuous strip of semicircles.
Round 2 :
After sewing slices pairwise, join each subsequent slice in the same way until you have one long runner strip of 6 slices. When you reach each join point, position two leaves: sew one leaf to the top of the seam and one to the bottom of the seam using dark green yarn tails. Sew through the base of the leaf and into both slices for stability.
Round 3 :
For extra stability, work a crochet seam along the joined straight edge: With medium green yarn and 4.0mm hook, starting at one end, pick up matching loops along the join and sl st across the seam through both layers every stitch for 24 sl st. Fasten off and weave in ends.
Info :
If you prefer a visible knitted-look seam, use surface slip stitches in a contrasting green to create a decorative band along the joins. Pin leaves symmetrically between slices and tack them with a few discreet stitches.
Round 4 :
At the two ends of the runner, tidy the straight lateral edge by working a short edging: attach dark green yarn and sc evenly across the straight lateral edge of the first and last semicircle (24 sc across each end). If desired, add a small tassel or loop at each end.
Round 5 :
Reinforce joins by weaving ends into the seam from both sides and trimming. Press flat with light steam, being careful with block if using synthetic yarn.
— Final Outer Edge & Optional Padding
Round 1 :
To unify the whole runner and give the scallops a consistent outer rim, join dark green yarn at the outermost scallop of the first semicircle and work a decorative scallop join across the outer edges of each slice, skipping and attaching to adjacent slices' scallops to make a continuous scalloped trim: *sc in seam between scallops, (ch 3, sl st in next scallop center)* repeating around all semicircles (visual anchors: 24 per slice)
Info :
If you'd like a slightly cushioned runner, cut strips of thin batting or use a thin placemat backing and sew it to the underside of the runner with a hidden whip stitch before final outer edging. This produces a padded effect while keeping the crochet fabric visible on top.
Round 2 :
Optional slip-stitched stabilization: with a 3.5mm hook and matching medium green, work sl st through both layers (if backed) around the entire outer perimeter of the runner to secure lining and crochet together. Work evenly and maintain tension to avoid puckering.
Round 3 :
Add final decorative picot: *ch 3, sl st in same st* at each scallop peak for a delicate looped finish (work to taste)
Info :
Weave in all ends on the underside. If seeds are crocheted appliques, stitch them to the red centers now with long tails you left earlier. Position seeds in a fan pattern and sew securely with short, tight stitches.
Round 4 :
Blocking: Gently damp-block or steam each slice so scallops and leaves sit flat. Lay the runner flat while it dries. If necessary, pin scallop points to keep consistent spacing.
Round 5 :
Final inspection: check seams, add extra reinforcement stitches where needed, trim loose ends and press lightly. Your full watermelon table runner is complete.
Info :
This assembly sequence assumes 6 semicircles joined by the straight edges with two leaves per join. If you change the number of slices, adjust the number of leaves and join stitches accordingly.
— Variations, Texture & Advanced Decorative Options
Info :
1) Add a white/cream crochet lace edging between slices if you want a more vintage or delicate look. 2) Use bobble stitches on the medium-green band to mimic rind bumps. 3) Add a stitched outline with contrasting thread on the red flesh to emphasize the seed panel.
Info :
4) For a reversible runner, make two identical strips and seam them WHILE leaving a small opening to insert thin batting, then sew closed. 5) To make smaller or larger slices change yarn weight and hook size; stitch counts will scale proportionally if you keep the same increase pattern in the initial rounds.
Info :
Always keep a sample stitch gauge and make one prototype slice to test sizing, colors and tension before producing the full runner.
This watermelon slice table runner turns ordinary meals into sunny summer moments! With layered color bands, scalloped edging and tiny leaf accents, every stitch celebrates playful design and bright color. It's a delightful modular project — easy to customize and a wonderful gift for picnics, patios or seasonal decor. Enjoy making each juicy slice and watching them come together into a festive, cheerful runner! 🍉🌿