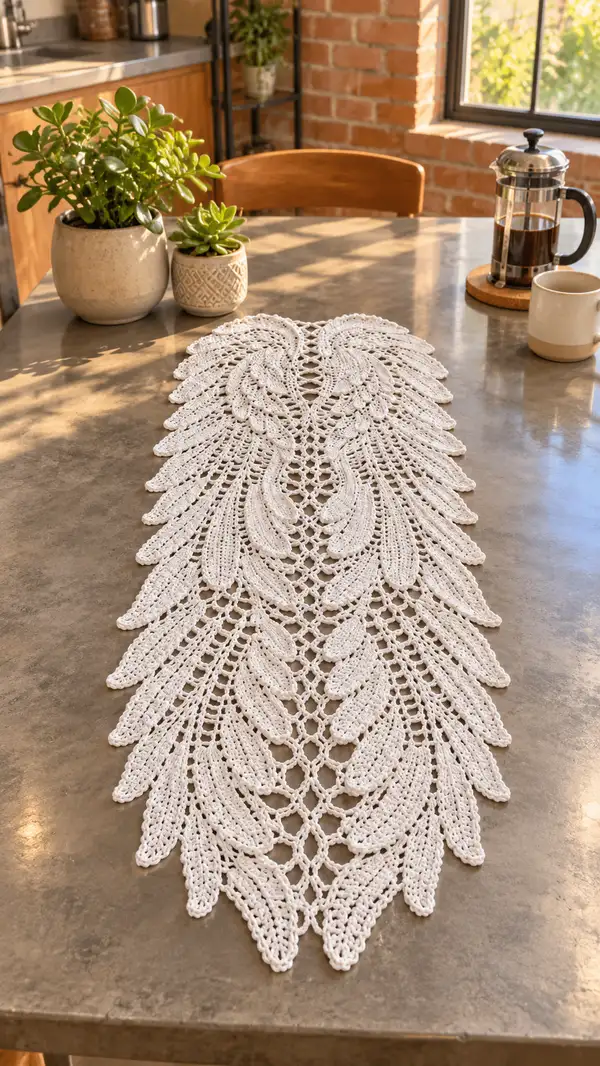
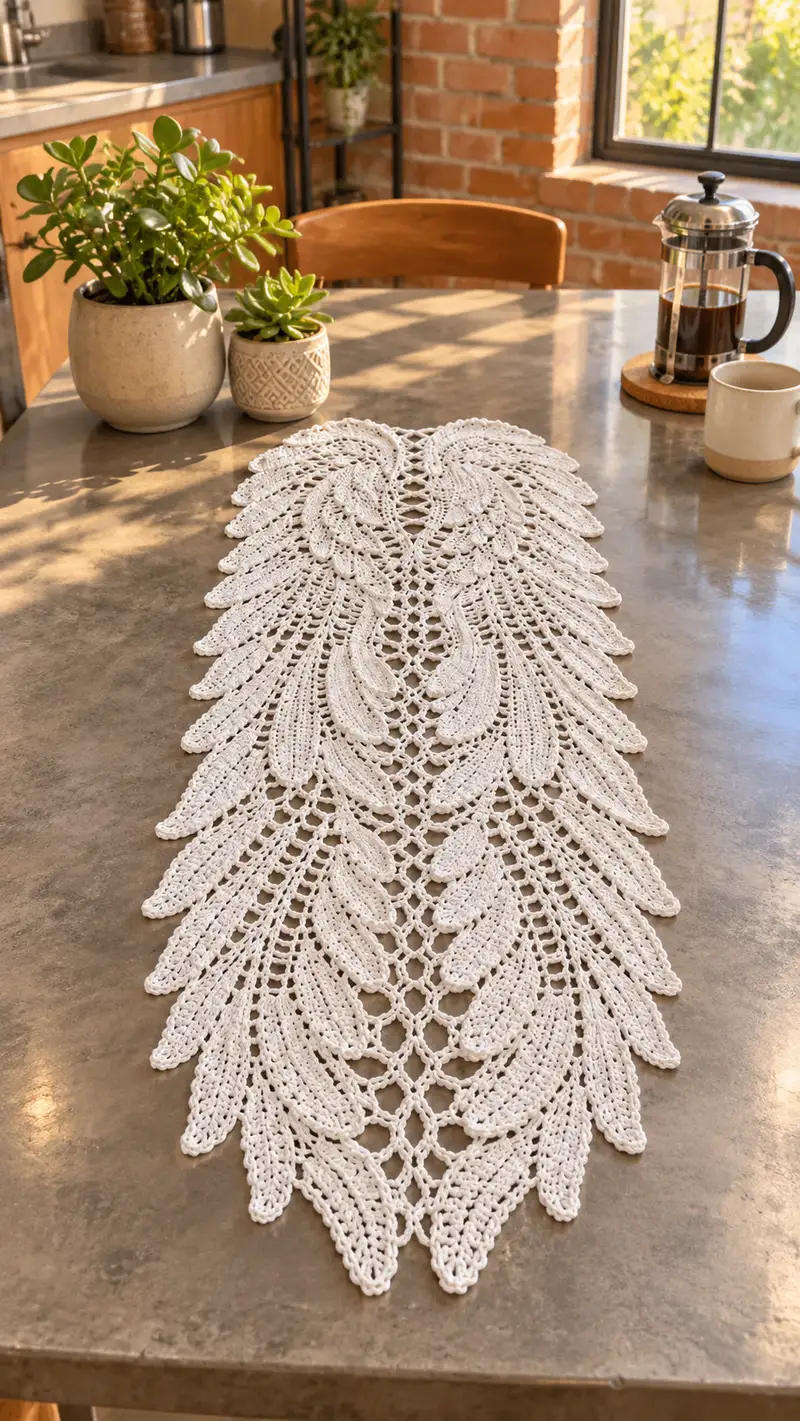
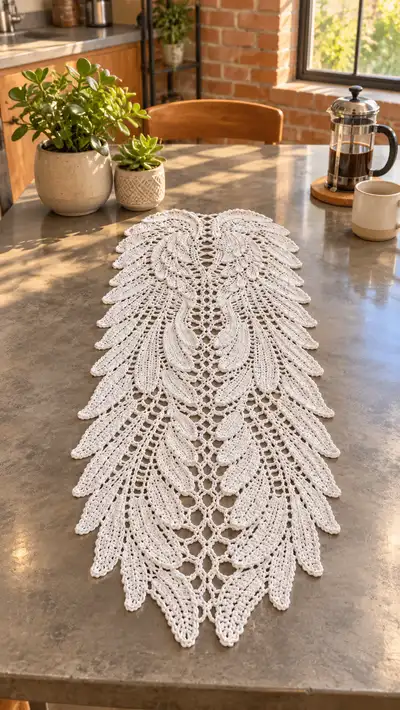
A delicate, airy table runner inspired by angel wings, worked in crisp white cotton with layered feather motifs and an open lace center spine. This elegant runner features elongated feather panels, open mesh joining chains and a scalloped picot edge for a refined, heirloom finish. Perfect for dining tables, dressers, or as a centerpiece under seasonal decor, it folds flat for easy storage and blocks beautifully to show off the sculpted feather texture.
Progress Tracker
0% Complete
— Materials & Gauge :
Info :
Use a DK cotton yarn and a 3.5 mm hook. Gauge is not strict for lace pieces, but a 10 cm square worked in dc should be approximately 20 dc x 10 rows blocked. Final runner pictured measures approximately 36-40 inches (92-102 cm) long and 9-11 inches (23-28 cm) wide before blocking; blocking will open the lace to the dimensions shown.
— Center Spine (Make 1 long center mesh, worked in rounds/rows to desired length) :
Round 1 :
Ch 14, sl st to first ch to form a loop (14 ch base)
Round 2 :
Ch 3 (counts as dc), dc in same ch, *ch 3, 2 dc in next ch; rep from * across, finish with ch 3, sl st to top of ch-3 (total 28 dc grouped in 14 pairs separated by ch-3 spaces)
Round 3 :
Ch 1, sc in same st, *ch 5, sc in center dc of next pair; rep from * across to create an open chain ladder linking pairs (maintain 14 ladder loops)
Round 4 :
Ch 3 (counts as dc), 2 dc in each sc across, working 3 dc clusters into spaces where sc sits, finish with sl st to top of ch-3 (42 dc total; each sc became 3 dc)
Info :
Center spine establishes points where wing motifs will join: mark every pair of ladder loops for later joining with stitch markers. Work center to the desired number of repeats; the runner pictured uses 8 main feather motif attachment points per side (16 total). Adjust to length by increasing or decreasing repeats here.
Round 5 :
Ch 1, sc in each dc across (42 sc). Keep spine flat by crocheting tightly on these dense rounds to anchor motifs.
Round 6 :
Ch 4 (counts as tr), *sk 1, tr in next st; rep across creating an elongated ridge (approx 21 tr ridges). Sl st to top of ch-4.
Round 7 :
Ch 1, sc in each tr across (21 sc), if you need to extend center make additional ch-2 mesh rows: ch 5, sl st back to create open arches; rep to length.
Info :
Work center spine until you have the correct number of attachment points. The pictured runner uses a center of 16 ladder loops; extend rounds 3-7 until the length matches the number of feather motifs you plan to add (typical layout: 8 repeats per side = 16 total attachments).
Round 8-20 :
Repeat Rounds 3-7 cyclically: mesh ladder row, dc anchor row, sc anchor row, tr ridge row. Each cycle adds approximately 1.0-1.25 cm to the spine length after blocking. Continue until you have created the spine long enough to attach your desired number of wing motifs. For the sample runner work this cycle 6 times to leave space for 8 motifs per side.
Info :
Keep stitch count consistent across anchors so feather motifs will align. Place markers at every 2nd ladder loop to match motif join points; take time now to count and correct the spine before attaching wings.
— Wing Motif (Make 8 motifs per side; work one motif as detailed then repeat) :
Round 1 :
Start with magic ring, 6 sc in MR (6)
Round 3 :
(1 sc, 1 inc) x 6 (18)
Round 4 :
(2 sc, 1 inc) x 6 (24)
Round 5 :
(3 sc, 1 inc) x 6 (30)
Info :
These early rounds establish the narrow tip of each feather. Work tightly to keep a neat pointed tip. The motif will increase in width with each round; counts below follow logical progression in multiples of 6 for symmetry.
Round 6 :
(4 sc, 1 inc) x 6 (36)
Round 7 :
(5 sc, 1 inc) x 6 (42)
Round 8 :
(6 sc, 1 inc) x 6 (48)
Round 9 :
(7 sc, 1 inc) x 6 (54)
Info :
By Round 9 the feather base is broad enough to begin textural shaping. From Round 10 onward we will introduce texture rows (hdc/dc/tr) and chain arches to sculpt the feather lamellae.
Round 10 :
Ch 1, sc in next 3, *hdc in next 3, dc in next 2, ch 3, skip 1, sc in next 3; rep across to maintain 54 sts textured pattern (54 when counted as sc-equivalent)
Round 11 :
Ch 3 (counts as dc), dc in each st across but work every ch-3 space as (2 dc, ch 2, 2 dc) shell to create a lacy arch; maintain 54 main anchor points but shells add bulk visually
Round 12 :
Ch 1, sc in each dc across (54). At the peak edges add 2 sc in the first and last st to start creating a slight cupped shape if needed (+2 total if used)
Round 13 :
Ch 4 (counts as tr), *tr in next 3, ch 3, skip 1, tr in next 3; rep across to give elongated ridges to the feather body (pattern works across the 54 foundation points)
Info :
If you want deeper ridges, substitute tr with dtr on Rounds 13-15 in the central bands. Keep stitch markers at the peak and base of the motif so you can mirror the opposite wing easily when joining.
Round 14 :
Ch 1, sc in each tr and ch-3 space across (54). This flattens each ridge and prepares for the next increase set in Round 15.
Round 15 :
(8 sc, 1 inc) x 6 (60)
Round 16 :
Ch 2 (counts as hdc), *hdc in next 8, (hdc, ch 4, hdc) in next st to form decorative arch; rep across. Anchor arch centers with markers for consistent shaping across repeats.
Round 17 :
Ch 3, dc in each st and in each ch-4 space make (2 dc, ch 2, 2 dc) shell; (60 main anchors: shells will create 10 shells across)
Info :
At this stage fill the motif lightly with blocked starch only if you want extra stiffness for centering. This is optional as the runner in the photo is soft cotton with light blocking only.
Round 18 :
Ch 1, sc in each dc across (60)
Round 19 :
(9 sc, 1 inc) x 6 (66)
Round 20 :
Ch 3, dc in next 3, *ch 5, skip 3, dc in next 6; rep across to create elongated open channels that simulate feather veins (maintain 66 dc anchors plus chains)
Round 21 :
Ch 1, sc in each dc and place 1 sc in each ch-5 space to anchor (66 + anchors = 66 sc measured at main anchors)
Round 22 :
(10 sc, 1 inc) x 6 (72)
Info :
We now begin to form the feather edge: the outer edge will gradually narrow again via decreases while the inner edge remains full to blend to the spine. Keep notes marking inner edge stitches for joining later.
Round 23 :
Ch 4, tr in next 10, (tr, ch 3, tr) in next st to create outer ridged scallop along the outermost stitch band; rep across (72 tr anchors)
Round 24 :
Ch 1, sc in each tr and sc in each ch-3 space across (72 sc)
Round 25 :
(10 sc, 1 dec) x 6 (66)
Round 26 :
(9 sc, 1 dec) x 6 (60)
Info :
Begin stitching airy leaflets on the outer edge by working slip-stitch loops and elongating with ch-6 arches. These create the pointed feather tips seen along the border.
Round 27 :
Ch 1, sc in next 4, *(sl st, ch 6, sl st) anchored in next st to form a loop, sc in next 4; rep across forming series of small loops for featherlet bases (60 sc)
Round 28 :
Into each ch-6 loop: (sc, hdc, 3 dc, hdc, sc) to make a pointed petal; repeat for each loop to create outer scalloped petals (each petal counted as 6 stitches wide, counted visually)
Round 29 :
Ch 1, sc around each petal and sc across the body to tidy edges (60 sc around body counting each petal as equal width)
Round 30 :
(8 sc, 1 dec) x 6 (54)
Round 31 :
(7 sc, 1 dec) x 6 (48)
Info :
Start shaping the tip to meet the center spine. Leave an inner edge of approx 18-22 stitches reserved for joining (mark these stitches with a removable marker) and do not over-decrease these until joining round instructions.
Round 32 :
(6 sc, 1 dec) x 6 (42)
Round 33 :
(5 sc, 1 dec) x 6 (36)
Round 34 :
Ch 3, dc in next 4, *(ch 3, skip 1, dc in next 4) across to the inner edge to maintain airy connection points (36 main anchors)
Round 35 :
Ch 1, sc in each dc and place sc in each ch-3 space across (36 sc)
Round 36 :
(4 sc, 1 dec) x 6 (30)
Round 37 :
(3 sc, 1 dec) x 6 (24)
Round 38 :
(2 sc, 1 dec) x 6 (18)
Round 39 :
(1 sc, 1 dec) x 6 (12)
Round 40 :
6 dec (6) — Fasten off leaving a 40-50 cm tail for joining. Block lightly or pin flat if desired before joining to ensure consistent shape between motifs.
Info :
This wing motif is intentionally tall and layered: each round builds a new layer of feather texture. The sample runner used 8 motifs per side spaced evenly along the center spine and staggered so that the outer edges create the scalloped winged border. Make as many motifs as needed for your runner length; repeat the full 40-round motif for each feather.
— Mirror Wing Motif (Right Side) :
Info :
Make an identical motif as above but mirror the joining edge so it nests against the center spine neatly. Work all 40 rounds following the same counts and markers but reverse the orientation during joining so feather tips align symmetrically.
— Joining Motifs to Center Spine :
Info :
Layout: Place the center spine flat. Pin the first left wing motif so its inner edge lines up with the first marked ladder loop on the center spine. The inner edge should consist of the 18-22 stitches reserved earlier. For each joining point, you will use a combination of slip stitches and single crochet to create a firm but flexible seam.
Round 1 (Join Step 1) :
With right sides facing up, align inner edge of wing motif to the spine's first ladder loop. Using the long tail from the motif, whip stitch the inner edge to the spine every 2-3 stitches for stability, leaving a small gap between motifs equal to one ladder loop. Alternatively, join by sc around both edges through corresponding stitches: *sc in next stitch on motif, sc in corresponding spine loop; rep across the reserved inner edge. Fasten off and weave in ends.
Round 2 (Join Step 2) :
Repeat join for the corresponding right wing motif to the opposite side of the same spine ladder loop. Ensure mirror symmetry by pinning both motifs before stitching. Use a tapestry needle and mattress or ladder stitch for an invisible seam if desired.
Info :
When joining subsequent motifs, stagger the vertical placement slightly so that winglets overlap like feathers. The runner pictured has motifs placed so tips interleave in a soft cascade; experiment with pinning positions before sewing to achieve the look you prefer.
Round 3 :
Continue across the spine attaching alternating motifs left and right until all motifs are sewn to the center spine. After joining each pair, check the runner length and adjust the number of motifs or the spacing of the spine mesh if needed before adding the final edging.
— Inner Decorative Mesh Fill (Optional, works between motifs) :
Round 1 :
Where you have small gaps between mirror motifs along the center spine, work into the chains: ch 5, sl st into opposite loop to create a series of decorative X-chain laces connecting the two wings across the spine. Repeat between every motif pair for a consistent lattice.
Round 2 :
To deepen the lattice, into each ch-5 space make (sc, ch 3, sc) forming diamond netting. This step is optional and helps stabilize the runner if used on high-traffic surfaces.
Info :
Check symmetry after making the mesh. If you prefer more openness, skip this step and leave the open X-chain. The runner pictured uses a modest lattice to accent the center without obscuring the feather shapes.
— Outer Scalloped Edge & Picot Border :
Round 1 :
With runner assembled and seams secured, attach yarn at any outermost point of a feather petal. Ch 1, sc evenly around the outer edge of the entire runner, placing 1 sc in each visible stitch and 3 sc across each petal center to ensure even spacing. Maintain count of outer sc per motif to ensure consistent scallops around the whole runner.
Round 2 :
Ch 3 (counts as dc), *2 dc in next st, ch 2, sk 1, 3 dc in next st; rep around shaping into shallow shells between petal points. This creates the first scalloped sculpting along the outer feathers.
Info :
Keep a stitch marker for the start of the border round; scallop counts should match across motifs so the runner edge looks continuous. After one full round of shells, evaluate whether the scallops are uniform and adjust subsequent rounds to fill gaps.
Round 3 :
Ch 1, sc across shells to tidy edge; place 1 sc in each ch-2 space between 3-dc groups.
Round 4 :
For a delicate picot edge: *sc in next 2, ch 3, sl st in 3rd ch to form picot, sc in next 2, sk 1; rep around. This will produce a neat picot trim along the scallops (repeat count depends on outer sc count; distribute picots evenly).
Round 5 :
Optional reinforcement round: ch 1, sc in each picot base to anchor and strengthen the edge; this prevents stretching over time if runner will see frequent handling.
Info :
The runner pictured has a high-contrast crisp picot scallop; if you prefer a softer edge, substitute Round 4 with a half-double crochet finishing row: hdc around with 1 hdc in each stitch to round out shapes.
— Final Blocking and Finishing :
Info :
Pin the runner flat on a blocking board or foam mat. Gently stretch each feather edge to open the lace uniformly. Use rust-proof pins at each scallop point and along the spine to achieve symmetrical shaping. Mist lightly with warm water or use a spray starch for a crisper finish. Allow to dry completely (12-24 hours) before removing pins.
Round 1 :
Weave in all ends with a yarn needle, burying tails at least 5 cm into the fabric through several stitches. Trim remaining tails close to fabric, avoiding cutting near seam joins.
Info :
Finally, press lightly with a warm steam iron if desired (place a damp cloth between iron and runner) for an even, polished look. Store flat or gently rolled to maintain scallops.
Finishing this angel wing table runner brings a beautiful sense of accomplishment — each feathered motif stacks into a sculpted, heirloom-worthy centerpiece. Blocking transforms delicate stitches into crisp wings that glide along your table, adding a handmade, timeless accent. Whether for a special dinner or everyday elegance, this runner makes a lovely statement and a cherished gift. 🕊️🧶