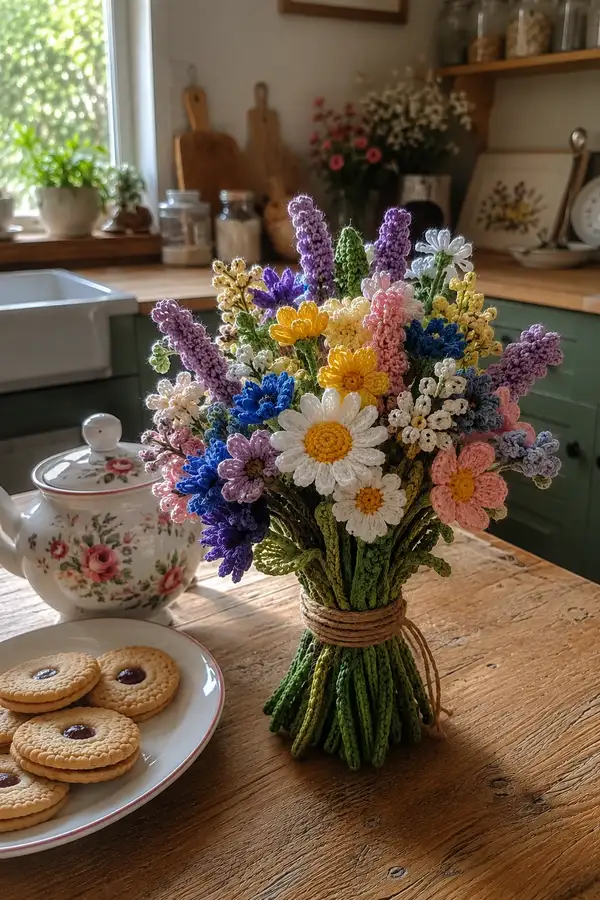
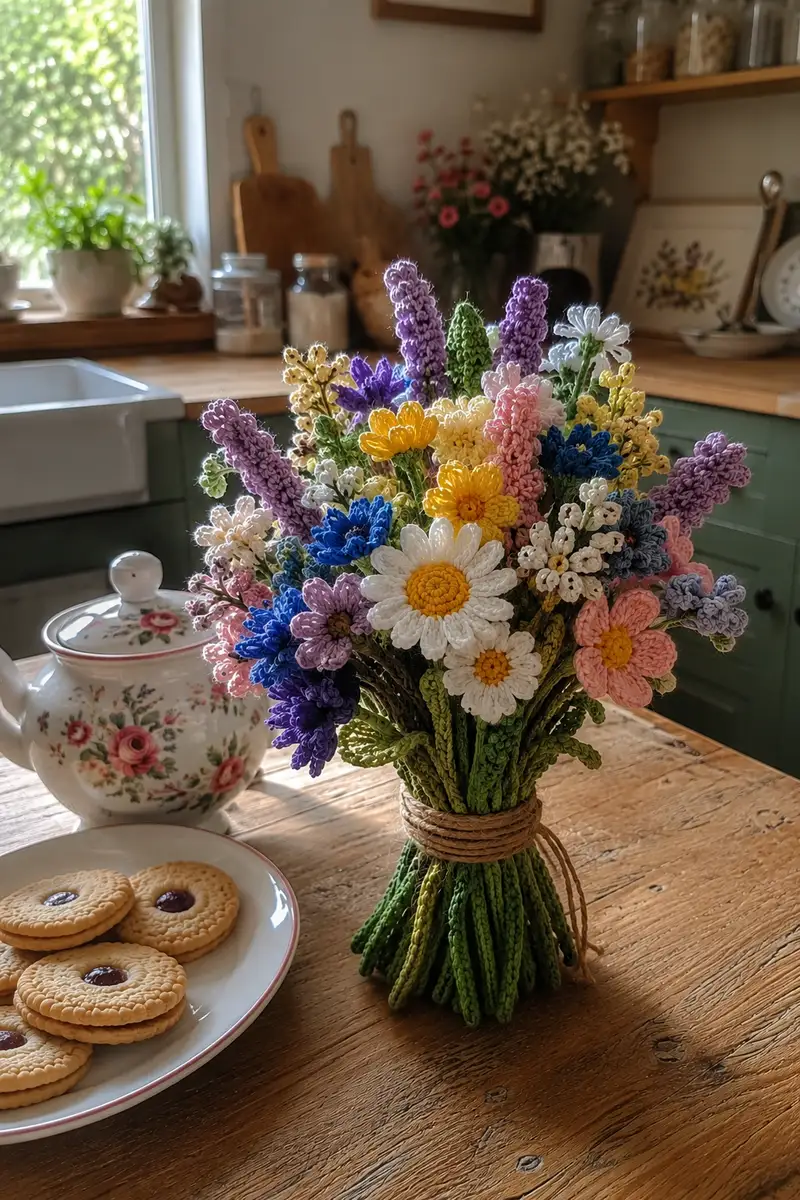
Create a delightful, everlasting bouquet of mixed wildflowers crocheted from cotton yarn. This pattern includes multiple flower types—daisies, cornflower-style blooms, lavender spikes, small filler sprays and leafy stems—assembled into a tied bunch for a rustic centerpiece. Designed with realistic texture, layered petals and sturdy stems, the bouquet sits beautifully on a table or in a small vase. The instructions include shaping, color notes and assembly tips for a charming finished arrangement.
Progress Tracker
0% Complete
— Materials & Prep :
Info :
Prepare required yarn colors, cut floral wire lengths and tape one end of each wire slightly to keep end from poking through later. Choose cotton DK for crisp petal edges. Keep a small ball of stuffing for stems. Make a sample stem and a sample flower to check tension and scale before committing to full bouquet.
— Stem (Base Tube) :
Round 1 :
6 sc in magic ring (6)
Round 3 :
(1 sc, inc) x 6 (18)
Round 4 :
(2 sc, inc) x 6 (24)
Round 5 :
(3 sc, inc) x 6 (30)
Info :
At the end of round 5 your stem base is wide enough for a small wire core. If you prefer a slimmer stem, stop at round 4. Insert floral wire down the center before stuffing for stability, or leave wire to be inserted later if you prefer to crochet closed first.
Round 6-10 :
1 sc in each st (30)
Round 11 :
1 sc in each st BLO (30)
Info :
Work 4-8 rounds in BLO to create a slight ridge texture on the stem if desired. This gives a natural-looking rib when stems are grouped together.
Round 12-34 :
1 sc in each st (30). Continue until stem reaches desired length (approximately 22-25 cm before stretching for a standard bouquet). For shorter table bouquets, stop at 16-18 cm.
Info :
Stuff very lightly along the tube to avoid lumps—a small amount of fiberfill every 8-10 rounds stabilizes the tube while keeping it bendable. If inserting wire, slide the wire through the open end now and fold or tape the tip to prevent poking the fiberfill.
Round 35 :
(3 sc, dec) x 6 (24)
Round 36 :
(2 sc, dec) x 6 (18)
Round 37 :
(1 sc, dec) x 6 (12)
Info :
Fasten off leaving a 25-30 cm tail for sewing to flower heads or wrapping around wire. If you inserted wire, leave excess as a core to twist around assembled stems. Make as many stems as you will need—plan 18-30 stems depending on bouquet fullness. Use varied lengths for visual interest.
— Leaf (Make many) :
Info :
Leaves are worked flat from base to tip then mirrored back; choose medium green. Leaves are attached to stems by sewing; leave long tails to secure around wire if used.
Round 1 :
Ch 8, sc in 2nd ch from hook, sc 5, 4 sc in last ch; rotate to work down opposite side: sc 5, sc in last ch (12) — counts around chain perimeter
Round 2 :
Ch 1, 1 sc in same st, (1 hdc, 1 dc, 2 tr) across center to create a pointed tip, then reverse: 2 tr, 1 dc, 1 hdc, 1 sc along opposite side (18)
Round 3 :
1 sc in each st BLO (18) to create a central ridge (18)
Round 4 :
Dec evenly around to narrow base: (2 sc, dec) x 3 (15)
Round 5 :
1 sc in each st (15)
Info :
Work a matching small leaf by reducing chain length to ch 6 for petite leaves. Flatten and block leaves lightly with a damp cloth if using cotton to achieve a slightly flat natural look.
Round 6 :
Fasten off leaving long tail for sewing (approx 15-20 cm). Make 2-3 leaves per stem for a lush bouquet or fewer for a tidier look.
— Daisy (Large white daisy) :
Info :
Daisy is worked in two parts: center disc (yellow) then white petals assembled around. Petals are looped petal clusters using chains and slip stitches for tidy, flat petals.
Round 1 :
With yellow, mr, 6 sc in mr (6)
Round 3 :
(1 sc, inc) x 6 (18)
Round 4 :
(2 sc, inc) x 6 (24)
Info :
Work two rounds in the center then fasten off and switch to white for petals, joining with a sl st to any st on the outer round.
Round 5 :
Join white with sl st. *Ch 8, sl st into next st, sl st into next st* repeat around to create 12 long loops (24 outer stitches, create 12 petals) (12 loops)
Round 6 :
Work petals: For each loop work (sc, hdc, 3 dc, hdc, sc) into loop and secure with sl st into next base st. Repeat over each loop to make rounded petals (12 petals)
Round 7 :
Work a second petal layer behind the first for fullness: join white behind a loop with sl st, *ch 6, sl st into base st* repeat for 12 smaller loops
Round 8 :
Into each small loop work (sc, hdc, 2 dc, hdc, sc) to make inner petal layer (12 petals)
Info :
Sew center disc to back of petals if not already integrated. Attach daisy to a stem by inserting stem wire or sewing stem tail into center back. For two-tone centers, embroider a small ring of darker yellow or orange into the center before placing the flower on the stem.
Round 9 :
Fasten off white leaving long tail for sewing; weave tail through back of petals to flatten and secure (no stitch count)
— Cornflower / Blue Chrysanthemum Style (Make several in blue/purple shades) :
Info :
These are built on a dense center with many short looped petals made with picot or puff stitches to emulate textured cornflower heads. Use slightly lighter or darker blues for variety.
Round 1 :
mr, 8 sc in mr (8)
Round 3 :
(1 sc, inc) x 8 (24)
Round 4 :
1 sc in each st (24)
Round 5 :
*Ch 3, 1 sl st into same st* around to create 24 tiny picot loops (24 loops)
Round 6 :
In each picot loop work a small cluster: (hdc, dc, hdc) and sl st to base to form a plush petal cluster (24 clusters)
Round 7 :
Work an additional round of small picot loops between clusters by inserting hook between clusters, *ch 2, sl st* 24 times (24)
Round 8 :
Into each new loop, work (sc, hdc, sc) to add depth (24)
Info :
For heavier texture, make a third outer round of tiny loops and clusters. These flowers thrive when the center is not too flat—leave some loft by working the clusters loosely but consistently.
Round 9 :
Fasten off leaving long tail for sewing. Attach to stem by running yarn tail down stem and stitching around the stem tube to secure the base of the bloom.
— Lavender Spike (Tall purple spike) :
Info :
Lavender spikes are worked along a short chain wrapped around the stem with small loop clusters to emulate buds. Work with purple or mauve and alternate tones for realism.
Round 1 :
Ch 18 (or longer for taller spike). Turn; working along chain: sc in 2nd ch from hook and in each ch across (17)
Round 2 :
Ch 1, turn, sc in each st (17)
Round 3 :
Ch 1, turn, *ch 3, sl st into next st* across to create 17 loops along one side (17 loops)
Round 4 :
Into each loop work a 3-puff cluster: *(yo, insert, pull up, yo, pull through 2) x3, yo, pull through all loops, sl st to close* making 17 puff clusters
Round 5 :
Fold the chain around the stem and sew the chain base to stem tube, spacing clusters upward to form a vertical spike. Fasten off and hide tail inside stem (no count)
Info :
For denser spikes make ch 24 and add clusters on both sides of chain by repeating the loop step and working clusters into both front and back loops. Wrap the chain around the stem starting near the top and spiral downwards.
— Small Filler Spray (Baby's breath style) :
Info :
These tiny sprays are made from a short center with many 3-stitch picot sprays along a short branch. Work in creamy white or pale yellow for contrast.
Round 1 :
Ch 12, turn, sc in 2nd ch from hook and in next 10 ch (11)
Round 2 :
Working along one side: *ch 4, sl st into next st* across to make 5 tiny loops (5 loops)
Round 3 :
Into each loop: ch 2, sl st to form small picot; secure loops with a sl st at base. Repeat on opposite side for fuller spray (no count)
Info :
Make multiple sprays and attach near the tops of other stems to add light airy texture. Sew or wrap them to stem wire with thin yarn or florist tape for stability.
— Small Yellow Button Flower (Make several) :
Round 1 :
mr, 6 sc in mr (6)
Round 3 :
1 sc in each st (12)
Round 4 :
*Ch 5, sl st into next st* repeat 6 times around to make 6 loops (6 loops)
Round 5 :
Into each loop, work (sc, hdc, 2 dc, hdc, sc) to make 6 small rounded petals (6 petals)
Info :
Make these in several shades of yellow and gold to add variety to the bouquet. Sew to stems using long tails threaded down inside the stem tube for a neat finish.
Round 6 :
Fasten off leaving long tail for sewing (no count)
— Pink Five-Petal Flower :
Round 1 :
mr, 5 sc in mr (5)
Round 3 :
1 sc in each st (10)
Round 4 :
*Ch 7, sl st into next st* repeat 5 times to form 5 loops (5 loops)
Round 5 :
Work petals: into each loop work (sc, hdc, 3 dc, hdc, sc) to form five larger petals (5 petals)
Info :
These are pretty clustered near the top of the bouquet. For shallower petals shorten loops to ch 5. Sew onto stems so petals face outward at 45 degrees for a natural look.
Round 6 :
Fasten off leaving long tail for sewing
— Chrysanthemum / Multi-layer Round (Yellow, Medium) :
Info :
This bloom uses several short loop layers to create a dense round flower. Alternate shades for depth.
Round 1 :
mr, 8 sc in mr (8)
Round 3 :
(1 sc, inc) x 8 (24)
Round 4 :
1 sc in each st (24)
Round 5 :
*Ch 3, sl st into next st* around for 24 loops (24 loops)
Round 6 :
Into each loop, work (sc, hdc, dc) to make first layer of dense petals (24)
Round 7 :
Repeat round 5 and 6 for a second layer for increased fullness (24)
Round 8 :
Optional third layer: ch 2 loops and work (sc, hdc) in each loop for a smaller outer frill (24)
Info :
When attaching to stem, sew through back of center and then wrap the long tail down the stem to hide the knot. Slightly flare outer petals while sewing to create a rounded profile.
Round 9 :
Fasten off leaving long tail for sewing (no count)
— Assembly & Tying :
Info :
Arrange flowers on a flat surface to plan composition. Mix heights and colors, place taller lavender and purple spikes toward the back, daisies and round blooms in front and center, and filler sprays throughout. Slightly bend stems with wire for natural curves.
Round 1 :
Hold stems together at base in desired cluster arrangement (no stitch count)
Round 2 :
Using long tails from stems, wrap several stems together near the base with yarn, crocheting a short chain or two rounds of sc around bundle to hold position if desired (no count)
Round 3 :
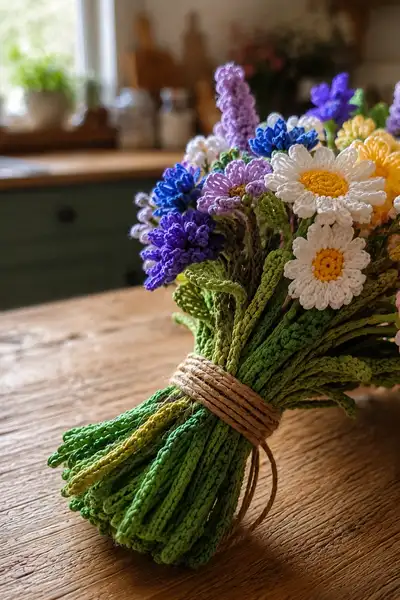
Wrap jute or twine around stems 5-8 times and tie securely in a decorative knot. Optionally stitch twine in place with yarn needle to stop slipping (no count)
Info :
Trim stems to even length if needed. If wires are protruding, fold them inward and wrap with florist tape before tying. Hide any visible yarn tails by tucking under the twine wrap or weaving into nearest stem.
Round 4 :
Optionally make a small crocheted cuff to cover base of stems: ch 35, join to a round with sl st, work 1 sc in each ch for 3 rounds, fold under and sew to base of flowers, then fasten off (35)
Info :
Spray a light starch and shape petals if using cotton to keep petals crisp or very lightly block petals to flatten if needed. For added stability, use a dab of fabric glue at flower anchor points (apply sparingly).
— Finishing Touches & Variation Notes :
Info :
Create variations by altering petal lengths, changing the number of petals per flower, using more open daisies or adding metallic thread sparingly for a morning-dew sparkle. To make mini bunches as gifts, reduce stem lengths and use 6-10 stems per mini bouquet.
Round 1 :
Make at least 3 samples of each flower so you can build confidently and maintain consistent size across the bouquet (no stitch count)
Info :
Store finished bouquet by wrapping in tissue and keeping flat or placing in a small vase. Dust lightly with a soft brush occasionally to keep colors fresh.
This wildflower bouquet pattern brings the joy of everlasting blooms into your home with charming detail and texture. Each stitched petal and stem is a tiny triumph of patience and creativity, culminating in a rustic, gift-ready arrangement you'll be proud to display. Gather your favorite colors, take your time, and enjoy the meditative rhythm of making a bouquet that never wilts. 🧶🌼💛