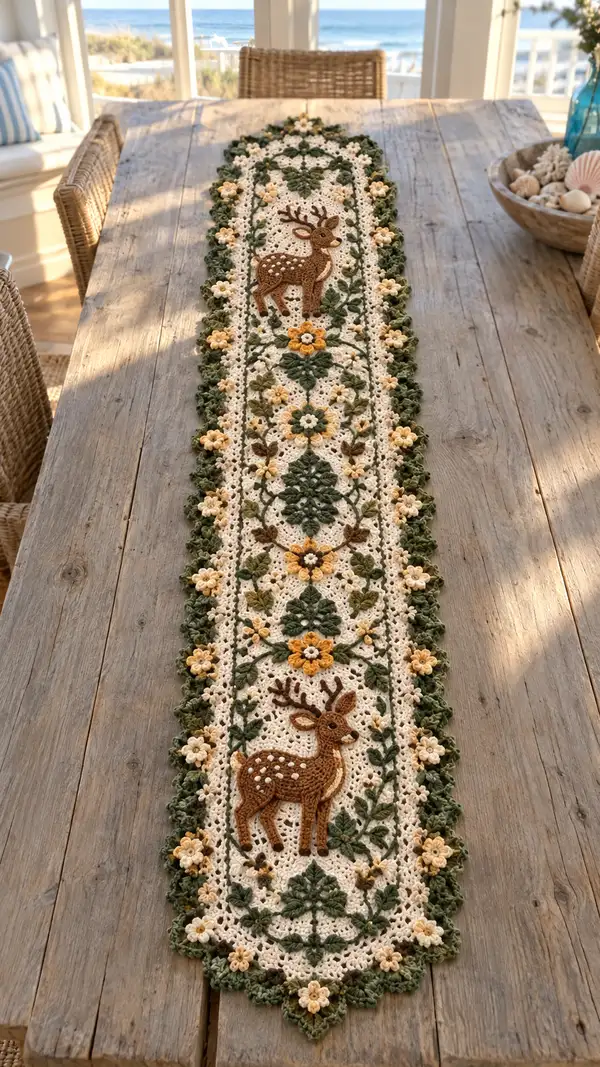
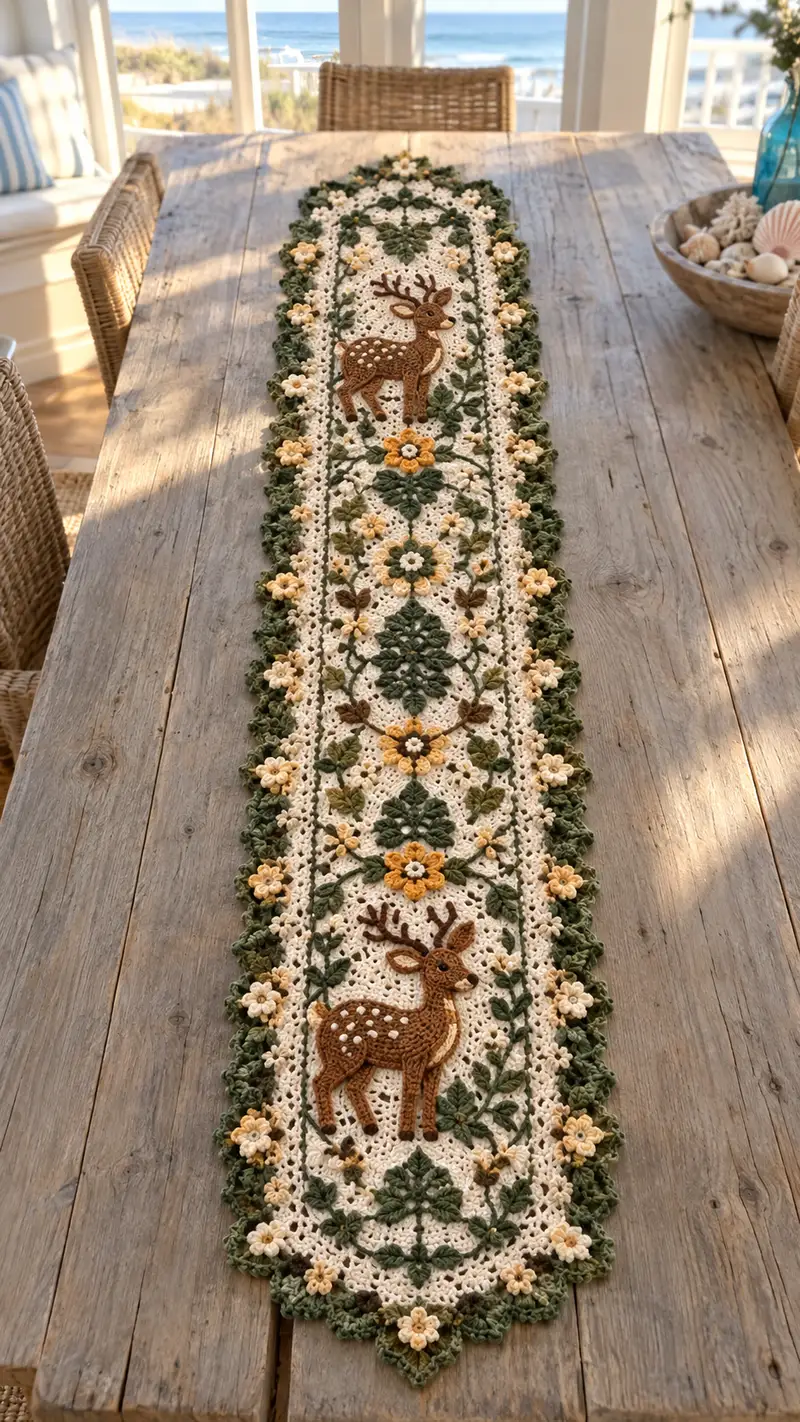
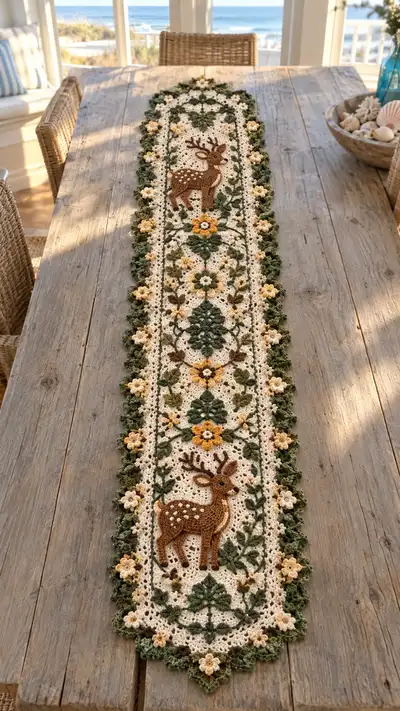
A vintage-inspired crochet table runner featuring two embroidered deer appliques, layered floral medallions, and leafy vines in soft cream, moss green and warm mustard. This long oval runner showcases dense textured stitches, three-dimensional flowers and a scalloped green border to frame your table. The pattern uses joined motifs and applique assembly to create an elegant, rustic centerpiece that pairs beautifully with natural wood and coastal decor.
Progress Tracker
0% Complete
— General Notes :
Info :
Work with a 3.5mm hook for the main panels and a 3.0mm hook for appliques if you want slightly firmer details. Maintain even tension; this project consists of many joined motifs and layered appliques that must lie flat. Block all motifs before final assembly to ensure consistent shaping. Gauge is not critical but affects final size; the finished runner shown measures approximately 12 x 70 inches when motifs are blocked and assembled.
Info :
Color abbreviations in the instructions: CC = Cream (main ground), MG = Moss Green (leaves & border), OG = Olive Green (leaf accents), MY = Mustard Yellow (flower centers), BR = Brown (deer). Carry color tails behind work, or fasten off and weave ends in as preferred for a clean reverse side.
— Central Oval Medallion (Make 6 identical medallions) :
Round 3 :
(1 sc, inc) x 6 (18)
Round 4 :
(2 sc, inc) x 6 (24)
Round 5 :
(3 sc, inc) x 6 (30)
Info :
These first five rounds establish a solid circular base. Keep your stitches tight but not constricting; this will be the core of each medallion.
Round 6 :
(4 sc, inc) x 6 (36)
Round 7 :
(5 sc, inc) x 6 (42)
Round 8 :
(6 sc, inc) x 6 (48)
Round 9 :
1 sc in each st around (48)
Round 10 :
*(ch3, sk 1, dc) around in pattern to create small lacy arcs — actually: ch3, sk next st, dc in next; rep around (48 arcs)
Info :
Round 10 shifts to a small openwork to start making the medallion more lacy. Keep ch-3 arcs even; these will accept decorative petals in later rounds.
Round 11 :
In each ch-3 space: (sc, hdc, dc, hdc, sc) to form small petal shells (48 shells)
Round 12 :
1 sc in each st around, working 2 sc in each shell apex to maintain shape (approx 60)
Round 13 :
(4 sc, inc) x 10 (70)
Round 14 :
*(ch2, sk 1, dc) repeat around to form slight scallop edge (70 arcs)
Info :
These medallions will be joined together and to the central mesh; keep counts exact. Block each medallion flat before joining. When blocked they will measure roughly 7 inches across at their widest point.
Round 15 :
1 sc in each st around (70)
Round 16 :
Work decorative leaf cluster: in next st: (ch3, tr, ch3, sl st) to create central point; repeat every 10 sts for symmetrical placement (7 clusters)
Round 17 :
1 sc around securing cluster bases (70)
Round 18 :
*(BLO) 1 sc in each st around to create a subtle ridge (70)
Round 19 :
Fasten off CC leaving a long tail for assembly. Weave tail through last round and pull slightly to shape.
Info :
Make six of these medallions. Two will sit under the deer appliques and four will form the repeating center motifs. Block each medallion thoroughly; use T-pins and a spray of water to open the lacy shellwork.
— Connecting Mesh Panel (Make 1 long mesh panel as spine) :
Foundation :
Using CC, ch 160 (this length will be adjusted by joining medallions later). Join into ring with sl st being careful to keep chain flat.
Round 1 :
ch2 (counts as hdc), hdc in each ch around, join (160)
Round 2 :
*(ch3, sk 2, sc in next) repeat to create ch-spaces that will form vine lanes (approx 53 ch-3 spaces)
Round 3 :
sc in each st and sc in each ch-3 space to make small eyelets (160)
Info :
The mesh panel is a forgiving section; its job is to link medallions and create channels for vines. Keep the panel slightly narrower than the medallions so the medallions sit proud on top of the mesh.
Round 4-8 :
Repeat rounds 2-3 (five times) to build height of mesh panel (160 each round)
Round 9 :
Work a decorative band: *(ch2, hdc in next 2, sc in next 2) around (160)
Info :
At this stage you will pin six medallions along the panel: two medallions positioned near each end for the deer placement and four spaced evenly between them. Use blocking pins to mark positions before sewing.
Round 10 :
Fasten off leaving long tail for seam. Do not assemble yet—prepare appliques first.
— Deer Applique: Body (Make 2 identical deer) :
Round 1 :
Using BR, mr, 6 sc in mr (6)
Round 3 :
(1 sc, inc) x 6 (18)
Round 4 :
(2 sc, inc) x 6 (24)
Round 5 :
(3 sc, inc) x 6 (30)
Info :
These initial rounds will form the hindquarter base. The deer applique is worked in a semi-oval shaping; after round 6 you will begin shaping the neck, back and belly by using partial rounds and directional increases.
Round 6 :
Working back-and-forth across 30 sts as a short oval: sc 10, hdc 6, sc 14 (30)
Round 7 :
On hind area: (2 sc, inc) x 6 around hindquarter (36)
Round 8 :
Work right leg shaping: leave 8 sts unworked to create gap for leg; sc across remaining 28 sts (28)
Round 9 :
Fold and work in rounds around the short tube to create leg base if working leg in place: join BR and work 8 sc in the 8-st space to form leg rim (8)
Info :
For a flat applique that is later sewn to the panel, work legs and head as separate pieces and sew them into place. If you prefer a more sculptural applique, build the legs as short tubes and lightly stuff them with fiberfill before attaching.
Round 10 :
Continue body: 1 sc in each st around larger body portion, increasing slightly at hip to maintain oval (approx 32)
Round 11 :
(4 sc, inc) x 6 across hip area to bulk hindquarters for rounded shape (36)
Round 12 :
Flatten front area and begin neck: sc 12, dec 2 times across neck base, sc remaining 18 (34)
Round 13 :
Short rows to shape chest and belly: sc around, dec once on belly side to taper (33)
Round 14 :
1 sc in each st (33)
Round 15 :
(3 sc, dec) x 6 (27)
Info :
Lightly stuff the hind area with a thin layer of fiberfill to give a slight three-dimensional lift. Do not overstuff — the applique should lie mostly flat against the medallion.
Round 16 :
(2 sc, dec) x 6 (18)
Round 17 :
(1 sc, dec) x 6 (12)
Round 18 :
Fasten off BR leaving long tail for sewing. Weave through remaining sts and pull closed slightly to create rounded rump shape.
Info :
Sewing tip: When attaching the body to the medallion, use a backstitch with matching yarn. Pin the body in place on the medallion so the deer faces outward and the legs align with the inner vine pattern.
— Deer Applique: Legs (Make 4 legs total; 2 per deer) :
Round 1 :
Using BR, mr, 6 sc (6)
Round 3-6 :
1 sc in each st around (12)
Round 7 :
Flatten and sc across 6 sts only to create foot: sc6, turn (6)
Round 8 :
Work foot shaping: sc across, dec once to taper, sc across (5)
Round 9 :
Fasten off leaving tail. Lightly stuff foot and sew to body at indicated leg openings. Repeat for remaining legs.
Info :
Position front legs slightly closer together and hind legs slightly angled back for a natural standing posture. Use small stitches to attach faithfully to the deer body base.
— Deer Applique: Head & Neck (Make 2 heads) :
Round 1 :
Using BR, mr, 6 sc (6)
Round 3 :
(1 sc, inc) x 6 (18)
Round 4 :
(2 sc, inc) x 6 (24)
Round 5 :
1 sc in each st around to build height (24)
Round 6 :
(3 sc, inc) x 6 (30)
Info :
Start shaping nose by working short directional increases; the head will be later folded and sewn to the neck. Eyes are embroidered or small seed beads can be added in round 7-8 area.
Round 7 :
Sc 6, inc, sc 6, inc, sc remaining to keep oval shape (32)
Round 8 :
(4 sc, inc) x 6 (36)
Round 9 :
Short rows across nose: sc across 12 sts only, turn, sc back across to deepen muzzle (12)
Round 10 :
Fasten off, stuff lightly, and sew to neck opening on body. Embroider a small nose with black/brown, and add white spots with small stitches for highlights.
Info :
For safety, do not use plastic eyes if the runner will be in reach of small children; embroider eyes with black/brown yarn to secure permanently.
— Deer Applique: Antlers (Make 2 sets) :
Round 1 :
Using BR or darker brown, ch6, sc in 2nd ch from hook and across (5)
Round 2 :
Turn and sc across 5 (5)
Round 3 :
At base: sc2, ch3, sl st back into middle ch to create prong; continue sc across remaining 3 sts (8 including prong)
Round 4 :
Create second prong opposite the first: sc across to spot, ch2, sl st to create small branch, finish row (10)
Round 5 :
Fasten off leaving long tail for sewing. Pin antlers to head, checking symmetry before stitching firmly in place.
Info :
Antlers are worked flat and sewn onto head. Slight starch or light coat of diluted craft glue can help them stay upright if needed.
— Small 3D Flower (Make 40 small flowers) :
Round 1 :
Using MY, mr, 6 sc in mr (6)
Round 2 :
*(ch2, 3 dc, ch2, sl st in next st) around to create 6 petals. Fasten off (6 petals)
Info :
These flowers are small accent blossoms used along the border and center vines. Stack them onto cream backings (one small sc circle in CC) for neat attachment. Sew with a small contrasting center bead or a French knot of MY to secure.
— Layered Sunflower Motif (Make 6) :
Round 1 :
Using MY, mr, 8 sc in mr (8)
Round 2 :
(1 sc, inc) x 8 (16)
Round 3 :
Switch to CC — 1 sc in each st around (16)
Round 4 :
In each st: (ch2, 3 dc, ch2, sl st) to form 16 petals (16)
Round 5 :
Using OG, work leaflets between petals: in each space work (sl st, ch4, tr, ch4, sl st) 8 times to form alternating leaf effect
Info :
Stack a small MY center (a tiny puff or knot) and sew next to medallion center. These larger floral motifs act as anchors for the vine patterns and align with the deer medallions.
— Leaf Motif (Make 48 leaves) :
Round 1 :
Using MG, ch8, sc in 2nd ch from hook, hdc, dc, tr, hdc, sc, sl st to finish leaf (7 sts along chain)
Round 2 :
Work along opposite side of chain: sc, hdc, dc, tr, dc, hdc, sc. Fasten off leaving tail for sewing (14 stitches total leaf front/back)
Info :
Sew leaves along vine lanes in symmetrical pairs. Add an olive-green accent leaf (OG) beneath selected flowers by sewing a smaller leaf cut in OG on top of MG leaf for depth.
— Decorative Vine Embroidery (Work directly on panel) :
Info :
Using a strand of MG and OG held together for visual weight, embroider vines across the mesh panel using chain stitch and surface slip stitch. Start from the base of each medallion and work a flowing S-curve toward the adjacent medallion; attach leaves and small flowers as you go.
Round 1 :
With MG, bring yarn up at medallion edge, ch a length of 8–12 and secure with slip stitch to create a vine segment. Attach leaf motifs at intervals of approx every 6–8 chs.
Round 2 :
Repeat on both sides of the central axis to create mirrored vines. Use smaller flowers (MY centers) opposite the larger sunflower motifs for balance.
Info :
Keep vine lines slightly raised by pulling surface stitches snug but not tight. Pin everything before final sewing to check symmetry and spacing of deer, flowers, and leaves.
— Joining Medallions to Mesh Panel (Assembly Rounds) :
Info :
Pin medallions to the mesh panel using blocking pins. Use the long tails left from medallions to whip stitch around the seam edge, attaching medallion edge to mesh at every 3–4 sts for secure connection. Begin by placing and securing the two deer medallions near each end and space the four remaining medallions evenly between them.
Round 1 :
Sew medallion 1 into position: with CC tail, use a yarn needle to weave through medallion outer round and through mesh panel edge, making even stitches until fully attached.
Round 2 :
Repeat for medallions 2–6. Fasten off and weave in all tails. Ensure joins are flat; if any gaps remain, use small whip stitches and a tiny amount of CC yarn to tighten edge.
Info :
Check alignment: centers of medallions should fall on the imaginary runner centerline and be parallel to runner edges. Keep spacing consistent; the final runner shown has approx 7–9 inches between the centers of adjacent medallions.
— Attaching Deer & Floral Appliques :
Round 1 :
Pin deer body onto chosen medallion so feet lightly overlap the medallion outer scallops. With long BR tail, use whip stitch around the base of deer body to secure. Use ladder stitch for invisible seam on the top area near the neck so deer sits naturally upon the medallion.
Round 2 :
Sew on head and antlers. Use small stitches to attach antler base to head and to fix head to neck opening on body. Embroider eye with small satin stitch and add tiny white specks on the deer coat with small French knots using CC for spots.
Info :
Use thin yarn or no more than 2 plies to embroider fine details. Keep embroidery tight and tidy so it does not catch or snag on table linens.
— Border: Inner Cream Edging :
Round 1 :
With CC, join at one medallion seam and work 1 rnd sc in each exposed st around full runner edge to create a uniform base (work approx 520 sc total around runner — exact depends on joins)
Round 2 :
*(ch3, sk 1, dc) repeat around to create uniform arc-lace (approx 170 arcs)
Round 3 :
1 sc in each st around to stabilize lace (approx 520)
Info :
Work these rounds evenly; when you encounter applique or join points, work sc through both layers to ensure the border holds everything together without gaps.
— Border: Leaf Scallop Edge in MG (Final Border) :
Round 1 :
Switch to MG. *(sc in next 2, 5 dc in next st to make tall fan, sc in next 2, sl st to next st) repeat around to create scalloped fans (approx 85 fans)
Round 2 :
In each fan, attach a small 3D flower: pick up MY flower and sew its base into the center of the fan using a small whip stitch and a single COLORED bead or French knot center.
Round 3 :
Work one round of sc around the base of fans to tidy edge and lock flowers in place. Fasten off and weave all ends.
Info :
For heavy use runners consider a hidden backing fabric sewn to the underside after assembly to protect the crochet from spills and to add weight; do not glue the back as it may stiffen the lace.
— Final Finishing Touches :
Round 1 :
Steam block the entire runner. Pin flat on blocking surface and lightly steam or spray with water and let dry. Crocheted edges should be gently coaxed into perfect scallops. Trim remaining tails close to the fabric after weaving them in.
Round 2 :
Optional: sew a thin piece of cotton lawn or linen to the underside, using small invisible stitches, leaving a small hem allowance — this makes a durable underside while keeping the lace visible from the top.
Info :
Check for loose embellishments before placing runner on table. If you plan to wash, handwash gently in cool water and lay flat to dry. Avoid machine washing to preserve shape and appliques.
This woodland table runner is a labor of love that blends botanical motifs, layered texture and charming deer appliques into a centerpiece you’ll be proud to display. Each carefully blocked medallion and sewn applique adds character and depth to the overall design. The final scalloped border and tiny 3D flowers tie the palette together for a warm, handmade accent that welcomes gatherings and everyday moments. 🧶🌿 Take your time, enjoy the rhythmic stitching, and savor the reveal when it comes together. 🦌✨