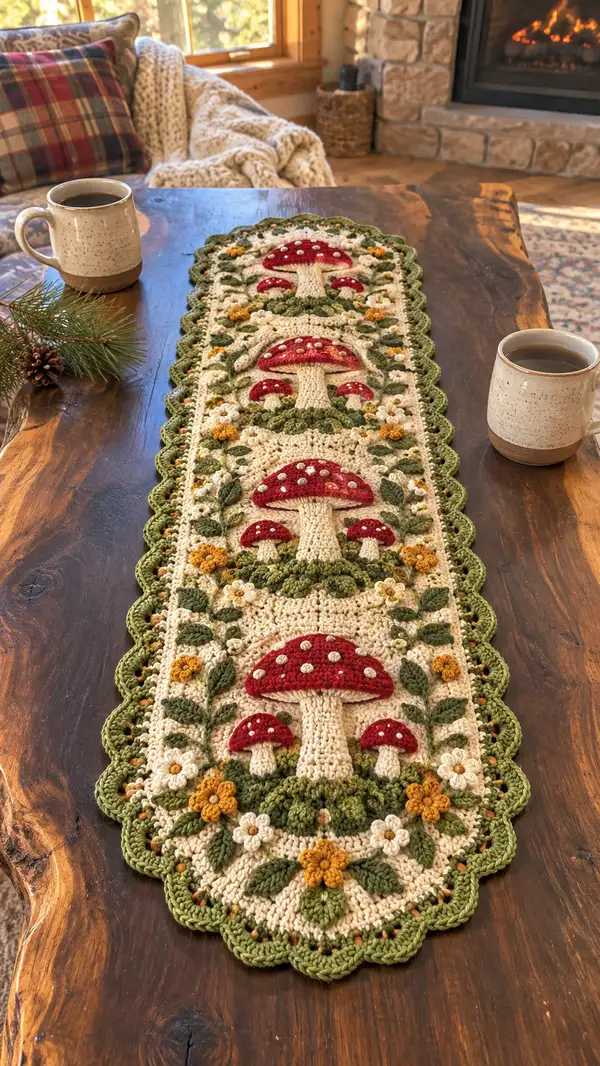
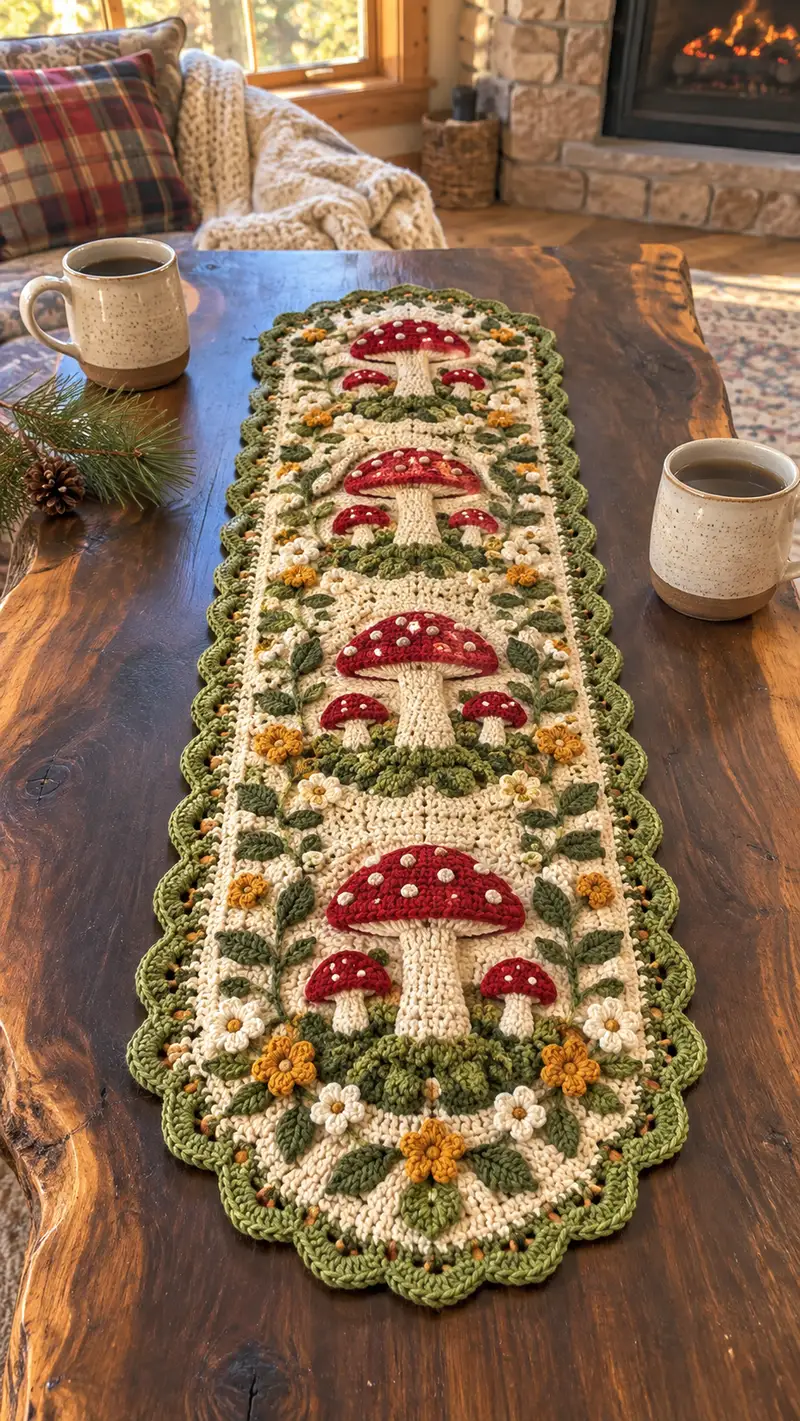
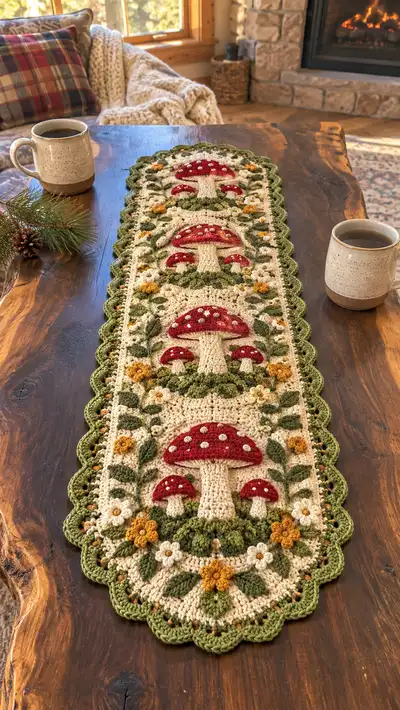
Create a cozy cottagecore table runner inspired by woodland mushrooms and meadow flowers. This long, narrow runner features three framed mushroom vignette panels with raised mushroom appliques, embroidered white spots, mustard and cream flowers, and leafy vines on a warm cream background with a scalloped green border. Detailed step-by-step instructions lead you through panel construction, appliques, motifs, and assembly for a charming heirloom accent.
Progress Tracker
0% Complete
— Materials & Gauge :
Info :
Gauge is not strict for a decorative runner but for reference: 16 sc and 18 rows = 10 cm in single crochet using 3.5mm hook in worsted weight yarn. Finished runner as written measures approximately 34-36 inches long and 8.5-9 inches wide. Adjust foundation chain to change width and repeat panel elements to change length.
— Overview & Construction Notes :
Info :
This runner is worked flat in rows to create a long rectangular main panel. Three framed vignette panels are formed by worked framing rows and textured ground rows. Mushroom caps, stems, leaves, and flowers are crocheted separately (applique) and sewn to the background. A scalloped green border is worked around the entire finished rectangle. Use stitch markers at row ends for even edges and pin appliques before sewing.
— Foundation & Panel Setup (Main Panel) :
Round 1 :
Foundation chain 86 (or any multiple of 14 + 2 for repeats) - ch 86, turn (86)
Round 2 :
Row 1: Working in 2nd ch from hook, 1 sc in each ch across, ch 1, turn (86)
Round 3 :
Row 2: 1 sc in each st across, ch 1, turn (86)
Round 4 :
Row 3: Repeat Row 2. Keep tension even and edges straight by working last sc into top of turning chain every row (86)
Round 5 :
Row 4: 1 sc in each st across (86)
Round 6 :
Row 5: Work 2 rows in hdc to create a subtle frame line: hdc in each st across, ch 1, turn (86)
Round 7 :
Row 6: hdc in each st across, ch 1, turn (86)
Info :
These initial hdc rows create a firmer, framed base immediately above the lower border; use these to position lower vignette later.
Round 8 :
Row 7-12: Work 6 rows even in sc (86). These rows make the lower field for the first vignette. Mark the center vertical area for mushroom placement: count 43rd stitch as center column.
Info :
Place two small stitch markers 5 stitches either side of the center stitch to mark the approximate width of each mushroom base (11-12 stitches wide depending on desired proportion).
Round 14 :
Row 13: Frame row - Switch to 1 sc in BLO across to produce a recessed ridge that visually frames each vignette area (86)
Round 15 :
Row 14: 1 sc in each st across (86)
Round 16 :
Row 15: Texture band - Work fpdc and bpdc alternately to create a raised ground row: *fpdc around next st, bpdc around next st; rep from * across. Ch 1 turn (86)
Info :
The fpdc/bpdc row produces a ridge useful as the 'mound' where mushroom stems will be attached. Use this band to align the mushroom bases later.
Round 17-20 :
Rows 16-19: 4 rows sc even to create space for appliques (86)
Round 21 :
Row 20: Repeat the frame sequence: 1 sc in BLO across to mark top of first vignette (86)
Round 22 :
Row 21-28: Work 8 rows sc even for the main vignette area where you will sew the mushroom applique and flowers (86)
Info :
Before proceeding, lightly press or block the panel if any rows are uneven. Keep RS facing you; pin the first mushroom applique (see Mushroom Applique section) so its stem base aligns with the fpdc/bpdc mound row and center stitch marker.
Round 29-30 :
Rows 29-30: 2 rows hdc even to give separation between vignettes (86)
Round 31 :
Row 31: 1 sc in BLO across to mark the frame (86)
Round 32-44 :
Rows 32-44: Repeat rows 16-28 sequence again to create second vignette area (13 rows sc even + frame + textured band). Maintain same center markers for middle vignette (86)
Info :
If making a runner with three vignettes, repeat the framed vignette sequence a third time. The written construction includes space for three vignettes; the center of the runner holds the second vignette and the far end holds the third.
Round 45-56 :
Rows 45-56: Work final vignette sequence mirroring the first two; ensure spacing between framed bands is even. End with two rows sc even (86)
Round 57 :
Row 57: Work one row sc in BLO to create the inner border line (86)
Round 58-60 :
Rows 58-60: 3 rows sc even to finish the main field. Fasten off and weave ends on the WS (86)
Info :
The main panel is complete. Keep it flat and mark the centers of each vignette with pins. You will now crochet appliques (mushroom caps, stems, mushrooms small, leaves and flowers) and sew them onto the panel.
— Mushroom Applique: Cap (Make 3 large caps + 6 small caps) :
Info :
Caps are worked from the center out in the round, then flattened and slightly stuffed to hold shape. Use 3.0mm hook for a tighter fabric. For large caps use red; for small caps scale the rounds down by stopping early.
Round 1 :
MR, ch 1, 6 sc in MR (6)
Round 3 :
(1 sc, inc) x 6 (18)
Round 4 :
(2 sc, inc) x 6 (24)
Round 5 :
(3 sc, inc) x 6 (30)
Info :
For small caps (the two tiny mushrooms that sit beside each large mushroom) stop here for a small domed cap (30 sts) and fasten off, leaving a long tail for sewing. For large caps continue below.
Round 6 :
(4 sc, inc) x 6 (36)
Round 7 :
(5 sc, inc) x 6 (42)
Round 8 :
(6 sc, inc) x 6 (48)
Round 9 :
(7 sc, inc) x 6 (54)
Round 10 :
1 sc in each st for 2 rounds (54)
Info :
To form the scalloped underside of the cap, work 1 round of dc clusters on the next round. This produces a slight ruffle resembling a mushroom's underside.
Round 11 :
*sk 1 st, 5 dc in next st, sk 1 st, sl st in next st; rep from * around to produce small petal clusters under the rim. Adjust spacing by skipping extra stitches if clusters bunch (approx 18 clusters).
Info :
Slightly stuff the cap with a pinch of polyfill in the center to create a domed appearance but keep it light so it lies flat when sewn. Use a yarn tail to flatten or gather the inner center slightly if needed.
Round 12 :
Fasten off leaving long tail for sewing. Weave tail inside cap from center to edge and use to tack cap into a very shallow dome by pulling slightly; knot and hide end (54)
Round 13 :
White Spot Embroidery (Make for each cap): Using cream/white yarn and a tapestry needle, embroider several French knots or small single crochet spots distributed across the cap surface. For large caps make 10-14 spots; for small caps make 4-6 spots. Place spots mostly toward the outer third of the cap.
Info :
To make French knots: bring needle up at desired spot, wrap yarn around needle twice, then pull back through keeping knot snug. Alternatively, crochet 1 sc into selected stitches on the top surface as tiny raised dots.
— Mushroom Stem (Make 3 large + 6 small stems) :
Info :
Stems are worked in the round, slightly tapered, and lightly stuffed. Use cream/ivory yarn and a 3.0mm hook for tighter fabric. Work stems with continuous rounds (spiral) to avoid visible seams.
Round 1 :
MR, ch 1, 6 sc in MR (6)
Round 3 :
(1 sc, inc) x 6 (18)
Round 4-6 :
Rounds 4-6: 1 sc in each st (18) — work 3 rounds even to build column height
Info :
Begin stuffing lightly at end of Round 5. Use a chopstick or stuffing tool to push fill into narrow stem. Stuff firmly but not so much that seams stretch.
Round 7 :
(2 sc, dec) x 6 (12)
Round 8 :
1 sc in each st (12)
Round 9 :
(1 sc, dec) x 4 (8) — taper for base attachment (8)
Round 10 :
Fasten off leaving long tail for sewing. Insert a small amount of stuffing at top before closing to keep shape, but leave base open for sewing to main panel (8)
Info :
For small stems, work Rounds 1-4 only, then dec once to leave a shorter stem. Keep proportions such that small cap sits naturally atop the stem.
— Mushroom Assembly (Make 3 large sets with 2 small mushrooms each) :
Round 1 :
Position one large stem on main panel: align base with marked center of vignette and the textured mound row (fpdc/bpdc). Pin in place through several base stitches to prevent shifting.
Round 2 :
Sew stem to panel using mattress or whip stitch through base round and onto 8-10 stitches of the panel to secure. Use invisible stitches for a neat finish.
Round 3 :
Place cap over the top of the stem so that its inner circumference overlaps the top of the stem by 6-8 stitches. Pin evenly around and sew through cap underside clusters and top rounds of the stem to hold in place.
Info :
For a natural look, offset the two small mushrooms slightly forward or angled beside the large mushroom, and attach their stems and caps similarly in positions about 8-12 stitches left and right and 2-4 rows lower than the main stem base.
Round 4 :
Check symmetry from both sides; adjust before final sewing. Sew all thread tails to inside of panel and weave well.
— Raised Ground Mound (Make 3 mounded bands, one per vignette) :
Info :
The mound is worked directly on the panel or as a separate strip sewn on. This pattern describes crocheting a narrow strip and sewing to the panel for precise placement: make a strip approx 20 sts wide and 4-6 rows high with puff stitch clusters to mimic grassy texture.
Round 1 :
ch 22, turn. Row 1: 1 sc in 2nd ch from hook and in each ch across (21)
Round 2 :
ch 2 (counts as hdc), 1 hdc in each st across, ch 2, turn (21)
Round 3 :
ch 1, *skip next st, in next st make puff stitch: yo, insert hook, draw up loop 4 times, yo and pull through all loops, ch 1; sk 1, sc in next; rep from * across to create staggered puff texture (approx 10 puffs) (21)
Round 4 :
ch 1, 1 sc in each st across to tidy top (21)
Info :
Sew this strip to panel aligning its back edge with the top of the textured fpdc/bpdc row so mushrooms appear to emerge from the grassy mound. Use small stitches to avoid visible join bulges.
— Leaves (Make 30-36 leaves) :
Info :
Leaves are worked flat and sewn as pairs along vines. Use olive and dark green for two-tone leaves if desired. Make many small leaves to decorate both sides of the runner and the areas around each vignette.
Round 1 :
ch 7, turn. Row 1: sc in 2nd ch from hook, hdc in next, dc in next 2, hdc in next, sc in last (6 sts total across) (6)
Round 2 :
Turn, working along opposite side of foundation chain: sc in first st, hdc in next, dc in next 2, hdc in next, sc in last; sl st to join to first sc. Fasten off leaving tail for sewing (12 stitches around leaf perimeter)
Info :
To create a raised vein, use a strand of darker green and embroider a central line down the leaf using surface slip stitches or back stitch. Make 30-36 leaves and place in mirrored pairs along vine rows.
— Small Five-Petal Flower (Make 18-24 flowers) :
Round 1 :
MR, ch 1, 6 sc in MR, sl st to join (6)
Round 2 :
*ch 3, sl st into next st; rep from * around to create 6 petals, sl st to join
Round 3 :
Using mustard yellow for centers, embroider a small French knot or sew a small knot of stitches in the center. Fasten off leaving tail for sewing.
Info :
Make a mixture of mustard and cream flowers for contrast. Stitch flowers onto the panel at vignette corners, between leaves, and around mushroom bases as shown in the photo (approximately 6-8 flowers per vignette including small filler daisies).
— Daisy-style Flower (Make 12-18) :
Round 1 :
ch 6, sl st to form ring. Round 2: *ch 4, 3 dc in ring, ch 4, sl st in ring; rep 6 times to create 6 elongated petals. Fasten off leaving tail for sewing.
Info :
Sew a mustard French knot in the center of cream petal flowers for the look shown. Space daisies along the runner in small clusters with leaves.
— Vining Border Embroidery (Left & Right Sides) :
Round 1 :
With olive green and a tapestry needle, embroider vine lines on both long edges: pick up a stitch from the edge every 3-4 sts and use chain stitch (surface) or a row of sl sts to form a vine line down the side. Work from bottom to top so vines are consistent (approx 40-45 sl sts per side).
Round 2 :
Attach leaves and small flowers at intervals along the vine using the tails left from motifs. For symmetry, mirror placements on both long sides: three clusters per vignette usually looks balanced.
Info :
Embroider a few small dot accents in mustard or cream to mimic seeds or small buds along the vine. Use French knots spaced evenly.
— Scalloped Edge Border (Worked Around Entire Panel) :
Info :
Use olive/leaf green yarn and a 3.5mm hook to work the border all around. Work continuous rounds around the rectangle, turning corners carefully with increased stitches to keep scallops even.
Round 1 :
With RS facing, attach green yarn at lower left corner with sl st. Work 1 sc evenly across bottom edge into ends of rows (86 sc across bottom). Work 3 sc into the corner turning chain and continue up side edge placing 1 sc into each row end (approx 56 sc up the side), 3 sc into corner chain, sc across top edge (86), 3 sc into corner, sc down other side (56), join with sl st to first sc. Total around depend on exact row count.
Round 2 :
*Ch 3, sk next sc, sl st in next sc; rep along entire edge to create spaced loops for scallops. At corners work (ch 3, sk 1 sc, sl st in corner sc) to keep corners curved. Join with sl st to first loop.
Round 3 :
Scallop Row: Work *7 dc into loop, sl st into next loop; rep around to form full scallops. At corners work 9 dc into corner loop for a smooth curve. Join and fasten off. Weave in ends on WS.
Info :
For added stability, block the border gently after finishing. If scallops are uneven, steam-blocking while pinned into a scalloped curve will even them out.
— Final Finishing Touches & Embroidery :
Round 1 :
Embroider white tiny spots on mushroom caps using cream/white yarn: use up to 14 spots on large caps and fewer on small ones. Also add a row of French knots or tiny sl st clusters around the mound for texture.
Round 2 :
Secure all appliques with small neat stitches from back of panel to avoid visible front knots. Trim any stray hairs and weave ends to the inside. Optionally, add a few hand-stitched seed beads or french knot centers in mustard for a raised pollen look.
Info :
When sewing on caps and stems, use hidden ladder or whip stitches and sew through several base stitches of the panel to anchor pieces firmly—mushrooms should not wobble or pull when the runner is picked up.
— Block & Care :
Round 1 :
Lightly block the finished runner by laying it flat, pinning into shape, and misting with water. Allow to dry fully. Do not saturate heavy stuffing pieces. Spot-clean where possible. For deeper cleaning, hand wash gently and reshape while damp.
Info :
Because the runner has appliques and small stuffed parts, avoid machine washing; store flat or rolled to prevent crushing raised mushrooms.
This woodland mushroom table runner blends nostalgic cottagecore charm with tactile stitchwork to create a cozy centerpiece you will adore. Each mushroom, leaf, and flower is a tiny handcrafted detail that brings warmth to your tabletop. The pattern encourages creativity while guiding you step-by-step to a beautiful finished piece. Enjoy making, gifting, and displaying this little forest on your table — happy stitching! 🧶🍄