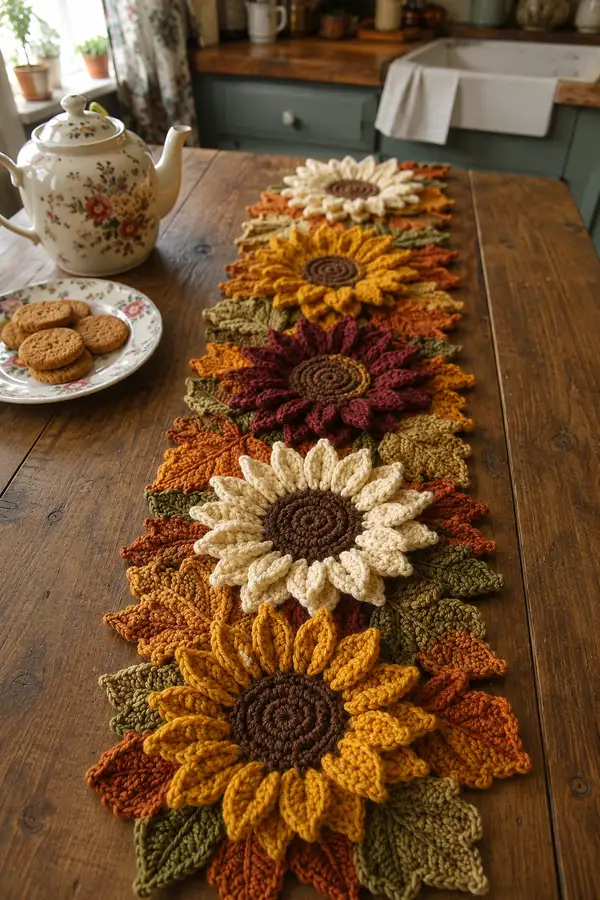
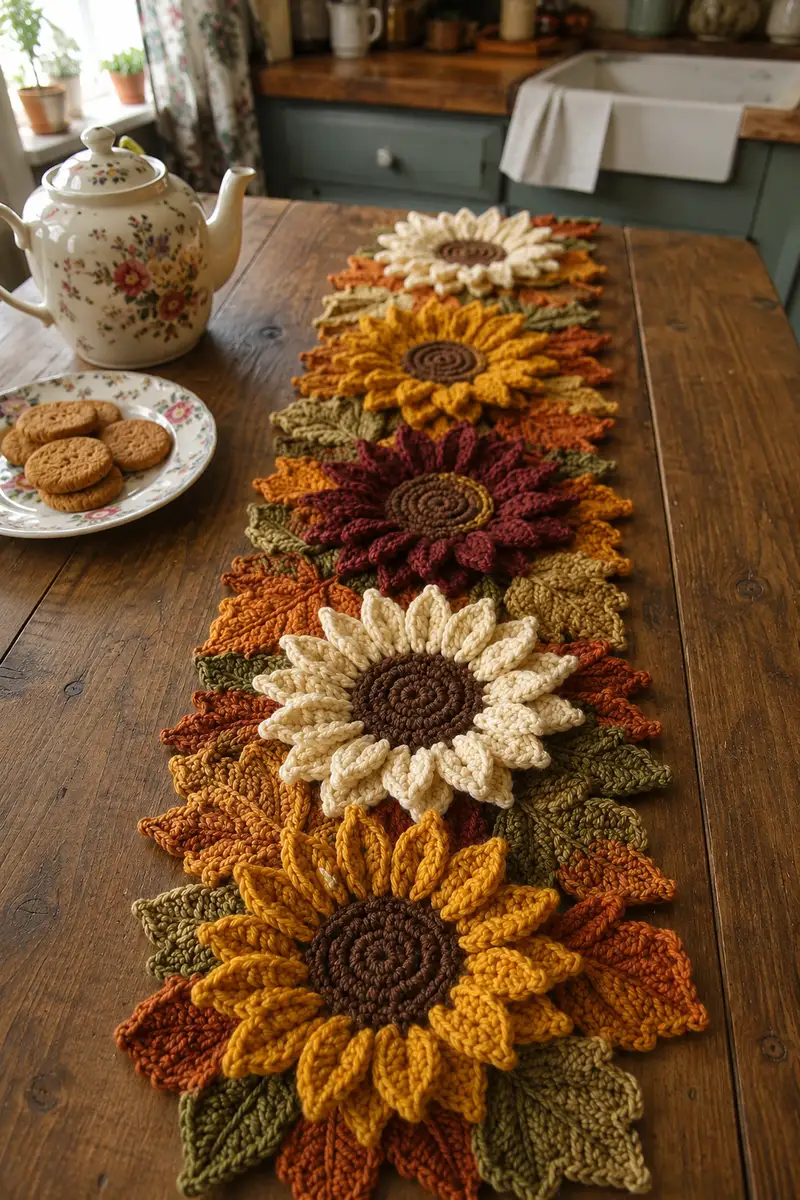
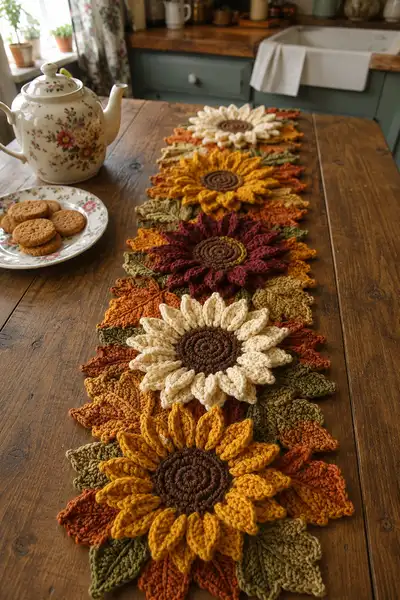
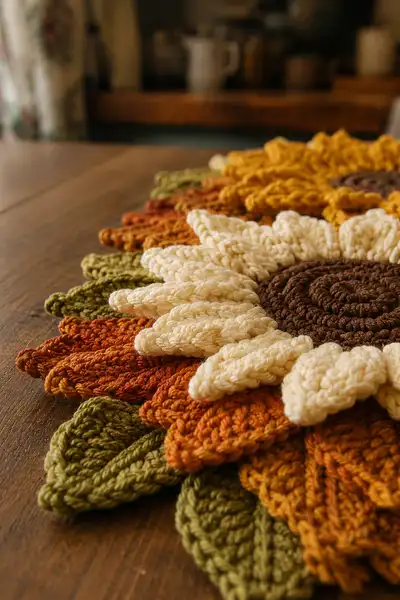
Create a warm, rustic table runner made of layered crochet sunflowers and textured leaves in autumnal tones. This pattern uses modular sunflower motifs joined into a long runner with rich puff and post-stitch petals. Finished runner shows clustered mustard, cream, burgundy and olive motifs for a cozy harvest table display.
Progress Tracker
0% Complete
— Center Spiral (make one per sunflower) :
Round 1 :
6 sc in magic ring (6)
Round 3 :
(1 sc, 1 inc) x 6 (18)
Round 4 :
(2 sc, 1 inc) x 6 (24)
Round 5 :
(3 sc, 1 inc) x 6 (30)
Round 6 :
(4 sc, 1 inc) x 6 (36)
Round 7 :
(5 sc, 1 inc) x 6 (42)
Round 8 :
(6 sc, 1 inc) x 6 (48)
Info :
Use a smaller hook for the first 6-8 rounds if you prefer a tighter, denser center. Maintain 48 sts to anchor 16 petals later (48 divided by 16 = 3 base sts per petal)
Round 9 :
1 sc in each st (48)
Round 10 :
1 sc in each st (48)
Round 11 :
Work 1 sc in each st BLO to produce a subtle ridge (48)
Info :
If you want a slightly domed center, lightly stuff the center with a small ball of yarn or fiberfill before adding petal anchors
Round 12 :
1 sc in each st (48)
Round 13 :
1 sc in each st (48)
Round 14 :
Change to chocolate brown or chosen center color if needed and work 1 sc in each st (48)
Info :
Place 16 evenly spaced removable stitch markers around this round, marking every 3rd stitch. These marks will be your petal anchor points; adjust spacing visually if you prefer larger or smaller petals
— Petal Base & Petals (work one motif's petal round; 16 petals) :
Round 1 :
With petal color, join with sl st to any marker stitch. *Ch 1, sc in next 3 sts* then move to next marker. Repeat from * to * around ensuring you work 3 sc segments into the three base sts assigned for each petal anchor. (48)
Round 2 :
Working in back loops only across the 48 sts: 1 sc BLO in each st (48)
Info :
The BLO round creates a subtle ridge that helps petals stand proud. If you prefer flatter petals, work this round in normal sc
Round 3 :
*Work into the 1st st of each 3-st anchor: ch 2, 3 dc in same st, ch 2, sl st in same st (petal shell made on single anchor)*. Move to the next anchor st (repeat x16). After 16 petals you will have formed 16 shell anchors across the round.
Round 4 :
*Turn work so petals face outward. In the small space over each petal base ch 1, work 6 puff stitches across the petal body to create a raised elongated petal: (yarn over, insert hook, pull up loop) x3-4 then pull through all loops and ch 1 to close puff.* Slip stitch into base between petals to secure. Repeat x16 (petal count =16)
Info :
Puff stitch details: keep consistent loop height for each puff (3-4 wraps for a pronounced petal). If your yarn is very bulky, use 3 wraps; for lighter worsted use 4 wraps for a lofty petal.
Round 5 :
Rotate work: sl st behind the first petal to the base. For each petal work (ch2, 3 dc cluster around the puff post, ch2), then sl st to next petal base. This reinforces petals and creates a layered look (work repeated x16)
Round 6 :
1 sc in each st around the center base between petals (48). This round will tidy the inner edge and secure petal anchors.
Round 7 :
Switch to secondary petal color if desired for bicolor petals. Join to the top of any petal and work 3 sc into the tip area of the petal, then 1 sc down the next side and 1 sc into base. Repeat around shaping the petal tip (this creates an outer taper). (16 petal tops, 48 sc distributed)
Info :
For deep, sculpted petals work the top repeat in FLO on this round to create a raised outer edge. Keep the petals consistent by counting the same stitches along each petal edge
Round 8 :
1 sc in each st (48). If your petals seem sparse, add a second reinforcement round of slip stitches along petal bases to lock them in place
Round 9 :
Optional: Work a decorative picot or sc edging around each petal tip: *ch 3, sl st in third ch to form small picot, sc down petal side* across each petal x16
Info :
Each motif uses 16 petals; if you prefer more delicate sunflowers use 20 petals by increasing early rounds to 60 sts (60/20 = 3 sts anchor) and adjust math accordingly
Round 10 :
Fasten off petal yarn leaving a 12-18in tail for sewing and assembly. Weave tail through base stitches and secure with a small knot on the wrong side if desired
— Leaf Unit (make 3-4 leaf motifs to layer under each sunflower) :
Round 1 :
Ch 10, sc in 2nd ch from hook and across (9 sc) — this forms leaf center foundation (9)
Round 2 :
Turn, ch 1, sc in first 3 sts, hdc in next 3 sts, sc in last 3 sts. Work back along opposite foundation chain: sc in last foundation st, hdc in next 3, sc in first 3 (total approximately 24 sts around leaf)
Round 3 :
Edge shaping: *sc, hdc, dc, tr, dc, hdc, sc* along one side of leaf from base to tip. Mirror the sequence down the other side when you reach the tip to form symmetric leaf (counts will vary with tension)
Info :
Work leaf sizes in pairs, blocking lightly so their shape matches. Use lighter or heavier gauge to make larger or smaller leaves to position beautifully under petals
Round 4 :
Work a row of fpdc along the midline (center spine) of the leaf: insert hook around post and fpdc to create raised vein. Do 1 fpdc every 2 sts along center to the tip (gives textured vein)
Round 5 :
Flip and repeat fpdc on the opposite side for a subtle raised vein on both sides. Fasten off leaving long tail for sewing
Info :
Alternate leaf colors (olive, rust, tan) to create a layered autumn palette. Make 3-4 leaves per motif and arrange them offset behind petals for a natural look
— Small Accent Leaf Variation (for outer runner fill) :
Round 1 :
Ch 7, sc in 2nd ch from hook and across (6 sc)
Round 2 :
Turn, ch1 sc in first 2 sts, hdc in next 2 sts, sc in last 2 sts. Mirror back along chain edge (approx. 16 sts around)
Round 3 :
Edge with 1 sc around, making 3 sc at the tip to shape the point. Fasten off leaving tail for assembly
Info :
Make many small leaves to tuck between motifs for a fuller runner — these are used to cover seams and create the dense leaf border you see in the photo
— Motif Assembly (attach leaves and finish motif) :
Round 1 :
Lay center & petal assembly flat. Position 3-4 full leaves slightly overlapping under the petals. Using the long tail from center, whip stitch leaves to the underside of center across base stitches. Use pins to secure placement first.
Round 2 :
Sew small accent leaves between the larger leaves and around the sides so that leaves overlap slightly and produce a layered edge. Aim for even distribution; a common layout is 3 large leaves spaced ~120 degrees and 4-6 small leaves to fill gaps.
Info :
Use a blunt tapestry needle and mattress or invisible stitches to secure leaves; take small stitches through the base to prevent visible sewing on the right side
Round 3 :
From the right side, pick up a contrast yarn (e.g., rust) and work sc around the underside join area to cover seam. Work 1 sc in each visible base stitch and in between leaf joins for neat finish (approx 48 sc around)
Round 4 :
Work 1 rnd of sc in FLO around petal outer edges where petals meet leaves to unify the motif; this often uses 48 sc spaced evenly (adjust as needed per petals)
Info :
If your join round increases the circumference slightly, register that change—this is normal due to layered fabric. Aim to keep counts near the original 48 anchor points to make joining motifs easier later
— Joining Motifs into Runner (arrange 4-6 motifs or more) :
Round 1 :
Lay motifs in desired order on flat surface with leaf layers overlapping slightly (photo shows motifs joined end-to-end with leaves interleaving). Place pins to hold positions.
Round 2 :
Whip stitch adjacent leaf edges together on the underside to secure initial placement. Use long whip stitches spaced every 4-6 mm to avoid bunching. Make sure motifs are aligned so centers create a straight central line down the runner.
Round 3 :
Change to a joining color (e.g., rust) and work through both motifs' outer edge loops with sl st or sc join: *Insert hook through outer loop of motif A and outer loop of motif B, sl st* repeat around overlapping leaf seam to create continuous fabric. Count stitches frequently — aim for 3 sl st per small leaf section or 6 sl st per large leaf depending on seam width.
Info :
Start joining from the underside to avoid visible knots on the right side. Work slowly at first to ensure leaves interlock naturally without twisting motifs
Round 4 :
After joining adjacent motifs along their overlapping leaves, work 1 round of sc along the open seam on the right side to tidy the join. This will often be 1 sc into each sl st join made and into the adjacent motif's edge stitches (approx 40-60 sc total across runner seam depending on motif layout)
Round 5 :
Repeat join process for all motifs until the runner reaches desired length. For a longer runner add more motifs and match leaf overlaps so seams lie flat.
Info :
Keep motifs facing the same direction so petal tips line up in a pleasing sequence. Alternate color order as you go to balance browns, golds and deep tones
— Outer Border & Edge Finishing :
Round 1 :
With contrast edging color (e.g., deep rust), join anywhere on outer edge and work 1 sc evenly along the entire perimeter of the joined runner. Where leaves create points, work 3 sc into the point to produce a scalloped look. Count total sts and adjust spacing for evenness (this round produces a tidy outer edge)
Round 2 :
Work 1 rnd of 1 sc in each st BLO to give a defined ridge on the outer edge (this will slightly raise the runner edge which looks neat on the table)
Info :
If your runner edge feels loose, add a second sc round or a round of hdc to add stability; this also helps protect leaf tips from wear
Round 3 :
Decorative picot round (optional): *sc, ch 3, sl st into first ch to create picot, skip 1 st* repeat around for a delicate border (counts depend on spacing)
Round 4 :
Fasten off and weave in all ends on the underside. Use a blunt needle and weave each tail through several rows of stitches and trim close. Press or gently steam-block runner to settle stitches.
Info :
Blocking tip: lightly dampen motifs and pin flat on a board so petals are slightly lifted. Allow to dry fully for best shape retention
— Optional Surface Embellishments :
Round 1 :
Use embroidery yarn or a contrast worsted to add French knot-style centers on the chocolate center with a tight chain of small slip-stitches or tiny bullion knots to mimic sunflower seeds.
Round 2 :
Add a few surface fpdc veins on the larger leaves for more texture: insert hook around post of leaf and pull yarn through to make raised veins; repeat as desired.
Info :
Less is more—subtle surface stitches enhance the rustic look. Test embellishments on a spare motif first to check scale
— Final Assembly & Care :
Round 1 :
Double-check all seams and weave in any remaining tails. Trim stray fibers and fluff petals lightly to keep them lofty.
Round 2 :
Spot clean as needed and hand wash gently in cool water if required. Reshape while damp and lay flat to dry to protect the structure of puff and post stitches.
Info :
Store flat or rolled (not folded) to avoid flattening petals. Avoid machine washing to maintain dimensional pillows of petals
This autumn sunflower table runner brings seasonal charm and handcrafted warmth to any table setting. Each layered sunflower and leaf is designed to create depth, color and texture—perfect for holiday gatherings or cozy everyday decor. I hope you enjoy stitching each motif and watching the runner grow—every petal is a little moment of craft joy. 🧶🍁🌻