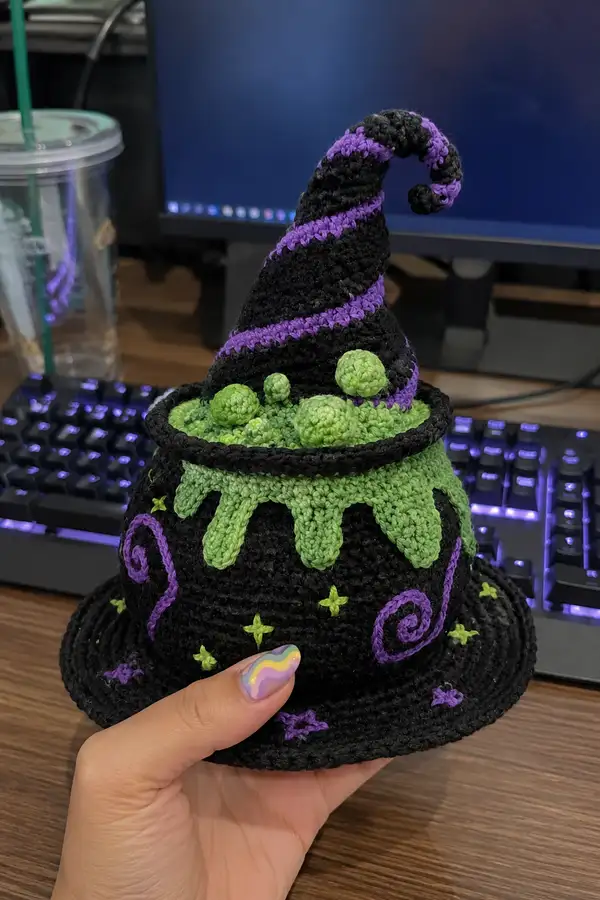
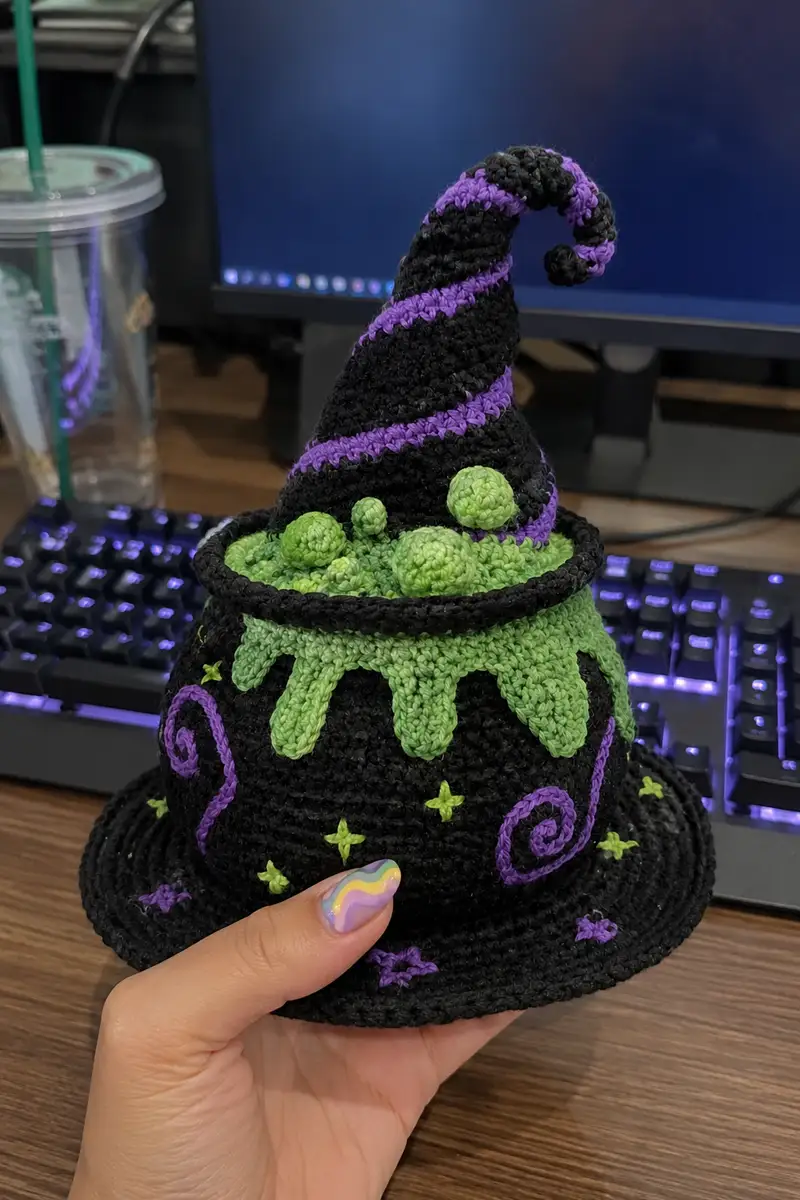
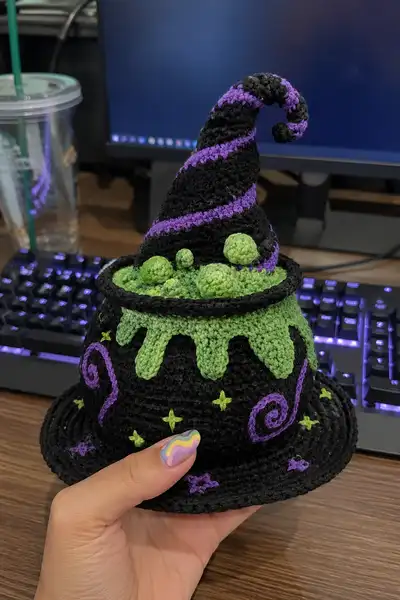
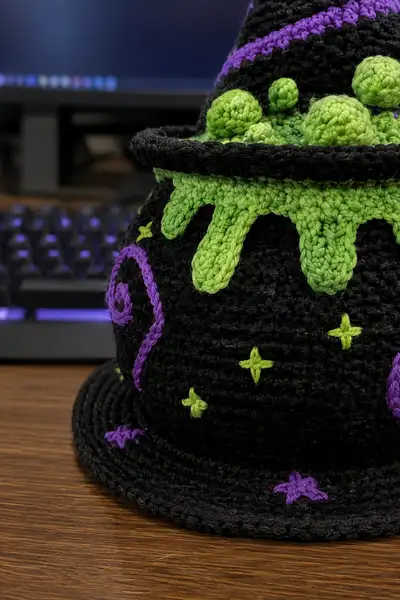
A whimsical crochet amigurumi that doubles as a tiny cauldron and a curled witch hat, filled with bubbling potion and playful embroidered details. This pattern recreates the black cauldron body, bright lime green potion drips and bubbles, and a spiraled black-and-purple witch hat topper. Decorative purple swirls and tiny green stars finish the look—perfect for spooky season displays or as a charming handmade gift.
Progress Tracker
0% Complete
— Cauldron Base (flat circle to start) :
Round 1 :
6 sc in magic ring (6)
Round 3 :
(1 sc, inc) x 6 (18)
Round 4 :
(2 sc, inc) x 6 (24)
Round 5 :
(3 sc, inc) x 6 (30)
Round 6 :
(4 sc, inc) x 6 (36)
Round 7 :
(5 sc, inc) x 6 (42)
Round 8 :
(6 sc, inc) x 6 (48)
Info :
This flat circle will be the bottom of the cauldron. If you want a slightly larger base, add one more increase round using (7 sc, inc) x 6 to reach 54 sts. Work tightly to avoid gaps so stuffing won't show through.
— Cauldron Body (join and work up sides) :
Round 1 :
Join with a sl st to front loop of first st of last round if desired to create a subtle seam, or continue without join. 1 sc in each st around (48)
Round 2 :
1 sc in each st around (48)
Round 3 :
1 sc in each st around (48)
Round 4 :
1 sc in each st around (48)
Round 5 :
1 sc in each st around (48)
Info :
Work these even rounds to build the cauldron wall height. Measure as you work - the sample photograph shows a cauldron wall of about 7-8 cm above the base. Stuff the base lightly if you'd like a more substantial feel at the bottom.
Round 6 :
1 sc in each st around (48)
Round 7 :
1 sc in each st around (48)
Round 8 :
1 sc in each st around (48)
Round 9 :
1 sc in next 6 sts, (dec, 1 sc) x 6, 1 sc in remaining sts to reposition decreases evenly (42)
Round 10 :
1 sc in each st around (42)
Round 11 :
1 sc in each st around (42)
Round 12 :
(5 sc, inc) x 6 (48)
Info :
This slight increase round restores the round count and adds gentle outward curve to the mid-body for the rounded cauldron silhouette. If the body feels too tall, stop earlier; if too shallow, add more even rounds before the next shaping series.
Round 13 :
1 sc in each st around (48)
Round 14 :
1 sc in each st around (48)
Round 15 :
1 sc in each st around (48)
Round 16 :
(6 sc, inc) x 6 (54)
Round 17-18 :
1 sc in each st around (54)
Info :
At rounds 17-18 you should have a nice flared mid-section. These rounds form the area where the decorative drips will attach. Keep stitch markers handy to mark the front center for aligning appliques.
Round 19 :
(7 sc, inc) x 6 (60)
Round 20-22 :
1 sc in each st around (60)
Round 23 :
(7 sc, dec) x 6 (54)
Round 24 :
(6 sc, dec) x 6 (48)
Info :
These decreasing rounds shape the top opening of the cauldron where the rim and potion collar will sit. Stop decreasing once the top diameter matches the brim and ring you plan to add (sample uses opening approx corresponding to 48 sts circumference).
Round 25 :
1 sc in each st around (48)
Round 26 :
1 sc in each st around (48)
Round 27 :
1 sc in each st around (48)
Round 28 :
1 sc in next 4 sts, (dec) x 6, 1 sc in remaining sts (42)
Round 29 :
1 sc in each st around (42)
Round 30 :
Fasten off leaving a long tail if you plan to sew a separate rim; otherwise prepare to add rim rounds directly. Weave in the tail later or use it to stitch on the rim piece.
— Cauldron Brim (flat wide disc) :
Round 1 :
6 sc in magic ring (6)
Round 3 :
(1 sc, inc) x 6 (18)
Round 4 :
(2 sc, inc) x 6 (24)
Round 5 :
(3 sc, inc) x 6 (30)
Round 6 :
(4 sc, inc) x 6 (36)
Round 7 :
(5 sc, inc) x 6 (42)
Round 8 :
(6 sc, inc) x 6 (48)
Round 9 :
(7 sc, inc) x 6 (54)
Round 10 :
(8 sc, inc) x 6 (60)
Round 11 :
(9 sc, inc) x 6 (66)
Info :
The brim should be considerably larger than the cauldron top so it flares out. Work an extra increase round if you want a floppy brim. If you prefer a stiffer brim, use a slightly smaller hook for these rounds or add interfacing between brim layers later.
Round 12-14 :
1 sc in each st around (66)
Round 15 :
1 sc in each st BLO to create a clean edge ridge (66)
Round 16 :
1 sc in each st around (66)
Round 17 :
1 sc in each st around (66)
Round 18 :
1 sc in each st around (66)
Round 19 :
1 sc in next 6 sts, (dec) x 6, continue even to create a small inward shaping along the inner rim area if desired (60)
Round 20 :
Fasten off leaving a long tail for sewing to cauldron body. If you prefer to create an underlining disc to stiffen, make a second identical disc and stitch them together with interfacing inside before attaching.
— Top Rim Ring (attachable) :
Round 1 :
6 sc in magic ring (6)
Round 3 :
(1 sc, inc) x 6 (18)
Round 4 :
1 sc in each st around (18)
Round 5 :
1 sc in next st, (inc) across to create a ring matching cauldron opening; work until ring diameter equals cauldron top opening (approx 18-24 sts depending on gauge)
Round 6 :
Work 2 rounds of 1 sc in each st around to build thickness (18-24)
Info :
Slip this ring onto the cauldron top opening to create the rolled lip. You can sew it in place with whip stitch using the long tail. If the lip looks too tall, reduce rounds; too thin, add another round before attaching.
— Potion Drip Collar (Lime Green Applique, make 1 full collar) :
Info :
Work the collar as a flat round strip sized to sit under the rim. You will create 8-10 drips by working a scalloped edge then shaping elongated drips as separate motifs attached along the collar base.
Round 1 :
6 sc in magic ring with lime green (6)
Round 3 :
(1 sc, inc) x 6 (18)
Round 4 :
Join with sl st to form a thin band and ch 1, 1 sc in each st around (18)
Round 5 :
Ch 1, (2 sc in next st, skip 1) around to create small scallop points (12)
Round 6 :
Fasten off leaving a long tail for sewing. Now make drip motifs and attach along the lower edge of the collar every 3-4 sts depending on desired spacing.
Drip Motif 1 (make 10) Round 1 :
6 sc in magic ring (6)
Round 2 :
1 sc in each st (6)
Round 3 :
Ch 1, sc in next 2 sts, hdc in next st, dc in next st, sl st in last st to create an elongated teardrop (shape length approx 4-5 rows when worked in rows). Fasten off leaving long tail.
Info :
Sew each drip motif along the collar’s scalloped edge so drips hang down. Stagger lengths slightly to give an organic molten look. Use the long tails to anchor the drips to the cauldron body through the rim area to secure them firmly.
— Potion Bubbles (make multiple: Large, Medium A, Medium B, Small x3) :
Large Bubble (1) Round 1 :
6 sc in magic ring (6)
Round 3 :
(1 sc, inc) x6 (18)
Round 4 :
(2 sc, inc) x6 (24)
Round 5 :
1 sc in each st around (24)
Round 6 :
(2 sc, dec) x6 (18)
Round 7 :
(1 sc, dec) x6 (12)
Round 8 :
6 dec (6) Stuff firmly and close with 3 sc2tog, fasten off leaving tail for attaching inside the cauldron (Makes 1 large bubble)
Info :
Make sure to stuff the larger bubble firmly so it sits proud above the cauldron rim. Use a yarn needle and long tail to sew the bubble to the inner top rim or the potion collar, hiding the tail end inside the bubble for a neat finish.
Medium Bubble A (make 2) Round 1 :
6 sc in magic ring (6)
Round 3 :
(1 sc, inc) x6 (18)
Round 4 :
(1 sc, dec) x6 (12)
Round 5 :
6 dec (6) Stuff lightly and fasten off, leave tail (Makes 2 medium bubbles)
Small Bubble (make 3) Round 1 :
6 sc in magic ring (6)
Round 2 :
dec x3 (3) Scale note: use a smaller hook for tiny bubbles if you want them very tight. Stuff minimally, fasten off and leave tail for sewing.
Info :
Vary bubble sizes and stuffing for a natural look. Sew each bubble to the inner rim band or to the inside of the cauldron using the long tails. Use pins to arrange before sewing to find a pleasing layout as shown in the reference image.
— Witch Hat (cone with spiral, worked in black with purple stripe) :
Round 1 :
6 sc in magic ring (6)
Round 3 :
(1 sc, inc) x6 (18)
Round 4 :
(2 sc, inc) x6 (24)
Round 5 :
(3 sc, inc) x6 (30)
Round 6 :
(4 sc, inc) x6 (36)
Round 7 :
(5 sc, inc) x6 (42)
Info :
These increase rounds create the hat base. The cone is worked taller than a simple cone to achieve the tall witchy shape that then tapers and curls. Decide now whether you want a firm or floppy hat tip — a wire will hold sculpted curls.
Round 8 :
(6 sc, inc) x6 (48)
Round 9-12 :
1 sc in each st around (48)
Round 13 :
(6 sc, dec) x6 (42)
Round 14 :
1 sc in each st around (42)
Info :
At this stage start your purple spiral stripe. To form a spiral stripe you will change to purple and work a single round of purple then return to black. Carry the black yarn up the inside or weave in tails later. Alternatively, carry both yarns loosely up the inside for a cleaner spiral.
Round 15 (purple stripe) :
Change to purple yarn. 1 sc in each st around (42)
Round 16-17 :
Change back to black. 1 sc in each st around (42)
Round 18 :
(5 sc, dec) x6 (36)
Round 19 :
1 sc in each st around (36)
Round 20 :
Change to purple. 1 sc in each st (36)
Round 21-22 :
Back to black. 1 sc in each st around (36)
Round 23 :
(4 sc, dec) x6 (30)
Round 24 :
1 sc in each st around (30)
Round 25 :
Change to purple. 1 sc in each st (30)
Info :
Alternate purple stripe rounds and black rounds to create the spiral bands. To make the spiral more visible, offset the start of each purple round by 1-2 sts relative to the round below — this creates a diagonal spiral look. Carry unused yarn inside or weave ends later.
Round 26 :
(3 sc, dec) x6 (24)
Round 27 :
1 sc in each st around (24)
Round 28 :
Change to purple. 1 sc in each st around (24)
Round 29 :
(2 sc, dec) x6 (18)
Round 30 :
1 sc in each st around (18)
Round 31 :
Change to purple. 1 sc in each st around (18)
Round 32 :
(1 sc, dec) x6 (12)
Round 33 :
1 sc in each st around (12)
Round 34 :
Change to purple. 1 sc in each st around (12)
Round 35 :
6 dec (6) Stuff lightly if you want the hat to keep some structure at the top. Leave a long tail or insert wire in the hat tip for a curled shape.
Round 36 (curl formation) :
Working in spiral, ch 2 and then sc in each round-end stitch forming a short spiral tail about 10-14 sts long; fasten off and use tail to sew tip into a curl. If using wire, insert and wrap with a little yarn before closing.
Info :
If you want a stable hat that sits on the cauldron, line the hat base round with a few rounds of slip stitch in black to create a slightly narrower opening that hugs the cauldron top ring. The sample hat has an exaggerated curl and alternating purple stripe rounds for contrast.
— Embroidered Swirls and Stars (purple and lime accents) :
Info :
Use surface slip stitch or chain-stitched embroidery with purple yarn to create the large spiral swirls on the cauldron sides. For small stars use lime green yarn and make simple four-point star stitches by crossing yarn through the fabric.
Purple Spiral (1) :
Start with a small chain of 4-6 stitches anchored at the spiral base on the side of the cauldron. Work surface sl st following a loose spiral shape, increasing length between rounds as you spiral outward. Fasten off and weave ends through inside.
Small Star (make 8-10) :
With lime green, push needle through fabric, make 4 straight stitches crossing at center (like an asterisk). Pull gently so the stitches lay flat and form a star. Tie small knot on inner side and trim close.
Info :
Use many small stars to scatter around the cauldron sides and brim as in the image. Place stars symmetrically or randomly for a magical effect. Use pins to plan placement before committing the embroidery.
— Finishing Details and Assembly Prep :
Info :
Weave in all ends but leave long tails on pieces that will be sewn together (brim to body, rim ring to cauldron opening, bubbles to rim). Block the brim slightly by pinning flat and spraying lightly if you used cotton yarn and want a crisp edge. If you used polyester yarn, blocking is optional.
Attach brim :
Position brim under cauldron body so that the inner edge of the brim aligns with the bottom of the cauldron side (rounds that correspond visually). Using the long tail, whip stitch from inside the cauldron through the brim inner round every 3-4 sts to secure evenly. Fasten off and weave tail inside.
Attach rim ring :
Slip the rim ring (rolled lip) over the cauldron top and line it up. Sew around the inner edge with long tail so that the ring sits flush against the top row of the cauldron body. This creates the rolled lip seen around the potion surface.
Attach potion collar :
Place the lime green collar under the rim, aligning scallops with the drips. Sew collar to the cauldron body just under the lip so the drips hang down over the side. Make sure drip motifs are secured to the body through the collar with a few stitches each.
Attach bubbles :
Arrange large and small bubbles on the inner rim and center of the potion. Sew securely with long tails pushing needle through the inside of the cauldron to hide knots. Use pins to preview arrangement: large bubble toward the back center, medium and small bubbles clustered around it.
Hat placement :
Either sew the hat to the rim ring or make it removable. For a removable hat, create a small felt disc inside the hat brim to help it sit snugly on the cauldron top. For sewn-on placement, attach with whip stitch around hat base to rim ring stitches at evenly spaced intervals.
Info :
Final shaping: gently pull and shape drips and hat curl after assembly. If you used a wire in the hat tip, bend the curl into a pleasing spiral. Add a few extra embroidery stitches to hide joining seams and reinforce stability.
Completing this Magic Bubbling Spiral Cauldron Witch Hat Amigurumi is so satisfying — every stitch adds a little more magic! The popped lime potion and curled purple-striped hat give the piece a playful personality. This project looks amazing on a shelf or as seasonally themed decor and makes a fantastic handmade gift. 🧶✨ Have fun stitching the details and don’t forget to show off your finished piece! 🎃