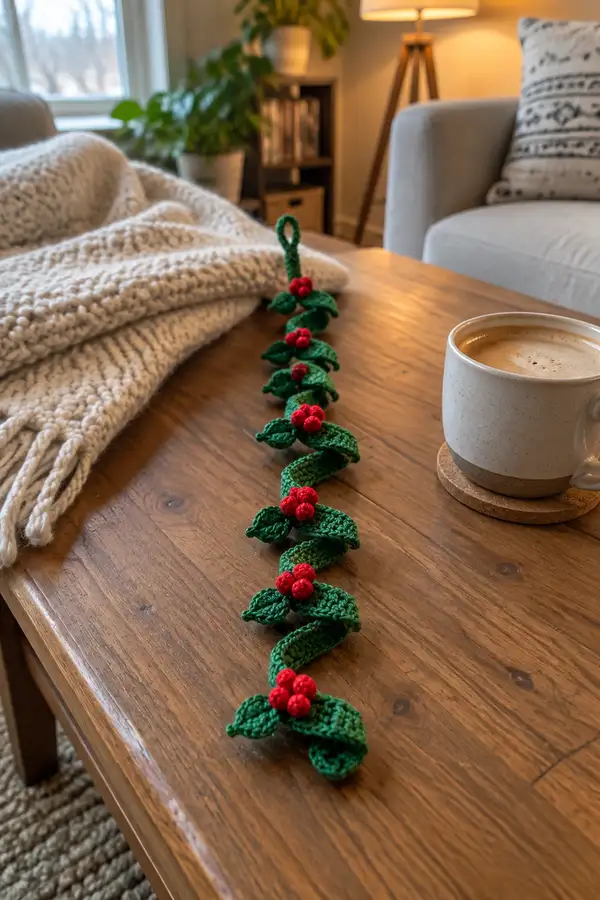
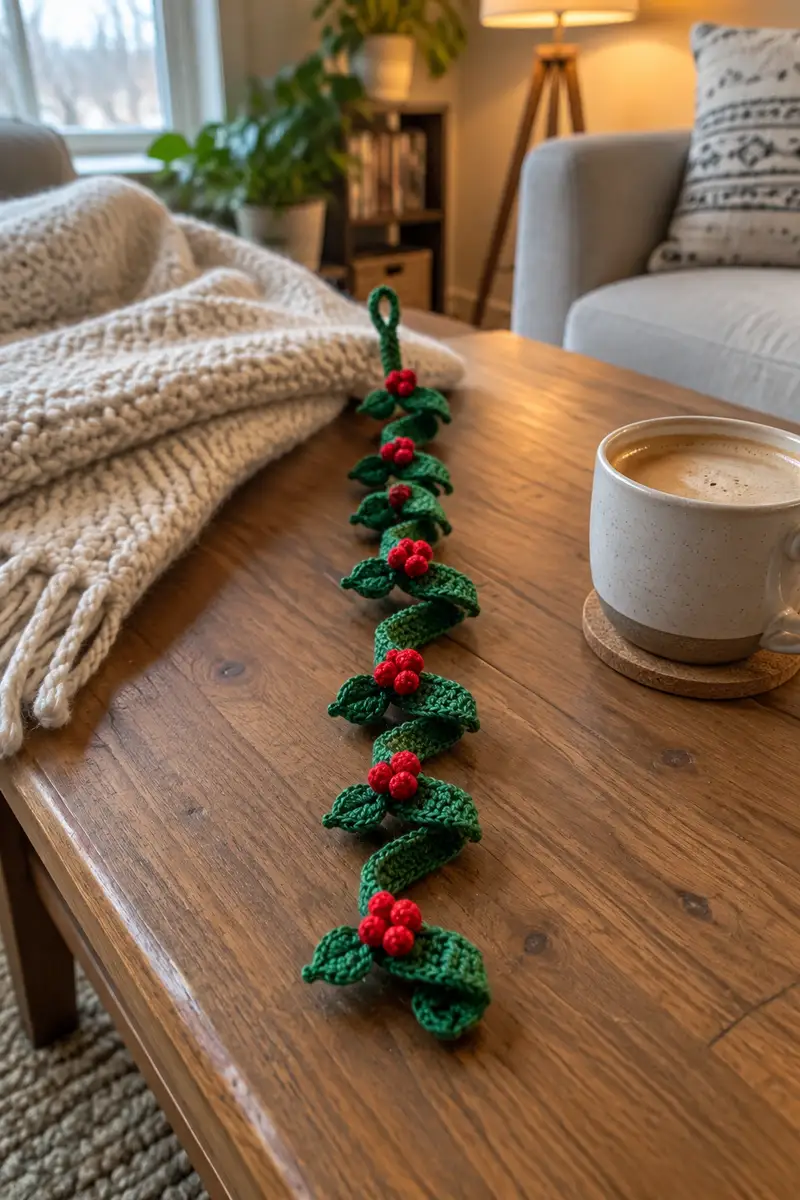
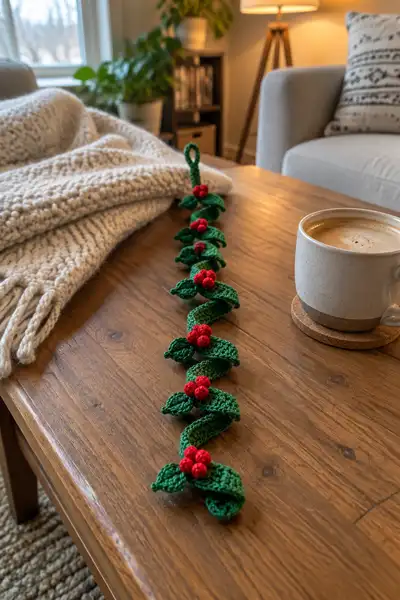
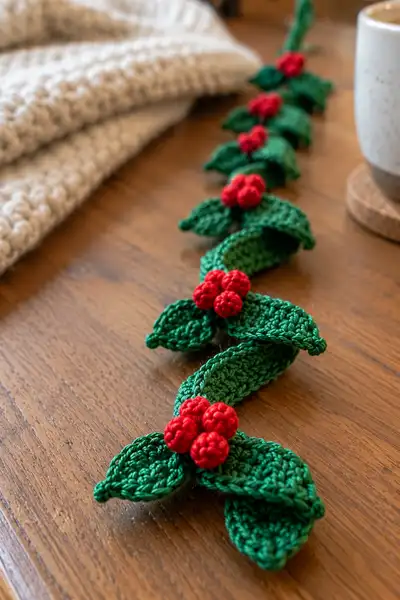
A festive spiral holly garland featuring paired textured leaves and clustered red berries, perfect for mantels, runners, or tree trimming. Crocheted in worsted-weight yarn with a compact, twisted vine construction that holds a natural spiral. The pattern includes step-by-step instructions for the stem, leaves, berries, hanger loop and assembly so you can easily create a long decorative garland.
Progress Tracker
0% Complete
— Overview :
Info :
This pattern constructs a long crocheted spiral stem, then adds paired leaves and clusters of three berries at regular intervals. The stem is worked in a tubular method by sc-ing around a folded chain to create a compact cord that naturally twists. You will make 8 leaf-pair units with matched berries to produce a garland approximately 18-24 inches long (using the yarn and hook listed). If you want a longer garland, simply add more leaf-pair units following the same spacing.
Notes :
Work in continuous rounds for the stem to maintain a smooth seam. Leaves are worked flat in rows that are then joined along the center to create a leaf shape. Berries are small spherical amigurumi pieces worked in rounds and lightly stuffed. Frequent Info notes guide shaping, blocking, and assembly.
— Stem (make 1) :
Info :
We will create the stem as a tubular crocheted cord by working sc around both long edges of a foundation chain. Choose chain length to match desired garland length; instructions below are for a base chain of 60 ch which, when folded and worked into a tube and slightly twisted, will result in an 18-24" garland depending on tension.
Round 1 :
Ch 60. Turn, sc in 2nd ch from hook and in each ch to end (59). This is the first side of the tube (59)
Round 2 :
Without turning, work 3 sc in last ch (tip), now continue to work along the opposite side of the foundation ch: sc in each ch across (59), join with sl st to first sc of Round 1 if you wish or continue in spiral (121)
Info :
You now have a flat 'tube' base composed of both sides of the foundation chain counted as a single round of 118-121 sts (depends whether you count tip extras). Work continuously without joining for a seamless cord — place a stitch marker in the first st and move it each round.
Round 3-6 :
1 sc in each st around (121)
Info :
Keep rounds even; if you prefer a slightly narrower tube, use a 3.25mm hook for the stem. Carry unused yarn inside the tube to avoid floats on the outside if you plan to insert a floral wire later.
Round 7 :
(6 sc, 1 inc) x 15 + (1 sc) to end to create a gentle slight ankle bump for leaf attachment (136)
Round 8-12 :
1 sc in each st around (136)
Info :
Place stitch marker where you want the first leaf pair to attach — we will attach leaf-pair Unit 1 at Round 10. Space later units approximately every 14th-16th round, or evenly along the stem length. If you need a shorter cord, reduce foundation chain accordingly.
Round 13 :
(7 sc, 1 dec) x 17 (136)
Round 14-18 :
1 sc in each st around (136)
Round 19 :
(5 sc, 1 dec) x 17 + adjust to maintain even count (114)
Round 20 :
1 sc in each st around (114)
Info :
If you'd like your stem more flexible for shaping, do not add wire. For a poseable garland, thread a length of thin floral wire through the tube now by leaving a long tail and pulling wire through the center. Secure ends by folding them into the tube and stitching closed later.
— Leaf Template (single leaf, make 16 leaves — two per unit) :
Info :
The leaf is worked flat starting with a foundation chain that forms a central vein. The pattern uses a 'worked around' chain method: sc along the top edge, increases at the tip to produce the point, then sc back down the opposite side. Each leaf will be joined to its pair along the base then sewn to the stem to produce a natural spiral twist.
Round 1 :
Ch 11. Starting in 2nd ch from hook, sc across 9 sts (9). In last ch work 3 sc to form the point (3). Now working down opposite side of chain, sc in next 9 ch (9) — do not join; you have 21 sts along the rim (21)
Round 2 :
Ch 1, turn into same first rim stitch, sc in next 3 sts, hdc in next 3 sts, dc in next 3 sts, hdc in next 3 sts, sc in next 4 sts (patterned shaping across the leaf) (21)
Info :
These stitches create a central swell: dc at the midsection produces a natural curve. Keep tension slightly looser when working the dc stitches so the leaf will curve when joined.
Round 3 :
Ch1, fold leaf so the two long edges meet over the center spine and work along outer edge: sc 2tog to shape the tip: (1 sc, dec) x 4 around the tip area, then sc in remaining stitches down the side (17)
Round 4 :
Ch1, sc in each st around (17)
Round 5 :
Working FLO on the flat body only, 1 sc in each st FLO to create a defined ridge (17)
Info :
Working in the front loops only (FLO) for a row creates a raised rib that looks like the central vein when the leaf is blocked. If you desire a more pronounced vein, use BLO on the reverse before joining leaves.
Round 6 :
Ch1, (sc, hdc, dc, hdc, sc) across the broad section to accentuate the lobed shape (17)
Round 7 :
Decrease along the tip area: (1 sc, dec) x 4, sc in remaining 9 sts (13)
Round 8 :
1 sc in each st around (13)
Round 9 :
Sl st through the outermost stitch to create a neat edge and fasten off leaving a 12-14" tail for sewing (13)
Round 10 :
Info : Block the leaf. Pin to a shaped template and steam lightly or wet-block, then allow to dry. This helps the leaf keep a curl and makes assembly simple.
Info :
Make 16 identical leaves following Rounds 1-9. For variety, you may use a slightly lighter green for every other leaf to add dimensionality. Keep tails long for sewing to the stem.
— Unit Assembly: Leaf Pair (make 8 pairs) :
Info :
Each unit has two mirrored leaves attached at their bases and flanking a small berry cluster. Position the two leaves so their rounded sides face outward and their pointed tips form a pleasing V shape. The seam where the leaves meet will be sewn to the stem.
Round 1 :
Place Leaf A and Leaf B right sides up with bases overlapping about 1/2". Using the long tail of Leaf A, whip stitch the two leaves together along the base across 6-8 stitches until they feel secure (no numeric stitch count — sew until bases sit flat)
Round 2 :
Securely tie off and weave tails into the underside of the leaves. Do not trim the tails yet — you will use the tails to sew the leaf-pair to the stem.
Info :
Pin the joined pair against the stem at the chosen attachment round (for example the stitch count at Round 10 of the stem). When pinned, the leaf pair should sit at a slight angle so the subsequent leaf pairs spiral naturally down the vine.
— Berry (single) :
Info :
The berry is a tiny spherical element. We will make each berry as a small amigurumi ball approximately 0.5"-0.75" in diameter when using worsted yarn and firm stuffing. Each cluster uses three berries sewn together.
Round 1 :
Using red yarn, make a mr, 6 sc in mr (6)
Round 2 :
Inc in each st around (12)
Round 3 :
(1 sc, inc) x 6 (18)
Round 4 :
1 sc in each st around (18)
Round 5 :
(1 sc, dec) x 6 (12)
Round 6 :
Dec in each pair around (6)
Round 7 :
Info : Stuff firmly but lightly before closing. Finish by pulling tail through remaining stitches, fasten off, and leave a long tail for sewing. Make 24 berries total (three per cluster for 8 units).
— Berry Cluster (assemble cluster of 3 berries) :
Round 1 :
Arrange three berries in a triangle shape. Using long tails, sew Berry 1 to Berry 2 by overlapping 3-4 stitches on their sides; repeat to attach Berry 3 so all three form a compact cluster. Weave tails back inside cluster and fasten off.
Round 2 :
Info : Make 8 clusters total so each leaf pair gets a cluster. Ensure clusters are centered on the leaf pair base so they read as a small group of three holly berries.
— Unit 1 (Leaf Pair + Berry Cluster) :
Round 1 :
Position the assembled leaf pair at the first leaf placement marker on the stem (approx Round 10 of the stem). Using the long tail from the leaf join, sew the base of the leaf pair onto the stem: insert needle through the tube of the stem and around the leaf base for approx 10-12 secure stitches across the seam.
Round 2 :
Sew the berry cluster into the center of the leaf pair using berry cluster tails, stitching through the leaf base and the stem for stability. Weave in all tails into the stem and trim.
Info :
Attach leaves at a slight offset from previous units so the garland forms a natural spiral. If working 8 units, place them about every 12-16 stitches along the stem to obtain even spacing. Adjust spacing by eye to taste.
— Unit 2 through Unit 8 (repeat assembly) :
Round 1 :
Repeat leaf pair assembly and berry cluster sewing as for Unit 1 at each subsequent marker around the stem. Follow the same pinning and shaping process so pairs alternate slightly left and right to form the spiral.
Round 2 :
Info : After attaching each unit, step back and check the twist and balance of the garland; adjust by moving the sewn seam a stitch or two along the stem if the spiral looks uneven.
— Hanger Loop :
Round 1 :
After final unit is attached near one end of the stem, ch 12, sl st to base of stem at the last stitch to create a loop for hanging. Fasten off leaving a 6" tail. Weave the tail through the inside of the tube and tuck ends in and secure.
Round 2 :
Info : For a stronger loop, make a short i-cord: using your hook, pick up stitches evenly over 12 ch and work 6 rounds of sc, then attach the cord to the stem and secure by sewing with the long tail.
— Finishing :
Round 1 :
Weave in all remaining yarn tails by threading tail through the inside of the stem, moving the needle back and forth at least 3 times before trimming to prevent unraveling.
Round 2 :
Info : Block the whole garland lightly one more time if necessary: pin units to a board in the desired spiral and spritz with water, then allow to dry. This sets the curl of leaves and stabilizes the assembly.
Round 3 :
Optional : If you used a floral wire for poseability, ensure the ends are tucked and stitched securely inside the stem and not exposed. Bend the garland gently to form a natural curve or spiral.
Round 4 :
Final inspection: check that all berries are firmly attached and leaves are symmetrical. Add tiny dots of fabric glue to berry seams if you expect heavy handling.
Info :
Your garland is complete. Hang it on a mantel, drape down a table runner, or use it as a festive centerpiece. For different looks, try metallic thread for the stem or switch to sport-weight yarn and a 3.0mm hook for a lacy, delicate garland.
This spiral holly garland is an instant holiday classic — small leaves, bright berries and a twirling vine make a lovely handcrafted accent for any room. Each unit is quick to make and the modular pattern makes it simple to lengthen or shorten the garland as needed. I hope you enjoy the meditative rhythm of crocheting leaves and berries and the reward of a beautiful finished piece that spreads seasonal cheer! 🎄✨