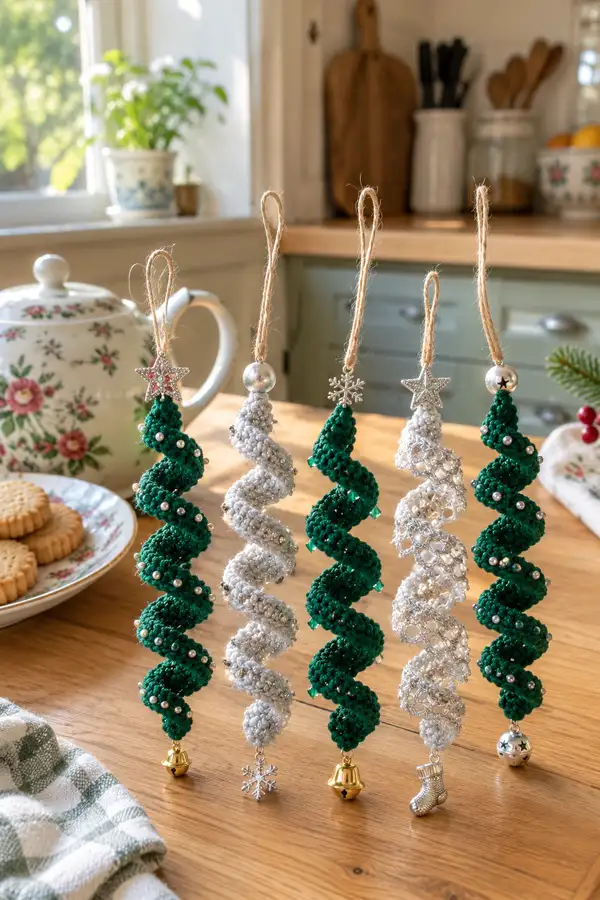
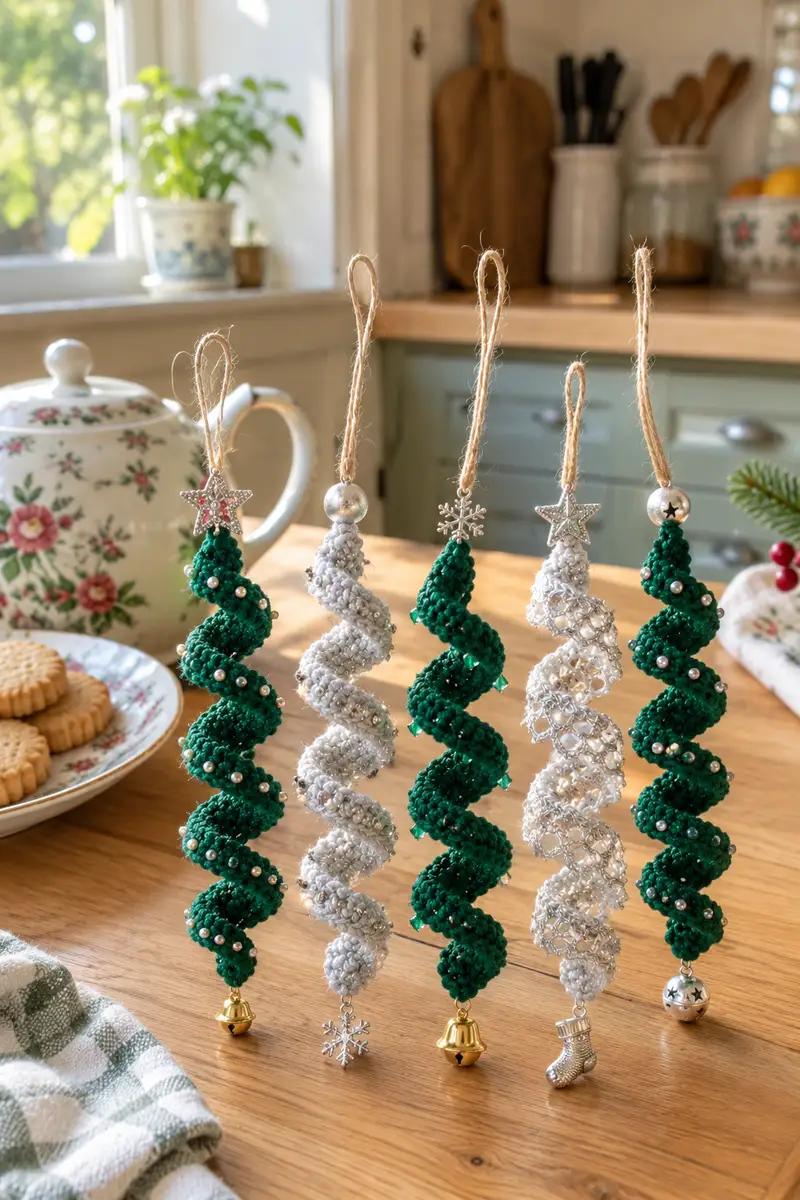
Create elegant spiral Christmas tree ornaments using cotton yarn, beads and simple crochet techniques. These twisting, hanging spirals are worked in the round into a narrow tube that slips over a thin wire core, then decorated with pearls, jingle bells and metallic charms. The pattern includes three style variations — dense, beaded and lace — with step-by-step rounds, placement tips and assembly notes to make a set of beautiful ornaments.
Progress Tracker
0% Complete
— Overview :
Info :
This pattern describes how to crochet a narrow tube in continuous rounds, insert a thin wire core, shape it into a corkscrew spiral and add beads or charms. Three style variations are included: Dense Spiral (solid fabric), Beaded Spiral (solid with beads worked-in) and Lace Spiral (openwork mesh). Each main spiral is worked from a closed top (small cap) expanding to a stable 30-stitch circumference then worked even for length before decreasing to a small bottom cap. Gauge is not critical but stitches must be tight enough so stuffing and wire are not visible.
— Notes & Preparation :
Info :
Work in continuous rounds without joining. Use a stitch marker to mark the first stitch of each round and move marker up after completing each round. When adding beads as you go, thread them onto the yarn before starting. For metallic thread or slippery thread, use a slightly smaller hook. Insert wire through the tube before final closure. Add beads, bells and charms at the top and bottom as desired.
— Dense Spiral (Solid Tube) :
Round 1 :
6 sc in magic ring (6)
Round 3 :
(1 sc, 1 inc) x 6 (18)
Round 4 :
(2 sc, 1 inc) x 6 (24)
Round 5 :
(3 sc, 1 inc) x 6 (30)
Info :
By round 5 you have a stable circumference of 30 sts which will be maintained for the tube body. Use this size for a neat narrow ornament. If you prefer a slimmer tube, stop increases at 24 sts; for a bulkier spiral increase once more to 36 sts by (4 sc, inc) x 6.
Round 6-15 :
1 sc in each st (30)
Info :
Work these even rounds to build the upper cone length. For a shorter top, stop earlier. Keep tension consistent. Begin checking length against wire core — you will want the total tube length around 12–18 cm depending on how tight a spiral you prefer.
Round 16-30 :
1 sc in each st (30)
Info :
Continue even rounds. This section forms the middle portion of the ornament; add beads as desired in every X stitches (see beading technique below). If using small pearls, plan placement now — typical spacing is every 8–10 stitches in a diagonal line as the tube is twisted.
Round 31-50 :
1 sc in each st (30)
Info :
Work more even rounds to reach desired total tube length. For a typical ornament length of about 16cm, aim for around 50 rounds total before starting decreases (round count will vary with yarn thickness and hook). Keep a note of how many rounds you work to match ornaments when making a set.
Round 51 :
(6 sc, 1 dec) x 3 (27)
Round 52 :
(5 sc, 1 dec) x 3 (24)
Info :
Begin decreasing to form the bottom cap. Start stuffing the tube lightly through the open bottom as you decrease; the core wire will go through the center so stuffing is only to give body and prevent beads from sinking into the tube.
Round 53 :
(4 sc, 1 dec) x 3 (21)
Round 54 :
(3 sc, 1 dec) x 3 (18)
Round 55 :
(2 sc, 1 dec) x 3 (15)
Round 56 :
(1 sc, 1 dec) x 3 (12)
Info :
Fasten off leaving a 25–30 cm tail. Thread tail through remaining 6 sts and pull tight to close. Secure knot and weave tail through interior of tube several rounds to hide it. Insert thin floral wire from top opening down through the center until it emerges from the bottom hole before final closure, or insert after widening small opening at top. If inserting the wire after closing top, you may need to open a small stitch and reclose around it later.
— Beading as You Go (Dense & Beaded Variants) :
Info :
To add beads while crocheting, pre-thread beads onto your working yarn before starting. Slide beads into position when you reach the stitch where you want the bead to sit: insert hook into stitch, slide bead close to hook, then pull loop through and complete the sc so the bead is secured on the outside. Typical placement is every 8–10 sts, staggered every 2–3 rounds to create a diagonal effect when twisted.
Info :
For pearl beads of 3–4mm use a needle to sew them in after finishing if threading onto yarn first is difficult. Use a short silk or upholstery needle and secure each bead with a knot inside the tube to hide ends.
— Beaded Spiral (worked-in beads) :
Round 1 :
6 sc in magic ring (6) — thread bead sequence onto yarn before starting (if possible)
Round 3 :
(1 sc, 1 inc) x 6 (18)
Round 4 :
(2 sc, 1 inc) x 6 (24)
Round 5 :
(3 sc, 1 inc) x 6 (30)
Round 6-10 :
1 sc in each st (30) — add a bead on round 7 into stitch 3, 11, 19, 27
Info :
Stagger bead placement every 2–3 rounds so that when you twist the tube the beads trace a spiral line. For larger beads, place them slightly more spaced to avoid bunching.
Round 11-30 :
1 sc in each st (30) — add beads every 3 rounds in positions offset by 4 sts each new band
Info :
If you run out of beads on your yarn strand, stop and attach a new strand by tying small knot and weaving the tail inside the tube; this will be hidden and secure.
Round 31-50 :
1 sc in each st (30) — continue bead pattern until desired length
Round 51-57 :
(6 sc, 1 dec) x 3 (27); (5 sc, 1 dec) x 3 (24); (4 sc, 1 dec) x 3 (21); (3 sc, 1 dec) x 3 (18); (2 sc, 1 dec) x 3 (15); (1 sc, 1 dec) x 3 (12)
Info :
Leave a long tail, thread core wire, close bottom, and weave in ends. Attach bell or charm to bottom by sewing through the closed loops or using a small jump ring if the charm has a loop.
— Lace Spiral (Openwork Mesh) :
Info :
The lace spiral is an airy openwork version made with alternating chains and single crochets in rounds to create a lacy net that collapses into a spiral when twisted. Use a lighter metallic thread and a small hook to create crisp loops.
Round 1 :
6 sc in magic ring (6)
Round 3 :
(1 sc, 1 inc) x 6 (18)
Round 4 :
(2 sc, 1 inc) x 6 (24)
Round 5 :
(3 sc, 1 inc) x 6 (30)
Round 6 :
(ch 2, skip 1, sc in next) x 30 (30 ch-2 spaces)
Info :
Work into the chain spaces for the next rounds to create a delicate mesh. If your thread is very fine, use 2.25–2.5mm hook for a neat uniform lace.
Round 7 :
sc in each ch-2 space (30)
Round 8 :
(ch 3, sc in next) x 30 (30 ch-3 loops)
Round 9-12 :
sc in each ch-3 space (30)
Info :
Alternate loop rounds and sc rounds to build height and openwork. The chain loops will give a lacy scallop appearance when spiraled. Add small seed beads to chain loops by threading onto yarn and sliding into place before completing the sc round.
Round 13-30 :
Repeat rounds 8–12 pattern to desired length (30 sts per round)
Round 31-40 :
Begin decreasing with (3 sc, 1 dec) x 6 (24); (2 sc, 1 dec) x 6 (18)
Round 41 :
(1 sc, 1 dec) x 6 (12)
Round 42 :
6 dec (6) — close and fasten off
Info :
Insert wire core before final closing. Because lace is openwork, be careful when threading the wire through the center — use a needle or a beading awl to guide it.
— Alternate Construction: Spiral From Chain Strip (Optional Method) :
Info :
If you prefer not to work rounds, you can crochet a long narrow rectangle (strip) and stitch its short ends together to form a tube, or leave it flat and starch lightly, then twist onto wire. This method uses dc and ch spacing to build a ruffled ribbon that will still spiral when suspended.
Round 1 :
Chain 8, sc in 2nd ch from hook and across (7 sc)
Round 2-120 :
ch 1, turn, sc across (7 sc) — repeat to desired length
Info :
Stitch short ends together with slip stitch to form a loop, then insert wire and twist the loop along the wire to form spirals. This produces a flatter spiral with decorative picots or scallops if desired.
— Hanging Loop & Top Bead Cap :
Round 1 :
Attach yarn at top center (open top) and ch 20 (or desired loop length), sl st into base to make loop. Fasten off and weave tail inside.
Info :
For a sturdier hanging loop, make a short chain of 20–30 using jute or twine and whipstitch it into the top stitches from the inside. Add a decorative star bead or bead cap at the top by stringing it on before closing the top cap.
Round 2 :
Optional: Work a small cap to cover the top opening — 6 sc in mr, 6 inc (12), (1 sc, inc) x 6 (18), sl st to closure and sew cap over opening
Info :
If your top bead has a large hole, thread the hanging twine through the bead first then through the tube and secure with a knot above the bead. This provides a neat finished look as seen in the photos where beads and star charms top the spirals.
— Bottom Charm Attachment :
Info :
Choose a small bell, star, snowflake or novelty charm. You can attach it by sewing through the base stitches before fully closing, or by adding a jump ring through a closed loop when the bottom has been cinched shut. If you want the charm to dangle, attach a small chain or jump ring to the bottom tail before closing and pull it through so it hangs outside the tube.
Round 1 :
If sewing charm inside loop: before final cinch, thread small jump ring through last 6 stitches and secure charm; then pull tail to close around ring.
Info :
For bells that jingle, leave a small interior cavity or add a tiny bead inside the bottom cap so the bell can move and ring. Metallic charms can be attached with a small eye pin or jump ring using pliers.
— Finishing & Shaping :
Info :
After you have closed the bottom and woven in ends, gently bend the wire into a corkscrew spiral shape. The tighter you bend, the steeper the spiral. Use pliers to form smooth curves and avoid kinks. If the tube resists bending, loosen the wire slightly or remove, reshape and reinsert. You can also lightly steam-block the crochet (with care for metallic threads) to help it keep a softer curve.
Info :
For a consistent set, make a template from thick cardboard: wrap the ornament around the template to measure spacing between coils, then use the same template when shaping each finished piece.
— Variation Tips & Colorwork :
Info :
Change color bands by switching yarn at the beginning of a round. Carry the unused color inside the tube and secure every 6–8 rounds. For striped spirals, alternate colors every 6–10 rounds. Metallic thread can be held together with cotton for a subtle shimmer.
Info :
To create a two-tone look like alternating green and silver spirals, work rounds 6–12 in color A, change to color B at round 13, then alternate. Keep color changes at even round intervals to preserve a regular stripe when the spiral is formed.
— Stitch & Tension Advice :
Info :
Work tightly. Use a hook 0.5 mm smaller than recommended for the yarn if you find holes forming. Keep a stitch marker in the first stitch of each round and move it at the end of the round to avoid accidentally increasing or missing stitches in continuous rounds.
Info :
When using metallic thread or slippery yarn, keep stitch loops short and use a firm but not overly tight tension to avoid distorting the metallic thread. A small amount of craft glue on knot tails prevents unraveling on metallic threads.
— Bead Embellishment (After Finishing) :
Info :
If you prefer not to thread beads onto yarn while crocheting, sew beads on afterwards using a sharp beading needle and strong thread. Anchor each bead with two small stitches into the tube fabric. For pearly beads, secure with a small dab of clear fabric glue inside the tube to ensure they stay in place.
Info :
For spaced clusters as shown in photos, place beads 1.5–2cm apart along the length of the spiral and in diagonal offsets so they follow the twists of the finished piece. Use matching or contrasting bead sizes for depth and texture.
— Troubleshooting :
Info :
If the spiral does not sit nicely, try loosening the wire center by a few millimetres, or reshape the curves with pliers. A wire that is too stiff causes sharp kinks rather than gentle curves; use a softer floral wire if needed. If beads pull the tube out of shape, reposition them slightly further apart to distribute tension evenly.
Info :
When a tube looks uneven in thickness, block it by gently steaming or by shaping over a bottle and allowing to cool in place with the wire inside. This helps even out slight variations in stitch tension.
— Final Quality Check :
Info :
Before gifting, inspect all beads and charms for secure attachment. Tug on hanging loop gently to ensure it is sewn in firmly. Trim and hide all yarn tails. If using ornaments on a tree that will be handled by children, consider embroidering bead dots instead of using small detachable beads to avoid choking hazards.
These twisted spiral ornaments are a lovely way to add handmade charm to your holiday decor — delicate, sparkly and surprisingly quick to make. Each one can be customized with beads, bells and ribbons to suit your tree or wreath. Making a set is a joyous weekend project that yields beautiful results to gift or keep. 🎄✨ Handmade details make each spiral unique and heartwarming — enjoy every stitch! 🧶🎁