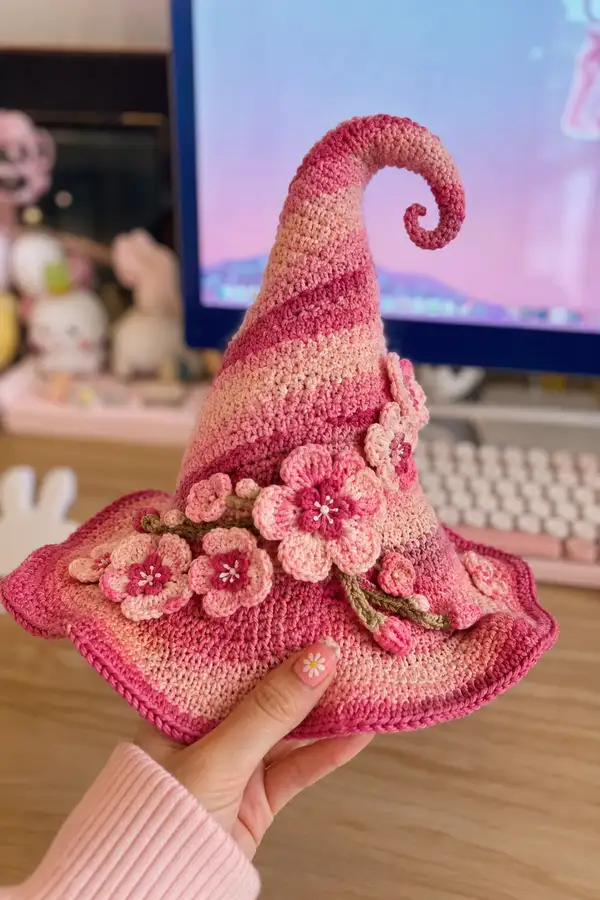
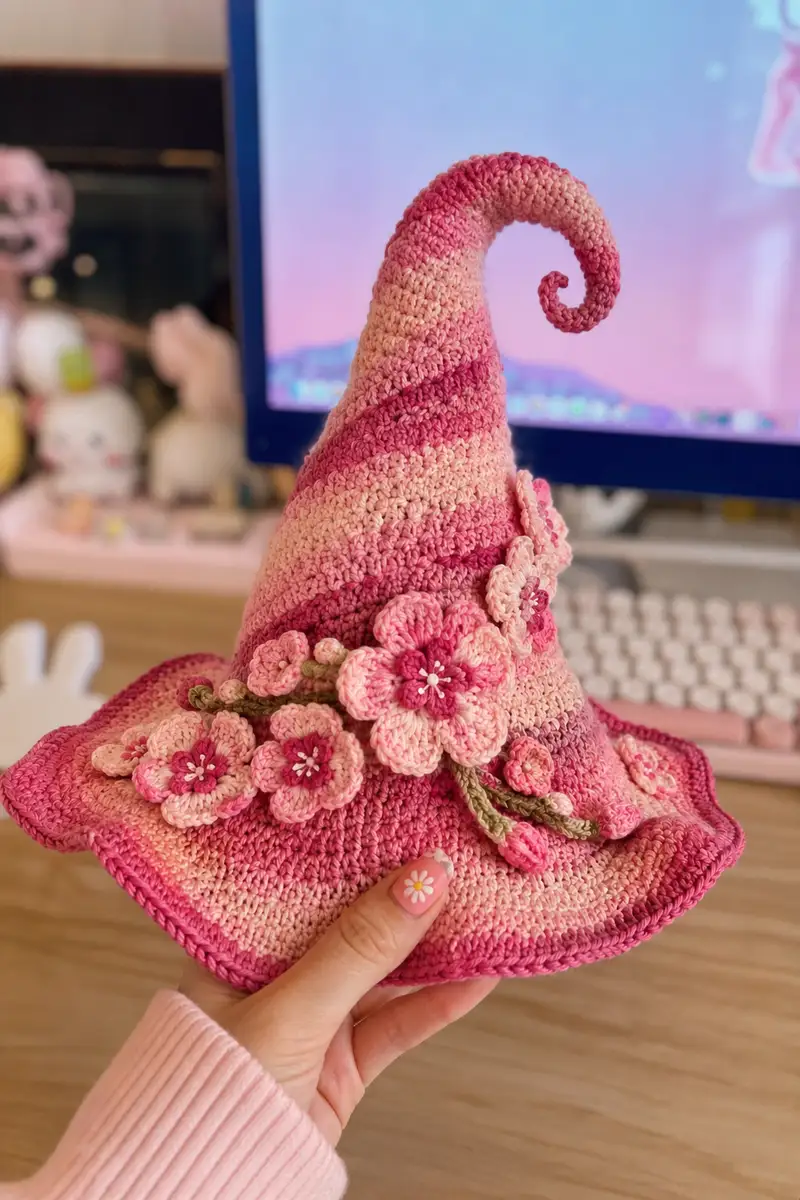
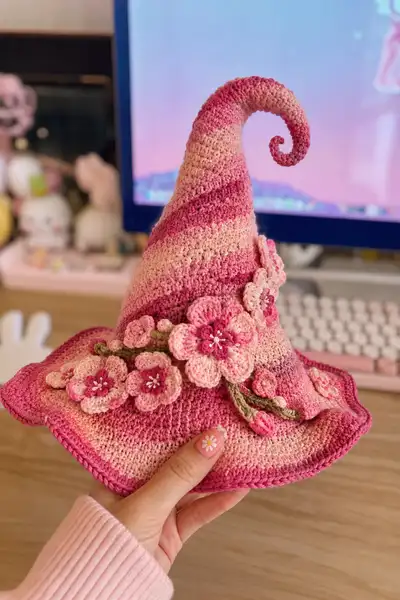
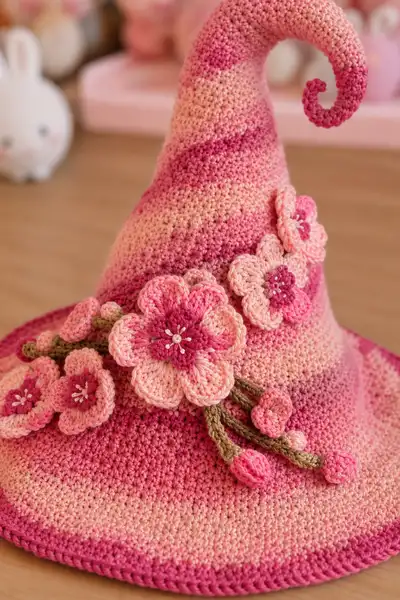
A charming large witch hat crocheted in a blush-to-berry ombre yarn with a whimsical curled tip and a sprig of layered cherry-blossom motifs. The wide wavy brim, spiral cone, and delicate flower clusters give this accessory a fairy-tale feel—perfect as a decorative prop or a statement display piece. The pattern uses simple stitches with shaping tricks to create the spiral cone and sculpted brim, plus step-by-step floral embellishments.
Progress Tracker
0% Complete
— Crown (main cone base) :
Round 1 :
6 sc in magic ring (6)
Round 3 :
(1 sc, inc) x 6 (18)
Round 4 :
(2 sc, inc) x 6 (24)
Round 5 :
(3 sc, inc) x 6 (30)
Round 6 :
(4 sc, inc) x 6 (36)
Round 7 :
(5 sc, inc) x 6 (42)
Round 8 :
(6 sc, inc) x 6 (48)
Info :
This establishes the crown beginning. Work in continuous rounds (spiral) for seamless shaping; use a stitch marker to mark round start. The ombre yarn will naturally stripe—plan which bands will be at the cone base so darker bands fall at the brim if desired.
Round 9 :
1 sc in each st (48)
Round 10 :
1 sc in each st (48)
Round 11 :
1 sc in each st (48)
Round 12 :
1 sc in each st (48)
Info :
Work even for these rounds to build height of the lower crown. If you prefer a taller crown base, continue even rounds here in increments of 2-4 rounds until the desired height is reached before tapering.
Round 13 :
(6 sc, dec) x 6 (42)
Round 14 :
1 sc in each st (42)
Round 15 :
(5 sc, dec) x 6 (36)
Round 16 :
1 sc in each st (36)
Info :
Begin gentle tapering for the conical shape. Stuffing is optional in the lower crown—this version of the hat is primarily unstuffed to remain floppy; if you want a stiffer cone base, insert a small light support ring (cardboard or interfacing) inside at the brim join later.
Round 17 :
(4 sc, dec) x 6 (30)
Round 18 :
1 sc in each st (30)
Round 19 :
(3 sc, dec) x 6 (24)
Round 20 :
1 sc in each st (24)
Info :
At this point you have reduced the crown to a narrower cone. Decide how much of the top will become the spiral tip. For a long spiral, continue with more rounds working tighter decreases; for shorter tip, proceed to spiral-start rounds sooner.
Round 21 :
(2 sc, dec) x 6 (18)
Round 22 :
1 sc in each st (18)
Round 23 :
(1 sc, dec) x 6 (12)
Round 24 :
1 sc in each st (12)
Info :
We now have a narrow top suitable for beginning the spiral tip. Keep rounds fairly tight to encourage the cone to hold shape when spiraled. If using a thin wire for structure, prepare it now (see spiral tip Info sections below).
Round 26 :
Work 6 sc tightly around previous round (6) - this will act as the first pivot for the spiral tip
Info :
Fasten off if you want to work the cone and brim separately; alternatively continue in same yarn into the spiral tip. If you plan a seamless cone with integral brim, continue as instructed into Spiral Tip section directly from crown top.
— Spiral Tip (curl extension) :
Info :
Choose whether to make the spiral crocheted or reinforced with wire. For a sturdy curl that remains upright, thread a thin floral wire inside the working spiral, securing one end hidden in the cone and wrapping the spiral around it as you go. If crocheting only, work tighter than usual (1.5-2 sizes smaller hook) to keep the curl firm.
Round 27 :
Using the same yarn, ch1, 6 sc in current 6 sts (6) - (Work in rounds around these 6 as a small tube for length)
Round 28 :
Inc in each st (6 inc) to lengthen slightly and prevent collapse (12)
Round 29 :
1 sc in each st (12)
Round 30 :
(2 sc, inc) x 4 (16)
Info :
Begin gently curling the tube by working a few rounds with incremental decreases on the outer curve side; this creates a spiral curvature when you shape it manually. If using wire, insert the wire now along the center of the tube and continue crocheting around it loosely to encase.
Round 31 :
1 sc in each st (16)
Round 32 :
(3 sc, dec) x 4 (12)
Round 33 :
1 sc in each st (12)
Round 34 :
(2 sc, dec) x 4 (8)
Round 35 :
1 sc in each st (8)
Round 36 :
(1 sc, dec) x 4 (4)
Round 37 :
4 sc around (4) - if you want a tightly coiled end, continue 1 sc rounds until coil length is achieved then fasten off, leaving tail to sew into the cone
Info :
To create the visible spiral curve like the photo, hold the crocheted tube and roll it inwards while stitching the outside edge with slip stitches to fix the curl into place. If using wire, shape the wire into the spiral then slide the crocheted tube around and sew the edges so the coil is tight and fixed.
— Brim (flat disc and wavy edge) :
Round 1 :
Join yarn at crown base (where crown meets brim) and ch1. Work 6 sc evenly around join position if seam exists to create a small starting ring for the brim (6)
Round 3 :
(1 sc, inc) x 6 (18)
Round 4 :
(2 sc, inc) x 6 (24)
Round 5 :
(3 sc, inc) x 6 (30)
Round 6 :
(4 sc, inc) x 6 (36)
Round 7 :
(5 sc, inc) x 6 (42)
Round 8 :
(6 sc, inc) x 6 (48)
Info :
You are now working a flat disc for the brim. If your yarn ombre band creates a darker ring near the brim edge in the photos, allow the gradient to position naturally; alternate rounds if you want to emphasize stripes. Keep increases evenly spaced to maintain a flat surface; if you see cupping, add extra increase rounds, if ruffling occurs, reduce increases in next round.
Round 9 :
(7 sc, inc) x 6 (54)
Round 10 :
(8 sc, inc) x 6 (60)
Round 11 :
(9 sc, inc) x 6 (66)
Round 12 :
1 sc in each st (66)
Round 13 :
1 sc in each st (66)
Info :
These rounds build the main brim surface. If you prefer a wider brim, continue increasing rounds in the pattern (increase every 10–12 stitches across rounds) until desired diameter is achieved. For the pictured hat, the brim diameter at this point should be approximately 10-12 inches unstretched with worsted yarn.
Round 14 :
(10 sc, inc) x 6 (72)
Round 15 :
1 sc in each st (72)
Round 16 :
1 sc in each st (72)
Round 17 :
(11 sc, inc) x 6 (78)
Round 18 :
1 sc in each st (78)
Round 19 :
1 sc in each st (78)
Info :
Now create the wavy edge shown in the photos. The wavy edge is made by increasing heavily over a short sequence then working a few tight rounds to make the brim ruffle. Placement of deeper pink band at outer brim is achieved by allowing the ombre to progress; consider changing to the deeper pink yarn for the last 2-3 brim rounds to emphasize a colored trim if your gradient isn't strong.
Round 20 :
(12 sc, inc) x 6 (84)
Round 21 :
1 sc in each st (84)
Round 22 :
(1 sc, ch2, skip 1 st) x around to create crocheted scallop base (scallop spacing varies by gauge)
Round 23 :
Join each scallop with 5 dc cluster in same sp then sl st to next scallop base, rep around for a wavy scalloped edge (approx 28 clusters)
Round 24 :
1 sc around edge to tidy up (84)
Info :
If you want a slightly stiffer brim as in the photos that hold shape, block the brim on a flat surface after finishing and spray lightly with a stiffening mixture (fabric stiffener diluted) or attach a thin circle of interfacing under the brim before final edging. Avoid heavy stiffeners that will make the hat hard to store.
— Brim Trim (contrast edge) :
Round 25 :
Switch to deeper pink (or continue ombre if it matches). 1 sc around evenly (84)
Round 26 :
(2 sc, skip 1, 3 dc in next, skip 1, 2 sc) rep around for decorative ridge (84)
Round 27 :
1 sc in each st BLO to create a neat ridge and slight curl (84)
Info :
Work the final edging with a slightly smaller hook if you want a crisp finish. We used a smaller hook to make the edge visible and slightly raised in the photo.
— Large Layered Flower (make 3 for cluster) :
Round 1 :
6 sc in magic ring (6)
Round 3 :
1 sc in each st (12)
Round 4 :
(1 sc, ch2, 3 dc, ch2, sl st in next) repeat to form 6 petal bases around (creates petal arches)
Round 5 :
In each petal arch: (sl st, sc, hdc, 3 dc, hdc, sc, sl st) to form fuller petal (work in contrasting pale pink for outer petals) - rep x6
Info :
Use a slightly smaller hook for petals than the main hat to make them sit neatly. Keep tension slightly looser on petals for soft ruffle. For the layered look in photos, make a second smaller layer using deeper pink and stitch it centered on top of the larger petals.
Round 6 :
Fasten off outer petal layer leaving long tail for sewing. Make inner layer now: 6 sc in magic ring (6)
Round 8 :
Work (sl st, ch2, 3 dc, ch2, sl st) x6 to create 6 small arches
Round 9 :
In each small arch: (sl st, sc, hdc, 3 dc, hdc, sc, sl st) - shape small petals (6)
Round 10 :
Sew small layer on top of large layer using long tail and mattress stitch; attach a small bead or work 6-8 French knots with light cream thread in center to mimic stamens
Info :
Make three of these layered flowers. Vary one of them to be slightly smaller by skipping an outer petal round for the more natural cluster effect like in the photos. Secure beads firmly or use embroidery cotton for strong French knots.
— Small Blossom (make 4-6) :
Round 1 :
5 sc in magic ring (5)
Round 3 :
(sl st, ch2, 3 dc, sl st) x5 to create 5 rounded petals
Round 4 :
In each petal: (sc, hdc, 3 dc, hdc, sc) to shape and slightly curl petals (5)
Round 5 :
Fasten off leaving tail for sewing; add single cream-colored bead or 4 small French knots for center
Info :
These small blossoms are used as accents around the large flowers and along the brim. Work them with the lighter blush color for contrast and scatter them in an organic arrangement for realism.
— Buds (make 5-7) :
Round 1 :
6 sc in magic ring (6)
Round 2 :
1 sc in each st (6)
Round 3 :
(sc, inc) x3 (9)
Round 4 :
1 sc in each st (9)
Round 5 :
Dec, 1 sc, dec, 1 sc, dec (6) - shape into a small oval
Round 6 :
Fasten off leaving long tail. Sew onto stems so bud tip faces outward.
Info :
For elongated tulip-like buds, make a short tight cylinder then close one end. Use deeper pink for closed buds and add a tiny lighter stitch on tip to mimic highlight as in the photos.
— Stems and Tendrils (make several lengths) :
Round 1 :
With sage yarn, ch 30 (or desired stem length). Join to form a tight i-cord by working sc through back loops only across chains or use a 3-sc i-cord method to make a tubular stem
Round 2 :
Work 1 sc in each ch back along chain turning to create a double-thickness cord; for tubular effect pick up ends and sc around to encase
Round 3 :
Repeat until desired thickness achieved; fasten off leaving long tail for sewing to hat
Info :
Stems in the photo are slightly twisted cords; to replicate, twist two cords together before sewing or plait three cords for natural texture. Keep stems slightly stiff by adding a light interior thread or thin wire if you want them to hold a posed curve.
— Leaves (make 4-6) :
Round 1 :
Ch7, sc in 2nd ch from hook, hdc, dc, hdc, sc, sl st to tip of leaf (5 stitches shaped)
Round 2 :
Turn and work 1 sc along other side of chain to mirror shape; sl st to join base, fasten off leaving tail (approx 12 sts)
Round 3 :
Using needle, embroider a central vein with a contrasting stitch (3 straight stitches down center)
Info :
Leaves are mainly decorative; make them slightly smaller than stems in the photo. Crochet loosely for a natural drape and press lightly flat before attaching to set shape.
— Assembly of Floral Spray :
Info :
Arrange the three large layered flowers diagonally across the front of the hat near the brim-crown junction as in the photo. Place small blossoms and buds to fill gaps and follow the flow down the brim. Pin each piece before sewing to check placement and balance.
Step 1 :
Position largest layered flower slightly off-center on the front-left of the crown seam, approximately where crown round 11 meets brim round 6. Pin in place.
Step 2 :
Arrange two medium-large layered flowers staggered behind and above the main flower so they overlap slightly; pins should hold petals but not compress them.
Step 3 :
Sew flowers using long tails and small whip stitches through the base of each flower layer, catching a few hat stitches and securing each layer individually; weave tails into hat interior.
Step 4 :
Sew stems under the flower cluster so they curve down across the brim and end in small buds near the brim edge; secure stems with hidden stitches along their length.
Step 5 :
Add small blossoms and leaves between flowers to create natural negative spaces and fullness; use tiny stitches to anchor centers and stems so the cluster sits flat against the crown.
Info :
If you used wire in stems, fold wire ends back on themselves and wrap with yarn before sewing to avoid sharp ends poking through; hide ends inside hat interior or between layers of petals.
— Decorative Details and Finishing Touches :
Round 1 :
With contrasting light cream embroidery thread, stitch 6-10 French knots into the center of each large flower to mimic stamens; add a small bead if desired
Round 2 :
Weave in all ends securely and trim close to work; for visible joins use a matching yarn to avoid contrasting knots
Info :
Lightly steam-block the hat if fibers allow to encourage the brim and cone to hold their shape. Do not overheat; check fiber label before steaming. If a rigid curl is desired, gently bend any internal wire to final shape and ensure wrapped yarn covers the wire end.
Final Step :
Give the hat a final grooming: adjust petals, flatten out the brim, and shape the spiral. Store flat with tissue paper inside the cone to retain shape if not worn.
This blush ombre spiral witch hat is the kind of project that feels like a little creative escape — sculptural, floral and utterly charming. As you crochet the cone, shape the spiral, and arrange the delicate cherry blossoms, each step adds personality and magic. The finished piece makes an enchanting display or gift, and the customizable elements let you make it uniquely yours. Enjoy the slow craftsmanship and the delight of seeing the ombre bands and petals come together. 🧶🌸