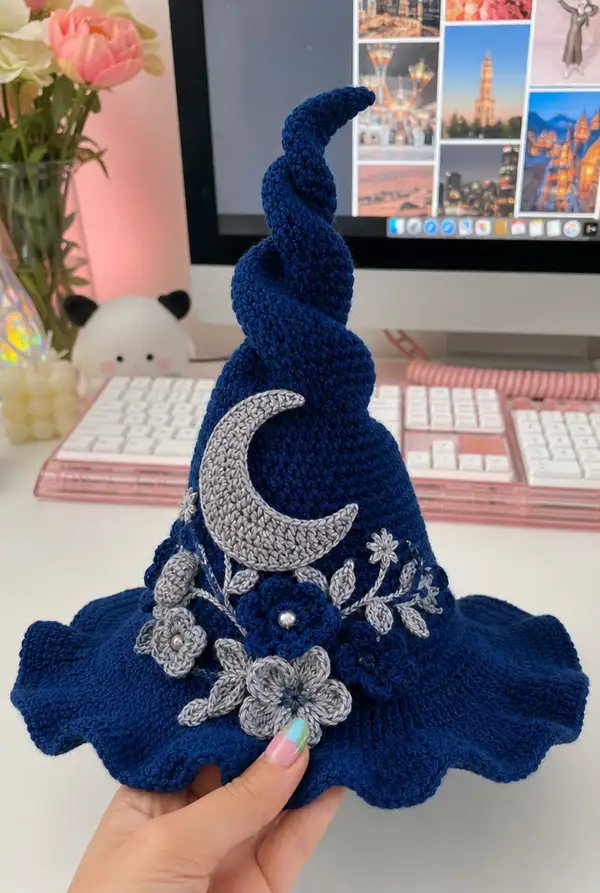
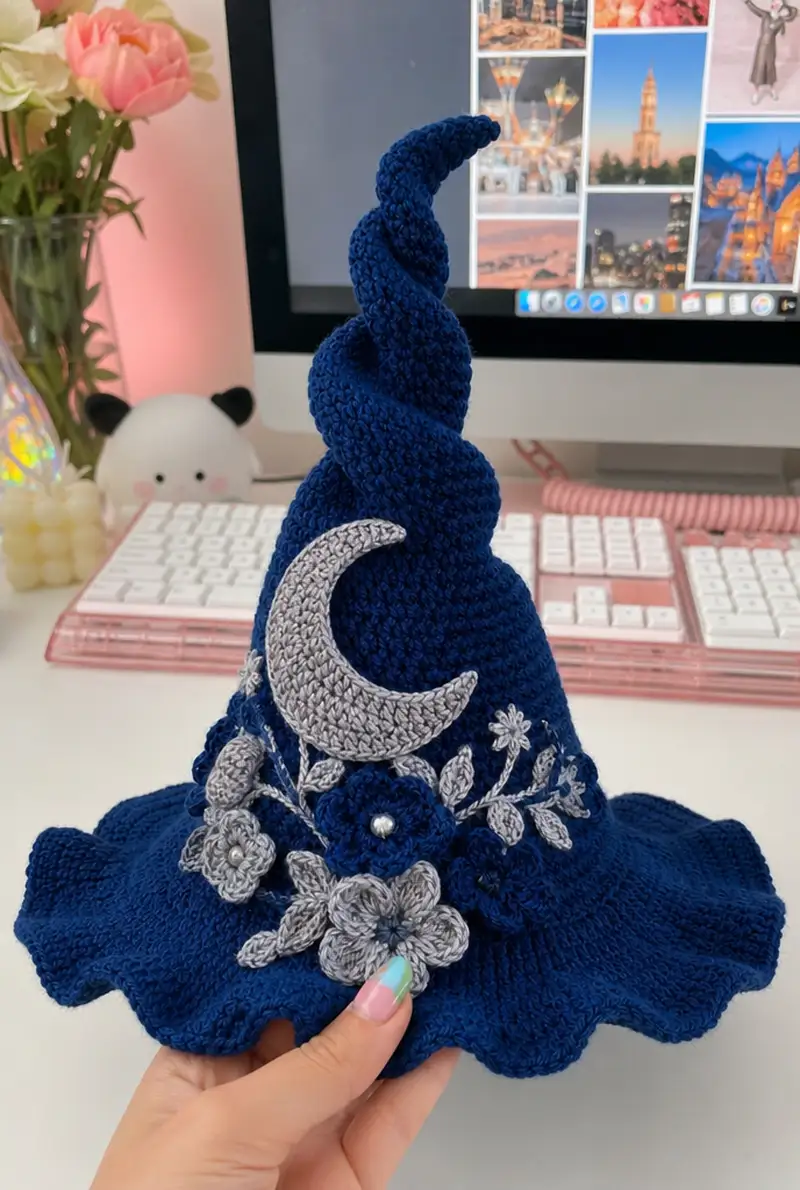
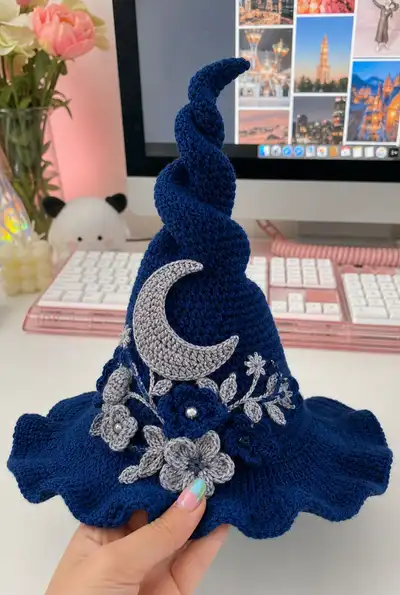
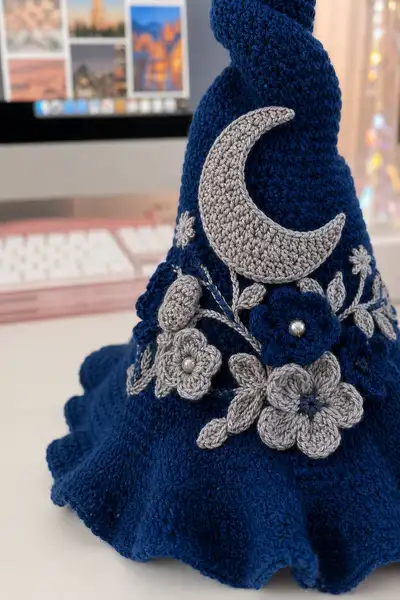
A dramatic midnight-blue spiral witch hat with a fluted ruffled brim, adorned with silver crescent moon and layered floral appliques. The pointed tip spirals elegantly for a whimsical silhouette while silver flowers, leaves and bead centers add a luxe finishing touch. Designed to be both decorative and wearable, this hat makes a statement on a shelf or as part of a costume. Detailed construction and many decorative pieces included for a satisfying, creative project.
Progress Tracker
0% Complete
— Crown & Cone (Top of Hat) :
Round 1 :
Make a magic ring and work 6 sc into the ring (6)
Round 2 :
Inc in each st around (12)
Round 3 :
(1 sc, inc) x 6 (18)
Round 4 :
(2 sc, inc) x 6 (24)
Round 5 :
(3 sc, inc) x 6 (30)
Round 6 :
(4 sc, inc) x 6 (36)
Info :
Work in continuous rounds (do not join) using a stitch marker to mark first stitch. This central crown forms the very top of the spiral tip.
Round 7 :
(5 sc, inc) x 6 (42)
Round 8 :
(6 sc, inc) x 6 (48)
Round 9-14 :
1 sc in each st (48)
Info :
These even rounds increase the initial cone height. Keep tension consistent to avoid waves between rows.
Round 15 :
(6 sc, inc) x 6 (54)
Round 16-20 :
1 sc in each st (54)
Info :
At rnd 20 you have the base of the upper cone. Decide width by counting finished circumference; this will determine how wide the hat body is.
Round 21 :
(7 sc, inc) x 6 (60)
Round 22-26 :
1 sc in each st (60)
Round 27 :
(8 sc, inc) x 6 (66)
Info :
These increases create a steady cone. If you want a taller, slimmer cone, reduce the number of increase rounds; for a fuller cone increase more.
Round 28-34 :
1 sc in each st (66)
Round 35 :
(8 sc, inc) x 6 (72)
Round 36-40 :
1 sc in each st (72)
Info :
Weave in or leave a long tail at the end of rnd 40 if you plan to use it for attaching the spiral reinforcement or to join to the hat body later.
— Mid-Cone Sculpting and Spiral Starting :
Round 1 :
1 sc in each st around working in continuous spiral (72)
Round 2 :
Work 12 sts BLO evenly across next rnd to create a faint ridge for texture, then 60 sc normally (72)
Round 3 :
(7 sc, dec) x 8 (64)
Info :
Begin gentle decreases to provide inward shaping that will help the spiral curve later. Use invisible decreases for neater appearance.
Round 4 :
1 sc in each st (64)
Round 5 :
(6 sc, dec) x 8 (56)
Round 6-7 :
1 sc in each st (56)
Round 8 :
(5 sc, dec) x 8 (48)
Info :
To form the start of the spiral twist, begin alternating rows of standard sc with a round of 'twist shaping' where you'll use surface slip-stitches and post stitches to bias the fabric. The combination of shaping and post stitch torque creates the spiral effect.
Round 9 :
1 sc in each st (48)
Round 10 :
Surface twist round: *sl st in next 2 sts, fpdc around next st (from front)* repeat across (48)
Round 11-12 :
1 sc in each st (48)
Round 13 :
(4 sc, dec) x 8 (40)
Info :
If you want a hollow spiral tip for inserting wire, stop and insert wire sleeve or lightly stuff the cone before completing the decreases. Fold wire ends back and cover with yarn tail so they do not poke.
Round 14 :
1 sc in each st (40)
Round 15 :
(3 sc, dec) x 8 (32)
Round 16-18 :
1 sc in each st (32)
Round 19 :
(2 sc, dec) x 8 (24)
Round 20 :
1 sc in each st (24)
Round 21 :
(1 sc, dec) x 8 (16)
Round 22 :
1 sc in each st (16)
Info :
At this point the cone is narrowing to the tip. Keep rounds neat; you will now begin to produce the visible spiral by alternating shaping with long front/post stitches to bias the fabric.
Round 23 :
Start spiral shaping: *hdc in next 3 sts, fpdc around next st, hdc in next 3 sts, sl st in next st* repeat to end (16 visible texture points)
Round 24-28 :
1 sc in each st, maintaining texture placement (16)
Round 29 :
(1 sc, dec) x 4 (12)
Round 30 :
1 sc in each st (12)
Info :
Fasten off leaving a 20-30cm tail if you will insert and wrap wire for final spiral shaping. Alternatively, leave long tail to weave in and tighten to close the point.
Round 32 :
Cut yarn leaving long tail and fasten off; use tail to close any small hole or to attach to the cone body when assembling.
— Main Hat Body (Lower Cone to Brim Join) :
Round 1 :
Join new yarn at the lower edge of the conical section (where rnd 40 of crown ended) and work 1 sc in each st around (72)
Round 2-6 :
1 sc in each st (72)
Info :
These rounds form the tall body of the hat. Work until the hat is the desired height before beginning the brim increases. Measure against the head or block to your preferred size — standard adult height is approx. 18-22 cm from base to where brim begins.
Round 7 :
(8 sc, inc) x 8 (80)
Round 8-12 :
1 sc in each st (80)
Round 13 :
(9 sc, inc) x 8 (88)
Round 14-18 :
1 sc in each st (88)
Info :
If you plan to embroider stems and leaves, note where you want the moon cluster to sit and position marker stitches at that location now (roughly 10-15% of the circumference from the front).
Round 19 :
(10 sc, inc) x 8 (96)
Round 20-24 :
1 sc in each st (96)
Round 25 :
(11 sc, inc) x 8 (104)
Round 26-30 :
1 sc in each st (104)
Info :
These increases create a slight bell shape before the brim. If you prefer a straighter cone, omit the latest increase round(s).
Round 31 :
1 sc in each st BLO to create a neat brim-join edge (104)
Round 32 :
1 sc in each st (104)
Round 33 :
1 sc in each st (104)
Info :
At rnd 33 the lower edge is prepared for the ruffled brim. Mark the first stitch where the brim will begin so you can return easily if interrupted.
— Brim & Ruffled Edge :
Round 1 :
Join new yarn at first marked st. Work (1 sc, inc) across to create a small flare (156) — math: (1 sc, inc) x 52 = 156
Info :
We are increasing at a 1:1 rate across the full circumference to start the ruffle. The base count is 104; this round increases to 156 stitches to begin a full ruffle.
Round 2 :
1 sc in each st (156)
Round 3 :
(2 sc, inc) x 52 (208)
Round 4 :
1 sc in each st (208)
Round 5 :
(3 sc, inc) x 52 (260)
Info :
By working progressive increase rounds (1:1 then 2:1 then 3:1) the brim will begin to ripple. Adjust the number of increases to achieve tighter or looser ruffles.
Round 6 :
1 sc in each st (260)
Round 7 :
(4 sc, inc) x 52 (312)
Round 8 :
1 sc in each st (312)
Round 9 :
(5 sc, inc) x 52 (364)
Round 10 :
1 sc in each st (364)
Info :
If the brim becomes extremely wide, you can reduce future increase intensity (for example switch to (3 sc, inc) repeats). Keep track of exact stitch counts for a balanced ruffle.
Round 11 :
Work decorative scallop: *skip 1 st, 5 dc in next st, skip 1 st, sl st in next st* repeat around (creates visible scallops)
Round 12 :
Sl st evenly into scallop joins to tidy and secure scallops (same count as previous round's repeats)
Round 13 :
Finish with 1 sc in each st for one tidy edge round. Fasten off and weave in ends (364)
Info :
Block the brim flat and shape scallops while damp for crisp edges. Insert optional wire into the brim edge tunnel (if you created one) to hold shape permanently.
— Crescent Moon Applique (Make 1) :
Round 1 :
With silver yarn, ch 4, join to form a ring and work 8 hdc into ring (8)
Round 2 :
(1 hdc, inc) x 4 (12)
Round 3 :
(2 hdc, inc) x 4 (16)
Info :
This small circle becomes the thick inner base for the crescent. Work loosely enough to allow flattening into a crescent shape later.
Round 4 :
Sl st across 4 sts to create a gentle crescent curve on one side; on the opposite edge work 8 sc to elongate and thin the crescent shape (24 total, varying tensions)
Round 5 :
Fold the piece gently so that the elongated edge overlaps the inner ring by 2-3 stitches and join with sl st along overlap to create a crescent. Reinforce by sewing with yarn needle along seam.
Round 6 :
Edge round: With sc evenly around the entire crescent to tidy and make it slightly raised (approx. 30 sc depending on seam). Fasten off and leave long tail for sewing.
Info :
The moon is made to be slightly padded. Optionally add thin scrap felt or small bit of stuffing behind the moon before sewing onto hat for a raised effect.
— Large Layered Flower A (Make 2) :
Round 1 :
With navy yarn, mr, 6 sc in ring (6)
Round 2 :
Inc in each st around (12)
Round 3 :
(1 sc, inc) x 6 (18)
Round 4 :
Ch 2, *3 dc in next st, sl st in next* repeat 6 times to form 6 petals attached to center. Fasten off and leave tail (work two petals rounds for fullness)
Info :
To make this flower layered, create another slightly larger navy round with more dc clusters and place underneath. Use a pearl bead or small button in the center and sew through several times to secure.
Round 5 :
Make a second layer: ch 2 from back of the flower center, *5 dc in next st, sl st in next* repeat 6 times to form larger petals. Fasten off and weave tails through center several times to secure layers together.
Round 6 :
Sew a pearl bead in center with silver thread or yarn and secure at back. Leave long tail for later sewing to hat.
— Medium Flower B (Make 3) :
Round 1 :
With silver yarn, mr, 6 sc in ring (6)
Round 2 :
(1 sc, inc) x 3 (9)
Round 3 :
Ch 2, *3 dc in next st, sl st in next* repeat 3 times to form 3 petals. Fasten off leaving tail for sewing.
Info :
These smaller silver flowers pair with the navy ones for contrast. Pin them in place and vary placement before sewing so composition feels organic.
— Small Flower C (Make 3-4) :
Round 1 :
With silver yarn, ch 4, join, ch 1, 10 sc into ring (10)
Round 2 :
*ch 2, sl st into same st* repeat 5 times to create small star petals; fasten off and leave tails (10)
Info :
Small flowers can be stacked or used as filler; add tiny bead centers for sparkle.
— Leaves (Make 8-12) :
Round 1 :
With silver yarn, ch 8, sc in 2nd ch from hook, hdc in next, dc in next 2, hdc in next, sc in next, sl st in last. Turn and sl st along opposite side of chain to form closed leaf; fasten off (approx. 7-9 sts)
Round 2 :
Refine leaf: with long tail, embroider a midrib using long running stitches with silver yarn to give the leaf shape more definition.
Info :
Make leaves in several sizes: use ch 6 for small, ch 10 for larger leaves. Leaves are lightweight and can be sewn flat or slightly cupped for dimension.
— Flower Bud / Oval Pod (Make 2) :
Round 1 :
With silver yarn, mr, 6 sc in ring (6)
Round 2 :
1 sc in each st (6)
Round 3 :
(1 sc, inc) x 3 (9)
Round 4-8 :
1 sc in each st (9) - work 5 rounds total to make a small elongated bud
Round 9 :
(1 sc, dec) x 3 (6)
Round 10 :
1 sc in each st (6), fasten off leaving tail to sew and shape into a bud; lightly stuff if you want a plump pod
Info :
These small oval buds add contrast and weight to the floral cluster. Sew them on at slightly different angles for a natural appearance.
— Stems & Surface Embroidery :
Round 1 :
Use silver yarn and a tapestry needle to couch a stem: anchor yarn with small stitches on the wrong side, then lay yarn on surface and sew down every 4-6 mm to secure the stem forming curves and branches.
Round 2 :
For raised veins on stems, use stem stitch or sl st surface embroidery in matching silver yarn; stitch leaves to stems with small hidden tacking stitches.
Info :
Plan your arrangement first by pinning appliques and stems in place. Once satisfied with composition, tack centers of each applique with a few stitches to hold and then permanently sew around edges.
— Bead Centers and Extras :
Round 1 :
Sew a small pearl bead into each flower center using matching thread. Secure with several passes and knot on the wrong side, then weave tail into the applique foundation.
Round 2 :
For extra shimmer, add 1-2 tiny seed beads along a stem or nestled in a flower cluster; sew through twice for security.
Info :
If the hat is intended for a small child or toy, omit beads and use crocheted circles or embroidered knots instead for child-safety.
— Assembly & Attachment :
Round 1 :
Arrange moon and flowers on front-right quadrant of the hat (approx. centered between brim edge and cone seam). Pin pieces and stems in place to confirm composition.
Round 2 :
Sew the moon on first: place moon slightly above the main flower cluster. Sew through the body of the moon and hat with mattress stitch or whip stitch every ~4 sts to secure flatly.
Round 3 :
Attach largest navy flower(s) directly beneath the moon, overlapping slightly. Use strong thread and sew through layers to hat fabric with several passes for stable attachment.
Round 4 :
Attach medium silver flowers, small silver fillers, buds and leaves around navy flowers. Sew each applique through multiple stitches and tack stems down with invisible stitches.
Round 5 :
Weave in all loose ends through several stitches at the back and trim short. Double-knot ends, then hide tails inside the hat fabric or trim close.
Info :
To make the cluster durable, tack each applique center to the hat first, then stitch around edges. Use hidden stitches and avoid puckering the hat fabric.
— Reinforcing the Spiral Tip (Optional) :
Round 1 :
For a crisp spiral that holds shape, insert thin millinery wire (folded and ends wrapped with tape or yarn) along the inside of the spiral tip before final tightening. Sew the base securely to the hat's inside to anchor.
Round 2 :
Wrap a narrow strip of felt inside the cone where wire rests to prevent abrasion to yarn and to make the interior neat.
Info :
Do not use wire if the hat will be worn by small children; instead add light stuffing or simply rely on crochet shaping and blocking to hold the spiral.
— Finishing Touches & Blocking :
Round 1 :
Steam-block the entire hat: dampen lightly, shape spiral tip upward, flatten and shape the brim scallops with pins on a round block or bowl sized to desired brim diameter. Allow to dry fully.
Round 2 :
Once dry, remove pins and reinforce any petals whose seams are showing with additional stitches. Touch up stray yarn ends with small neat knots and hide tails behind appliques.
Info :
Final blocking is key to professional-looking scallops and spiral. Press gently and avoid crushing the spiral's texture when steaming.
This sculptural midnight-blue witch hat combines classic shaping with delicate floral appliques and a crescent moon for a magical finish. The spiral tip and ruffled brim are beautiful to make and display, and the silver embellishments give the piece a classy, ethereal feeling. Whether used for display, cosplay, or gifting, each stitch adds personality and charm to the finished hat. 🧙♀️🌙✨