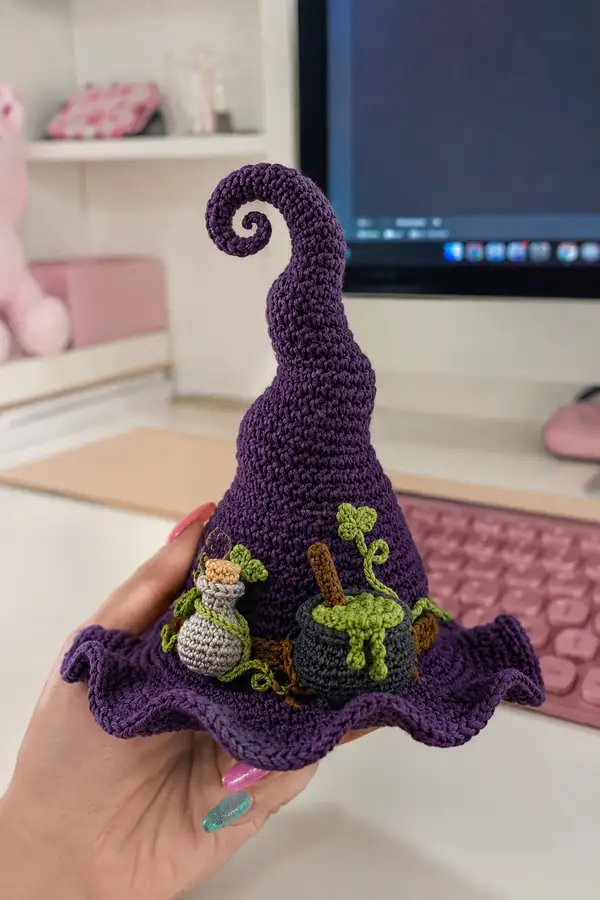
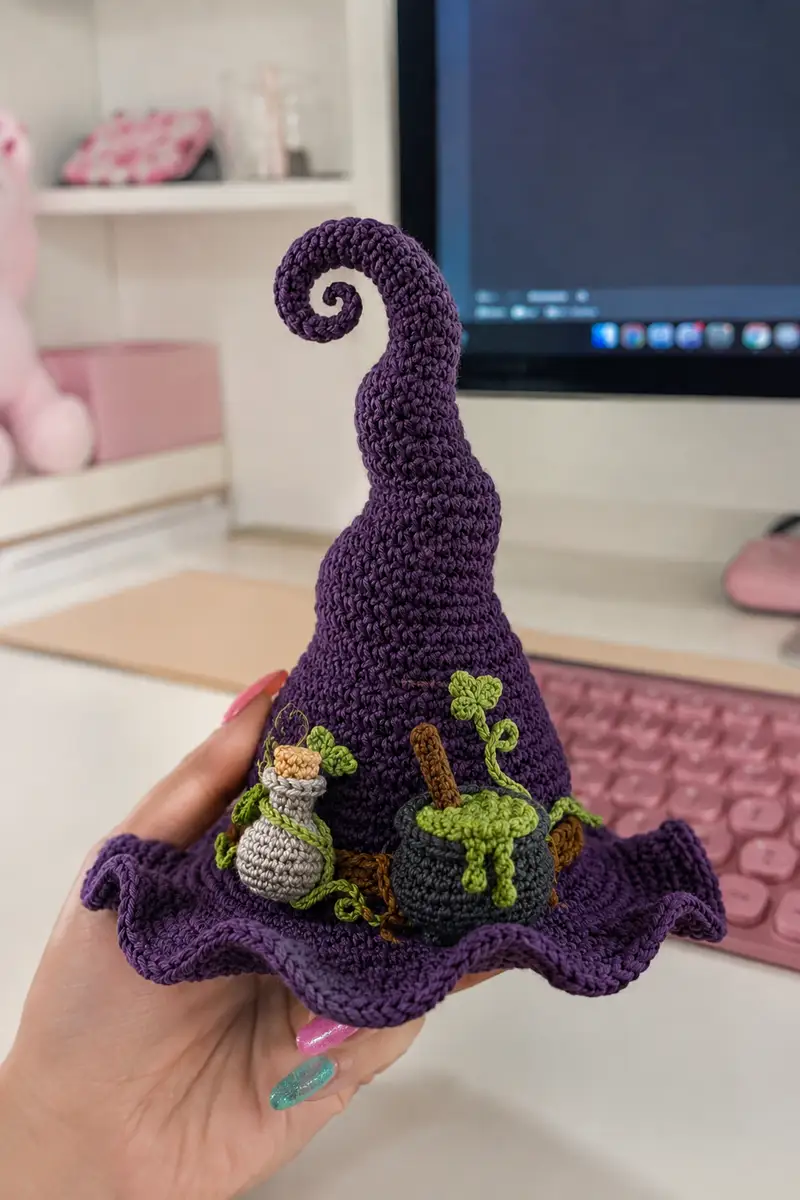
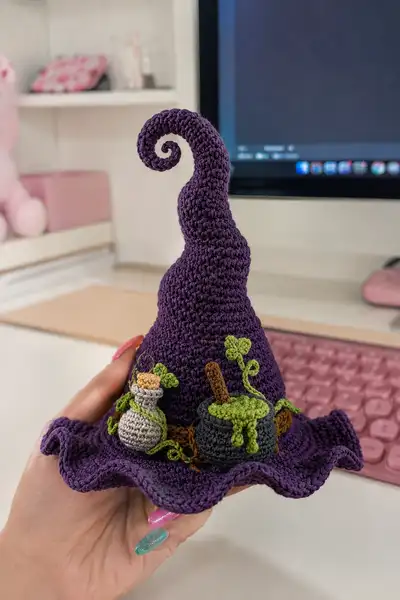
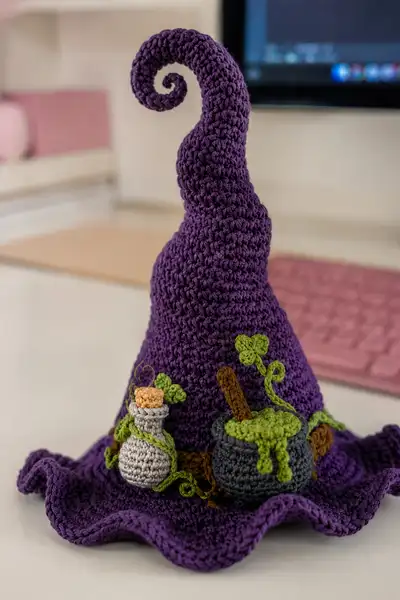
Create a whimsical purple witch hat amigurumi with a dramatic curled tip, ruffled brim, and tiny potion accessories. This pattern includes a sculpted cone body, a wavy brim, a spiral top you can wire for poseability, a little cauldron, potion bottle, wooden spoon and decorative vines and leaves. Worked in worsted weight yarn with detailed shaping and frequent tips so you can recreate the charming magical scene exactly as pictured.
Progress Tracker
0% Complete
— Hat Cone :
Round 1 :
6 sc in magic ring (6)
Round 3 :
(1 sc, inc) x 6 (18)
Round 4 :
(2 sc, inc) x 6 (24)
Round 5 :
(3 sc, inc) x 6 (30)
Info :
These increases create a stable base that will form the widest part of the cone near the brim. Use a marker to identify the first stitch of each round.
Round 6 :
(4 sc, inc) x 6 (36)
Round 7 :
(5 sc, inc) x 6 (42)
Round 8 :
(6 sc, inc) x 6 (48)
Round 9 :
(7 sc, inc) x 6 (54)
Round 10 :
(8 sc, inc) x 6 (60)
Info :
The cone base is intentionally wide to meet the ruffled brim later. Check your gauge: 60 sts at this round is the designed circumference. If your tension is loose, go down a hook size.
Round 11-16 :
1 sc in each st (60) (6 rounds total)
Info :
Work even to build height. Keep rounds consistent and count every few rounds to avoid accidental increases or decreases.
Round 17 :
(8 sc, inc) x 6 (66)
Round 18 :
1 sc in each st (66)
Round 19 :
(9 sc, inc) x 6 (72)
Round 20-23 :
1 sc in each st (72) (4 rounds)
Info :
This subtle increase section creates a slight belly in the cone that gives the hat a whimsical, bulging silhouette just above the brim.
Round 24 :
(9 sc, dec) x 6 (66)
Round 25 :
(8 sc, dec) x 6 (60)
Round 26-29 :
1 sc in each st (60) (4 rounds)
Info :
Begin tapering the cone here; this helps the conical silhouette transition smoothly upward. Do not stuff the cone like a plush head—only a light layer of stuffing or none at this stage to preserve a hollow, wearable/stackable structure.
Round 30 :
(7 sc, dec) x 6 (54)
Round 31 :
(6 sc, dec) x 6 (48)
Round 32 :
1 sc in each st BLO (48)
Info :
Working this round in BLO adds a subtle ridge that catches light and creates a faint banded texture on the cone. This also helps the decorative belt sit more securely.
Round 33 :
(5 sc, dec) x 6 (42)
Round 34 :
(4 sc, dec) x 6 (36)
Round 35 :
1 sc in each st (36)
Info :
From rounds 35-40 we'll shape the narrower upper cone before joining the spiral tip. At this stage you can insert a length of flexible wire down the center if you plan to make the spiral tip poseable. Leave the wire free at the top to feed into the spiral piece later.
Round 36 :
(3 sc, dec) x 6 (30)
Round 37 :
(2 sc, dec) x 6 (24)
Round 38 :
(1 sc, dec) x 6 (18)
Round 39 :
1 sc in each st (18)
Round 40 :
Fasten off leaving a 40 cm tail if you plan to sew the spiral tip in later, or continue directly into the spiral tip joining here if you prefer a seamless cone-to-spiral construction. If fastening off, weave tail to inside and knot temporarily.
Info :
Hat cone complete. The cone is designed to be mostly hollow with light shaping so the hat holds its sculpted silhouette without heavy stuffing. If you prefer a more sculpted look, add light stuffing in the lower belly area only. Keep the top unstuffed until the spiral tip is attached, or insert wire as directed for poseability.
— Spiral Tip (Make 1) :
Info :
The spiral tip is a narrow tube worked in rounds and then curled into a spiral. For poseability, insert flexible floral wire through the spiral and secure by wrapping it with yarn end before closing. Begin with main purple yarn to match the cone.
Round 1 :
6 sc in magic ring (6)
Round 3 :
(1 sc, inc) x 6 (18)
Round 4 :
1 sc in each st (18)
Round 5 :
1 sc in each st BLO (18)
Info :
BLO rounds create a slightly flattened seam which aids rolling into a spiral. Continue with small even rounds to lengthen the tube.
Round 6-15 :
1 sc in each st (18) (10 rounds)
Round 16 :
(2 sc, dec) x 6 (12)
Round 17 :
1 sc in each st (12)
Round 18 :
(1 sc, dec) x 4 (8)
Round 19 :
1 sc in each st (8)
Round 20 :
Fasten off leaving a long tail for sewing into the top of the cone or slip stitch join to cone top if you worked the cone and spiral seamlessly.
Info :
To curl: coil the tube around your finger from the small end toward the larger end, forming a tight spiral; stitch the spiral center to the cone top with the long tail. If using wire, feed wire through the tube before coiling and secure the wire ends inside the cone (wrap wire with yarn tail to avoid poking).
— Ruffled Brim :
Info :
The brim is worked in rounds beginning where the cone increases became widest (around the 60 st circumference). You can work the brim while the cone remains on the hook (join at desired brim round). The brim uses layered increases to create a wavy ruffle.
Round 1 :
Join yarn to the base of the cone at the round where you have 60 sc. Ch1, 1 sc in same st and in each st around (60)
Round 2 :
1 sc in each st BLO (60)
Round 3 :
(3 sc, inc) x 15 (75)
Round 4 :
1 sc in each st (75)
Info :
Working rounds alternately in BLO and full rounds helps the brim hold a ruffled wave rather than a flat circular expansion. Adjust increase frequency to make the ruffle more or less dramatic (more incs = bigger waves).
Round 5 :
(4 sc, inc) x 15 (90)
Round 6 :
1 sc in each st (90)
Round 7 :
(1 sc, inc) x 90 (180) - (i.e. inc in every stitch)
Round 8 :
1 sc in each st (180)
Info :
Round 7 is an aggressive ruffle row that doubles the brim count for a full wavy edge. If you prefer a subtler ruffle, instead do (2 sc, inc) repeats to result in a 120-135 st brim.
Round 9 :
(2 sc, inc) x 60 (240) - optional extra ruffle for very dramatic waves
Round 10 :
Fasten off, weave in ends. Block the brim gently by shaping the waves with your hands and pinning if desired. Optionally stiffen with a light fabric stiffener or glue a thin felt circle inside to make the brim hold shape.
Info :
If you used the larger increase for an extremely ruffled brim, you will have more fabric to stitch your accessories onto. Trim or adjust rounds to reach your desired size. The brim pictured has a medium-deep ruffle (we recommend using the 180-st method in Round 7).
— Cauldron (Make 1) :
Info :
Worked in dark gray, this small cauldron is a tiny stuffed sphere with an open top and decorative bubbling brew in lime green. Size is about 3-4 cm across when worked with worsted yarn and 3.25 mm hook. Keep stuffing light so it sits flat on the brim.
Round 1 :
6 sc in magic ring (6)
Round 3 :
(1 sc, inc) x 6 (18)
Round 4 :
(2 sc, inc) x 6 (24)
Round 5 :
1 sc in each st (24)
Round 6 :
(3 sc, inc) x 6 (30)
Round 7-9 :
1 sc in each st (30) (3 rounds)
Info :
Rounds 1-9 create the body. On round 9 stop stuffing lightly here so the cauldron sits with a hollow top for the brew insert.
Round 10 :
(3 sc, dec) x 6 (24)
Round 11 :
(2 sc, dec) x 6 (18)
Round 12 :
1 sc in each st (18)
Round 13 :
Fasten off leaving a 25 cm tail for sewing. Stuff gently to create a rounded base but keep top hollow to accept brew. Use a few extra decorative slip stitches around the top edge to create a rim if desired.
Info :
To create a deeper opening, omit the decreases at R10-11 and instead stop at R9; this will produce a shallower, open bowl. Adjust to taste.
— Cauldron Brew Insert :
Round 1 :
Using lime green yarn: 6 sc in magic ring (6)
Round 3 :
1 sc in each st (12)
Round 4 :
Fasten off leaving a tail. Flatten this disc into the cauldron top and stitch around the rim with the tail to secure. For bubbling drips, chain 6, sl st to previous stitch to make a small drip and knot; weave tail.
Info :
Add a tiny cauldron spoon handle by crocheting a short brown tube (see spoon section) and inserting it into the brew before securing the disc at the rim.
— Potion Bottle (Make 1) :
Info :
This tiny bottle is worked in light gray for the glass body, with a tan cork top. It is decorative and sewn to the brim beside the cauldron. Keep it small and firmly stuffed so it holds shape.
Round 1 :
6 sc in magic ring (6) (bottle base)
Round 3 :
(1 sc, inc) x 6 (18)
Round 4-6 :
1 sc in each st (18) (3 rounds) - continue to build the body
Round 7 :
(2 sc, dec) x 6 (12)
Round 8 :
1 sc in each st (12)
Round 9 :
Fasten off leaving a long tail for sewing. Stuff lightly; the body should be firm but not overstuffed. Set aside for cork.
— Cork :
Round 1 :
Using tan yarn: 6 sc in magic ring (6)
Round 3 :
1 sc in each st (12)
Round 4 :
Fasten off leaving short tail. Stuff minimally and sew cork to bottle opening using the body tail. You can angle the cork slightly to match the photo look.
Info :
Wrap a thin vine (see vine section) around the bottle neck for the decorative wrap. Glue a dab of craft glue under the vine to secure if needed for display pieces.
— Wooden Spoon (Make 1) :
Info :
Worked in brown yarn as a short tube with a flat disc head. This will be inserted into the cauldron brew disc for a realistic touch.
Round 1 :
6 sc in magic ring (6)
Round 2-6 :
1 sc in each st (6) (5 rounds) - create the handle
Round 7 :
Switch to a slightly wider disc for the spoon head: 6 inc (12)
Round 8 :
1 sc in each st (12)
Round 9 :
Fasten off leaving a tail to sew. Flatten the spoon head slightly and whip stitch the handle base to the brew disc; stitch the handle into the cauldron side so it sits at a natural angle.
Info :
You can also craft the spoon entirely as a flat ovoid for a more stylized look. If you prefer, make the handle longer or shorter to fit your cauldron scale.
— Vines and Leaves (Make several) :
Info :
Vines are made with chains and tiny crochet leaves attached at intervals. Use lime green yarn. The pattern on the hat shows a long vine winding around the base and small leaves placed decoratively.
Vine Chain :
Step :
Ch 20 (or desired length). Sl st back along the chain to form a twisted rope effect, or leave the chain and attach leaves directly by single crocheting into chain stitches. Fasten off, leaving long tail for stitching to hat brim.
Small Leaf (Make 6-8) :
Round 1 :
Ch 4, in 2nd ch from hook: sc, hdc, dc; in next ch: hdc, sc; sl st to base (a small leaf) - fasten off leaving a tail for sewing.
Info :
Leaves pictured are tiny, layered, and slightly cupped. When sewing, position the seam on the underside and tack the leaf into place with a few invisible stitches so the leaf sits slightly raised.
Curled Tendril :
Step :
Ch 12. Sc in 2nd ch and each ch across with 2 sc in every 3rd chain to create a spiral tendency; when finished, wrap around a pencil to set curl and stitch ends to the hat.
Info :
Vines can be sewn on with the long tails from your chain; twist and wrap them around the cauldron and bottle to match the photo. Use a thin brown yarn for the belt and secure vines around that for texture contrast.
— Decorative Belt / Sash :
Round 1 :
Using brown yarn: ch 80 (measure against hat circumference; adjust as needed). Sl st into each chain across to form a flat band. Join ends with sl st and weave tails to secure.
Info :
Place the belt roughly at the position of the BLO ridge you created on the cone (Round 32 earlier). Stitch the belt to the hat in several places to hold it firmly. Add a knot or loop to one side to anchor the cauldron and bottle embellishments.
— Assembly and Decorative Placement :
Info :
Positioning is critical. Use pins to place the cauldron, bottle and belt before sewing. The cauldron should sit centered on one front side of the hat brim with the spoon angled inside; the bottle sits next to it wrapped with a vine, and the belt wraps around the cone just above the brim.
Step 1 :
Sew the belt to the cone at the BLO ridge using your yarn needle and long tail from the belt. Secure with several passes and knot the tail on the inside.
Step 2 :
Pin the cauldron to the brim; sew around the base with small whip stitches through the brim fabric into the bottom stitches of the cauldron (use the 25 cm tail left earlier). Reinforce with 6-10 passes to prevent wobble.
Step 3 :
Attach the brew disc inside the cauldron by stitching the disc tail to the rim stitches; for extra realism add a couple of 'drip' chains to hang over the rim and tack into place.
Step 4 :
Sew the bottle to the brim next to the cauldron. Wrap the prepared vine around the bottle and tack the vine down to the brim in a few places to secure it. Use a knot behind the bottle under the belt to hold it steady.
Step 5 :
Sew the spoon into the brew by inserting the handle into the brew disc before closing; tack the handle to the side of the cauldron to prevent it from falling out.
Step 6 :
Pin and sew the leaves and tendrils along the belt and cone, spacing them attractively. Add tiny embroidered accents (French knots) in lime green to suggest bubbling magic if desired.
Info :
Weave and hide all tails through interior stitches, trimming close to the fabric. If the hat will be handled frequently, apply a dot of fabric glue to stitches holding small accessories to prevent snagging or loosening.
— Finishing Touches and Options :
Info :
Optionally: insert a thin felt circle inside the brim and glue to the underside for reinforcement. You can also stiffen the brim with diluted fabric stiffener for a more sculpted wavy edge. For a fully poseable spiral tip, ensure the wire is fully inserted up through the spiral and wrapped down into the cone interior and covered with a little yarn to avoid sharp ends.
Final Step :
Check all attachments, trim stray threads, lightly steam-block the hat if your yarn allows it (do not overheat), and display on a shelf or as part of a Halloween vignette. Enjoy your Enchanted Twisty Brew Witch Hat!
Info :
Care instructions: spot clean with damp cloth, avoid machine washing if accessories are glued. Store flat to preserve brim shape or stuff inside with tissue paper when not displayed.
This enchanting little amigurumi hat brings a pocket of magic to your shelf—complete with a twisty tip, bubbling cauldron and wrapped vines. Each stitch builds personality and charm, and the tiny accessories are a joy to crochet and sew into place. I hope this pattern sparks creativity and results in a piece you love displaying or gifting. 🧶✨🎃