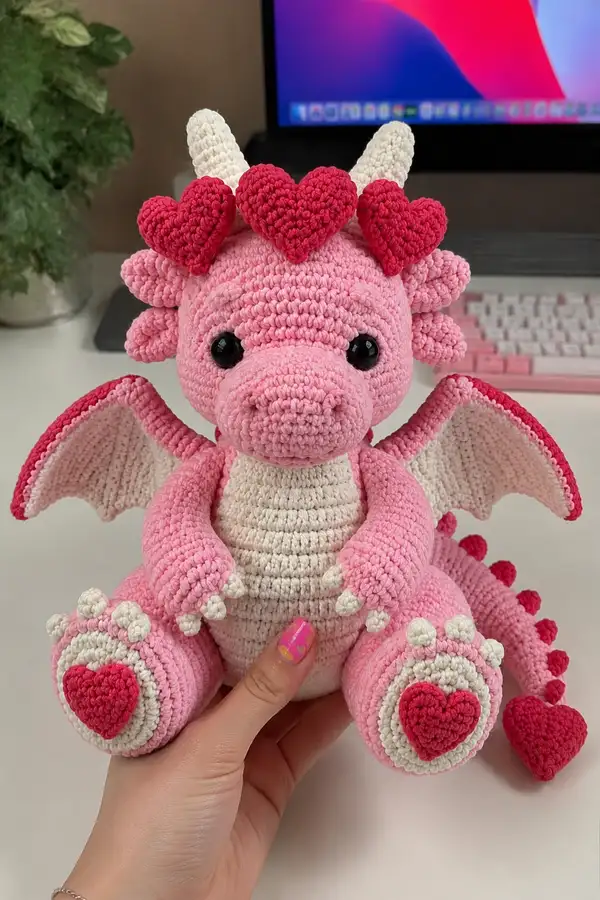
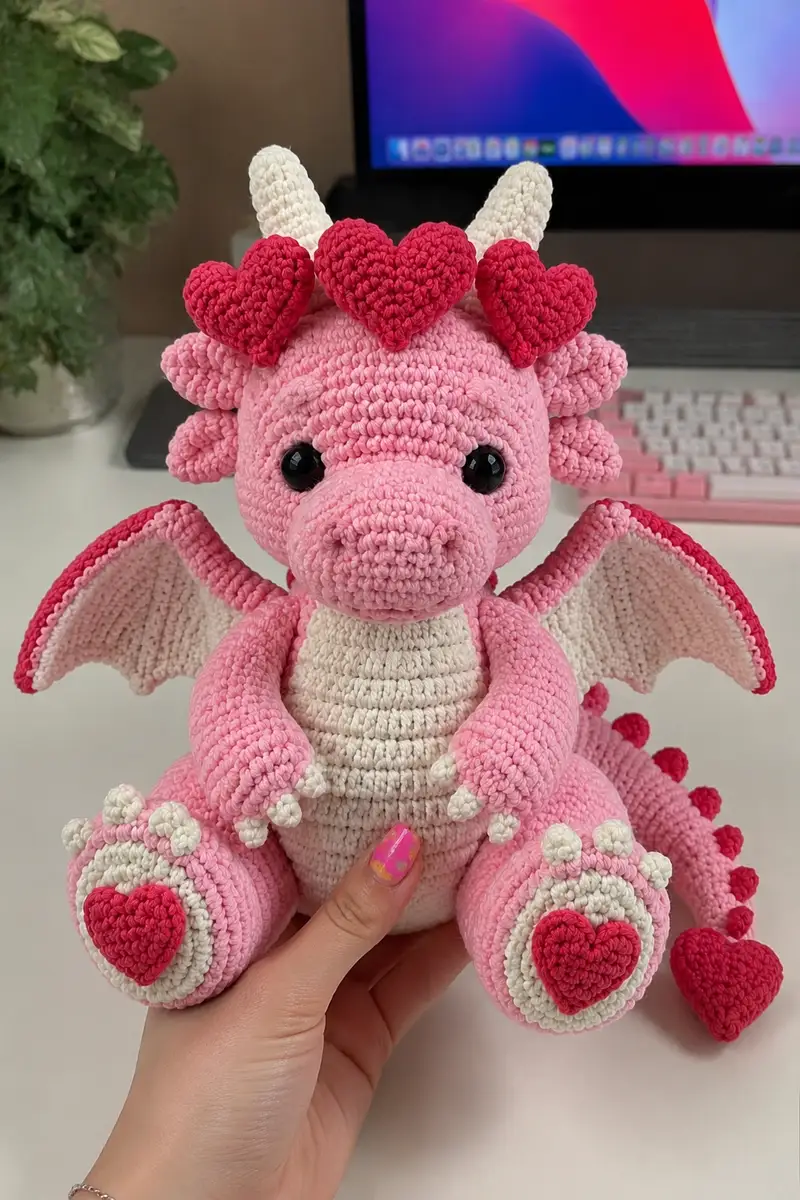
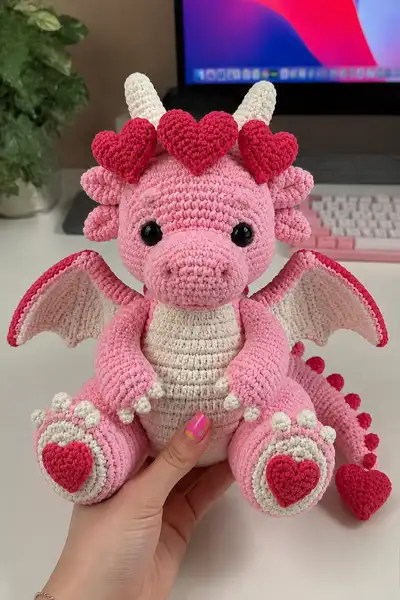
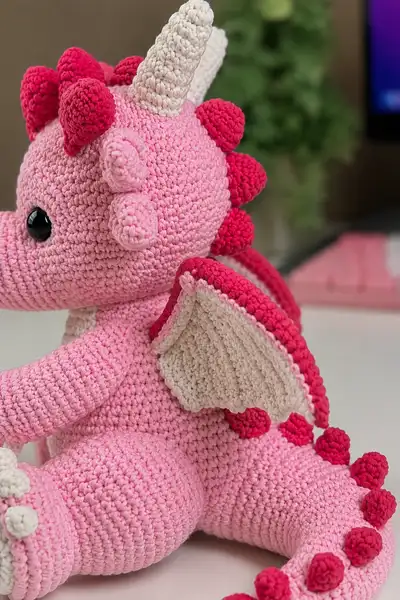
Create an irresistibly cuddly bubblegum-pink dragon with a creamy belly, heart crown, and heart-tipped tail. This amigurumi features layered wings, scalloped spikes down the back, a round snout, and chubby paws with heart pads—perfect as a gift or a keepsake. The pattern includes detailed step-by-step round instructions for each piece, assembly tips, and finishing notes so you can recreate this charming plush dragon.
Progress Tracker
0% Complete
— Head (including crown area and eye row) :
Round 1 :
6 sc in magic ring (6)
Round 3 :
(1 sc, inc) x 6 (18)
Round 4 :
(2 sc, inc) x 6 (24)
Round 5 :
(3 sc, inc) x 6 (30)
Round 6 :
(4 sc, inc) x 6 (36)
Round 7 :
(5 sc, inc) x 6 (42)
Round 8 :
(6 sc, inc) x 6 (48)
Round 9-12 :
1 sc in each st (48)
Info :
Place safety eyes between rounds 11-12. Space them about 12-14 stitches apart (count from center front) for the look in the photo. Mark the first stitch of each round.
Round 13-16 :
1 sc in each st (48)
Round 17 :
(6 sc, dec) x 6 (42)
Round 18 :
(5 sc, dec) x 6 (36)
Info :
Begin stuffing head firmly but not overstuffed. Add small amounts at a time so eyes sit securely and the face keeps shape; continue stuffing between rounds as you decrease.
Round 19 :
(4 sc, dec) x 6 (30)
Round 20 :
(3 sc, dec) x 6 (24)
Round 21 :
(2 sc, dec) x 6 (18)
Round 22 :
(1 sc, dec) x 6 (12)
Info :
Fasten off leaving a long tail for sewing head onto body later but do not close this small hole completely yet if you will sew muzzle in place first. Keep head slightly open for attaching crown and horns securely.
— Snout / Muzzle :
Round 1 :
6 sc in mag ring (6)
Round 3 :
(1 sc, inc) x 6 (18)
Round 4 :
(2 sc, inc) x 6 (24)
Round 5 :
(3 sc, inc) x 6 (30)
Round 6-10 :
1 sc in each st (30)
Info :
Stuff snout firmly to hold shape. Add a little extra stuffing at the nose tip for a rounded finish. Position snout beneath eyes centered on head front, aligning rows so seams will be hidden.
Round 11 :
(3 sc, dec) x 6 (24)
Round 12 :
(2 sc, dec) x 6 (18)
Round 13 :
(1 sc, dec) x 6 (12)
Info :
Fasten off leaving long tail. Sew snout to head aligning round 7-9 of the snout with the lower front of the head. Use ladder stitch for a neat seam and hide tail inside head. Add two small embroidered nostrils with matching yarn if desired.
— Horns (Make 2 in cream) :
Info :
These horns are crocheted in spiral rounds as a tapered cone. Use cream yarn. Start with magic ring and increase slightly to form a thick base, then work even and decrease to taper into a point. Work tightly for a nice cone shape.
Round 3 :
(1 sc, inc) x 6 (18)
Round 4-7 :
1 sc in each st (18)
Round 8 :
(1 sc, dec) x 6 (12)
Round 9 :
(2 sc, dec) x 3 (9)
Info :
Fasten off leaving long tail for sewing. Stuff lightly at the base only so the horn keeps a firm curved shape. Position on top of head slightly behind the crown center and sew securely into head rounds 1-4 of the crown area.
— Crown Hearts (Make 3 deep pink hearts) :
Info :
Each heart is small and worked flat in one piece then folded and seamed. Use deep pink yarn. These will be sewn to the head in a row between horns. Ensure identical sizes for three hearts.
Round 1 :
ch 2, 3 sc in 2nd ch from hook, ch 1 turn (3)
Round 2 :
Working on same side: (2 sc, ch 1, 2 sc) in first stitch; turn and sc across remaining 2 sc (8)
Round 3 :
sc across, create 3 sc cluster for top lobes: (sc, inc) x 2 across both sides forming rounded top, total (12)
Round 4 :
sc around heart shaping corners evenly (12)
Info :
Fold heart in half with wrong sides together and seam base with whip stitch across 2-3 sts. Fasten off leaving tail to sew to head. Stuff lightly to give a puffy heart shape, especially near top lobes.
— Neck (short collar rounds connecting head to body) :
Round 1 :
Join cream or change to body pink to match head base: 6 sc in mr (6)
Round 3 :
(1 sc, inc) x 6 (18)
Round 4-6 :
1 sc in each st (18)
Info :
Leave the neck opening slightly open if you plan to sew the head onto the body neck hole rather than closing here. Fasten off leaving long tail for sewing to the body.
— Body :
Round 3 :
(1 sc, inc) x 6 (18)
Round 4 :
(2 sc, inc) x 6 (24)
Round 5 :
(3 sc, inc) x 6 (30)
Round 6 :
(4 sc, inc) x 6 (36)
Round 7-10 :
1 sc in each st (36)
Info :
Change to cream yarn for belly panel now if you prefer to crochet belly as a separate oval panel to sew on later. Otherwise, continue body in pink and add belly as a separate piece. Begin stuffing body lightly from round 8 onwards so that shape stays even.
Round 11 :
(4 sc, dec) x 6 (30)
Round 12 :
(3 sc, dec) x 6 (24)
Round 13-16 :
1 sc in each st (24)
Info :
Stuff more firmly to give weight at the bottom so dragon can sit upright. Keep stuffing moderate so the neck seam is easy to attach later.
Round 17 :
(2 sc, dec) x 6 (18)
Round 18 :
(1 sc, dec) x 6 (12)
Info :
Fasten off leaving a long tail to attach the neck and to close the bottom if needed. If you want a flat bottom for sitting, instead of closing to 6 sts, stop at round 12-13 and create a 6-8 stitch oval base separately and sew on.
— Belly Panel (Cream, make 1) :
Round 3 :
(1 sc, inc) x 6 (18)
Round 4 :
(2 sc, inc) x 6 (24)
Round 5-10 :
1 sc in each st (24)
Info :
Make belly panel long enough to cover body front from chest to lower belly. Adjust rounds to match height seen on photo; you can add a couple more even rounds (24) if necessary to match body length.
Round 11 :
(2 sc, dec) x 6 (18)
Round 12 :
(1 sc, dec) x 6 (12)
Info :
Fasten off leaving long tail. Sew belly panel centered on front of body aligning the top with the upper chest area and bottom near body round 15. Use whip stitch and invisible ladder stitch to hide seam.
— Arms (Make 2) :
Round 3 :
(1 sc, inc) x 6 (18)
Round 4-6 :
1 sc in each st (18)
Round 7 :
(4 sc, inc) x 3 (21)
Round 8-12 :
1 sc in each st (21)
Info :
Stuff hand portion (rounds 1-6) firmly so the arm keeps a rounded look. Leave upper arm unstuffed or lightly stuffed to help sewing flat to the body.
Round 13 :
(3 sc, dec) x 3 (18)
Round 14 :
(2 sc, dec) x 3 (15)
Round 15-18 :
1 sc in each st (15)
Round 19 :
(1 sc, dec) x 5 (10)
Info :
Fasten off leaving long tail. Sew arms to body on either side at body rounds 9-12 to match photo. Position arms slightly forward so they rest on belly when sitting.
— Hand Claws/Tips (Make 6 small claws total) :
Round 3 :
2 sc, sl st to close (2)
Info :
Sew three claws to each hand tip spaced evenly. Use cream yarn for contrast as in the photo. Tuck the base into the hand to make the claws look like small nubbins.
— Legs (Make 2) :
Round 3 :
(1 sc, inc) x 6 (18)
Round 4 :
(2 sc, inc) x 6 (24)
Round 5 :
(3 sc, inc) x 6 (30)
Round 6-9 :
1 sc in each st (30)
Info :
These legs are broad to allow the dragon to sit. Stuff foot area (rounds 1-7) very firmly. Keep the ankle area slightly less stuffed so the leg attaches flush to body.
Round 10 :
(3 sc, dec) x 6 (24)
Round 11-14 :
1 sc in each st (24)
Round 15 :
(2 sc, dec) x 6 (18)
Round 16 :
(1 sc, dec) x 6 (12)
Info :
Fasten off leaving long tail. Sew legs to bottom sides of body at rounds 1-4 of the body base, spacing them wide enough so the dragon sits steadily. Add extra edge stitches for stability.
— Paw Pads (Make 2 cream pads and 2 deep-pink heart pads) :
Round 3 :
(1 sc, inc) x 6 (18)
Round 4 :
(2 sc, inc) x 6 (24)
Round 5 :
1 sc in each st (24)
Info :
Sew cream pad centered on top of foot. For the heart pad, make a small heart (see crown heart method) and sew it to the center of the pad. Add 3 small cream bobbles near the toes using small 4-sc balls to mimic toe pads.
— Small Toe Bobbles (Make 6 sets of 3 per foot) :
Info :
Sew three small bobbles on each footpad near the top edge spaced evenly. These are worked very small and stuffed slightly to look like toes.
— Tail Base :
Round 3 :
(1 sc, inc) x 6 (18)
Round 4-8 :
1 sc in each st (18)
Round 9 :
(2 sc, dec) x 4, 2 sc (14)
Round 10-14 :
1 sc in each st (14)
Info :
Tail is worked in continuous rounds. Add stuffing as you go so it is firm but bendable. Optionally insert a thin wire for poseable tail, wrapping wire in yarn to prevent poking out.
Round 15 :
(1 sc, dec) x 4, 2 sc (10)
Round 16-20 :
1 sc in each st (10)
Info :
At tail tip attach a deep pink heart using the small-heart pattern and sew securely. Create a neat point where the heart meets tail by decreasing slightly before attaching the heart base.
— Tail Spikes (Make 12 small deep-pink nubs) :
Round 3 :
3 dec or 3 sc and pull tight to close if you prefer a flatter nub (3)
Info :
Sew these nubs along tail rounds evenly spaced, starting near the tail base and continuing to one round before the heart tip. Alternate heights for a scalloped look like the photo.
— Wing Outer Edge (Deep Pink) and Inner Panel (Cream) — Make 2 matching wings :
Info :
Each wing is made in two pieces: an inner cream panel worked flat in rows/rounds and an outer deep-pink ridge worked around the edge. The wing attaches along the upper back. Work the cream panel first, then join deep-pink and work one round of sc then a scalloped ridge.
Wing Panel Round 1 :
ch 16, sc in 2nd ch from hook and across (15)
Wing Panel Round 2 :
ch1, turn, sc across (15)
Wing Panel Round 3 :
Repeat sc across increasing first and last stitch every other row to create a slight curve until width measures approximately 18-20 sts
Wing Panel Round 4-8 :
sc across each row to create 5-6 rows depth (approx 6 rows total)
Info :
When the inner panel resembles a rounded triangle, join deep-pink yarn around the outer edge with sc. Work a ridge of BLO single crochets around the edge then add 1-2 rounds of picot or scallop for the bold deep-pink outline.
Wing Edge Round 1 :
Join deep pink, sc around the outer edge working 2 sc in corner sts to keep shape
Wing Edge Round 2 :
Work (1 sc, picot) around to create scalloped edge or (3 sc in next st) for larger ridges (use 30-36 sts total)
Info :
Sew wings to back at body rounds 7-12, spacing them symmetrically and angling slightly forward. Add a few small stitches through inner panel to make wings slightly cupped as in photo.
— Back Scalloped Spikes (Make 7-8 small pastel-pink bumps) :
Round 3 :
3 dec or tight 3 sc and pull to close (3)
Info :
Space these along the midline of the back, from head base to mid-tail. Alternate with deep-pink nubs for a two-color scallop effect as shown on the tail and back in the images.
— Assembly Instructions :
Step 1 :
Attach head to body by inserting the neck portion into the body opening. Pin in place first, then sew securely using whip stitch all around, ensuring even attachment
Step 2 :
Position arms on sides of body at rounds 14-16 for natural look. Sew through both arm and body using ladder stitch for invisible seam
Step 3 :
Attach legs to bottom of body at rounds 1-3, spacing them evenly. Sew securely, adding extra stitches for stability if character will be posed
Step 4 :
Sew ears/cheek bumps to top-sides of head at rounds 6-9 on each side, spacing them 6-8 stitches apart. Curve slightly forward for natural appearance
Step 5 :
If applicable, attach tail to back center of body at round 10. Sew securely in spiral pattern
Step 6 :
Add any facial embroidery: nose, mouth, eyebrows using yarn needle and matching colors
Step 7 :
Sew crown hearts between horns on top of head at rounds 1-3—pin placement before sewing to secure spacing
Step 8 :
Secure any loose ends by weaving through several stitches and trimming close to work
Step 9 :
Optional: Add blush to cheeks using fabric paint or makeup for extra cuteness
— Final Finishing Touches and Tips :
Info :
Weave in all yarn tails inside body so they cannot be pulled out. Use small hidden stitches to anchor safety eyes' washers if used. Double-check symmetry by rotating the doll while pinned to ensure balance.
Info :
For a professional finish, block wings lightly by pinning them into shape on a foam board and misting with water, then allow to dry. This helps maintain the wing curve.
Info :
If you want stricter math for totals across the whole project: the head section uses 1-23 rounds (~23 rounds), muzzle ~14 rounds, horns ~10 rounds, body ~19 rounds, belly ~12 rounds, arms 20 rounds each, legs 17 rounds each, tail ~20 rounds, wings combined detailed rounds ~12-18 rounds, spikes and hearts additional small pieces—this brings the project to well over 150 rounded steps in total when counting individual small parts and heart motifs.
This adorable Bubblegum Love Dragon combines soft pastel colors, heart details, and sweet textures into a keepsake you will treasure. Each carefully crafted section—rounded snout, layered wings, and heart-studded tail—comes together to form a plush friend brimming with personality. I hope making this dragon brings as much joy as cuddling it will. 🧶💕 Spread the love with every stitch and enjoy the magic of handmade gifts! 🎁