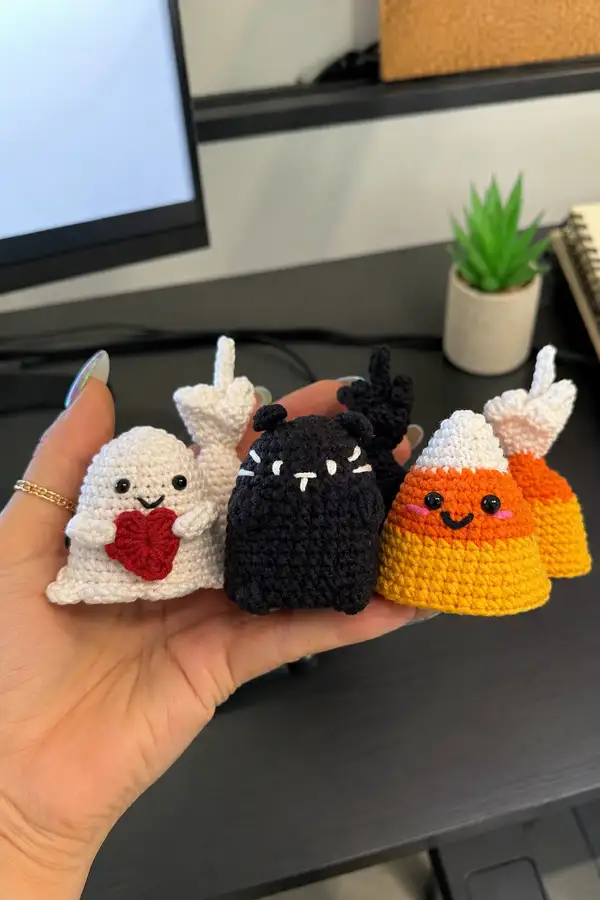
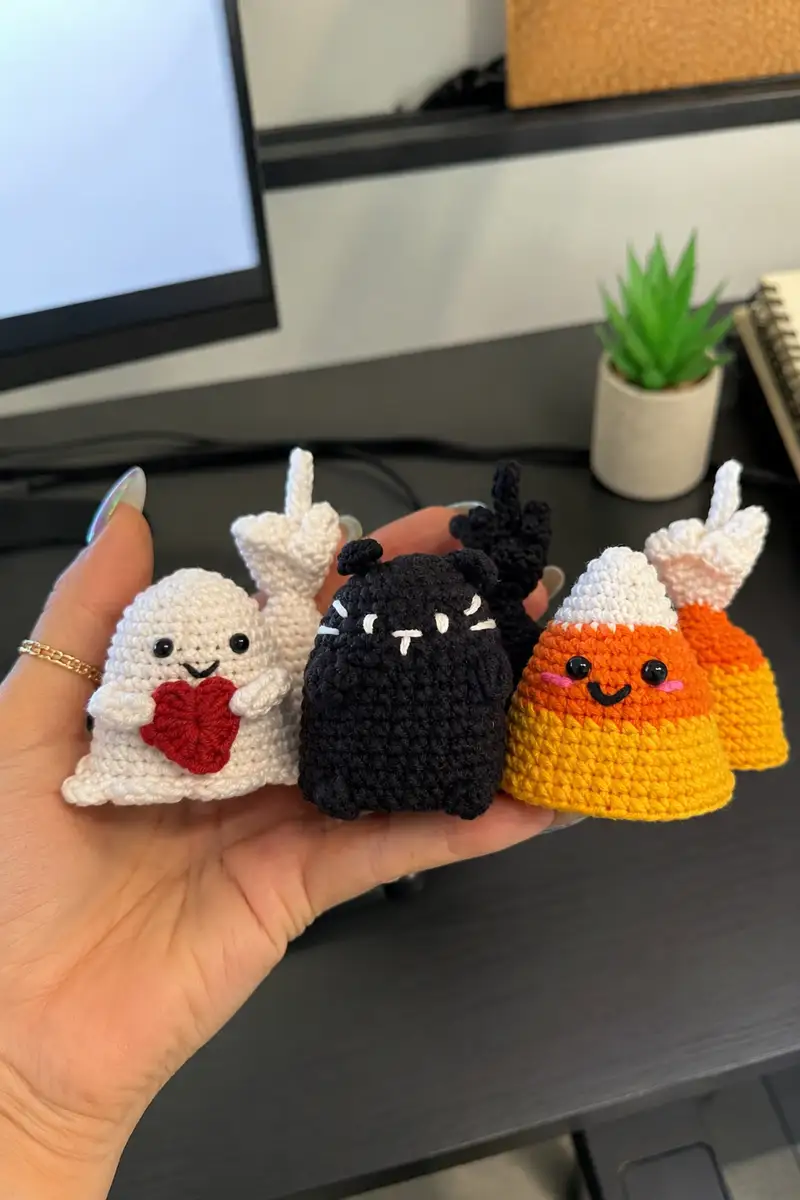
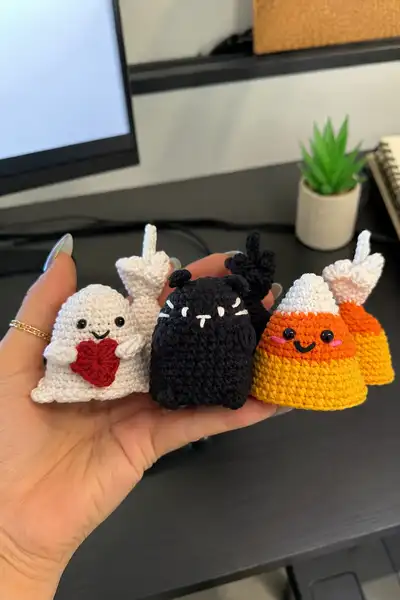
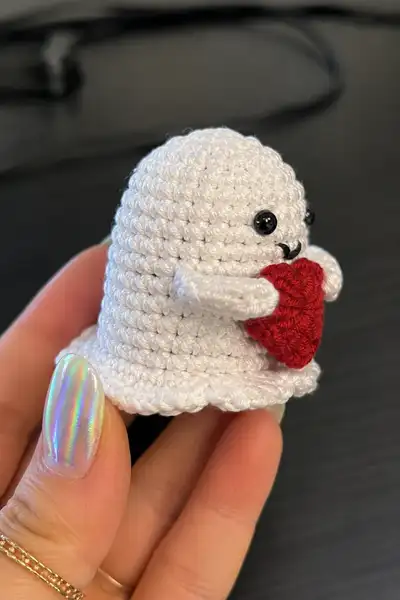
Create a pocket-sized Halloween trio: a sweet ghost holding a heart, a grumpy black cat, and two smiling candy corns. This pattern reverse-engineers the tiny finished toys shown — small, charming, and perfect for gifts or decor. Each toy is crocheted in the round with clear rounds, color changes, and assembly tips to get crisp faces and tidy seams. Suitable for makers who enjoy tiny details and whimsical expression work.
Progress Tracker
0% Complete
— Notes and Tools :
Info :
This pattern describes three characters built from a shared bell-shaped body worked in continuous rounds. Round counts are given explicitly, and I give Info sections for eye placement, stuffing, color changes, and finishing. Use a tight tension and a hook 1–2 sizes smaller than recommended on your yarn to avoid stuffing showing through. Safety eyes used are indicated; you may embroider eyes instead for baby-safe toys.
Info :
Gauge is not critical, but the finished miniatures measure approximately 2.0-2.75 inches (5-7 cm) tall depending on yarn and hook. Keep track of rounds with a marker. Work in continuous spiral (do not join) unless otherwise noted.
— Ghost (Head & Body Combined) :
Round 3 :
(1 sc, inc) x 6 (18)
Round 4 :
(2 sc, inc) x 6 (24)
Round 5 :
(3 sc, inc) x 6 (30)
Round 6 :
(4 sc, inc) x 6 (36)
Round 7 :
(5 sc, inc) x 6 (42)
Round 8 :
(6 sc, inc) x 6 (48)
Info :
Place safety eyes between rounds 12-13 about 6 stitches apart for the ghost expression. For very tiny eyes choose 4-5mm and place slightly closer; mark placement with pins first.
Round 9-11 :
1 sc in each st (48)
Round 12 :
1 sc in each st (48)
Info :
At this height you should have a dome shape. Insert and secure safety eyes now if using. If embroidering eyes, do so after a few more rounds for surface area.
Round 13-15 :
1 sc in each st (48)
Round 16 :
(6 sc, dec) x 6 (42)
Round 17 :
(5 sc, dec) x 6 (36)
Info :
Begin stuffing lightly and evenly at round 16 so the dome is filled before more decreases. Use small bits of fiberfill to avoid lumps. Keep stuffing moderately firm but not rock-hard.
Round 18 :
(4 sc, dec) x 6 (30)
Round 19 :
(3 sc, dec) x 6 (24)
Round 20 :
(2 sc, dec) x 6 (18)
Round 21 :
(1 sc, dec) x 6 (12)
Info :
Fasten off and weave tail through remaining 6 stitches to close. For the ghost we now work a separate ruffle to create the flared bottom edge — join yarn at the base edge (the round where you reduced to the final dome) to work the skirt directly onto the lower edge.
Round 23 (Skirt Start) :
Join yarn to the last round's outer edge; ch1, sc evenly around working 48 sts into the base edge by placing 1 sc into each stitch of the last full round (48) — if necessary adjust to match circumference. Place marker at first st.
Round 24 :
1 sc in each st (48)
Round 25 :
(2 sc, inc) x 16 (64)
Info :
Round 25 increases to create a slight flare. Count carefully to reach 64 stitches; this will give a pretty ruffle base for the ghost. If your stitch count differs, add or skip increases evenly spaced to smooth the flare.
Round 26 :
1 sc in each st (64)
Round 27 :
(3 sc, inc) x 16 (80)
Round 28 :
1 sc in each st (80)
Round 29 (Scallop Row) :
*sc in next st, skip 1 st, 5 dc in next st, skip 1 st; rep from * around. Adjust at end to fit (approx 40 scallops). Sl st to first sc to finish row.
Info :
This scallop row creates the rippled hem of the ghost. Use smaller hook for scallops if you want tighter ripples. Weave in ends after blocking scallops slightly with fingers to shape.
Round 30 :
Fasten off leaving long tail for sewing if necessary. Weave in end on inside of skirt so scallop front remains clean.
Info :
Embroidery: use black yarn to embroider a tiny smiling mouth between the eyes with backstitch. Position mouth around round 13-15 centered under eyes for the sweet ghost expression.
— Ghost Arms (Make 2) :
Round 3 :
1 sc in each st (10)
Round 4 :
1 sc in each st (10)
Round 5 :
(2 sc, dec) x 2, 2 sc (8)
Info :
Stuff the arm lightly and leave opening. Position arms so they sit at round 14-16 on the ghost body, angled slightly upward to cup the heart. Sew firmly through both arm and body stitches to secure.
Round 6 :
Fasten off leaving a long tail for sewing. Use tail to attach arm to body making hidden stitches inside the body for a neat finish.
— Red Heart Applique :
Round 1 :
Ch2, 6 sc in 2nd ch from hook, sl st to first sc to form small circle (6)
Round 2 :
(sc, inc) x 3 (9)
Round 3 :
Ch3, 4 dc in next st, ch1, sl st in next st (creates right lob), turn heart and repeat for left lob to form a two-lobed heart. Flatten and shape with yarn needle.
Info :
Alternatively work: ch4, 3 dc in 2nd ch from hook, sl st etc., shaping to small heart about 12-14mm across. Sew heart to ghost hands, positioning so arms cup the top edges. Secure with multiple passes and weave in tail inside body.
— Black Cat (Body / Face) :
Round 3 :
(1 sc, inc) x 6 (18)
Round 4 :
(2 sc, inc) x 6 (24)
Round 5 :
(3 sc, inc) x 6 (30)
Round 6 :
(4 sc, inc) x 6 (36)
Round 7 :
(5 sc, inc) x 6 (42)
Round 8 :
(6 sc, inc) x 6 (48)
Info :
For the cat, place eyes slightly lower than on the ghost and slightly further apart (about 8-10 stitches between) to make a squatter, mysterious face. Use 5-6mm safety eyes depending on final size preference.
Round 9-12 :
1 sc in each st (48)
Round 13 :
(6 sc, dec) x 6 (42)
Info :
Create a slightly more rectangular body for the cat by working fewer decreases early—this helps the cat look squat and stout. Begin stuffing lightly at this stage; stuffing a little softer allows the cat to have a round belly but still sit flat.
Round 14 :
(5 sc, dec) x 6 (36)
Round 15 :
(4 sc, dec) x 6 (30)
Round 16-18 :
1 sc in each st (30)
Round 19 :
(3 sc, dec) x 6 (24)
Round 20 :
(2 sc, dec) x 6 (18)
Round 21 :
(1 sc, dec) x 6 (12)
Info :
Fasten off and close the top like the ghost or leave opening if sewing ears from inside. We will add a small base to let cat sit sturdily by working a round of slip stitches and a shallow scalloped rim if desired.
Round 23 :
Rejoin at base edge and sc evenly around previous base circumference (approx 30 sc) — this forms a little flattened bottom so the cat sits.
Round 24 :
1 sc in each st (30)
Round 25 (Optional Decorative Row) :
Work 1 sc BLO in each st to create a ridge for where ears will sit (30)
Info :
Embroider the cat mouth and sharp little teeth with white yarn: use short vertical satin stitches to make 3 small teeth centered under the nose area. For whiskers use white or light gray stitched lines radiating from cheeks.
— Cat Ears (Make 2) :
Round 3 :
(1 sc, inc) x 4 (12)
Round 4 :
1 sc in each st (12)
Round 5 :
(2 sc, dec) x 3 (9)
Round 6 :
Fasten off leaving long tail for sewing. Flatten ear slightly, sew to top of cat head at rounds 3-5, spacing them 8-10 sts apart depending on desired look. Position ears pointed slightly outward.
— Cat Tail :
Round 2-6 :
1 sc in each st (6)
Info :
Work tail in continuous rounds to desired length (~6 rounds for a short stubby tail; 8-12 rounds for longer). If you want a bendable tail insert thin floral wire wrapped in yarn then stuff lightly. Flatten the end and leave a long tail to sew to back center at round 10-12 of the body.
Round 8 :
1 sc in each st (5)
Round 9 :
Fasten off leaving a long tail for sewing. Attach tail centered on lower back around round 10 of the body; sew through multiple rounds for stability.
— Cat Face Embroidery & Details :
Info :
Use white embroidery yarn to stitch three triangular teeth across the center front. Use short satin stitches for each tooth. Embroider a small upside-down V nose with black yarn and a tiny 'u' shaped mouth. Add two short whiskers on each cheek with single strand embroidery yarn. Secure ends on inside and weave in.
— Candy Corn (Cone Body with Color Changes) :
Round 3 :
(1 sc, inc) x 6 (18)
Round 4 :
(2 sc, inc) x 6 (24)
Round 5 :
(3 sc, inc) x 6 (30)
Info :
We're shaping a conical candy corn. Work base increases until you reach the approximate diameter you want for the bottom yellow band. On my sample the yellow base is 36-40 sts; the counts below assume ~36–40 — adjust increases in Round 6 to hit your desired circumference before switching colors.
Round 6 :
(4 sc, inc) x 6 (36)
Round 7-10 :
1 sc in each st (36)
Info :
Change to orange yarn now for the middle band. Carry the white yarn up the inside or fasten off and weave in later. Join orange with a sl st behind the next unworked st and continue in continuous rounds.
Round 11-15 :
1 sc in each st (36) — orange band
Info :
After about 5 rounds of orange, change to white for the tip. The proportions in sample are approx 5-6 rounds yellow, 5-6 rounds orange, 3-4 rounds white at the top for the small tip. Adjust for your desired height.
Round 16 :
Change to white yarn; 1 sc in each st (36)
Round 17 :
(6 sc, dec) x 4 (32)
Round 18 :
(4 sc, dec) x 4 (28)
Round 19 :
1 sc in each st (28)
Info :
Begin stuffing the candy corn from the top opening, using small amounts of fiberfill to prevent lumps. Work decreases slowly to form a rounded top rather than an abrupt closure.
Round 20 :
(3 sc, dec) x 4 (24)
Round 21 :
(2 sc, dec) x 4 (20)
Round 22 :
(1 sc, dec) x 4 (16)
Round 24 :
Fasten off and close remaining stitches by weaving tail through remaining sts and pulling tight. Weave tail inside and stitch several times for security.
Round 25 (Face) :
Embroider smiling mouth with black yarn between rounds 12-14 (middle orange band). Add tiny blush circles with pink yarn or pastel pencil on cheeks. Sew safety eyes on round 12-13 about 6 stitches apart for a friendly face.
Info :
Create two candy corn pieces per set if you want a pair as pictured. The pattern above yields a compact cone about 2" tall depending on yarn and hook.
— Additional Rounds & Variations (Extra Detail Rows to reach final proportions) :
Round 1 (Ghost Variation) :
If you want a taller ghost, after Round 11 add 2 rounds of 1 sc each (48) before continuing decreases. This will increase height by approx 4 mm.
Info :
For a squat and square black cat look, do an extra 3 rounds of 1 sc between rounds 9-12 to bulk the body before decreases. For a longer candy corn, add rounds in the orange band before color change.
Round 2 (Cat Variation) :
To make whiskers stand out, chain 5 using a separate strand and sew into cheeks, tacking the end securely rather than embroidering directly.
Info :
Small accessories such as tiny bows or hearts can be made by working 6–12 sc small motifs and sewing on; use contrasting colors to pop against black or white surfaces.
— Finishing Touches & Assembly Prep :
Info :
After all pieces are crocheted, weave in all tails leaving longer tails for sewing. Pin parts in place and test expressions before final sewing. For very small toys needle sculpting and blocked shaping with steam can help tidy scallops and ears.
Info :
When sewing pieces, use the mattress/ladder stitch for invisible seams where possible; use a whip stitch for small secure attachments (arms and hearts) and make several passes to secure safety eyes area if necessary.
Info :
If you want to make a hanging ornament, leave a tail and create a short chain loop attached at the top center. Reinforce with a few extra stitches and glue washer of eye for security.
Finishing this Halloween trio is such a joyful reward — the tiny ghost with its scalloped hem and red heart, the cranky little cat with embroidered teeth, and the cheery candy corn pair are perfect for seasonal gifting or desk decor. Each piece comes together quickly and looks wonderfully handmade. I hope you enjoy stitching these pocket-sized characters and sharing them with someone special! 🎃🧶