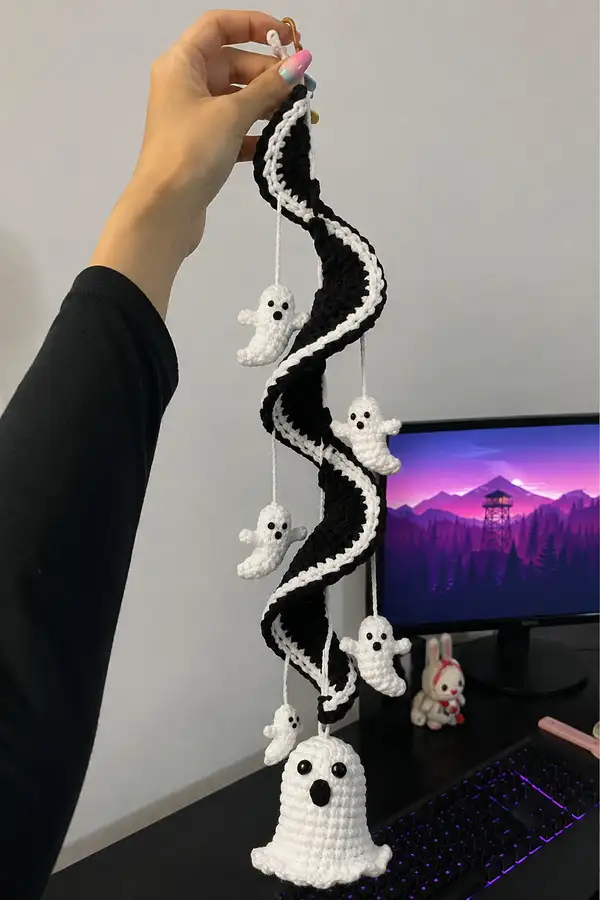
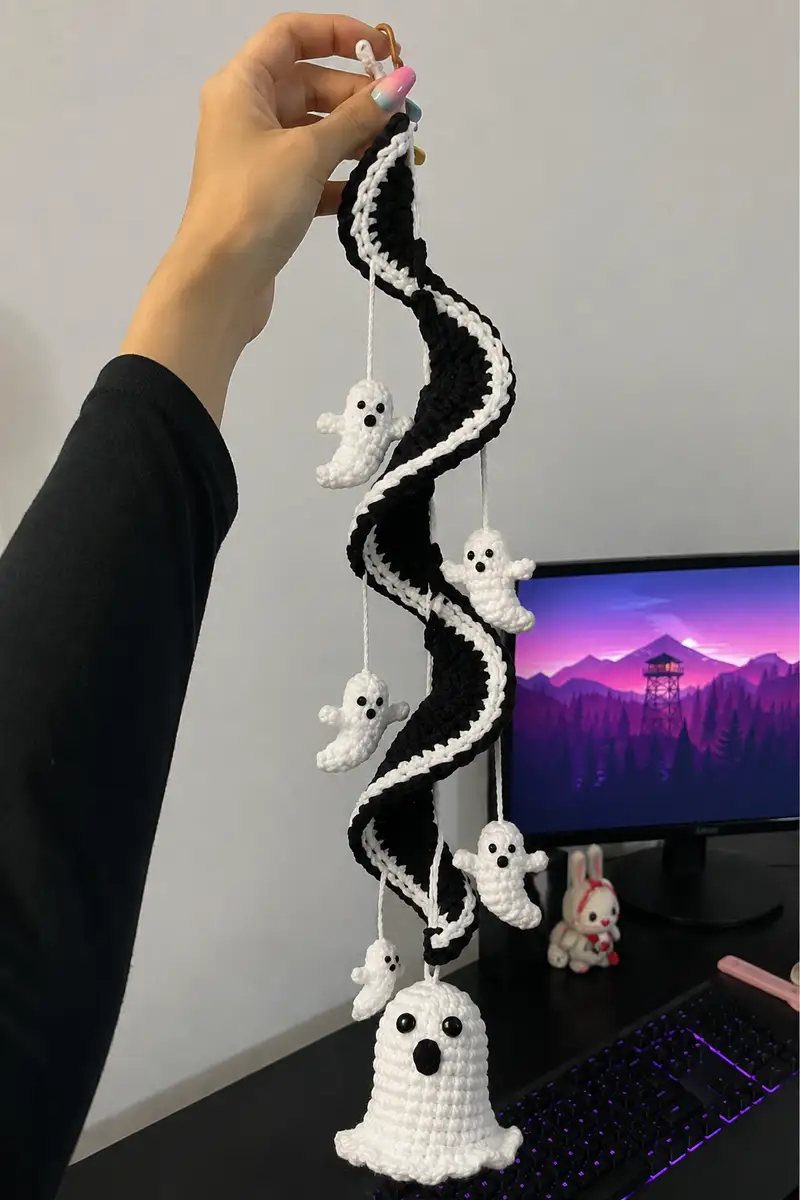
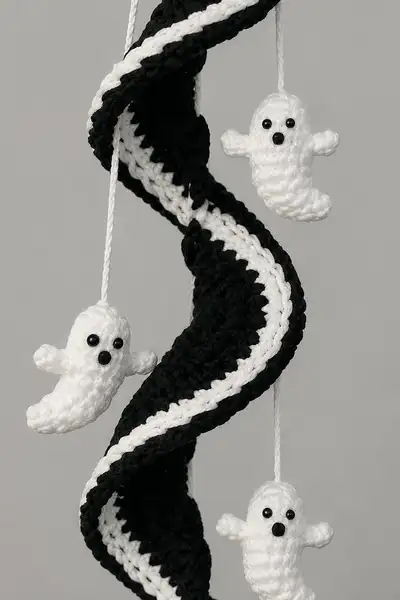
Create a spooky-chic hanging mobile featuring a dramatic black-and-white twisted spiral ribbon and a family of floating ghosts. This pattern teaches you to crochet a long spiral ribbon with contrasting edge detailing and several small and one large bell ghost, complete with tiny arms and safety eyes. Perfect for Halloween decor or a year-round whimsical accent.
Progress Tracker
0% Complete
— Large Bell Ghost Head :
Round 1 :
6 sc in magic ring (6)
Round 3 :
(1 sc, inc) x 6 (18)
Round 4 :
(2 sc, inc) x 6 (24)
Round 5 :
(3 sc, inc) x 6 (30)
Round 6 :
(4 sc, inc) x 6 (36)
Round 7 :
(5 sc, inc) x 6 (42)
Round 8 :
(6 sc, inc) x 6 (48)
Round 9-16 :
1 sc in each st (48)
Info :
Place 10mm safety eyes between rounds 11-12, leaving 8-10 stitches between them for a friendly expression. Secure but do not finalize shaping; we will stuff through the lower opening later.
Round 17 :
(6 sc, dec) x 6 (42)
Round 18 :
(5 sc, dec) x 6 (36)
Info :
Begin light stuffing at round 18 — fill gradually with polyester fiberfill so the top stays rounded and smooth. Avoid overstuffing; the bell ghost needs a softer drape to allow the skirt to flare.
Round 19 :
(4 sc, dec) x 6 (30)
Round 20 :
(3 sc, dec) x 6 (24)
Round 21 :
(2 sc, dec) x 6 (18)
Round 22 :
(1 sc, dec) x 6 (12)
Info :
Fasten off leaving a long tail for sewing. Do NOT fully close the opening yet — the bell ghost in this design has a cylindrical body that continues below this section into the bell skirt. We are forming the top cap here; position the top securely and weave in tail after attaching to next section.
— Large Bell Ghost Body / Bell Skirt :
Round 1 :
Join white yarn to the last round of the head seam location with a sl st, ch1, 6 sc evenly spaced into space around the base you left (6)
Round 3 :
(1 sc, inc) x 6 (18)
Round 4 :
(2 sc, inc) x 6 (24)
Round 5 :
1 sc in each st (24)
Round 6 :
1 sc in each st (24)
Info :
Work these rounds in continuous rounds (do not join) to create a smooth cylinder. Add moderate stuffing as you work the second repeat of round 6 so the body is gently filled; you want a soft, slightly floppy bell.
Round 7 :
(3 sc, inc) x 6 (30)
Round 8 :
1 sc in each st (30)
Round 9 :
(4 sc, inc) x 6 (36)
Round 10-12 :
1 sc in each st (36)
Info :
We are beginning to flare the skirt. The increases create a fluted, ruffled edge later; keep your tension even. Add a little more stuffing so the top of the bell has stability but leave the skirt area less packed for a natural drape.
Round 13 :
(4 sc, inc) x 6 (42)
Round 14 :
1 sc in each st (42)
Round 15 :
(5 sc, inc) x 6 (48)
Round 16 :
1 sc in each st (48)
Round 17 :
Switch to 'ruffle' edge: *ch2, skip 1st st, 1 sc in next st; rep around* — this creates slight scallops (48 scallop points)
Info :
For the flared edge you can also opt to use single crochet shells (5 dc in same st, skip 2) to create a pronounced frill. The pattern photo shows a subtle scalloped hem; choose the shell if you prefer a more dramatic bell bottom.
Round 18 :
Work a decorative edging: in each ch2 loop work (sc, ch1, sc) to make small loops (48)
Round 19 :
Fasten off and weave in ends. Add security stitches to hold the skirt shape by going through the first ruffle loop and adding two passing stitches creating a slight wave.
Info :
Sew or weave in the long tail from the head into the top of the bell opening to close gaps and secure the head to the bell. The bell ghost in the photo has a crisp head and a hanging skirt — secure thoroughly so the piece hangs evenly.
— Small Ghost (Make 5) - Head/Body Combined :
Round 1 :
6 sc in magic ring (6)
Round 3 :
(1 sc, inc) x 6 (18)
Round 4 :
(2 sc, inc) x 6 (24)
Round 5 :
(3 sc, inc) x 6 (30)
Round 6-9 :
1 sc in each st (30)
Info :
Place 6mm safety eyes between rounds 7-8 about 6-8 stitches apart depending on how wide you want the face. For very small ghosts you can also embroider eyes with black thread to avoid small parts if gifting to children.
Round 10 :
(4 sc, dec) x 6 (24)
Round 11 :
(3 sc, dec) x 6 (18)
Info :
Begin stuffing lightly here; small ghosts should be firm but not rock hard. Stuff enough to keep a plump shape while keeping the bottom flexible for the tail curve.
Round 12 :
(2 sc, dec) x 6 (12)
Round 14 :
Fasten off leaving long tail for sewing. Shape a gentle tail by threading tail through a few exterior stitches and pulling slightly to create a tapered curling tail effect like in the photo.
Info :
For the little curl seen in the photos, after fastening off sew through the outermost spiral rows on the tail to bias the tail slightly to one side. You can add a small stitch of glue for extra hold before final weave-in of the tail.
— Small Ghost Arms (Make 10 — 2 for each ghost) :
Round 1 :
4 sc in magic ring (4)
Round 3 :
(1 sc, inc) x 2 (6)
Round 5 :
Fasten off leaving long tail for sewing; lightly stuff or leave flat depending on desired arm thickness
Info :
Sew arms to sides of the small ghosts between rounds 6-8, positioning them symmetrically. Tuck the tail into the body and weave securely. Use matching white yarn so seams are invisible.
— Small Ghost Face (All small ghosts) :
Info :
Sew or secure 6mm safety eyes with washers on the inside; place about 2-3 stitches between the eyes depending on face width. Embroider or sew a small round nose with black yarn, approximately 1-2 stitches below the eyes.
— Spiral Ribbon (Main Long Spiral) :
Info :
The spiral in the photos is a long, slightly flattened tube with a white crocheted edge. We will construct a black tubular spiral worked in continuous rounds to a long length and then add a white trim around one long edge. The black tube is worked in continuous rounds to produce an even surface that can be twisted naturally into a spiral.
Round 1 :
6 sc in magic ring using black yarn (6)
Round 3 :
(1 sc, inc) x 6 (18)
Round 4 :
(2 sc, inc) x 6 (24)
Round 5 :
(3 sc, inc) x 6 (30)
Round 6 :
(4 sc, inc) x 6 (36)
Round 7-10 :
1 sc in each st (36)
Info :
We now have a small tube circumference of 36 stitches — this will create a slightly flattened tube after blocking and twist. If you prefer a wider ribbon, increase rounds 5-6 to reach 48 sts circumference, but note that wider tube may be heavier and behave differently when twisted.
Round 11-120 :
1 sc in each st (36) — work continuous rounds until the tube measures the desired hanging length. The example photo's finished spiral is roughly 70-90cm long; to achieve a similar length you will likely need 110-130 rounds at this circumference depending on your gauge. For this pattern we will instruct to work rounds 11-120 then check length.
Info :
Work in a continuous spiral — do NOT join rows with slip stitch. Place a stitch marker at the first stitch of your row only to track start. The goal is a long uniform tube that is flexible. Every 10-15 rounds take a moment to smooth and ensure the tube is not twisting on itself prematurely.
Round 121 :
1 sc in each st (36) — check length; if you need more length continue in 1 sc each st until you reach the desired length (example photo used about 120 rounds total)
Info :
When your tube reaches desired length, prepare for finishing the ends: flatten the end a little and stitch closed with invisible st, leaving a short tail to attach to the hanger ring. We will add a white contrasting edge along one long seam; mark the seam side before doing the edging.
Edging Round 1 :
With white yarn, join at one seam on the edge of the tube. Working around the long edge only, sc evenly into the edge stitch of each round creating a white line. You will work 1 sc into the edge stitch for each round; if your tube has 120 rounds you will make 120 sc edging stitches to form a white rib that spirals along the tube.
Info :
Because the tube is worked continuous rounds, the white edging will create the visible white diagonal stripe shown in the photo. Keep the white edging tension slightly firmer so it sits proud of the black tube for contrast. Carry the white yarn inside if you intend to continue more edging around the other sides; otherwise, cut and weave ends neatly.
Edging Round 2 :
Work 1 sc in each white sc around to bulk up the stripe if desired (optional) — this will make the stripe more pronounced (same number of stitches as in Edging Round 1)
Info :
If you prefer the flat ribbon effect rather than a rounded tube, after finishing the tube you may choose to press it flat and stitch one side down along the entire length to create a flattened ribbon with a white edge. The method given in this pattern uses a tube that naturally flattens and twists into a spiral similar to the reference photo.
— Hanging Cord / Attachment Loop :
Round 1 :
With white yarn, ch 30 (or desired hanging loop length), sl st into first ch to form a loop. Fasten off leaving long tail (optional: make a small tube for the loop by working sc in rounds over the chain to create a sturdier cord)
Info :
Attach the loop securely to the top end of the spiral tube by stitching the tube's top rounds 1-3 together around the loop, then weaving in ends. For extra safety, anchor with a small amount of craft glue under the stitches around the loop base.
— How to Make Hanging Strings for Ghosts :
Info :
Cut lengths of white yarn to desired hanging distances for each ghost. The sample arrangement uses 5 small ghosts spaced approximately 10-18cm apart along the spiral with the large bell ghost on the bottom. Make cords between 8cm and 25cm depending on placement. Tie the cords to the inside of the spiral tube by pulling yarn through the tube and knotting to an inner row, then bringing the cord out through the seam or an eyelet hole you create with a darning needle.
Info :
If you want the floating effect seen in the photo, attach the cords along different sides and lengths so the small ghosts dangle at varying heights and positions relative to the spiral curve. Tie a secure knot inside the tube and add a dab of glue to prevent slipping.
— Final Eyes and Nose Details (All Ghosts) :
Info :
For the little ghosts use 6mm black safety eyes; for the large bell ghost use 10mm black safety eyes. Insert eyes before closing bodies completely, affix washers on the inside, and then continue stuffing and closing. For the round nose seen on each ghost use a small black felt circle sewn on or a tiny black bead sewn through the stitch directly under the eyes. Make sure any beads are firmly secured with thread and glue if giving to small children—otherwise embroider the noses for safety.
— Assembly and Finishing :
Info :
After all pieces are made, position your spiral on a flat surface and begin attaching the hanging cords and ghosts. The large bell ghost is attached centrally to the bottom of the spiral or to the longest cord to hang below the spiral. Adjust the cords until the composition balances and then securely knot and weave in all ends.
Info :
If the spiral does not hold the exact twist you want, you can damp-block it by misting lightly, shaping the spiral with your hands, and allowing it to dry on a curved form (a rolled towel works well). This helps the ribbon hold its spiral formation.
This spiral ghost mobile brings playful spooky style to any room with its dramatic twist and floating friends. Each little ghost can be made in minutes but gives so much character when grouped together. The black-and-white contrast is modern and bold, while the soft crocheted texture keeps it cozy and inviting. Hang it for Halloween or let it float in your craft corner year-round — making and displaying this piece is pure delight. 🎃🧶