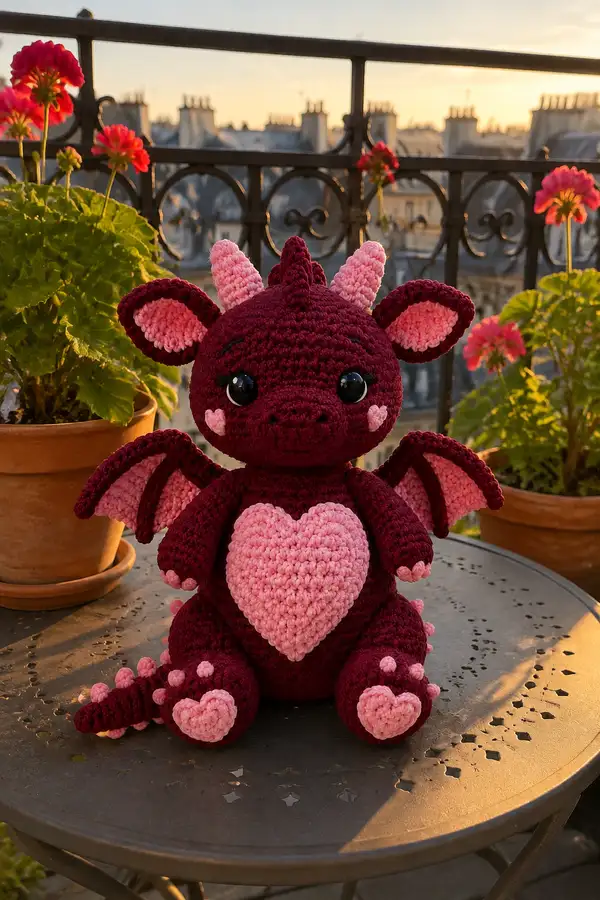
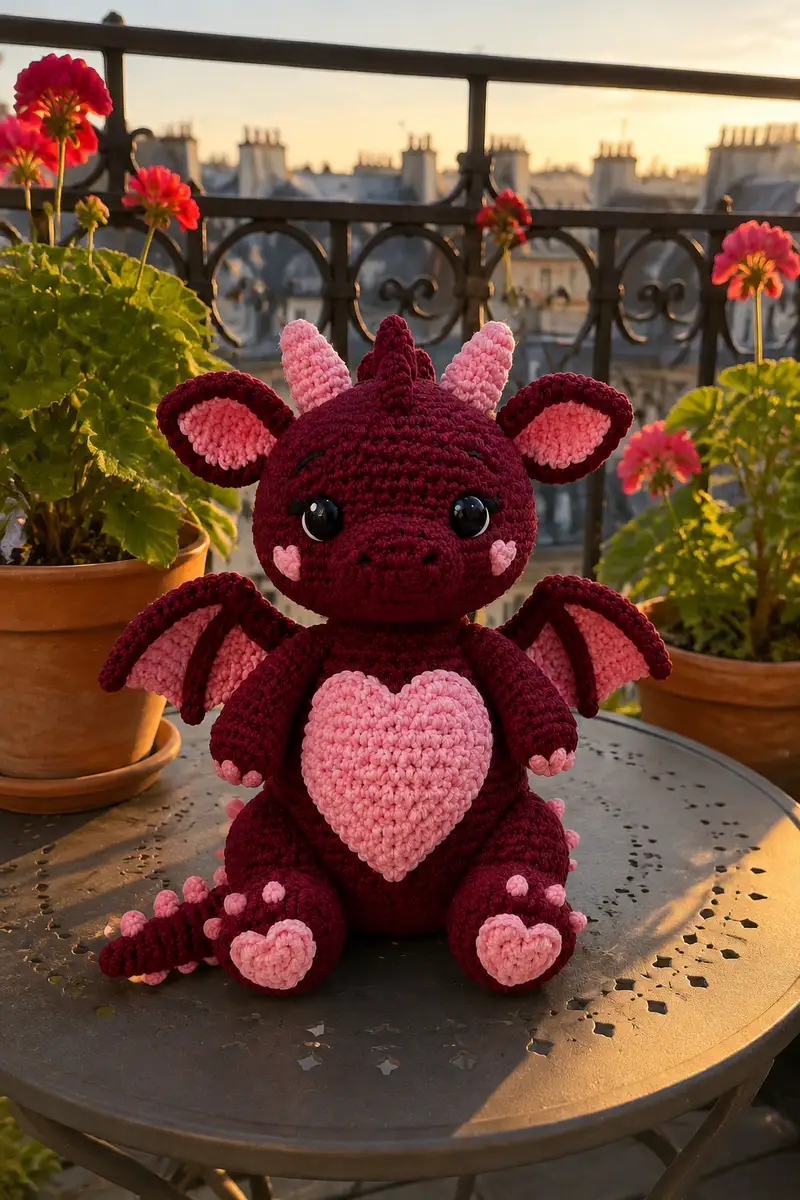
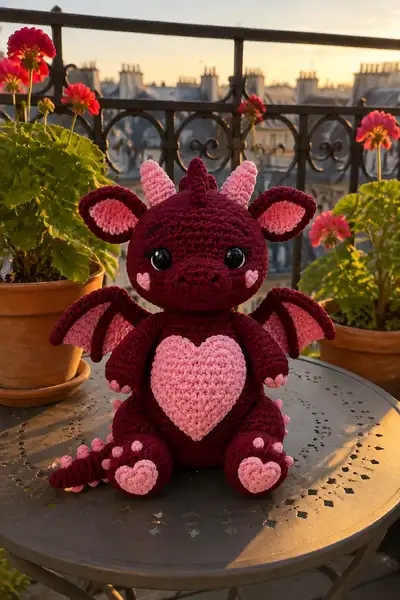
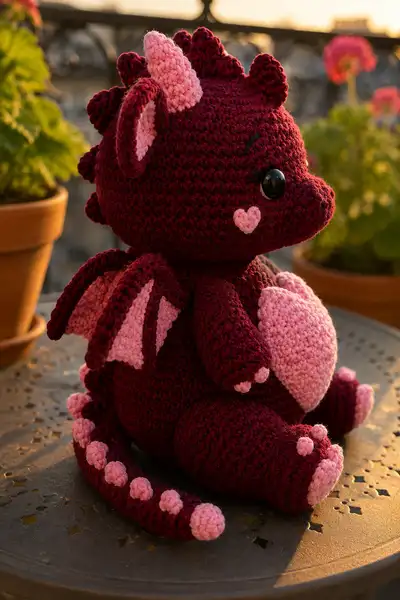
Make a lovable burgundy dragon with a big pink heart belly, cute ear and horn details, wing membranes, and a curled tail dotted with heart bumps. This pattern includes step-by-step round-by-round instructions for all parts, clear assembly guidance, and helpful tips for stuffing and shaping. Perfect for gifting or keeping as a cuddly companion with personality and a romantic twist.
Progress Tracker
0% Complete
— Head :
Round 1 :
6 sc in magic ring (6)
Round 3 :
(1 sc, inc) x 6 (18)
Round 4 :
(2 sc, inc) x 6 (24)
Round 5 :
(3 sc, inc) x 6 (30)
Round 6 :
(4 sc, inc) x 6 (36)
Round 7 :
(5 sc, inc) x 6 (42)
Round 8 :
(6 sc, inc) x 6 (48)
Info :
Use deep burgundy yarn. Place a stitch marker in the first stitch of this round and move it each round. Work tightly so stuffing won't show through. At this size head will be approximately 12-13 cm wide before stuffing.
Round 9-14 :
1 sc in each st (48)
Info :
Place safety eyes between Rounds 12 and 13 about 10-12 stitches apart center-to-center for the expressive look shown. If using 12mm eyes, place them at Round 13 with 10 stitches between eyes; for 10mm use 8 stitches between eyes.
Round 15-18 :
1 sc in each st (48)
Info :
If adding embroidered eyebrows or eyelids, plan them now. Lightly mark with pins the placement for the snout attachment; the snout will be centered starting at Round 16-18.
Round 19 :
(6 sc, dec) x 6 (42)
Round 20 :
(5 sc, dec) x 6 (36)
Info :
Begin stuffing the head firmly but not overstuffed. Use small amounts of fiberfill and press gently for an even round shape. Continue stuffing periodically through the decreases for best shape control.
Round 21 :
(4 sc, dec) x 6 (30)
Round 22 :
(3 sc, dec) x 6 (24)
Round 23 :
(2 sc, dec) x 6 (18)
Round 24 :
(1 sc, dec) x 6 (12)
Info :
Fasten off leaving a 20-30 cm tail for sewing. Pull tail through last 6 sts to close temporarily. Do not fully close because you will attach neck to body later; leave the top of head slightly open if you plan to add interior attachments for horns.
— Snout :
Round 1 :
6 sc in magic ring (6)
Round 3 :
(1 sc, inc) x 6 (18)
Round 4 :
(2 sc, inc) x 6 (24)
Round 5-6 :
1 sc in each st (24)
Info :
Make the snout shorter and slightly flattened. Stuff lightly to keep a rounded but defined nose shape. Attach snout centered on the head between the eyes at rounds 13-15 using the long tail and ladder stitch; check positioning with pins.
Round 7 :
(3 sc, dec) x 6 (18)
Round 8 :
(1 sc, dec) x 6 (12)
Info :
Fasten off leaving long tail. Use tail to sew snout onto head firmly, using small stitches around the base. Arrange so nostrils and slight upward tilt match the photos.
— Face Details (Cheeks, Eyebrows, Eyes) :
Info :
Eyes: insert safety eyes at Round 13 before stuffing too fully. Secure with washers. Cheek hearts: make two small hearts in soft pink using the Heart Applique pattern section (small hearts below) and sew them symmetrically under each eye. Embroider small eyelid lines with black yarn above each eye approximately along Rounds 12-13.
— Body :
Round 1 :
6 sc in magic ring (6)
Round 3 :
(1 sc, inc) x 6 (18)
Round 4 :
(2 sc, inc) x 6 (24)
Round 5 :
(3 sc, inc) x 6 (30)
Round 6 :
(4 sc, inc) x 6 (36)
Round 7 :
(5 sc, inc) x 6 (42)
Round 8 :
(6 sc, inc) x 6 (48)
Info :
Work body in burgundy. This body will be slightly larger than the head circumference. Use stitch marker and count carefully. The large heart applique will be sewn to the front later; mark the center front of rounds 14-18 where the heart will sit.
Round 9-12 :
1 sc in each st (48)
Round 13 :
(6 sc, inc) x 6 (54)
Round 14-20 :
1 sc in each st (54)
Info :
Begin stuffing the body at Round 16. Stuff firmly for a sturdy base but leave a small unstuffed opening at the neck top to sew head in later. Use the heart placement marker to locate where the large heart applique will be sewn; center it on Rounds 15-19.
Round 21 :
(7 sc, dec) x 6 (48)
Round 22 :
(6 sc, dec) x 6 (42)
Round 23 :
(5 sc, dec) x 6 (36)
Round 24 :
(4 sc, dec) x 6 (30)
Round 25 :
(3 sc, dec) x 6 (24)
Round 26 :
(2 sc, dec) x 6 (18)
Round 27 :
(1 sc, dec) x 6 (12)
Info :
Fasten off leaving a long tail for sewing the body bottom closed after attaching legs and tail. Before fully closing base, ensure legs and tail are attached and stuffed correctly. Reinforce the base by sewing through stitches twice for stability.
— Large Heart Applique (Belly) :
Round 1 :
6 sc in magic ring (6)
Round 3 :
(1 sc, inc) x 6 (18)
Round 4 :
(2 sc, inc) x 6 (24)
Round 5 :
(3 sc, inc) x 6 (30)
Round 6 :
1 sc in each st (30)
Round 7 :
(3 sc, dec) x 6 (24)
Round 8 :
(2 sc, dec) x 6 (18)
Round 9 :
(1 sc, dec) x 6 (12)
Info :
Work the heart in soft pink. After Round 6, shape into a heart by adjusting placement of stitches; some flattening is needed. Stuff very lightly if you want the heart slightly raised. Fasten off and leave a long tail for sewing to the body, centering the heart on the marks at Rounds 15-19 of the body.
— Arm (Make 2) :
Round 1 :
6 sc in magic ring (6)
Round 3 :
(1 sc, inc) x 6 (18)
Round 4-7 :
1 sc in each st (18)
Info :
Make burgundy arms. These are slightly tapered. Start stuffing the hand area firmly at Round 6 to create a defined paw. Add tiny pink paw tips later.
Round 8 :
(2 sc, dec) x 6 (12)
Round 9-12 :
1 sc in each st (12)
Round 13 :
(1 sc, inc) x 6 (18)
Round 14-16 :
1 sc in each st (18)
Round 17 :
(2 sc, inc) x 6 (24)
Round 18 :
1 sc in each st (24)
Info :
Fasten off leaving a long tail for sewing. Sew arms to the body at approximately Rounds 18-22 of the body, spacing them evenly on either side of the heart. Add small pink paw tips by changing to soft pink and working 6 sc around the last palm stitches as a tiny cap.
— Leg (Make 2) :
Round 1 :
6 sc in magic ring (6)
Round 3 :
(1 sc, inc) x 6 (18)
Round 4 :
(2 sc, inc) x 6 (24)
Round 5-8 :
1 sc in each st (24)
Info :
Work the foot a little wider and flatter for sitting stability. Stuff the foot firmly by Round 6. The visible heart paw pad will be attached to the toe area later.
Round 9 :
(3 sc, inc) x 6 (30)
Round 10-16 :
1 sc in each st (30)
Round 17 :
(3 sc, dec) x 6 (24)
Round 18 :
(2 sc, dec) x 6 (18)
Round 19 :
(1 sc, dec) x 6 (12)
Info :
Fasten off leaving long tail. Sew legs to the bottom opening of the body at the marked positions (approx body Rounds 1-6 area). Ensure spacing allows the dragon to sit evenly. Attach the heart paw pads (small heart appliques) to the toes using the long tail.
— Small Heart Applique (Make 6 for toes and cheeks) :
Round 1 :
5 sc in magic ring (5)
Round 2 :
(1 sc, inc) x 2, 1 sc, inc in last st to shape (8)
Round 3 :
1 sc in each st (8)
Round 4 :
Buttonhole-style shaping: ch 1, sl st into specific st, then sc in next; shape with 2-3 sl sts to make top lobes. Fasten off leaving tail for sewing
Info :
These tiny hearts can be shaped by flattening and sewing the top segments together slightly when attaching so they form a flat heart like the ones on the cheeks and toes in the photo.
— Ear (Make 2) :
Round 1 :
6 sc in magic ring soft pink inner ear (6)
Round 3 :
(1 sc, inc) x 6 (18)
Round 4 :
1 sc in each st (18)
Info :
Switch to burgundy for the outer ear border: join burgundy yarn along the edge and work 1 round of sc through both loops around to frame the inner ear. Leave a long tail for sewing and fold slightly while attaching to create a cupped ear.
Round 5 :
Join burgundy, work 1 sc around outer edge (18)
Round 6-7 :
1 sc in each st (18)
Info :
Sew ears to the head at approximately Rounds 6-8 on either side and slightly angled forward. Pin before sewing to ensure symmetry and that inner pink shows prominently.
— Horn (Make 2) :
Round 1 :
6 sc in magic ring (6)
Round 3 :
(1 sc, inc) x 6 (18)
Round 4-5 :
1 sc in each st (18)
Round 6 :
(2 sc, dec) x 6 (12)
Round 7 :
(1 sc, dec) x 4, 2 sc (8)
Round 8 :
1 sc in each st (8)
Round 9 :
Fasten off leaving long tail. Stuff lightly and sew horns centered on top of the head, spaced as in the photo. For a slightly spiral look, offset the decreases on alternating rounds while stuffing.
— Dorsal Spikes (Make 8-10 small bumps) :
Round 1 :
5 sc in magic ring (5)
Round 2 :
1 sc in each st (5)
Round 3 :
(sc around chain) or shape into small scallop then fasten off leaving tail
Info :
Make 8-10 spikes in burgundy and sew down the center back of the head and down the spine to the tail. Space evenly and angle them slightly; use small, neat whip stitches to fix each base so they stand upright like scallops in the photo.
— Wing (Make 2) :
Round 1 :
Make foundation chain 12, join to work in rounds to create wing shape or start with 6 sc in magic ring then expand to wing skeleton (6)
Round 2 :
Work increases on the curve: (1 sc, inc) along the long edge to flatten into a semi-oval (approx 18-22 sts total)
Round 3 :
1 sc in each st BLO to create a ridge along the top for structure (22)
Info :
Wing membrane: join soft pink and work a slightly smaller membrane piece to sew inside the wing skeleton. The outer wing frame is burgundy and the inner membrane is pink. The frame should have three finger ridges; create three strips by crocheting narrow tubes and sewing them across the membrane for the segmented look.
Round 4 :
Make inner membrane: using soft pink, foundation chain 8, 2 sc in second ch from hook then sc across, turn and increase to form a triangular membrane sized to fit inside the burgundy frame (approx 6-8 rows)
Round 5 :
Sew membrane inside frame. Attach three narrow ridges: ch 10, sc back along chain (three times), sew onto membrane to look like the wing fingers, slightly curved.
Round 6-10 :
Finish frame and close small opening. Fasten off leaving tails for sewing. Attach wings to the back at body Rounds 12-16, angling down slightly and supported by spikes near the base for a natural look.
— Tail :
Round 1 :
6 sc in magic ring (6)
Round 3 :
(1 sc, inc) x 6 (18)
Round 4-6 :
1 sc in each st (18)
Round 7 :
(2 sc, dec) x 6 (12)
Round 8-10 :
1 sc in each st (12)
Round 11 :
(1 sc, dec) x 4, 1 sc x 0 to shape (8) - alternate decreases to taper naturally (8)
Round 12-20 :
1 sc in each st (8) - work length to desired tail size (approx 20 rounds total for a long tail)
Info :
Add an inner wire if you need a poseable tail before stuffing fully. Sew small pink bobble spikes (see Tail Spike section) along the top of the tail spaced evenly. Fasten off and attach to the back bottom of the body with tight stitches, reinforcing at least 6 times through the base.
— Tail Spike / Bobble (Make 10) :
Round 1 :
6 sc in magic ring (6)
Round 3 :
1 sc in each st (12)
Round 4 :
Fasten off leaving tail. These bobbles will appear raised on top of tail and on toes. Sew each bobble securely in line along the tail as pictured.
— Paw Heart Pads (Make 2 for toes) :
Round 1 :
5 sc in magic ring (5)
Round 2 :
(1 sc, inc) x 2, 1 sc, inc in last st to shape (8)
Round 3 :
1 sc in each st (8)
Info :
Flatten and sew to toes so that the heart looks like a little pad. Use soft pink for contrast. Secure with hidden stitches so they sit flush with the foot.
— Assembly & Final Shaping :
Info :
Before sewing, block pieces lightly by shaping with hands. Use pins to place head, arms, legs, wings, tail and spikes. The head attaches to the body at the body opening: place the head opening over the body top and sew with a ladder stitch around the neck, matching Rounds for even join.
Info :
Sew dorsal spikes along the center back: start at the top of the head and continue to the tail base. Sew wings to the back at Rounds 12-16 of the body and add reinforcement stitches. Attach horns at the top of the head with strong stitches and a dab of fabric glue inside if you want extra security.
Info :
For facial expression, embroider small curved eyebrow lines above the eyes using a few stitches of black yarn. Sew the little cheek hearts under each eye. Ensure symmetry by measuring distances from eye centers to each feature before sewing.
Info :
Weave in all yarn tails neatly into the body and trim. Use a surface stitch around join lines if you want a more polished, invisible seam. Add a little blush using craft chalk or soft pink pigment on the cheeks if desired.
— Finishing Touches :
Info :
Check all attachments for security. Reinforce high-stress seams with extra passes. If adding a wire inside limbs or tail, ensure ends are folded and padded well to prevent poking through. If giving to a small child, consider embroidering eyes instead of safety eyes for safety.
This sweet burgundy dragon brings heart-warming charm to any shelf or nursery with its soft curves, contrasting pink heart, and playful spikes. Every stitch is a little act of love, and assembly is where all the personality comes together. Display proudly or gift to someone special — this dragon is made to be cherished. 🧶💕✨