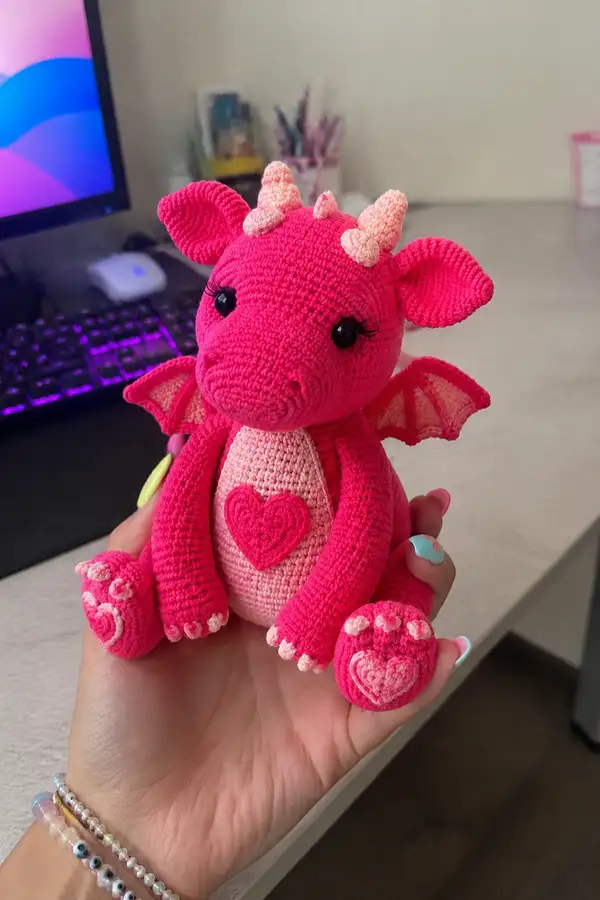
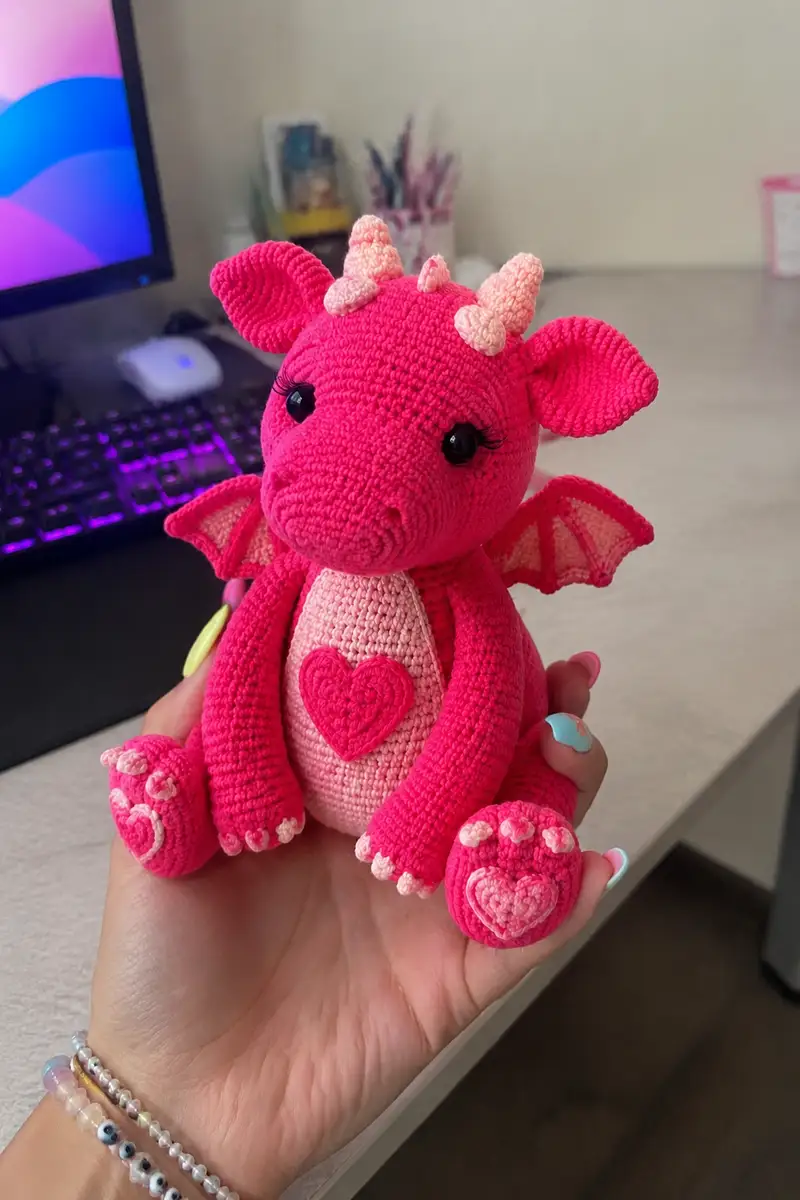
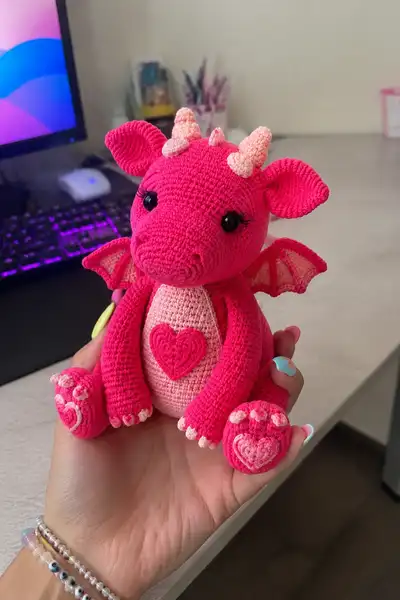
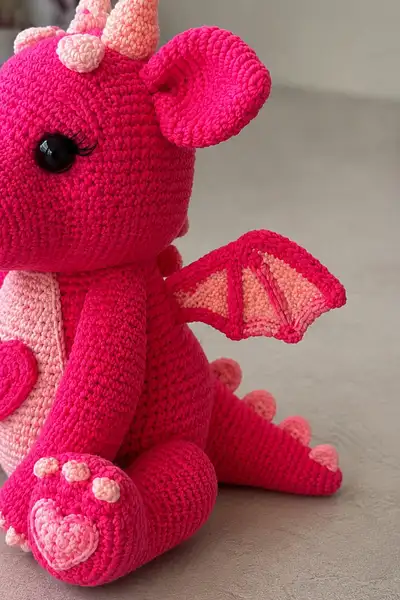
Sweet, squishable hot-pink dragon with contrasting baby-pink details, a heart applique on the belly and a trail of tiny hearts on the paws and tail. Features large expressive safety eyes with long lashes, cute curled ears, gentle wings, and soft conical horns. This pattern walks you through shaping the head, body, limbs, wings, tail and decorative hearts step-by-step for a charming finished toy. Great as a whimsical gift or a colorful decor piece.
Progress Tracker
0% Complete
— Head :
Round 1 :
6 sc in magic ring (6)
Round 3 :
(1 sc, 1 inc) x 6 (18)
Round 4 :
(2 sc, 1 inc) x 6 (24)
Round 5 :
(3 sc, 1 inc) x 6 (30)
Round 6 :
(4 sc, 1 inc) x 6 (36)
Round 7 :
(5 sc, 1 inc) x 6 (42)
Round 8 :
(6 sc, 1 inc) x 6 (48)
Info :
Work in continuous rounds (spiral) for a seamless look. Place a stitch marker at the first stitch of Round 1 and move it each round to track round start. Use Hot Pink yarn for head unless changing color later.
Round 9-12 :
1 sc in each st (48)
Info :
Round 9-12 begin building height of head. At the end of round 12, use a removable marker to map eye placement: eyes will sit between rounds 13-15 centered about 10-12 stitches apart depending on expression; for this dragon place eyes 8-10 sts apart from center front.
Round 13 :
1 sc in each st (48)
Round 14 :
1 sc in each st (48)
Info :
Insert safety eyes between rounds 13 and 14, spacing them 9 stitches apart (measure from center front). Insert eyes before heavy stuffing, secure washers firmly. If using eyelashes, attach now or later with a dab of fabric glue behind eyes.
Round 15-18 :
1 sc in each st (48)
Round 19 :
(6 sc, 1 dec) x 6 (42)
Info :
Begin to shape face and muzzle. Stuff head gradually from this point with polyester filling. Add small amounts at a time, pushing the fill into cheek areas and top of skull for rounded shape.
Round 20 :
(5 sc, 1 dec) x 6 (36)
Round 21 :
(4 sc, 1 dec) x 6 (30)
Round 22 :
(3 sc, 1 dec) x 6 (24)
Info :
Create the forehead to muzzle taper by watching placement of decreases centrally: keep decreases evenly spaced so the face remains rounded, not flattened. Continue stuffing to keep face firm but squeezable.
Round 23 :
(2 sc, 1 dec) x 6 (18)
Round 24 :
(1 sc, 1 dec) x 6 (12)
Info :
Fasten off leaving a long tail for sewing into the neck opening later. Finish stuffing firmly so the front of the muzzle keeps its shape. The small center opening will be used to attach head to body so do not close completely here.
Round 26 :
Join Hot Pink to form snout ridge: ch1, 6 sc around muzzle opening to create a short collar (6)
Round 28 :
(1 sc, inc) x 6 (18)
Round 29 :
1 sc in each st (18)
Info :
These rounds build a short snout collar for shaping and to provide a stable sewing edge when attaching the head to the body. Keep stitches snug and even.
Round 30 :
(1 sc, 1 dec) x 6 (12)
Round 32 :
Fasten off and leave long tail for sewing (6)
Info :
Sew in any remaining opening or leave a long tail to attach to the neck of the body during assembly. Add embroidered nostril detail by using a few short satin stitch lines on the snout if desired.
— Horns & Small Spikes (Make 7 - 3 on head, 4 on tail) :
Round 1 :
Using Baby Pink, 6 sc in magic ring (6)
Round 3 :
(1 sc, 1 inc) x 6 (18)
Round 4 :
1 sc in each st (18)
Info :
These create small conical horns. For the three head horns, make slightly larger by working rounds 5-7: work 3 sc rounds for height. For tail spikes, stop sooner to keep them smaller.
Round 5 :
1 sc in each st (18)
Round 6 :
(3 sc, 1 dec) x 4 + 2 sc (14) adjust to shape tip
Round 7 :
(2 sc, 1 dec) x 3 + 2 sc (11) sculpt tip
Round 8 :
Finish shaping, FO leaving tail for sewing
Info :
Stuff horns lightly with a small pinch of filling to keep shape. For a smoother cone, use fewer decreases at last rounds. Sew three onto top of head evenly spaced: two larger lateral horns and one small center horn, using placement between rounds 8-10 of head.
— Ears (Make 2) :
Round 1 :
6 sc in magic ring (6)
Round 3 :
(1 sc, 1 inc) x 6 (18)
Round 4 :
(2 sc, 1 inc) x 6 (24)
Round 5 :
1 sc in each st (24)
Round 6 :
1 sc in next 6 sts, FLO for 12 sts to form inner ridge, then 1 sc in last 6 sts (24)
Round 7 :
(1 sc, 1 dec) x 6 (18)
Info :
Fold ear slightly to create cupped shape. Work last rounds more tightly to create a rim. Use Hot Pink for outer ear and Baby Pink for a small inner patch if desired by changing color on Round 5 and working in FLO to create a visible inner ridge.
Round 8 :
(1 sc, 1 dec) x 6 (12)
Round 10 :
FO leave tail for sewing
Info :
Sew ears to the sides of the head between rounds 8-12. Pin both ears first to ensure symmetry before stitching. Slightly rotate ears forward to mimic the picture's curled, open ear look.
— Body :
Round 1 :
6 sc in magic ring (6)
Round 3 :
(1 sc, 1 inc) x 6 (18)
Round 4 :
(2 sc, 1 inc) x 6 (24)
Round 5 :
(3 sc, 1 inc) x 6 (30)
Round 6 :
(4 sc, 1 inc) x 6 (36)
Round 7 :
(5 sc, 1 inc) x 6 (42)
Round 8 :
(6 sc, 1 inc) x 6 (48)
Info :
Body is worked in Hot Pink. These increases build a rounded base to match the head scale and allow room for belly shaping. Place a removable marker at start of round 1 to track orientation for attaching limbs later.
Round 9-12 :
1 sc in each st (48)
Round 13 :
(6 sc, 1 dec) x 6 (42)
Round 14-16 :
1 sc in each st (42)
Info :
Now mark the front center of the body. You will work an inset belly panel (Baby Pink) starting round 17. If you prefer to embroider the panel later, continue in Hot Pink for now.
Round 17 :
Change to Baby Pink. 1 sc in each st (42)
Round 18 :
1 sc in each st (42)
Info :
To create a flat oval belly panel, work a short separate oval piece in Baby Pink (instructions below) and sew onto the front of the body for a smooth layered look. Alternatively continue in Baby Pink rounds to incorporate belly directly into the body.
Round 19-22 :
1 sc in each st (42)
Round 23 :
(5 sc, 1 dec) x 6 (36)
Round 24 :
(4 sc, 1 dec) x 6 (30)
Info :
Begin taper toward the neck. If attaching the head immediately, leave the top rounds slightly open. Stuff the body firmly as you progress but leave the top 6-8 rounds unstuffed until head is sewn on to allow for easier alignment.
Round 25 :
(3 sc, 1 dec) x 6 (24)
Round 26 :
(2 sc, 1 dec) x 6 (18)
Round 27 :
(1 sc, 1 dec) x 6 (12)
Round 29 :
Fasten off leaving long tail for sewing head (6)
Info :
Do not fully close body top. Use the long tail to stitch the head to the body opening; pull slightly tight so the neck sits snugly. If you worked Baby Pink rounds, make sure the belly panel is centered before final closure.
— Belly Oval Panel (Baby Pink) :
Round 1 :
6 sc in magic ring (6)
Round 3 :
(1 sc, 1 inc) x 6 (18)
Round 4 :
1 sc in each st (18)
Round 5 :
(2 sc, 1 inc) x 6 (24)
Round 6 :
Work BLO around to create slight ridge for edge, 1 sc in each st (24)
Round 7 :
1 sc in next 6 sts, 6 hdc across the long edge, 1 sc in last 6 sts to shape an oval (24)
Round 8 :
Sl st around and FO leaving tail for sewing to body
Info :
Stuff very lightly or leave flat; the belly is a decorative panel and should not be heavily stuffed. Center and sew onto front of body using whip stitch, matching round 17-22 area for alignment. The heart applique will be sewn on top.
— Arms (Make 2) :
Round 1 :
6 sc in magic ring (6)
Round 3 :
(1 sc, 1 inc) x 6 (18)
Round 4 :
(2 sc, 1 inc) x 6 (24)
Round 5-8 :
1 sc in each st (24)
Info :
These form the hand and wrist. Stuff the hand area firmly to give a rounded palm before working the forearm. If you want poseable arms, insert floral wire down the center shaft before stuffing the upper arm.
Round 9 :
(3 sc, 1 dec) x 6 (18)
Round 10-16 :
1 sc in each st (18) work straight to create forearm and elbow length
Round 17 :
(2 sc, 1 dec) x 6 (12)
Round 18 :
1 sc in each st (12)
Round 19 :
Fasten off leaving long tail for sewing (12)
Info :
Sew arms to body on the sides between rounds 12-16 of the body; place them slightly forward to achieve the sitting, slightly hugging pose seen in the photo. Sew through the top 6 rounds of each arm into the body to anchor securely.
— Paw Details (Make 2) :
Round 1 :
With Baby Pink, 6 sc in magic ring (6)
Round 3 :
(1 sc, 1 inc) x 6 (18)
Round 4 :
sl st and FO leaving tail. Flatten and sew to top of hand palm (18)
Info :
Make three small little toe bumps per paw using hot pink tiny bobbles: ch2, 3 dc in same st, sl st to base, FO. Sew them across the top of the paw pad for textured toes.
Round 5 :
For layered heart on paw: With Baby Pink make small heart (see heart applique below), with Hot Pink make slightly larger heart and sew Baby Pink heart onto it, then sew onto paw center.
— Legs (Make 2) :
Round 1 :
6 sc in magic ring (6)
Round 3 :
(1 sc, 1 inc) x 6 (18)
Round 4 :
(2 sc, 1 inc) x 6 (24)
Round 5 :
(3 sc, 1 inc) x 6 (30)
Round 6-10 :
1 sc in each st (30) work the foot base rounds
Info :
For a flat bottom foot, on Round 10 work short row modification: work 12 sc, turn (do not join), 12 sc back in FLO, continue next round in continuous rounds around to form a slight sole. This gives a flatter base so dragon can sit nicely.
Round 11 :
(4 sc, 1 dec) x 5 (25)
Round 12-15 :
1 sc in each st (25)
Round 16 :
(3 sc, 1 dec) x 5 (20)
Round 17-20 :
1 sc in each st (20) build calf length
Round 21 :
(2 sc, 1 dec) x 5 (15)
Round 22 :
(1 sc, 1 dec) x 5 (10)
Round 23 :
Fasten off leaving long tail for sewing (10)
Info :
Stuff feet firmly to create a solid base. Sew legs to bottom of body at rounds 1-4 area spaced evenly apart so dragon sits balanced. Reinforce stitches at attachment points for stability.
— Tail :
Round 1 :
6 sc in magic ring (6)
Round 3 :
(1 sc, 1 inc) x 6 (18)
Round 4-8 :
1 sc in each st (18) taper by working even rounds here to create length
Round 9 :
(3 sc, 1 dec) x 4 + 2 sc (14)
Round 10-13 :
1 sc in each st (14)
Round 14 :
(2 sc, 1 dec) x 3 + 2 sc (11)
Round 15 :
1 sc in each st (11)
Round 16 :
Attach small baby-pink spikes: make 4 small spikes (see Horns & Small Spikes) and sew along the tail spaced evenly. FO tail leaving long tail for sewing to back of body
Info :
Stuff tail lightly so it curves gently. Sew tail to back of body centered along bottom rounding just above the leg attachment so the tail rests naturally behind the dragon.
— Wings (Make 2) :
Wing Panel Round 1 :
Using Baby Pink, ch 12, turn, 10 sc starting in 2nd ch from hook to form a flat strip (10)
Round 2 :
Ch1, 1 sc in each across (10)
Round 3 :
Turn and hdc in FLO across to create a slight ridge (10)
Info :
These rounds form the wing membrane. Next we create the wing frame in Hot Pink and join around the edge to create a defined wing shape.
Wing Frame Round 4 :
Join Hot Pink to one short end, sc evenly around strip adding 3 extra sc at each corner to curve the wing into a triangular bat-like shape (approximately 36 total)
Round 5 :
1 sc in each st around (36)
Round 6 :
Work 3 ridged spokes: mark three evenly spaced points on membrane and work BLO ridges from outside edge toward root using sc rows that are worked back and forth over 4-6 sts to mimic wing bones. Secure ends and FO leaving long tail for sewing.
Info :
Sew wings to upper back of body between rounds 10-14, spacing slightly behind where the arms attach. Position so wings angle outward. Reinforce with a few mattress stitches through wing root and body for stability.
— Heart Applique (Large Belly Heart) :
Round 1 :
With Baby Pink, ch 4, sl st to form ring, work 6 sc into ring (6)
Round 3 :
(1 sc, 1 inc) x 6 (18)
Round 4 :
Work 1 sc in next 4 sts, 3 sc in next st (peak of heart), 1 sc in next 4 sts, 3 sc in next st, finish shaping by working sc across remaining to form a rounded heart (18-20 depending on shaping)
Round 5 :
Round in Hot Pink around edge for contrast: sl st in next st, sc evenly around to create a hot-pink rim, FO leaving tail for sewing
Info :
Sew heart centered on baby-pink belly panel. Use small invisible stitches around perimeter to keep seam neat. Make sure heart sits flat; add a few anchoring stitches through the panel but not through body stuffing.
— Paw Heart Appliques (Make 2 per paw - base and small heart) :
Round 1 :
With Baby Pink, 4 sc in magic ring (4)
Round 3 :
Work shaping to heart by flattening and making 3 sc bobble on top points then 1 sc across bottom to form a tiny heart. FO leaving tail
Info :
Sew small baby-pink heart onto slightly larger hot-pink heart that you make with the same method but add one extra increase round. These layered hearts were sewn onto the paw soles in the picture for a dimensional effect.
— Assembly & Final Details :
Info :
Before assembly, ensure all ends are woven in and all parts stuffed as instructed. Use pins to position pieces prior to sewing for correct placement and symmetry.
Step 1 :
Attach head to body by sewing the head collar (Round 26-31 of head) to top opening of body using mattress stitch. Align center front of head (snout) to center front of body.
Step 2 :
Sew arms to body along rounds 12-16, slightly forward-facing so hands rest on the belly. Reinforce with 6-8 passes of yarn for each arm.
Step 3 :
Attach legs to bottom of body around rounds 1-4 area, spacing legs about 10-12 stitches apart for balance. Add extra stitches if needed to secure legs so the toy sits stably.
Step 4 :
Sew tail to back center of body at bottom and reinforce with cross-stitching to keep it anchored. Position small spikes evenly along tail top and sew firmly.
Step 5 :
Sew wings to upper back between rounds 10-14. For a stable look, tack down wing tips to back with a couple small stitches so they tilt slightly upward as in the photo.
Step 6 :
Sew ears to head sides between rounds 8-12 and attach horns to top center of head. Add eyelash pieces or embroider eyelashes with black yarn beneath safety eyes for expression.
Info :
After sewing all pieces, weave in tails and use a yarn needle to hide knots. Add small embroidered nostrils and a subtle smile with a few backstitches. Optionally rub light blush onto cheeks with fabric-safe pastel for a sweet finish.
This hot-pink love dragon comes alive with bright color and heart-filled details — horns, wings, curled ears and layered heart appliques make it delightfully charming. Each section is crafted for personality: expressive eyes, soft tail spikes and little paw hearts add character. The pattern balances simple shapes with rewarding detail so your finished friend is both beautiful and huggable. Enjoy stitching every heart-filled round and celebrate the joy of handmade gifts! 🧶💖