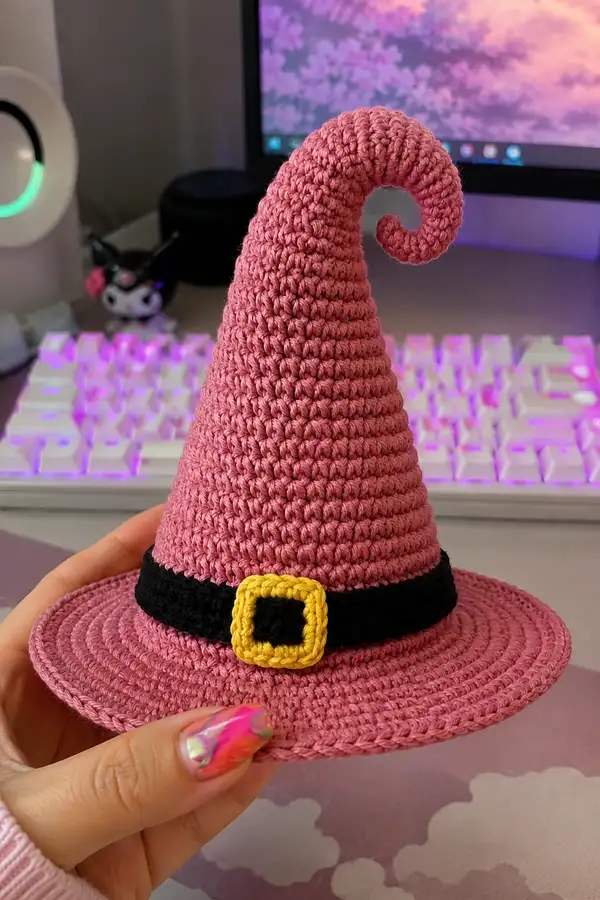
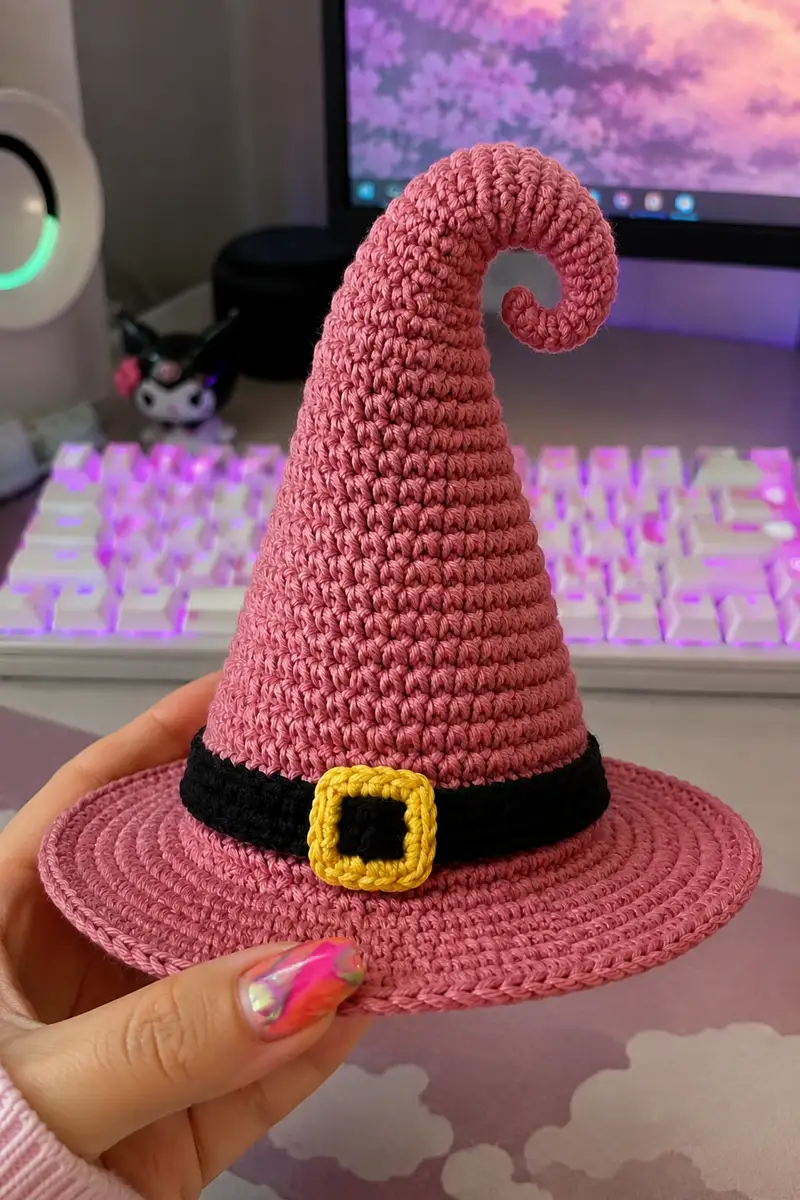
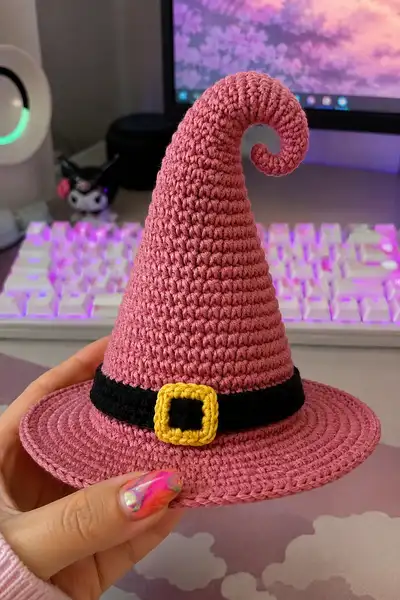
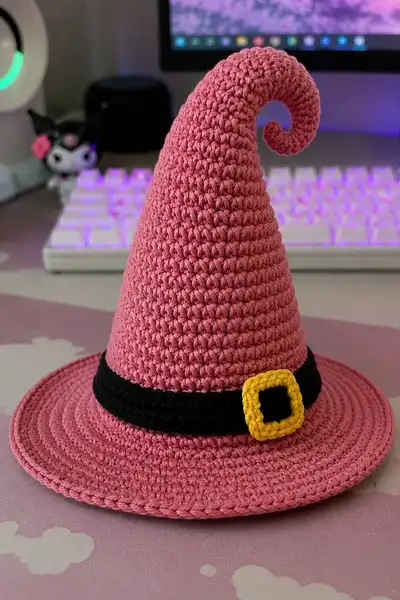
A sweet, spired witch hat with a dramatic curled tip — crocheted in dusty pink with a contrasting black band and a bright yellow buckle. This pattern creates a sturdy, slightly stiff hat perfect as an amigurumi accessory or a small decoration. The tall cone, gently flared brim and whimsical spiral curl are designed to be sculpted with optional wire or light stuffing so the curl holds its shape.
Progress Tracker
0% Complete
— Overview :
Info :
This pattern builds a tall conical witch hat worked from tip to brim, finishing with a wide brim worked separately then attached, plus a decorative band and buckle. You can optionally insert wire into the spiral tip for shaping or lightly stuff the spiral tube. All rounds are worked in continuous rounds unless noted; use a stitch marker to mark the first stitch of each round. Measurements: finished height approximately 7-8" to tip of curl (unbent), brim diameter approximately 8-9" depending on yarn and tension.
— Crown / Cone (work in Dusty Pink) :
Round 1 :
6 sc in magic ring (6)
Round 3 :
(1 sc, 1 inc) x 6 (18)
Round 4 :
(2 sc, 1 inc) x 6 (24)
Round 5 :
(3 sc, 1 inc) x 6 (30)
Round 6 :
(4 sc, 1 inc) x 6 (36)
Round 7 :
(5 sc, 1 inc) x 6 (42)
Round 8 :
(6 sc, 1 inc) x 6 (48)
Round 9 :
(7 sc, 1 inc) x 6 (54)
Round 10 :
(8 sc, 1 inc) x 6 (60)
Round 11 :
(9 sc, 1 inc) x 6 (66)
Round 12 :
(10 sc, 1 inc) x 6 (72)
Info :
By round 12 you have reached the intended internal circumference where the hat will sit. If you are making this for a particular amigurumi head, check fit now; adjust by adding or removing increase rounds before continuing. Mark first stitch of every round to avoid losing place.
Round 13-22 :
1 sc in each st (72) (10 rounds total) — build height, keep fabric dense and even
Info :
If you prefer a taller hat, work additional even rounds here in multiples of 2-6 rounds to keep proportions. This section should remain straight so the cone flares only near the brim.
Round 23-28 :
1 sc in each st (72) (6 rounds)
Info :
Work tightly on these rounds; on camera hat the stitches are compact and uniform. If you are seeing gaps, switch to a hook 0.25-0.5mm smaller.
Round 29 :
(10 sc, 1 dec) x 6 (66)
Round 30 :
(9 sc, 1 dec) x 6 (60)
Round 31 :
(8 sc, 1 dec) x 6 (54)
Info :
Begin subtle tapering here; we are narrowing the cone slightly to encourage it to coil toward the tip later. Do not stuff the cone — this piece is generally hollow for an amigurumi head or display. If you want a rigid internal form, insert a light cardboard cone or interfacing before finishing the brim.
Round 32 :
(7 sc, 1 dec) x 6 (48)
Round 33 :
(6 sc, 1 dec) x 6 (42)
Round 34 :
(5 sc, 1 dec) x 6 (36)
Info :
At round 34 the cone is narrowing; if you are making this hat to sit on a doll head, test the opening now by sliding it gently over the head shape — the base should be wide enough to sit snug but not jam. Add or reduce even rounds in earlier sections if necessary.
Round 35 :
(4 sc, 1 dec) x 6 (30)
Round 36 :
(3 sc, 1 dec) x 6 (24)
Round 37 :
(2 sc, 1 dec) x 6 (18)
Round 38 :
(1 sc, 1 dec) x 6 (12)
Info :
We will create the spiral tip as a narrow tube worked in continuous rounds from this point. Keep these stitches consistent in tension — the tube should be narrow and stable. Place a stitch marker at the first stitch of round 39 and move it each round.
Round 39-58 :
1 sc in each st (12) (20 rounds) — work a long narrow tube; this will become the spiral spine
Info :
If you plan to add wire for a poseable curl, insert a length of thin floral wire or coated craft wire inside this tube before final shaping. Feed the wire through while the tube remains open; stop about 1-2" before the tip. Make sure the wire end is bent so it cannot poke through stitches.
Round 59 :
(1 sc, 1 dec) x 4 (8)
Round 60 :
(1 sc, 1 dec) x 2 (6)
Round 61 :
1 sc in each st (6)
Round 63 :
1 sc in each st (3)
Info :
Fasten off leaving a long tail if you want to sew the tip closed more neatly. At this point you can lightly stuff the spiral tube (if you prefer) with a small amount of fiberfill around the wire so the spiral holds and looks plump. If you used wire, bend gently into the desired swirl shape. Alternatively, do not stuff and allow the spiral to rest as a hollow tube for a lighter look.
Round 64 :
Optional finishing: sl st in next st and fasten off; weave in ends securely
Info :
To make a tighter spiral tip (as in the photo), curve the last 6-10 rounds around a finger or small dowel, then bend the wire carefully to hold that curl and stitch through the tube layers to lock the spiral shape. Use a tapestry needle to take small whip stitches through the layers of the spiral to keep it from uncoiling.
— Brim (worked in Dusty Pink, make as a separate flat disc) :
Info :
Make the brim as a separate flat disc then sew to the crown base. The brim starts at a small centre and increases rapidly to get a wide, even circle. Count your rounds carefully — the brim in the photos is fairly wide (8-9" diameter). We'll increase to 120 sts total before working a few even rounds for width.
Round 1 :
6 sc in magic ring (6)
Round 3 :
(1 sc, 1 inc) x 6 (18)
Round 4 :
(2 sc, 1 inc) x 6 (24)
Round 5 :
(3 sc, 1 inc) x 6 (30)
Round 6 :
(4 sc, 1 inc) x 6 (36)
Round 7 :
(5 sc, 1 inc) x 6 (42)
Round 8 :
(6 sc, 1 inc) x 6 (48)
Round 9 :
(7 sc, 1 inc) x 6 (54)
Round 10 :
(8 sc, 1 inc) x 6 (60)
Round 11 :
(9 sc, 1 inc) x 6 (66)
Round 12 :
(10 sc, 1 inc) x 6 (72)
Round 13 :
(11 sc, 1 inc) x 6 (78)
Round 14 :
(12 sc, 1 inc) x 6 (84)
Round 15 :
(13 sc, 1 inc) x 6 (90)
Round 16 :
(14 sc, 1 inc) x 6 (96)
Round 17 :
(15 sc, 1 inc) x 6 (102)
Round 18 :
(16 sc, 1 inc) x 6 (108)
Round 19 :
(17 sc, 1 inc) x 6 (114)
Round 20 :
(18 sc, 1 inc) x 6 (120)
Round 21-26 :
1 sc in each st (120) (6 rounds) — build brim width and create a flat even surface
Info :
The brim in the photo has a neat rolled edge. To achieve this, after the even rounds, work one or two rounds in BLO to create a slight ridge, then finish with a round of sl st in each st to pull the edge together and create the crisp rim.
Round 27 :
1 sc in each st BLO (120)
Round 28 :
sl st in each st around (120) — neat finishing round
Info :
Block the brim flat while wet and pin it to a circular form if you want a perfectly flat brim. For a slightly upturned edge like the photo, gently steam or spray and shape the rim upward before it dries. For a sturdier brim, apply diluted fabric stiffener on the underside and let dry tightly pinned.
— Band (work in Black) :
Info :
The band is a simple strip worked to wrap around the base of the crown. You can either stitch it to the outside of the brim/crown joint or slip-stitch it in place for a clean finish. Measure circumference before finishing — aim for 72-74 sts to match the base of the crown (adjust if you changed counts above).
Round 1 :
Ch 74 (or ch to measured circumference + 1). Join with sl st to form a ring, avoiding twisting ch loop.
Round 2 :
sc in each ch around (74) — join with sl st to first sc (74)
Round 3-5 :
sc in each st around (74) (3 rounds) — band height approx 3-4 rows
Info :
Work the band in BLO for the last round to create a visible ridge if you like. Alternatively, make it two rows taller for a chunkier look. Keep long tail for sewing in place and pin around hat base before final attachment.
Round 6 :
Optional: 1 sc in each st BLO (74) — creates subtle ridge on lower edge
— Buckle (work in Yellow with small black insert) :
Info :
The buckle is a 3D square sewn to the band. Make a small black square for center if desired then surface crochet yellow around to create frame.
Black center — Round 1 :
mr, 6 sc in mr (6)
Black center — Round 2 :
6 inc (12)
Black center — Round 3 :
1 sc in each st (12) — fasten off leaving tail for sewing
Yellow frame — Round 1 :
Attach yellow yarn to edge of black square, ch 1, sc evenly around the black square working approx 12-14 sc depending on space; join with sl st to first sc (12-14)
Yellow frame — Round 2 :
(1 sc, inc) evenly around to create thicker frame (approx 18-20 sts) — join with sl st
Yellow frame — Round 3 :
1 sc in each st around to build thickness; fasten off leaving long tail for sewing to band
Info :
Sew the buckle to the center front of the band — anchor through both band layers or around the band, using small stitches for an invisible attachment. If you prefer a flatter buckle, make only one yellow round around the black square and sew it flat to the band.
— Optional Lining / Internal Support :
Info :
If you want the hat to hold a more permanent shape or to slide smoothly over an amigurumi head, cut a lightweight conical piece of interfacing or plastic canvas to fit inside the crown and glue or stitch it in place. For a poseable spiral tip, thread wire through the narrow tube before attaching the brim. If you prefer a floppy spiral, skip the wire and only lightly stuff with fiberfill.
— Finishing Rounds and Texture Details :
Info :
Many hats like this feature subtle ridges at intervals on the cone for texture. To add those, work a round in BLO every 6-8 rounds around the cone while building height (for example after rounds 16, 24, 32). On the brim, finish with BLO and sl st rounds for crisp edges. Always weave in ends into the body, and hide tails by threading them through several rounds of stitches.
Decorative row (cone) :
Optional: After round 20, work 1 sc in each st BLO to create a horizontal ridge; continue with 1 sc in each st next round.
Decorative row (under brim) :
Optional: Join a contrasting color for a thin piping around the brim's underside with sl st, then weave in loose ends for professional look.
Info :
Double-check all joins: the brim attaches to the lower edge of the crown where the stitch count matches the brim's round at 72 or your adjusted number. If needed, add small evenly-spaced increases or decreases when attaching to match counts exactly. Pin carefully and sew with a whip stitch or mattress stitch for an invisible join.
— Edge reinforcement and final shaping :
Info :
After sewing the brim to the crown and attaching the band and buckle, block the entire hat gently to the desired shape. Steam lightly or mist with water and pin the brim and spiral into the final curved position. For extra durability, apply diluted fabric glue or a thin layer of craft stiffener to the underside of the brim, allowing it to dry flat.
This rosy spiral witch hat captures a playful Halloween vibe with a bold buckle and perfectly curled tip. With a combination of steady rounds and gentle shaping, each step leads to a charming finished piece you can proudly display or dress your amigurumi in. The hat's structure is forgiving — add wire for poseable fun or keep it soft and whimsical. 🧶✨ This project is fast to stitch and highly customizable — enjoy the process and make it your own! 🎃