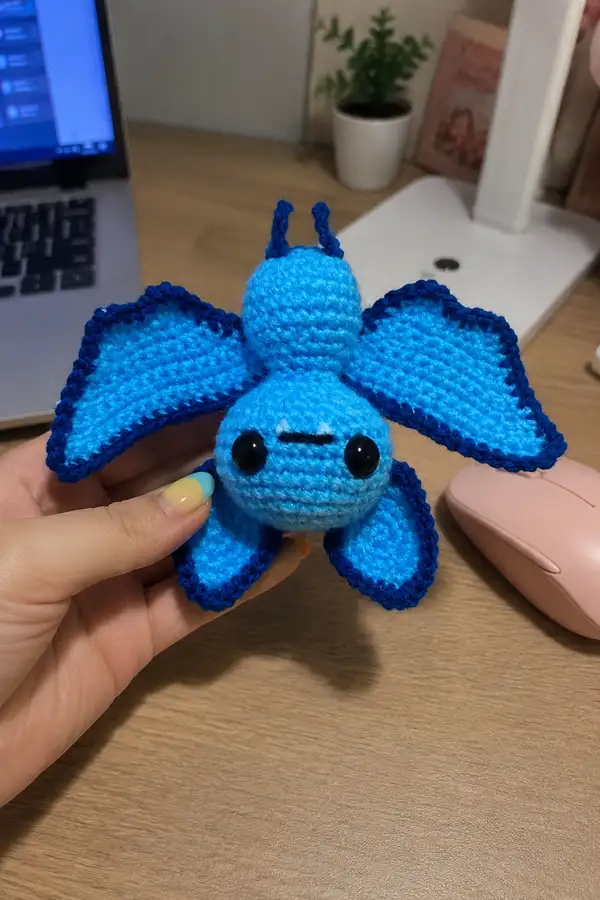
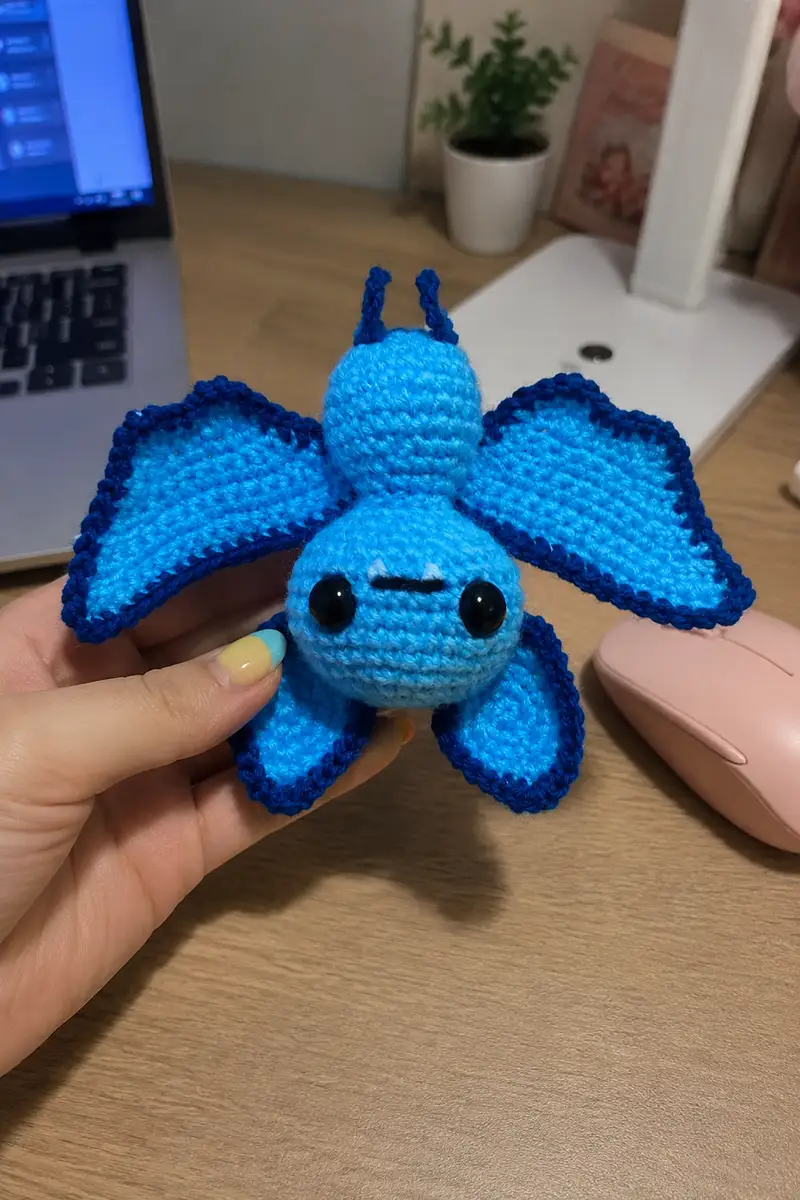
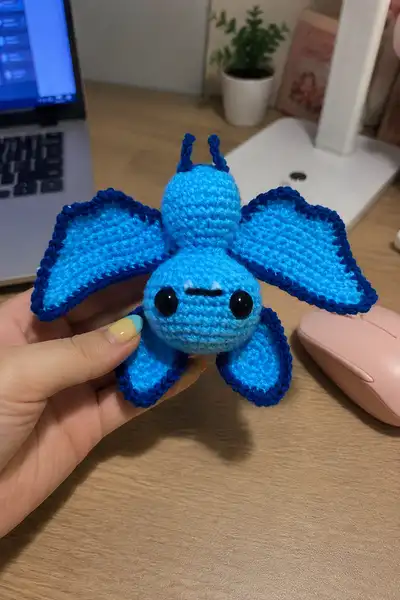
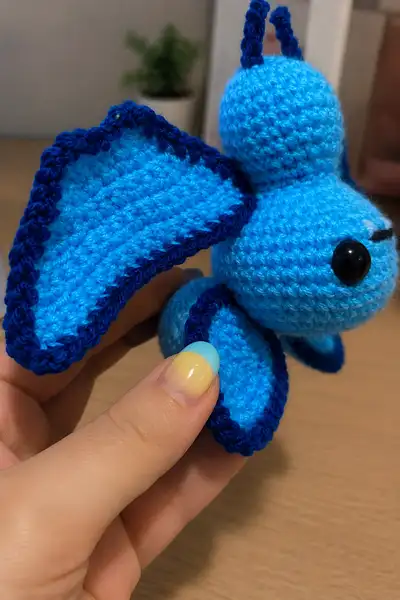
This sweet, pocket-sized bat amigurumi features big layered wings, a rounded two-part body, button-like safety eyes, and a cute embroidered mouth. Worked in bright cyan with a deep blue contrast edging, the plush has a playful, chubby silhouette and small antennae/ears on top. It's the perfect Halloween buddy or year-round kawaii companion, small enough to hold in one hand yet full of character.
Progress Tracker
0% Complete
— Head :
Round 1 :
6 sc in magic ring (6)
Round 3 :
(1 sc, 1 inc) x 6 (18)
Round 4 :
(2 sc, 1 inc) x 6 (24)
Round 5 :
(3 sc, 1 inc) x 6 (30)
Round 6 :
(4 sc, 1 inc) x 6 (36)
Round 7 :
(5 sc, 1 inc) x 6 (42)
Round 8 :
(6 sc, 1 inc) x 6 (48)
Round 9-12 :
1 sc in each st (48)
Info :
Place safety eyes between rounds 10 and 11, approximately 10-12 stitches apart measured across the front depending on expression. For the look in the photo, position eyes about 11 stitches apart (counting between the centers).
Round 13-14 :
1 sc in each st (48)
Info :
Embroider a short horizontal mouth between the eyes later; mark center line to keep symmetry. Begin to watch shaping so you can start stuffing soon.
Round 15 :
(6 sc, 1 dec) x 6 (42)
Round 16 :
(5 sc, 1 dec) x 6 (36)
Info :
Start stuffing the head firmly but not overly tight — the face should be round and smooth. Add small amounts of stuffing, pushing into the front for a round snout, and more toward back for balance.
Round 17 :
(4 sc, 1 dec) x 6 (30)
Round 18 :
(3 sc, 1 dec) x 6 (24)
Round 19 :
(2 sc, 1 dec) x 6 (18)
Round 20 :
(1 sc, 1 dec) x 6 (12)
Info :
Leave the opening at the top of the head loose for sewing to the thorax later. Fasten off if you prefer to close after assembling, or leave a long tail to seam to the neck piece. Weave no tail yet if you plan to attach later by slip stitch.
— Thorax / Upper Body (small stacked sphere behind head) :
Round 1 :
6 sc in magic ring (6)
Round 3 :
(1 sc, 1 inc) x 6 (18)
Round 4 :
(2 sc, 1 inc) x 6 (24)
Round 5-7 :
1 sc in each st (24)
Info :
This sphere sits directly behind the head to create the stacked look. It should be slightly smaller than the head so proportions match the photo. Use slightly looser stuffing than the head to keep it softer and allow a seamless join.
Round 8 :
(2 sc, 1 dec) x 6 (18)
Round 9 :
(1 sc, 1 dec) x 6 (12)
Info :
Leave a long tail for sewing if you plan to stitch this piece to the head from the back. Alternatively, stuff lightly and close with a few slip stitches, then join by sewing through both pieces for a flush seam.
— Lower Body / Belly Sphere :
Round 1 :
6 sc in magic ring (6)
Round 3 :
(1 sc, 1 inc) x 6 (18)
Round 4 :
(2 sc, 1 inc) x 6 (24)
Round 5 :
(3 sc, 1 inc) x 6 (30)
Round 6-9 :
1 sc in each st (30)
Info :
This bottom sphere forms the base of the figure and helps your bat sit upright. Stuff firmly so it provides stable support for the rest of the body. If you want the figure to sit more securely, you can insert a small poker of plastic pellets into the very bottom before finishing the stuffing.
Round 10 :
(3 sc, 1 dec) x 6 (24)
Round 11 :
(2 sc, 1 dec) x 6 (18)
Round 12 :
(1 sc, 1 dec) x 6 (12)
Info :
Leave a long tail for attaching this bottom sphere to the thorax piece. Align it so the thorax sits on top and the head faces forward. When you sew, keep the seam tight to avoid gaps.
— Large Wing (Make 2) :
Info :
Wings are worked flat in rows in the round to form a tapered, scalloped shape. These instructions create a wing approximately proportionate to the head/torso. Work both wings in main color (bright cyan), then add dark-blue edging in a separate round.
Round 1 :
Ch 11, join to create a narrow oval base with 1 sc in 2nd ch from hook, sc across (10 sc), 3 sc in last chain, continue on opposite side of chain: sc across 9, sl st to first sc to join (22 sts total including corners)
Round 2 :
Ch1, sc in each st around, at chain-ends work 3 sc in corner sts to maintain shape (22)
Round 3 :
Ch1, (1 sc, inc) at seven equally spaced positions along the long sides to widen slightly: work an inc every 3-4 sts to create (approx 28)
Round 4 :
1 sc in each st (28)
Round 5 :
(3 sc, 1 inc) x 5 then sc remaining stitches across to form the first outward bulge (33)
Info :
At this stage the wing will look like a small petal; the outer edge will later get a scalloped trim. Keep your tension even for a flat surface. If you prefer a stiffer wing, use a slightly smaller hook for the outer rounds or add a thin piece of craft felt inside when assembling.
Round 6-8 :
1 sc in each st (33)
Round 9 :
(4 sc, 1 inc) x 5 then sc across (38)
Round 10-12 :
1 sc in each st (38)
Round 13 :
(5 sc, 1 inc) x 5 then sc across (43)
Round 14-16 :
1 sc in each st (43)
Info :
Shape the wing by gently pulling the outer edge forward; this helps form the bat-like sweep. Block lightly with steam or a damp towel if you want the wing to hold its shape permanently.
Round 17 :
Start decreasing slightly to taper the tip: (7 sc, 1 dec) x 4 then sc remaining across (approx 39)
Round 18 :
1 sc in each st (39)
Round 19 :
(6 sc, 1 dec) x 4 then sc across (approx 35)
Round 20-21 :
1 sc in each st (35)
Round 22 :
Work a scalloped edge by: *sl st in next st, (3 dc, sl st) in following st* around the outer edge only (work scallops evenly spaced; approx 10-12 scallops)
Info :
Fasten off and weave in the tail. Repeat to make the second large wing. Once both wings are made, we will add a contrasting edging in deep blue. If adding internal wire for posing, insert thin floral wire along the central span now and tack lightly with a few stitches before edging.
Info :
Edge: Join deep blue to the outermost edge with sl st, then (1 sc, sl st) or (1 sc in each st) across for a tight contrasting line. For the scalloped outer rim, work sl st, (3 dc, sl st) in each scallop peak in contrast color.
— Small Lower Wing / Leg (Make 2) :
Round 1 :
Ch7, join to start oval: sc in 2nd ch from hook and across (6), 3 sc in final chain, sc across opposite side (5), sl st to first (14)
Round 2 :
1 sc in each st (14)
Round 3 :
(2 sc, 1 inc) x 3 then sc across (17)
Round 4-6 :
1 sc in each st (17)
Round 7 :
(1 sc, 1 inc) x 4 then sc across (21)
Round 8-10 :
1 sc in each st (21)
Round 11 :
Work a small scallop along outer rim: *sl st, (2 dc, sl st) in next st* around outer edge only (approx 8 scallops)
Info :
These serve as the smaller lower appendages that sit under the head in the finished toy. Edge them with deep-blue yarn as you did the large wings for a cohesive look.
— Horns / Tiny Ears (Make 2) :
Round 1 :
6 sc in magic ring (6)
Round 2-6 :
1 sc in each st (6) (work in continuous rounds to create a short tube, approx 6 rounds long)
Info :
Stuff minimally or leave hollow for a slight floppy horn. Attaching these to the top of the thorax just behind the head gives the bat its antennae-like look. Make them in contrast dark-blue or in main color — photo shows dark-blue horns.
— Wing Edge (Contrast Trim) :
Info :
Use deep navy / dark blue. Join at a corner or a sl st in the outermost round. Work 1 sc in each outer loop around; when you hit scallop peaks, work sl st followed by (3 dc, sl st) into the peak for a raised scalloped trim. This border visually separates wing shapes and matches the photo.
— Face Details :
Info :
Sew in safety eyes if not already. Embroider a short horizontal mouth using black yarn between the eyes at the front center: thread a yarn needle and make 2-3 small horizontal satin stitches to create a short bar mouth. You can also add a tiny white french knot stitch at the corner of each eye for a reflected highlight if desired.
— Assembly :
Info :
Block all wings gently if needed, making sure the dark-blue edge sits nicely. Pin parts to the body with the head centered above the lower body sphere, thorax between head and bottom sphere. Position wings so large wings connect to thorax sides and small lower wings attach near the base of the head/neck for the look in the photo.
Round 1 :
Sewing detail: Use a mattress stitch or ladder stitch to invisibly seam the thorax to the head — stitch through corresponding rounds to seat them tightly. Repeat to stitch thorax to bottom body. Use the long tails left earlier to sew; fasten off and weave ends into the body.
Info :
When attaching wings, sew through both wing base and a couple rounds of the thorax to ensure a sturdy join. Use small whip stitches spaced evenly around the wing root to prevent floppy wings. If using wire inside wings, be sure to tuck and secure the wire ends before sewing so they do not poke through the surface.
Info :
Finally, secure horns to the top of the thorax behind the head by sewing through 2-3 stitches at their base. Keep stitches small and tight so they stand upright. Add any final shaping to wings and position legs as desired.
This charming little bat combines simple spheres with dramatic wings and contrasting trim for a look that's both playful and polished. Each carefully crocheted piece comes together to form a compact, huggable companion that makes a wonderful gift or seasonal decoration. I hope you enjoy stitching, stuffing, and customizing this tiny blue bat — it's a fast, rewarding project with delightful results! 🧶🦇