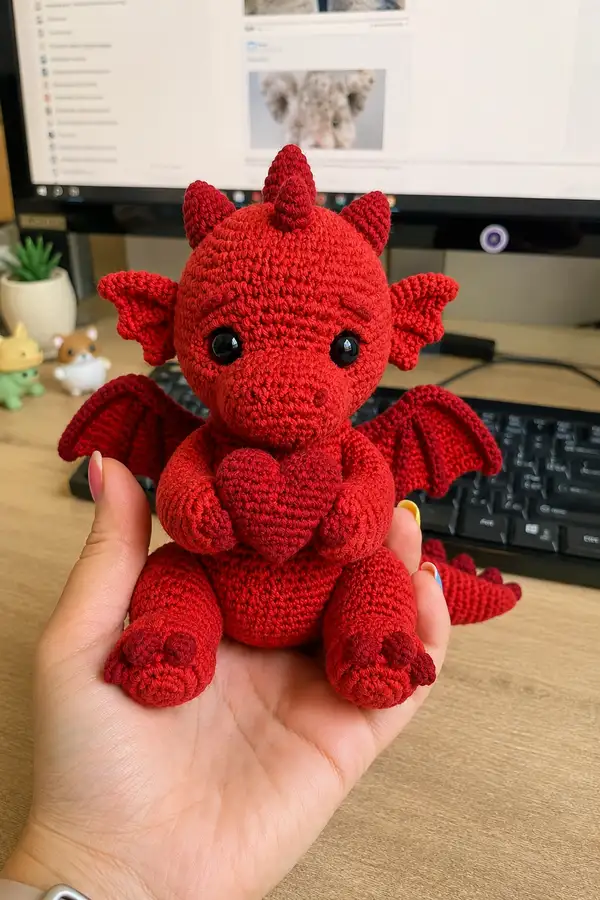
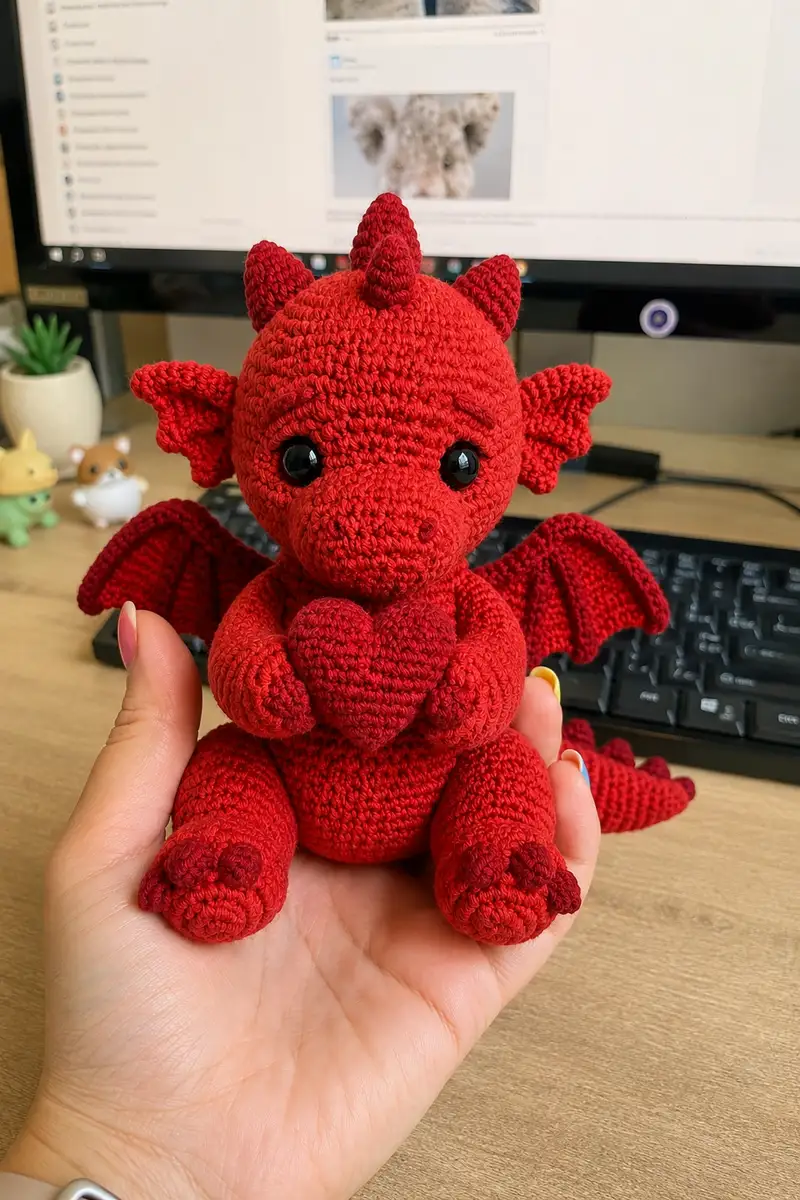
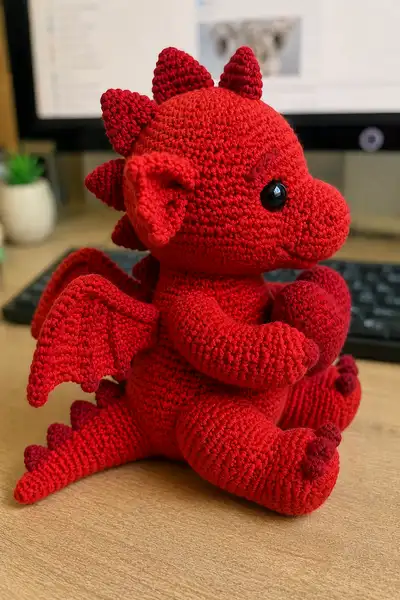
Make a cuddly little dragon who holds a tiny heart — a perfect handmade gift for valentines, birthdays, or cozy décor. This pattern recreates the pictured plush red dragon with pointed spikes, folded wings, chubby limbs, and an adorable heart accessory. The pattern includes step-by-step round-by-round instructions, stuffing and assembly tips, and notes for color accents on claws and spikes. A charming project for an intermediate crocheter who loves detailed amigurumi.
Progress Tracker
0% Complete
— Head :
Round 1 :
6 sc in magic ring (6)
Round 3 :
(1 sc, inc) x 6 (18)
Round 4 :
(2 sc, inc) x 6 (24)
Round 5 :
(3 sc, inc) x 6 (30)
Round 6 :
(4 sc, inc) x 6 (36)
Round 7 :
(5 sc, inc) x 6 (42)
Round 8 :
(6 sc, inc) x 6 (48)
Round 9 :
(7 sc, inc) x 6 (54)
Round 10-17 :
1 sc in each st (54)
Info :
Place safety eyes between rounds 14 and 15, approximately 10-12 sts apart depending on your preferred expression; mark the right eye position first. If using 10mm eyes, 10-12 sts spacing creates the look shown. Embroider small eyebrows later using a few short satin stitches between rounds 16-17.
Round 18 :
(7 sc, dec) x 6 (48)
Round 19 :
(6 sc, dec) x 6 (42)
Round 20 :
(5 sc, dec) x 6 (36)
Info :
Begin stuffing head firmly now, add small amounts at a time to keep a round, smooth shape. Focus extra stuffing just under the eyes and around the brow to keep a slightly pronounced forehead like the sample.
Round 21 :
(4 sc, dec) x 6 (30)
Round 22 :
(3 sc, dec) x 6 (24)
Round 23 :
(2 sc, dec) x 6 (18)
Round 24 :
(1 sc, dec) x 6 (12)
Info :
Fasten off leaving a long tail for sewing. Finish stuffing so head is firm but still soft to the touch. Close opening using a yarn needle and the tail, weaving the closing seam inside several rounds for a neat finish. Set head aside or attach to neck when body is ready.
— Muzzle / Snout :
Round 1 :
6 sc in magic ring (6)
Round 3 :
(1 sc, inc) x 6 (18)
Round 4 :
(2 sc, inc) x 6 (24)
Round 5-7 :
1 sc in each st (24)
Info :
After round 7, position muzzle on head to determine how deep you want the muzzle to sit. The example has it placed so the muzzle begins around round 13 of the head and projects forward about 5-6 rounds.
Round 8 :
(2 sc, dec) x 6 (18)
Round 9 :
(1 sc, dec) x 6 (12)
Info :
Leave a long tail for sewing. Stuff muzzle lightly to maintain a slightly firm rounded nose. Sew the muzzle to the head aligning its base at head rounds 12-14 and centering it between the eyes. Use ladder stitch or whip stitch and work through several rounds on both pieces for a secure join.
— Ears (Make 2) :
Round 1 :
6 sc in magic ring (6)
Round 3 :
(1 sc, inc) x 6 (18)
Round 4 :
1 sc in each st (18)
Round 5 :
1 sc in next 6 sts, FLO next 6 sts, 1 sc in last 6 sts (18)
Info :
Fold the ear slightly by taking the FLO ridge and tacking it with a slip stitch or sewing into the body later to create the folded appearance visible in the image. Position ears at head rounds 6-8 on each side, slightly angled forward.
Round 6 :
(2 sc, dec) x 4, 2 sc (14)
Round 7 :
1 sc in each st (14)
Info :
Fasten off leaving long tail for sewing. Pin ears in place on head before final stitching to ensure even placement and angle. Sew through several stitches and secure tail inside head using extra yarn tucked inside.
— Spikes / Horns (Make 7 - 3 large on head, 4 small down tail) :
Round 1 :
6 sc in magic ring (6)
Round 3 :
(1 sc, inc) x 6 (18)
Round 4 :
1 sc in each st (18)
Round 5 :
(2 sc, dec) x 6 (12)
Round 6 :
(1 sc, dec) x 4 (8)
Round 7 :
6 dec (4) - shape tip
Info :
Make 3 slightly larger spikes for the head (stop after round 6 and do not close completely so they keep a cone shape), and 4 smaller spikes for the tail (make one extra smaller by reducing to 12 sts at round 3 and finishing at round 6). Sew large spikes evenly along head top: first spike centered at head top, second and third spaced to left and right about 6-8 sts apart. Sew tail spikes evenly along top of tail, leaving even space between each spike.
— Body :
Round 1 :
6 sc in magic ring (6)
Round 3 :
(1 sc, inc) x 6 (18)
Round 4 :
(2 sc, inc) x 6 (24)
Round 5 :
(3 sc, inc) x 6 (30)
Round 6 :
(4 sc, inc) x 6 (36)
Round 7 :
(5 sc, inc) x 6 (42)
Round 8-14 :
1 sc in each st (42)
Info :
If you want a slightly larger belly, add two extra rounds even at 42 sts. The pictured dragon has a plump rounded belly, so keep rounds 8-14 even to create that volume. Begin stuffing body at round 12 so you can achieve the rounded base and attach legs later.
Round 15 :
(5 sc, dec) x 6 (36)
Round 16 :
(4 sc, dec) x 6 (30)
Round 17 :
(3 sc, dec) x 6 (24)
Round 18 :
(2 sc, dec) x 6 (18)
Info :
Stop decreasing when you have a round that will easily accept the neck insertion (we will leave the top open for head attachment). Stuff body firmly but keep the top opening slightly unstuffed so you can sew the neck of the head in. You can also use a small chopstick to push stuffing into tight areas like armpits.
Round 19 :
(1 sc, dec) x 6 (12)
Round 20 :
6 sc (12) - leave opening for neck
Info :
Fasten off leaving a long tail for sewing the head. If you prefer to crochet the neck separately and insert it, you can add 2-4 rounds of a tube at the top (1 sc in each st) to create a neck to sew the head to. Align head and body so the muzzle sits slightly forward over the belly when attached.
— Arms (Make 2) :
Round 1 :
6 sc in magic ring (6)
Round 3 :
(1 sc, inc) x 6 (18)
Round 4-6 :
1 sc in each st (18)
Info :
These rounds build the hand/paw. The hands in the picture are rounded and slightly cupped. Stuff the hand part firmly now to keep shape. When attaching the little heart, you will sew into the palm area across rounds 3-6.
Round 7 :
(2 sc, dec) x 4, 2 sc (14)
Round 8-12 :
1 sc in each st (14)
Round 13 :
(3 sc, inc) x 2, 1 sc, inc, 1 sc, inc (18) - shape wrist to upper arm
Round 14-18 :
1 sc in each st (18) - lengthen upper arm
Info :
Stuff hand part firmly and upper arm lightly so the arms are pliable but full. Leave a long tail for sewing and position arms so they sit slightly forward on the body, around body rounds 10-14 on each side for the pictured hugging pose. Sew through several rows of both arm and body for stability.
— Paw Claws / Fingertips (Make 6 small claws) :
Round 1 :
6 sc in magic ring in dark red (6)
Round 3 :
sl st into next st and fasten off leaving tail for sewing small claw to paw tip
Info :
Sew three small claws to each foot front as shown in the photo, using a darker red for contrast. Place claws evenly across the foot tip and secure with several stitches for durability.
— Legs (Make 2) :
Round 1 :
6 sc in magic ring (6)
Round 3 :
(1 sc, inc) x 6 (18)
Round 4 :
(2 sc, inc) x 6 (24)
Round 5-8 :
1 sc in each st (24) - foot base
Round 9 :
(3 sc, inc) x 6 (30)
Round 10-16 :
1 sc in each st (30) - build leg length
Round 17 :
(3 sc, dec) x 6 (24)
Round 18 :
(2 sc, dec) x 6 (18)
Round 19-22 :
1 sc in each st (18) - shape upper leg
Round 23 :
(1 sc, dec) x 6 (12)
Round 24 :
6 sc (12) - leave opening for sewing
Info :
Stuff feet firmly and legs moderately. Attach legs to bottom of body so the dragon can sit: position each leg at body base around rounds 2-6, with a slight outward angle so the feet rest on the surface. Sew through several rounds to secure.
— Wings (Make 2) :
Round 1 :
6 sc in magic ring (6)
Round 3 :
(1 sc, inc) x 6 (18)
Round 4 :
1 sc in each st (18)
Round 5 :
(2 sc, inc) x 6 (24)
Round 6 :
1 sc in each st BLO (24) - creates a defined edge ridge
Round 7-9 :
1 sc in each st (24)
Round 10 :
(3 sc, inc) x 6 (30)
Round 11-13 :
1 sc in each st (30)
Round 14 :
FLO 1 sc in next 5 sts, skip 2 sts, 1 sc in next 5 sts, skip 2 sts, (creates scalloped inner wing edge) (30)
Round 15-18 :
1 sc in each st (30)
Info :
Fold wing to create bat-like folds by sewing small tucks along the inner edge. Use pins to mark the three scallop points visible in the photo: about 6-8 sts inward from the outer edge create the wing fingers. Sew wings to upper back at body rounds 8-12, angling them slightly outward and down.
Round 19 :
(4 sc, dec) x 5 (25) - taper wing tip
Round 20 :
1 sc in each st (25)
Round 21 :
(3 sc, dec) x 5 (20)
Round 22 :
sl st around edge to give neat finish, fasten off leaving long tail for sewing
— Tail :
Round 1 :
6 sc in magic ring (6)
Round 3 :
(1 sc, inc) x 6 (18)
Round 4-8 :
1 sc in each st (18) - expand tail base
Round 9 :
(2 sc, dec) x 6 (12)
Round 10-18 :
1 sc in each st (12) - tail length
Round 19 :
(1 sc, dec) x 4 (8)
Round 20-22 :
1 sc in each st (8)
Round 23 :
(1 sc, dec) x 2 (6)
Round 24-25 :
1 sc in each st (6) - finish tip
Info :
Sew the tail to the lower back of the body around body rounds 2-6. Add the small spikes along the top of the tail with even spacing; use the smaller spike pieces made earlier and secure them with strong stitches so they follow the curve of the tail as shown in the photos.
— Small Heart Accessory :
Round 1 :
6 sc in magic ring (6)
Round 3 :
1 sc in next 6 sts, (1 sc, inc) x 3, 1 sc in next 6 sts (15) - shape heart lobes
Round 4 :
1 sc in each st (15)
Round 5 :
(2 sc, dec) x 3, 1 sc in remaining 3 sts (12)
Round 6 :
1 sc in each st (12)
Round 7 :
(1 sc, dec) x 4 (8)
Round 8 :
Finish stuffing heart lightly, close with 4 sc dec (4), fasten off leaving tail for sewing
Info :
Sew heart to the palms of both hands so it looks like the dragon is holding it in a cradled position. Alternatively, make the heart detachable by sewing a small loop at the back of the heart and attaching with a yarn button so it can be removed.
— Assembly and Finishing Touches :
Info :
Before sewing pieces together, weave in all loose tails partially but leave enough to secure pieces. Pin and arrange legs, arms and wings to achieve the pose seen in the photos. Use photos as a guide to spacing: legs outward at body base, arms slightly forward and hands cupping in front, wings low on upper back, head centered on top. Use extra sturdy thread or yarn when sewing limbs onto the body to prevent loosening.
Info :
Sew the head to the top opening of the body; if you prefer a neck, crochet a 6-8 round tube and sew tube into body and head for more height. Embroider small nostrils on the muzzle using two short satin stitches with dark yarn between rounds 6-7 of the muzzle. Add subtle eyebrow stitches above the eyes to match the expression.
Info :
Weave all ends into body so they are hidden and secure. If gifting to young children, consider embroidering eyes rather than using safety eyes. Optionally add a dab of fabric glue behind safety eyes for extra security. Lightly press cheeks with a small dab of blush or fabric paint if desired.
This adorable dragon combines classic amigurumi shaping with sweet styling — especially the tiny heart it holds — making it a perfect handmade gift or shelf companion. Each part builds up into a friendly face, chubby limbs and elegant wings, offering really satisfying assembly. Enjoy the rhythmic rounds as the pieces come together into a lovable dragon you can be proud to share. 🧶❤️✨