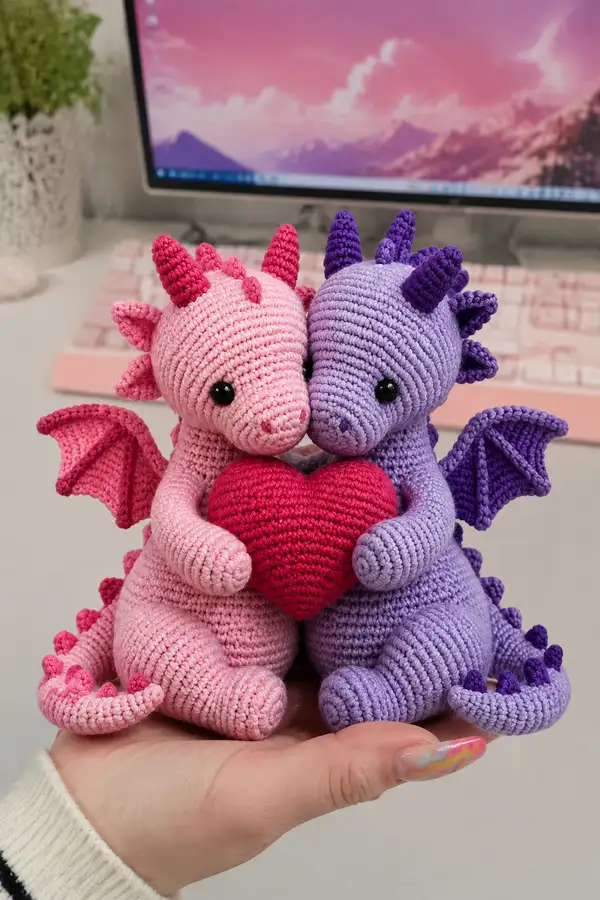
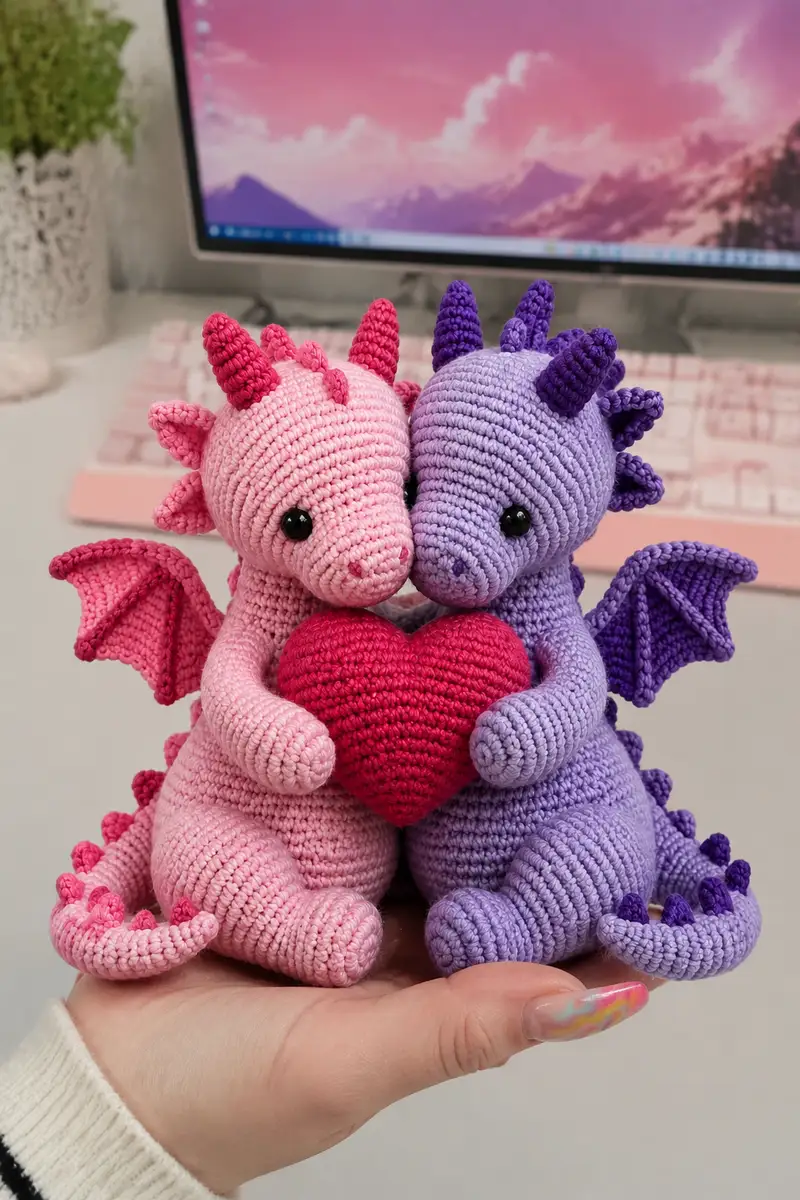
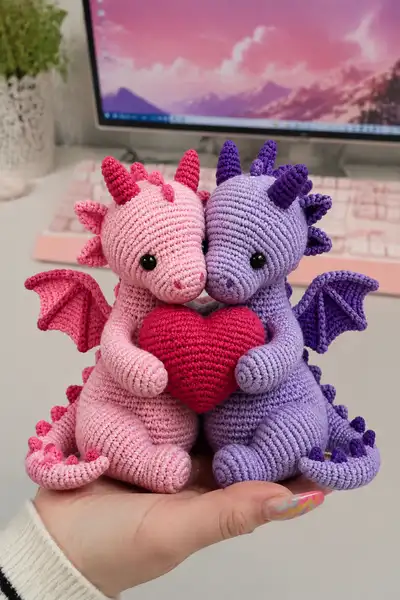
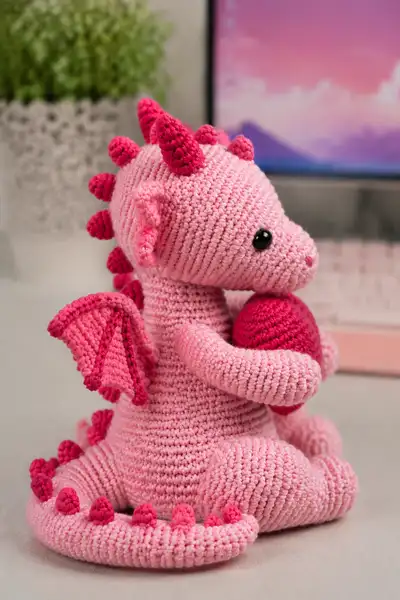
Make this adorable pair of cuddling dragon amigurumi holding a single heart — perfect as a gift or keepsake. This pattern includes detailed, round-by-round instructions for head, body, arms, legs, wings, tail, spikes and the shared heart. Two colorways are shown: soft pink with darker pink accents, and lavender with purple accents. The finished duo sit side-by-side and hold a plump heart between their arms.
Progress Tracker
0% Complete
— Notes & Gauge :
Info :
Gauge for amigurumi is flexible. Using worsted weight yarn with a 3.0mm hook should produce a finished seated dragon about 15-18 cm (6-7 in) tall when assembled. Maintain a tight gauge so stuffing does not show. Work in continuous rounds unless instructed otherwise, and use a stitch marker to mark the first stitch of each round.
— Head (Make 2, one for each dragon) :
Round 1 :
6 sc in magic ring (6)
Round 3 :
(1 sc, 1 inc) x 6 (18)
Round 4 :
(2 sc, 1 inc) x 6 (24)
Round 5 :
(3 sc, 1 inc) x 6 (30)
Round 6 :
(4 sc, 1 inc) x 6 (36)
Round 7 :
(5 sc, 1 inc) x 6 (42)
Round 8 :
(6 sc, 1 inc) x 6 (48)
Round 9-13 :
1 sc in each st (48)
Info :
Place safety eyes between rounds 11 and 12, approximately 8-10 stitches apart for a cute, spaced look. For the dolls shown, use 8mm eyes placed about 10 stitches apart (center to center) and roughly 7-9 stitches down from the topmost increase ridge. Mark eye placement with pins before inserting safety washers.
Round 14 :
(6 sc, 1 inc) x 6 (54)
Round 15-18 :
1 sc in each st (54)
Info :
Begin creating the snout shaping by moving the stitch marker slightly off center if needed; the snout is worked as part of the head shaping and will be formed with strategic decreases later. If you prefer a longer snout, add 1-2 rounds maintaining 54 stitches before starting decreases.
Round 19 :
(6 sc, 1 dec) x 6 (48)
Round 20 :
(5 sc, 1 dec) x 6 (42)
Round 21 :
(4 sc, 1 dec) x 6 (36)
Round 22 :
(3 sc, 1 dec) x 6 (30)
Info :
Start stuffing the head firmly from this round onward, focusing fiberfill into the snout first to keep shape, then fill the rest of the skull. Keep stuffing firm but not rock hard so the head remains cuddly and smooth.
Round 23 :
(2 sc, 1 dec) x 6 (24)
Round 24 :
(1 sc, 1 dec) x 6 (18)
Info :
For a slightly elongated snout, decrease more slowly over two extra rounds by substituting rounds 22-24 with (4 sc, 1 dec)x6 then (3 sc, 1 dec)x6, etc. The sample dragons have a gently tapered snout; follow the standard decreases above for the look shown.
Round 26 :
Fasten off leaving long tail for sewing. Finish stuffing and close opening using yarn needle and mattress stitch to make an invisible seam. Shape snout by pinching and sewing small tucks if necessary.
— Snout Tip & Nostrils :
Round 1 :
Using contrasting darker accent for tiny nostrils, embroider two small french knots or use thread to make two tiny stitches for nostrils spaced 2-3 stitches apart at the tip of the snout. If crocheting a tiny snout bump: ch2, sc in 2nd ch, fasten off and sew to tip.
Info :
For the pictured dragons, the nostrils are embroidered with a small length of darker pink/purple yarn using two tight stitches about 3-4 rounds down from the top of the snout.
— Spikes / Horns (Make 12 per dragon; 6 on head/back and 6 on tail) :
Info :
These are small cone shapes. Make a set in two sizes: 3 larger horns for the top of the head (front), 3 medium behind them, and remaining small spikes for the back and tail. Work in a darker accent color. Insert and sew into position securely. Repeat for second dragon using complementary accent.
Small Spike Round 1 :
6 sc in magic ring (6)
Small Spike Round 2 :
6 sc (6)
Small Spike Round 3 :
(1 sc, dec) x 2 (4)
Small Spike Round 4 :
4 sc (4)
Small Spike Round 5 :
dec x 2 (2) Fasten off, leaving tail to sew. Stuff lightly or leave unstuffed for a flatter spike (pictured are lightly stuffed)
Medium Horn Round 1 :
6 sc in magic ring (6)
Round 2 :
inc in each st (12)
Round 3 :
(1 sc, inc) x 6 (18)
Round 4 :
1 sc in each st (18)
Round 5 :
(1 sc, dec) x 6 (12)
Round 6 :
6 dec (6) Fasten off leaving tail to sew. Lightly stuff or keep hollow depending on look.
Large Horn Round 1 :
6 sc in magic ring (6)
Round 2 :
inc in each st (12)
Round 3 :
(1 sc, inc) x 6 (18)
Round 4 :
(2 sc, inc) x 6 (24)
Round 5-6 :
1 sc in each st (24)
Round 7 :
(2 sc, dec) x 6 (18)
Round 8 :
(1 sc, dec) x 6 (12)
Round 9 :
6 dec (6) Fasten off leaving tail to sew. Lightly stuff and shape into a cone before sewing into place.
— Ears (Make 2 per dragon) :
Round 1 :
6 sc in magic ring (6)
Round 2 :
inc in each st (12)
Round 3 :
(1 sc, inc) x 6 (18)
Round 4 :
1 sc in each st (18)
Round 5 :
(1 sc, dec) x 6 (12)
Round 6 :
1 sc in each st (12)
Round 7 :
(2 sc, dec) x 3 (9)
Round 8 :
Fold ear flat and sc through both layers around edge to create a slightly cupped ear (approx 9 sc). Fasten off leaving long tail for sewing.
Info :
Sew ears to the sides of the head between rounds 8 and 14, slightly angled forward. For a dainty inner ear, use a lighter or darker stitch on the inside edge using slip stitch trim.
— Body (Make 2) :
Round 1 :
6 sc in magic ring (6)
Round 3 :
(1 sc, 1 inc) x 6 (18)
Round 4 :
(2 sc, 1 inc) x 6 (24)
Round 5 :
(3 sc, 1 inc) x 6 (30)
Round 6 :
(4 sc, 1 inc) x 6 (36)
Round 7-11 :
1 sc in each st (36)
Info :
Body is worked top-down here to allow for easy neck attachment. Change to BLO on round 12 if you want a defined waist ridge or a 'shirt' edge. The sample dragons have a smooth long torso; continue even rounds.
Round 12-16 :
1 sc in each st (36)
Round 17 :
(4 sc, dec) x 6 (30)
Round 18-22 :
1 sc in each st (30)
Info :
Begin adding shaping for bottom and leg placement. When you reach round 20, fold and mark where legs will attach (see Leg attachment notes). Don't stuff body fully yet; leave it slightly understuffed to make sewing easier then finish stuffing after head is attached.
Round 23 :
(3 sc, dec) x 6 (24)
Round 24 :
(2 sc, dec) x 6 (18)
Round 25 :
(1 sc, dec) x 6 (12)
Round 26 :
Back loop only 1 sc in each st around (12)
Round 27 :
1 sc in each st (12)
Round 28 :
Join with slip stitch, fasten off leaving tail for sewing to head/legs. Stuff the body firmly now, especially the bottom and sides to allow the dragons to sit stably.
— Legs (Make 2 per dragon) :
Round 1 (foot base) :
6 sc in magic ring (6)
Round 2 :
inc in each st (12)
Round 3 :
(1 sc, inc) x 6 (18)
Round 4 :
(2 sc, inc) x 6 (24)
Round 5-6 :
1 sc in each st (24)
Info :
These rounds form the foot oval. If you want a flatter sole, work round 6 in BLO only. Stuff the foot firmly to give the leg weight and allow the dragon to sit up.
Round 7 :
(3 sc, dec) x 6 (18)
Round 8-12 :
1 sc in each st (18)
Round 13 :
(2 sc, inc) x 6 (24) — start flare for thigh
Round 14-16 :
1 sc in each st (24)
Round 17 :
(3 sc, dec) x 6 (18)
Round 18 :
(1 sc, dec) x 6 (12)
Round 19 :
1 sc in each st (12)
Round 20 :
Fasten off leaving long tail for sewing. Stuff leg firmly but allow seam to be slightly soft near the top for sewing into the body to create a natural seated bend.
Info :
Attach legs to the body at the bottom opening around rounds 1-3 of the body base; space them about 10-12 stitches apart for a seated look as pictured. Reinforce by sewing multiple passes through the top of the leg and around the body seam.
— Arms (Make 2 per dragon) :
Round 1 :
6 sc in magic ring (6)
Round 2 :
inc in each st (12)
Round 3-4 :
1 sc in each st (12)
Info :
Form the hand/forearm with these initial rounds and stuff the hand area firmly. The arm is a gentle tube that will curl around the heart; maintain a slight stuffing taper toward the shoulder so it bends naturally.
Round 5 :
(1 sc, inc) x 6 (18)
Round 6-10 :
1 sc in each st (18)
Round 11 :
(2 sc, inc) x 6 (24)
Round 12-15 :
1 sc in each st (24)
Round 16 :
(2 sc, dec) x 6 (18)
Round 17 :
(1 sc, dec) x 6 (12)
Round 18 :
1 sc in each st (12)
Round 19 :
Fasten off leaving long tail for sewing. Stuff hand firmly; arm should be moderately stuffed to allow for a little bend where you want it to hold the heart.
Info :
Sew arms to the body between rounds 10-14 at the sides, angling them forward so they can meet and hold the heart. Pin in place and adjust before sewing fully.
— Tail :
Round 1 :
6 sc in magic ring (6)
Round 2 :
inc in each st (12)
Round 3 :
(1 sc, inc) x 6 (18)
Round 4-6 :
1 sc in each st (18)
Round 7 :
(2 sc, dec) x 6 (12)
Round 8-10 :
1 sc in each st (12)
Round 11 :
(1 sc, dec) x 4 (8)
Round 12 :
1 sc in each st (8)
Round 13 :
Fasten off leaving long tail for sewing. The tail is stuffed lightly; it should have some flexibility so the dragons can sit and curl it around slightly.
Info :
Sew the tail to the back lower center of the body, exiting around body rounds 6-10. Add spikes along the top of the tail spaced evenly and alternating sizes to match the sample.
— Wing (Make 2 per dragon) :
Wing Round 1 :
ch 8, sc in 2nd ch from hook and across (7) turn, continue around working sc along the long edge, 3 sc in last ch to turn and work back across opposite side to form an oval shape. Close with sl st. (approx 20 sc)
Wing Round 2 :
1 sc in each st around to thicken wing (20)
Wing Round 3 :
Working on the front loops only of the prior round, sc in first 6 sts, (ch 4, sl st in next st) x 3 to form three little web points along inner edge, continue sc to finish. Fasten off leaving tail for sewing.
Wing Round 4 :
Using darker accent color, sl st along the outer edge to create a contrasting ridge: sl st in each st around (20). Fasten off and weave ends.
Info :
Wings for these dragons are small and semi-structured. Sew them to the sides of the upper back between head/base junction and first back spike (roughly between body rounds 8-12). Angle slightly outward and upward.
— Heart (shared accessory) :
Round 1 :
6 sc in magic ring (6)
Round 2 :
inc in each st (12)
Round 3 :
(1 sc, inc) x 6 (18)
Round 4 :
(2 sc, inc) x 6 (24)
Round 5 :
1 sc in each st (24)
Round 6 :
(3 sc, inc) x 6 (30)
Round 7-9 :
1 sc in each st (30)
Round 10 :
(3 sc, dec) x 6 (24)
Round 11 :
(2 sc, dec) x 6 (18)
Round 12 :
(1 sc, dec) x 6 (12)
Round 13 :
6 dec (6) Fasten off leaving long tail for sewing. Stuff heart firmly for plump shape and sew closed. For the heart shape, when sewing the final rounds, shape two small lobes at the top by sewing small tucks in before closing completely.
Info :
The heart in the sample is made in a darker contrasting pink/red and is shared between the two dragons. Position in the arms and tack in by sewing a few stitches through each arm inner face so it doesn't slip out.
— Decorative Scales Along Back (Make many) :
Small Scale Round 1 :
4 sc in magic ring (4)
Round 2 :
1 sc in each st (4) Fasten off leaving tail to sew. Make about 8-12 small scales per dragon and arrange alternating sizes up the back and tail.
Info :
Sew scales in a line from the top of the head along the spine and down to the tail tip, with slightly larger horns on the head and smaller scales toward the tail. The sample shows 6-7 scales along the back and 6 along the tail for each dragon.
— Assembly & Finishing :
Info :
Before assembly, block and steam very gently if needed to relax stitches. We recommend sewing head to body first so you can position legs and arms more easily after. Use pins to place pieces and compare both dragons so they match and can hold the heart symmetrically.
Head Attachment :
Sew head to body opening (body round 1-4 area) using the long tail from the body. Whip stitch evenly through head and body stitches, tightening to avoid gaps. Make multiple passes to secure weight transfer if children will handle the toy.
Attach Arms :
Position arms so when sewn they curve forward and meet around the heart. Sew through the top 3-4 stitches of the arm into body rounds 10-14. Reinforce with extra passes to keep arms stable.
Attach Legs :
Sew legs to the base, spacing them evenly so the dragon sits flat. Use a reinforced ladder stitch and anchor through the bottom of the body to add stability.
Attach Tail :
Sew tail to the back lowest center of the body. Add the small scales along the top by stitching each in place, spacing about 3-4 stitches between them.
Attach Wings :
Sew wings to the upper back between head and first spine. Angle them outwards and slightly up. Use a few stitches to create a fold at the base so they sit naturally.
Attach Horns & Spikes :
Sew larger horns to top of head, smaller spikes down the back and tail. Secure with a long tail and several passes. Glue can be added inside for extra security but is optional.
Attach Heart :
Position the heart in both arms and tack in place through the inner face of each arm with a few stitches. Ensure heart sits centered between the dragons.
Info :
Weave in all tails neatly through interior stitches and trim close. If you used safety eyes, add washers now if not already added. Consider adding a small felt base under each dragon foot for extra stability if they wobble.
— Final Details & Tips :
Info :
Embroider tiny lashes or eyebrows if desired using a few surface stitches. For cheek blush, use a tiny dab of fabric-safe chalk blush or diluted fabric paint and test on a scrap first. Keep all small parts secured tightly if the toy is for children under three years of age.
This sweet dragon duo makes an unforgettable handmade gift — two little dragons sharing one big heart! The step-by-step pattern walks you through each tiny detail, from the curled wings to the tiny spikes down the tail, so your finished pair feels polished and full of personality. Whether you make one or both, they are guaranteed to brighten a shelf or become a special keepsake. 🐉❤️🧶 Happy stitching — I can't wait to see your cuddly creations!