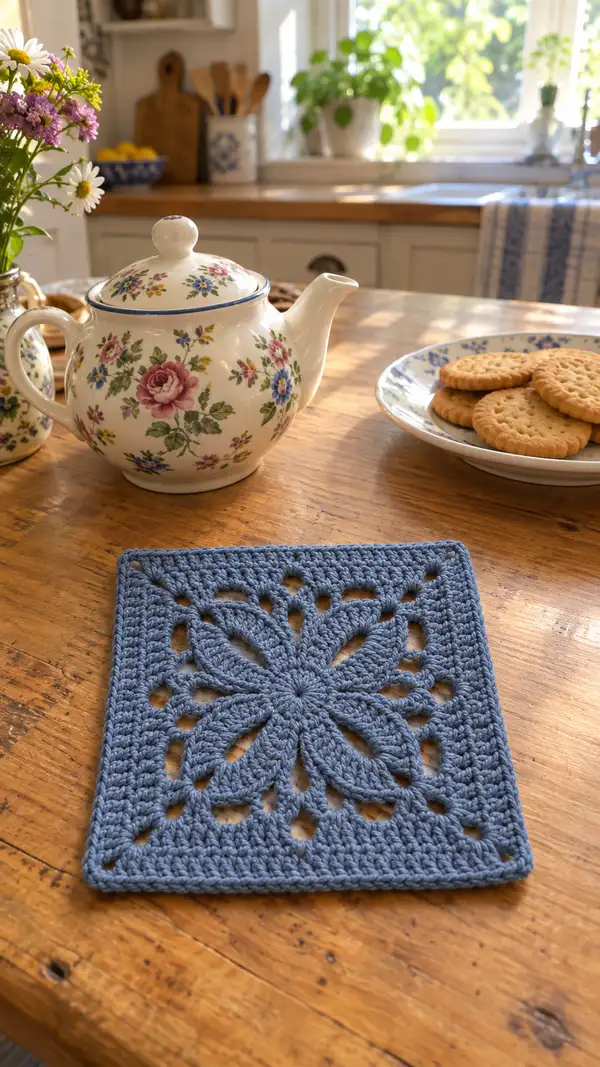
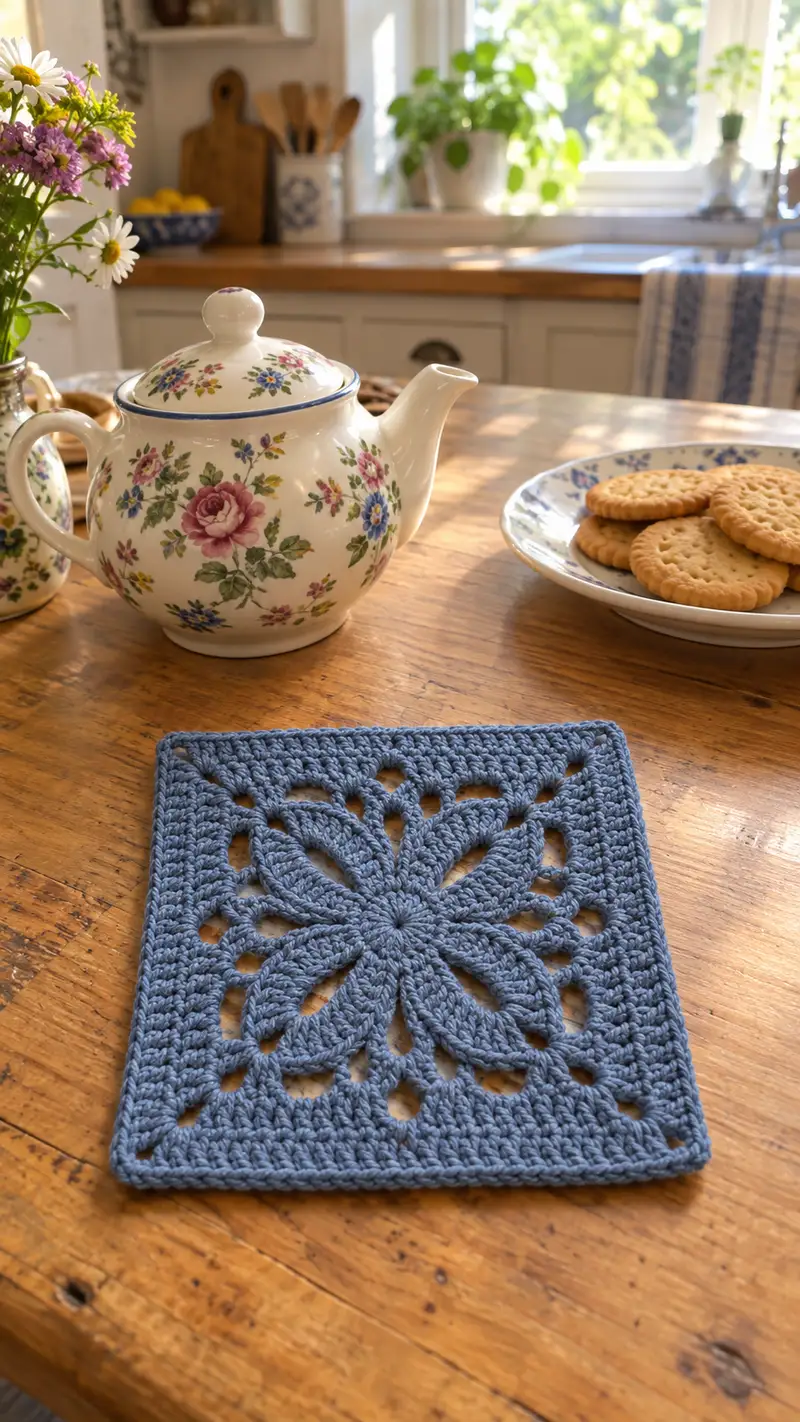
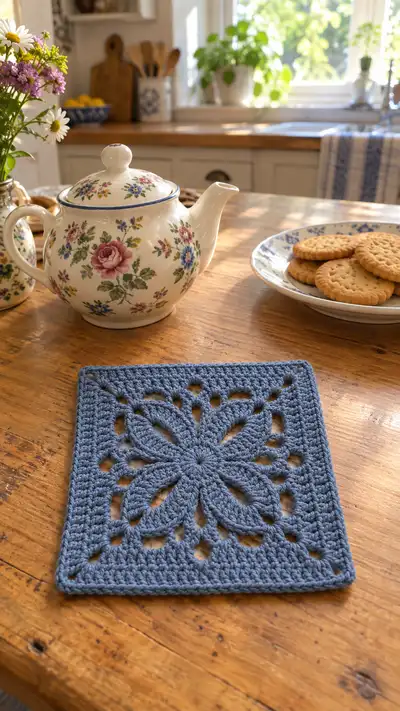
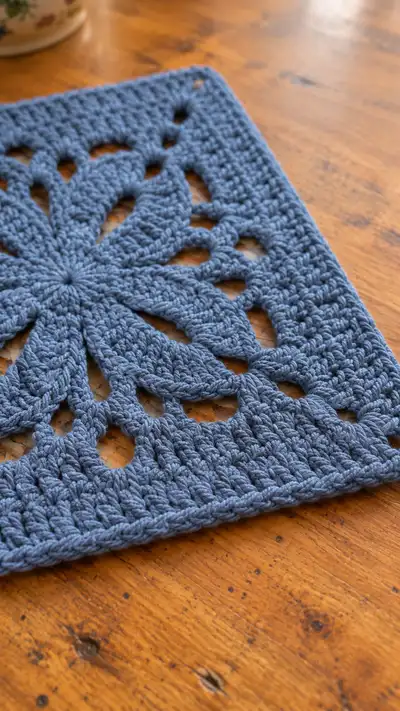
A charming square trivet with a raised floral medallion at its center, worked in a soft slate-blue cotton. This pattern creates a sturdy, decorative kitchen accent with an openwork petal design and a textured ribbed border. Perfect for tabletops, teapots, or as a thoughtful handmade gift.
Progress Tracker
0% Complete
— Center :
Round 1 :
mr, 8 sc in magic ring (8)
Round 2 :
2 sc in each st around (16)
Round 3 :
(1 sc, 1 inc) x 8 (24)
Round 4 :
(2 sc, 1 inc) x 8 (32)
Info :
Work these rounds with a slightly tighter tension to produce a firm center for the petal foundation. Place a stitch marker at the end of round 4 to mark round starts.
Round 5 :
(3 sc, 1 inc) x 8 (40)
Round 6 :
1 sc in each st around (40)
Info :
We will create 8 petal loops next; the 40 stitches allow us to space 8 loops evenly (40/8 = 5). Check your count now and adjust tension if needed.
— Petal Foundation :
Round 7 :
*sc in next 4 sts, ch 8, sl st in next sc* x 8 (40 sc, 8 ch-8 loops)
Info :
Each repeat uses 5 sc worth of the current round (4 sc + sl st into the next sc) so all 40 base sts are used. The ch-8 loops become the foundation for the 8 raised petals; ensure the chains are loose but not sloppy.
Round 8 :
Join in first ch-8 loop: ch2 (counts as hdc), 2 hdc in same loop, (puff3 in loop, ch1) 2 times, 2 hdc in loop, sl st to next base sl st; rep into each ch-8 loop (5 worked stitches per petal loop, 40 total worked stitches)
Info :
For the puff3: yarn over, insert hook, draw up loop, repeat 3 times in same place (you will have 7 loops on hook), yarn over and pull through all loops, ch1 to close puff. This creates a rounded rib for the petal.
Round 9 :
Sl st to center of first petal base, ch1, 1 sc in same place, *ch3, 3 sc around the body of next petal (working around puff), ch3, 1 sc in base between petals*; rep around (40 sc equivalent positions, 8 ch-3 arches)
Info :
Round 9 establishes small arches between the petals to visually separate them. Keep petals oriented outward and smooth each puff with a finger to create uniform shape before the next round.
— Petal Shaping :
Round 10 :
Working into the ch-3 arches: *in first ch-3 arch work (2 dc, ch1, 2 dc), sc in next base sc between petals*; rep around (40 sts equivalent: 8 shell sets)
Round 11 :
Turn petal bodies into defined leaves: *in center of each petal (at puff) work (ch2, 3 tr) in front of petal to extend length, sl st to top of puff; 1 sc in base between petals* x 8 (40 worked positions)
Info :
Pull each tr set slightly forward to lay over the petal puff. The combination of puff and tall stitches gives the raised petal in the photo. If your stitches are too tight, swap to a 4.5 mm hook for these rounds only, then switch back.
Round 12 :
1 sc in each st around working evenly across the shells and petals (40)
Round 13 :
(4 sc, 1 inc) x 8 (48)
Info :
Round 13 begins the transition from a round petal medallion to a wider disc that will later be squared off. Count carefully — every increase here adds 8 sts to the round total.
Round 14 :
1 sc in each st around (48)
Round 15 :
Work 1 round in BLO: 1 sc in each st BLO to create a defined ridge around the petal area (48)
Info :
Working in BLO produces a subtle ridge that frames the petals. This ridge corresponds to the shallow valley visible between the flower and surrounding openwork in the photo.
— Join & Square Formation :
Round 16 :
(5 sc, 1 inc) x 8 (56)
Round 17 :
(6 sc, 1 inc) x 8 (64)
Info :
We now have 64 sts — a convenient multiple of 8 for forming four corner increases later. Place 4 stitch markers evenly at quarter points (every 16 sts) to help locate corners for square shaping.
Round 18 :
1 sc in each st around (64)
Round 19 :
At each marked corner: (1 sc in next 6 sts, ch 4, skip 0, 1 sc in next 6 sts, ch 4) — this creates 4 corner chain loops evenly spaced. Work single crochets between corners so total sc per side remains consistent (64 sc plus 8 ch-4 loops)
Info :
The ch-4 corners will allow us to square off the round in subsequent rounds by working shells or increased clusters into them. If your corners look uneven, adjust where the ch-4 is placed by sliding 1-2 sts either way.
Round 20 :
Into each ch-4 corner: work (2 dc, ch2, 2 dc) to form corner shells, then 1 sc in each sc between corners (64 worked positions including corner shells)
Round 21 :
1 sc in each st around (count both shells as 4 sts each for consistency) (64)
Info :
At the end of this round the motif should begin to look less round and more square. Keep your tension even; this area defines the flat plane of the trivet.
Round 22 :
(7 sc, 1 inc) x 8 (72)
Round 23 :
1 sc in each st around (72)
Info :
We are expanding incrementally so the fabric remains flat and the corners can be defined with minimal bunching. Continue placing temporary markers at each corner point as you see them forming.
— Square Expansion (side shaping and reinforcement) :
Round 24 :
(8 sc, 1 inc) x 8 (80)
Round 25 :
1 sc in each st around (80)
Round 26 :
Work 1 round in FLO: 1 sc in each st FLO (80)
Info :
The FLO round creates a ridge that visually marks the start of the openwork area. Use a stitch marker to note the first st of this round for consistent joining later.
Round 27 :
(9 sc, 1 inc) x 8 (88)
Round 28 :
1 sc in each st around (88)
Round 29 :
(10 sc, 1 inc) x 8 (96)
Info :
We are broadening the square steadily to reach the diameter and proportions seen in the photo. Count frequently — a missed increase per round changes the next increase math.
Round 30 :
1 sc in each st around (96)
Round 31 :
Establish openwork arches between groups: *1 sc in next 6 sts, ch 5, skip 3 sts* x 16 (96 sc, 16 ch-5 arches)
Round 32 :
Work into each ch-5 arch: (2 dc, ch1, 2 dc) in each ch-5 arch; sc in the intervening scs (total worked positions equivalent to 96)
Info :
These arches mirror the open spaces visible between the petals and the border in the photos. Keep arches even by measuring the height of ch-5 with a gauge or a scrap before proceeding.
Round 33 :
1 sc in each st around (96)
Round 34 :
(11 sc, 1 inc) x 8 (104)
Round 35 :
1 sc in each st around (104)
Info :
If your square is growing faster than expected and looks oversized, omit the increases in one round (work even) until you achieve the desired measurements before continuing.
Round 36 :
Work BLO for a narrow ridge: 1 sc in each st BLO (104)
Round 37 :
(12 sc, 1 inc) x 8 (112)
Round 38 :
1 sc in each st around (112)
Round 39 :
Begin shaping flatter sides: *sc in next 13 sts, ch3, skip 1 st* x 8 — creates 8 ch-3 vents across sides (112 sc, 8 ch-3)
Info :
These small vents are decorative and echo the small teardrop openings seen near the center petals in the photo. Keep them subtle: ch3 is tall enough to form the space without weakening the fabric.
Round 40 :
Into each ch-3 vent: sl st, ch1, 3 sc in vent, sl st to join; sc evenly between vents (112)
Round 41 :
1 sc in each st around (112)
Round 42 :
(13 sc, 1 inc) x 8 (120)
Info :
As we approach the size in the photo, try the piece on your work surface under the teapot to check scale. Adjust by stopping increases when the square reaches the desired measurement.
Round 43 :
1 sc in each st around (120)
Round 44 :
Work 1 round in FLO to create a subtle ridge (120)
Round 45 :
1 sc in each st around (120)
Round 46 :
Prepare for ribbed border: *1 sc in next 14 sts, ch2* x 8 (120 sc and 8 ch-2 divider loops)
Info :
The ch-2 dividers mark positions for vertical stitch columns that will be worked in the border; these help keep the border rectangular and neat-looking.
— Openwork & Lace Rounds :
Round 47 :
Working into ch-2 divider loops: sl st into loop, ch1, 3 sc in loop, sl st into base; then 1 sc in each sc across (120)
Round 48 :
1 sc in each st around (120)
Round 49 :
Switch to hdc for texture: 1 hdc in each st around (120)
Info :
Half-double crochet gives a slightly taller, softer fabric which helps transition into the ribbed border. Keep even tension so columns align neatly later.
Round 50 :
1 hdc in each st around BLO (120)
Round 51 :
Begin vertical ribbing: *work 1 sc in FLO in next 6 sts, then 8 hdc in next 8 sts as a vertical column* x 10 to cover one side; rep around so columns form on every side (total positions equal 120)
Round 52 :
1 sc in each st around (120)
Info :
These rib columns are decorative and add weight to the border. They mimic the raised, tightly worked border seen in the close-up photo.
Round 53 :
Work 2 rounds of 1 sc in each st (120, 120)
Round 54 :
Start the structured border increases to square off corners: at each corner work (1 sc in next 10 sts, 3 sc in corner sp, 1 sc in next 10 sts) with sc between corners (120 total sc including corner clusters)
Round 55 :
1 sc in each st around (120)
Info :
If your corners still look rounded, add one more sc into each corner cluster on the next round. The aim is to create right-angle corners without too much bulk.
Round 56 :
Work 1 round in BLO: 1 sc in each st BLO (120)
Round 57 :
1 sc in each st around (120)
Round 58 :
*(3 sc, ch2, 3 sc) in the corner spaces, 1 sc in each st between corners* repeat around to reinforce corners (120)
Round 59 :
1 sc in each st around (120)
Info :
At this stage the piece is almost the same proportions as the photographed trivet. If you made it larger earlier, stop increasing and proceed to border rounds until the dimensions are right.
— Ribbed Border :
Round 60 :
Switch to a smaller hook (3.5 mm) for a neat edge. Ch1, 1 sc in each st around (120)
Round 61 :
1 sc in each st BLO (120)
Round 62 :
Begin tall rib rows: *ch1, 1 fpdc (front post double crochet) around next st, 1 bpdc around next st* rep across to create ribbed texture (60 fpdc + 60 bpdc positions equivalent)
Info :
Front and back post stitches create a fabric with vertical ribs. Work them evenly and maintain consistent height. If unfamiliar with fpdc/bpdc, practice on a small swatch first.
Round 63 :
Repeat Round 62 (ribbing pattern) to build border height (ribs deepen)
Round 64 :
1 sc in each st around (120)
Round 65 :
Work 2 rounds in hdc in each st around to stiffen the border (120, 120)
Info :
Adding two hdc rounds after ribbing gives the border structure and a clean finish. Switch back to the 4.0 mm hook if you prefer a softer edge.
Round 66 :
1 sc in each st around (120)
Round 67 :
Work a reverse single crochet (crab stitch) around the edge for a polished finish: reverse sc in each st around (120)
Info :
Crab stitch adds a firm corded edge that sits neatly against the table and prevents curling. If you prefer a flat edge, substitute one round of sl st instead.
Round 68 :
Fasten off and weave in ends on the wrong side, leaving a tail if adding backing (no change to stitch count)
Round 69 :
Optional decorative surface slip stitch: With contrasting yarn, work slip stitch borders 2 rounds in from edge to create a subtle frame (work even around) (120)
Info :
The surface slip stitch is cosmetic and mirrors the subtle ridge visible in the photo. Use matching yarn for a seamless look or contrasting yarn to accentuate the border.
— Final Edging & Blocking :
Round 70 :
Check overall shape; adjust corners by adding 1 sc into each corner cluster if necessary (120 or adjusted count)
Round 71 :
Wet-block or steam-block the square: pin to square dimensions on a blocking mat and allow to dry completely
Info :
Blocking evens stitches and flattens petals; pin gently so the petals remain slightly raised but the border lies flat. A square ruler is helpful to align corners precisely.
Round 72 :
Optional: Starch or fabric stiffener for trivet use; apply sparingly and let dry
Round 73 :
Optional: Add a small hanging loop by folding a ch-10 and sl st across to attach to a corner (no net change to stitch count)
Info :
If adding a loop, reinforce with extra slip stitches or a few sewn stitches through the base layers so it remains durable when hung.
— Optional Backing & Finishing :
Round 74 :
Optional backing: cut cotton fabric slightly smaller than the square's blocked size; baste to the wrong side with running stitch
Round 75 :
Sew backing by hand with blind stitch or whip stitch around edge, catching both yarn and fabric for neat finish
Info :
Backing protects surfaces and adds insulation. If using glue, test on scrap to ensure it doesn't seep through and stiffen petals undesirably.
Round 76 :
If adding cotton batting, sandwich it between square and backing, hand stitch around edges to secure (no change to external stitch count)
Round 77 :
Weave in all ends securely on the wrong side using yarn needle; trim tails close (no st change)
Round 78 :
Final inspection: check for uncaught loops or holes, add small slip stitches to close gaps as needed
Info :
Take a moment to tweak individual petal shapes by gently pulling or steaming; the finished tactile look is worth this attention to detail.
Round 79 :
Optional embroidered center detail: with contrasting yarn, embroider a small French-knot cluster into the very center (no count change)
Round 80 :
Optional: reinforce edge by sewing a topstitch from backing to front at 1/4" in, using invisible stitch (no st change)
Round 81 :
Store flat or hang by loop; avoid folding to keep petal relief intact (no st change)
Info :
When laundering, use gentle cycle and re-block while damp to refresh shape; do not tumble-dry if using starch backing or interfacing.
Round 82 :
Variation option: continue rounds in multiples of 8 to make larger square (add rounds: (14 sc, inc) x 8 etc.) — increase as needed to enlarge
Round 83 :
Note on color changes: change yarn at the end of a round before joining; carry unused yarn neatly along wrong side or fasten off and weave ends
Round 84 :
Special technique tip: if using a wood table like photo, apply felt pads beneath trivet when using hot pots to protect finish (no st change)
Round 85 :
Optional joining to make placemat set: use join-as-you-go method with next square, preparing corner ch-4 loops to accept slip-stitch joins in corresponding rounds (no st change)
Info :
Plan joining rounds before finishing border if making multiple squares so seams match and lie flat.
Round 86 :
For gift finishing: press lightly from back with steam and slip into gift box with tissue to preserve petals (no st change)
Round 87 :
If desired, add a row of decorative beads or wooden buttons sewn to corners for rustic look (no change to stitch count)
Round 88 :
Optional: topcoat with a clear washable fabric stiffener if making a decorative coaster that needs extra firmness (follow product instructions)
Info :
Any chemical stiffener may slightly darken cotton; test on scrap first if color fidelity is important.
Round 89 :
Pattern complete: final weave of ends and final blocking adjustments (no st change)
Round 90 :
Enjoy your finished trivet! Photograph in natural light to show raised petal texture
Info :
This pattern is intentionally modular — you can stop increasing earlier for a smaller coaster or continue the increase pattern for a larger placemat. Always increase in multiples of 8 to preserve symmetry.
This blue floral square trivet blends sculptural petals with an everyday practicality that I adore. Each petal is shaped to lift gently from the center, framed by openwork and a sturdy ribbed border for a finished, table-ready look. Whether used as a teapot trivet or a decorative accent, it adds cozy charm to any kitchen. 🧶 A thoughtful handmade gift, it celebrates slow craft and simple beauty. Enjoy blocking and styling your finished piece! 🌿