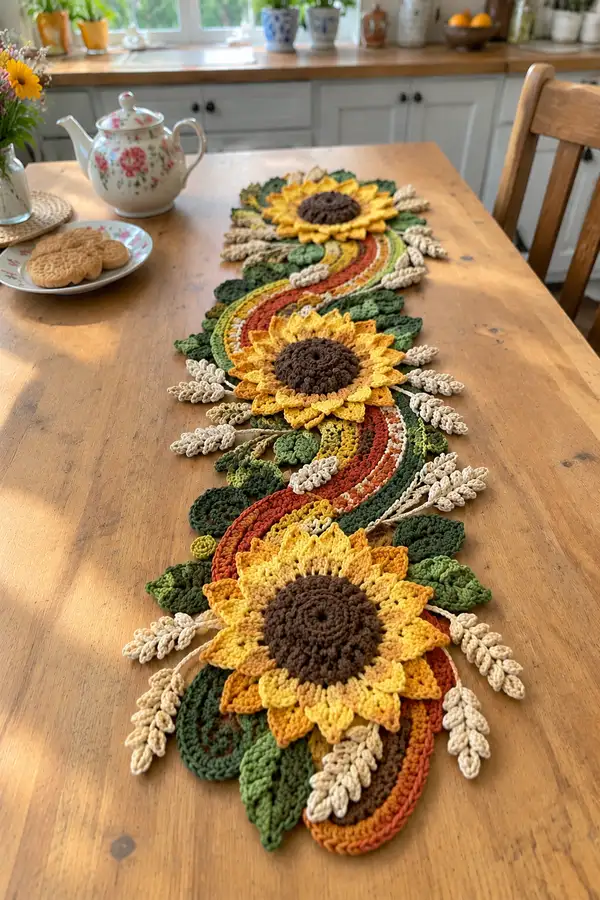
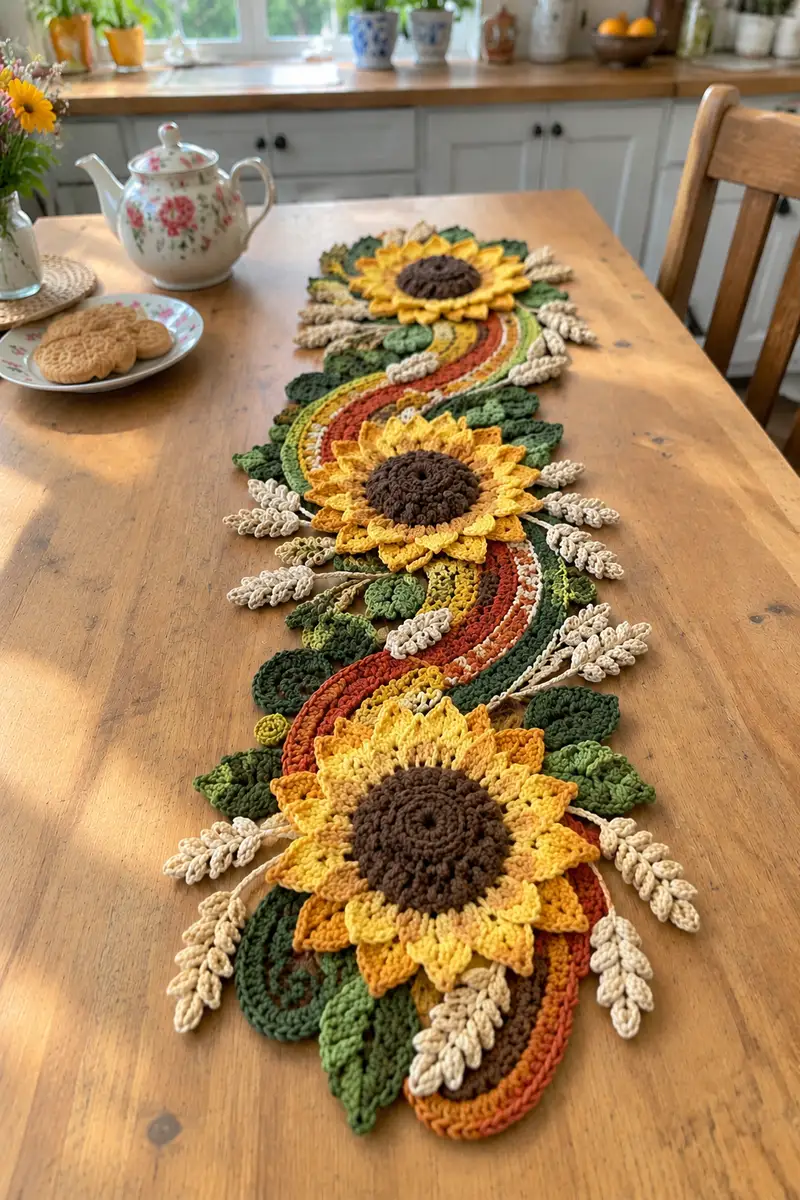
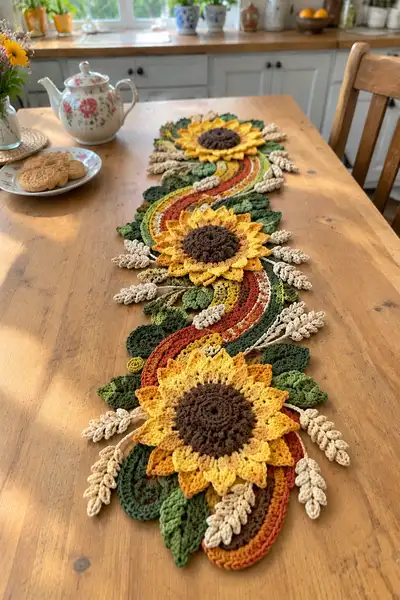
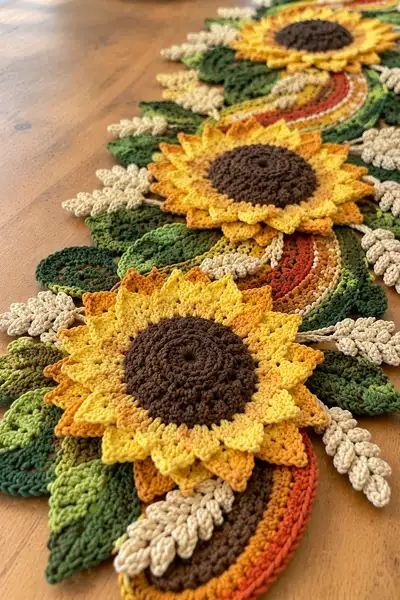
Bring the warmth of harvest season to your table with this Freeform Autumn Sunflower and Wheat Spiral Table Runner. Three layered sunflowers, flowing paisley arcs, textured wheat sprigs and lush leaves combine into a long, sculptural runner. Worked in warm ochres, golds, russet and multiple greens, this pattern uses modular motifs joined into an organic spiral layout for a dramatic autumnal centerpiece.
Progress Tracker
0% Complete
— Sunflower Center (Make 3) :
Round 1 :
6 sc in magic ring (6)
Round 3 :
(1 sc, inc) x 6 (18)
Round 4 :
(2 sc, inc) x 6 (24)
Round 5 :
(3 sc, inc) x 6 (30)
Info :
Work these rounds in dark brown. Use a stitch marker at the first stitch of each round and move it up as you work. This will form the slightly domed core of the sunflower.
Round 6 :
(4 sc, inc) x 6 (36)
Round 7 :
(5 sc, inc) x 6 (42)
Round 8 :
(6 sc, inc) x 6 (48)
Round 9 :
1 sc in each st BLO (48)
Info :
Working the next round in the BLO creates a defined edge so the center will sit neatly behind the petals. If you prefer a smoother dome, work both rounds in regular sc.
Round 10 :
1 sc in each st (48)
Round 11 :
(6 sc, inc) x 6 (54)
Round 12 :
1 sc in each st (54)
Round 13 :
Change to brown held double strand for extra texture (optional). 1 sc in each st (54)
Info :
To give the center a more textured, almost seed-like surface, consider working Round 13 as alternating dc and sc clusters or 1 sc and 1 pc (popcorn) every 6 stitches. If using popcorns, adjust counts visually — the surrounding rounds will hide small count variances.
Round 14 :
(6 sc, dec) x 6 (48)
Round 15 :
(5 sc, dec) x 6 (42)
Round 16 :
(4 sc, dec) x 6 (36)
Round 17 :
(3 sc, dec) x 6 (30)
Info :
Finish stuffing very lightly with a small scrap of batting if you want the center to lift slightly beneath the petals. Fasten off leaving a long tail for attaching to the inner petal layer; weave tail to the back and hide.
— Petal Layer A (Inner Petals — Make 3 sets of 12 petals) :
Round 1 :
Join sunflower center edge with gold/yellow yarn in any st, ch1, 1 sc in same st, 1 sc in next 3 sts, *[ch6, sk 4, sl st into next st] repeat around to create 12 ch-spaces (approx) (12 ch-sp)
Round 2 :
Work petals into ch6 spaces: *(sl st into ch-space, ch2, 2 dc, 1 tr, 2 dc, ch2, sl st into same ch-space) repeat around to form 12 small rounded petals
Round 3 :
Fasten off inner petal set or carry color to outer petal base. Weave ends neatly to the back. (No change in stitch count needed — petals sit on top of center)
Info :
Petal formation is done into chain-spaces that you make around the center; keep tension even so petals lie flat and are consistent in size. Use your finger to shape each petal while the stitch is new, this helps keep the curve.
— Petal Layer B (Outer Petals — Make 3 sets of 12 petals) :
Round 1 :
With a slightly darker gold or ochre, join at base of inner petals. Ch1, work 1 sc across the back of each inner petal base approximately 24 sc total to create a full round (24)
Round 2 :
(1 sc, inc) x 8, 1 sc in next 8 sts (32)
Round 3 :
Now form 12 larger petals around this base: *ch8, sl st into base to anchor, rep (12 petals formed)
Round 4 :
Work petal shape into each ch8: sl st into ch-space, ch3, 3 dc, 1 tr, 3 dc, ch3, sl st into same ch-space
Round 5 :
Edge each petal with 1 sc in each st around petal edge for definition; fasten off. (No numerical stitch count as petals are formed into separate spaces)
Info :
Layer B petals are slightly larger and staggered behind Layer A. When attaching, angle petals so they sit between inner petals for a natural sunflower look. Block each petal slightly if you want added crispness.
— Large Leaf (Make 6) :
Round 1 :
Ch 12, sc in 2nd ch from hook, hdc, 2 dc, 3 dc in next, 2 dc, hdc, sc, 1 sl st to turn along opposite side of chain, now work down chain: sc in next, hdc, 2 dc, 3 dc in next, 2 dc, hdc, sc (work creates a pointed leaf) — leave tail for sewing
Round 2 :
Working around leaf edge: *ch1, sl st in next st around to make a neat edge (28 approx)
Round 3 :
Return to leaf center: working along leaf body, sc in each st for a textured ridge (28)
Round 4 :
Fpdc along central vein only: insert hook around central post from previous dc cluster and work fpdc down the center line for raised vein (6 fpdc)
Info :
Use three shades of green for variety — two tone leaves add depth when assembled. Pin each leaf in place to check orientation before sewing.
Round 5 :
Work 1 sc around edge again if desired to tidy the outline (28)
Round 6 :
Fasten off leaving long tail for sewing to the runner base
— Small Leaf / Sprig Leaf (Make 8-10) :
Round 1 :
Ch8, sc in 2nd ch, hdc, 2 dc, hdc, sc, sl st to turn and sc along opposite side (approx 14)
Round 2 :
1 sc in each st around to neaten (14)
Round 3 :
Fasten off leaving long tail for placement
Info :
Smaller leaves are used as fillers around petals and along arcs. Vary direction and shade to avoid repeating patterns.
— Wheat Sprig (Make 12 or more) :
Round 1 :
Make a slip knot with cream yarn, ch 25 (this forms the central stem and grain base)
Round 2 :
Working from the 3rd ch from hook: *(sk 1 ch, in next ch work (ch4, sl st back into same ch) ) repeat this pattern down chain to create little grain loops on one side of the chain (approx 11 loops)
Round 3 :
Turn stem and repeat for opposite side: *(sk 1 ch, (ch4, sl st in same ch)) repeat down chain to mirror the loops (22 loops total)
Round 4 :
Secure the end with 1 sl st and fasten off leaving a tail to sew. If you want a fuller wheat head, add another shorter chain and attach similarly to the top of the stem.
Info :
Use a smaller 3.0mm hook to get tighter grains if the loops feel too loose. Gently steam-block or press with a warm iron under a cloth to open loops slightly into petal-like grains.
— Paisley Spiral / Arc Motif (Make 3 long arcs to join sunflowers) :
Round 1 :
Ch 40 in rust color for a long base curve (or longer/shorter to fit your runner length)
Round 2 :
Working back along chain: sc in 2nd ch from hook and in next 6 sts, hdc in next 8, dc in next 8, tr in next 8, skip last 7 and sl st to base turning point to create a tapered tail (approx counts: 32 into chain)
Round 3 :
Turn and work along the opposite side of the chain: sl st in first 4 sts, 1 sc in next 6 sts to shape the paisley body and create a full decorative arc
Round 4 :
Change to contrasting ochre/gold and work one round of 1 sc in each st BLO around the arc body to create a defined ridge for layering (count will match previous round)
Info :
These arcs are intentionally freeform. You can increase chain length or work more/less stitches into each section to produce a sweeping arc that ties each sunflower motif into the runner composition.
Round 5 :
Add surface decoration: using rust and olive, work surface slip-stitches or a contrasting running stitch on top of the arc to suggest texture and depth (no stitch count change).
Round 6 :
Edge the arc with a neat round of sc using dark green to create a leafy border if desired (count will equal circumference)
— Small Round Filler Motifs (Make 6) :
Round 1 :
6 sc in magic ring (6)
Round 3 :
1 sc in each st (12)
Round 4 :
Fasten off leaving tail to sew into gaps between leaves and arcs
Info :
These tiny rounds act as visual anchors between motifs and help disguise joins; make several in varying greens or ochres and sew them into gaps as you join the runner.
— Layered Leaf Cluster (Make 3 clusters) :
Round 1 :
Create a base chain of ch18 in deep green and work a medium leaf along the chain using the large leaf method but reduce ch-length: sc, hdc, 2dc, 3dc, 2dc, hdc, sc (leaves approx 18 staff)
Round 2 :
Attach a contrasting lighter green smaller leaf atop the base leaf by slip-stitching through the base leaf edge and working a small leaf pattern (no stitch count change)
Info :
Cluster several leaves in varying sizes and shades then tack them together at the base. These clusters are used between each sunflower to produce lush, layered foliage.
— Assembly Base and Layout Preparation :
Info :
Before joining, lightly block motifs to flatten any curls and pin the three sunflower motifs 20-25cm apart along your workspace to form the spiral runner layout. Place arcs connecting them, tuck leaf clusters and place wheat sprigs in groupings of 3-4 around each sunflower. Take a photo of your arrangement for reference before sewing.
Round 1 :
With contrasting thread, tack motifs together using large basting stitches to hold them in place temporarily (no numerical stitch count)
Info :
Use long tails left from each motif to sew pieces together. Start by attaching the sunflower centers to their inner petal layer if you left them separate, then sew the double petal layers together using a ladder stitch or whip stitch for an invisible seam.
Round 2 :
Sew petal base to arc edges where petals overlap using single crochet slip-stitch join or whip stitch depending on thickness. Reinforce any points where wheat sprigs will be attached.
Round 3 :
Join leaf clusters and filler rounds next, overlapping edges by 3-5 stitches and sewing with matching yarn so seams are hidden beneath leaf layers.
Info :
When joining, work from the center outward and sew through both layers only where needed — avoid flattening petals by picking up only a few loops and anchoring securely. Keep stitch tension even to prevent pulling motifs out of shape.
— Joining Details and Edge Stabilization :
Round 1 :
Once main pieces are sewn, work a unifying round of sc around the visible outer edges where motifs meet. Use a medium green to visually blend leaves and arcs (count will vary; work 1 sc in each available edge stitch).
Round 2 :
Where gaps remain, add small filler rounds or single leaves and whip them to the runner using invisible stitches. This step is iterative—fill gaps until runner looks cohesive.
Info :
Keep the runner asymmetrical yet balanced by moving leaf clusters and wheat stalks until the eye flows along the spiral. The joining round of sc creates a subtle trim and helps keep edges tidy.
— Final Border and Finishing Touches :
Round 1 :
With dark green, work 1 round of sc around entire runner edge to neaten and stabilize (work into available edges and seams; approximate final stitch count will match combined motif circumference)
Round 2 :
Add optional decorative picot edge: *sc in next 3 sts, ch3, sl st into first ch to form picot, repeat along edge to the end (creates dainty points)
Round 3 :
Weave in all ends and block lightly for final shape; place small amounts of batting between sunflower center and inner petal layer if extra lift is desired, then stitch closed carefully to hide batting.
Info :
Trim any stray fibers and press gently under a cloth if needed to set shape. If runner will be used under hot items, consider placing a heatproof trivet under hot dishes to protect yarn.
— Optional Additional Motifs and Variations :
Round 1 :
Create extra tiny daisies by making a 6 sc magic ring center and 5 small chain-petal repeats for scattered highlights
Round 2 :
Make additional wheat stalks and tuck them under large leaves for a fuller harvest look
Info :
Customize runner length by adding or removing arc length or repeating a sunflower motif. You can also make a table runner with two sunflowers instead of three for a smaller table.
Completing this Freeform Autumn Sunflower and Wheat Spiral Table Runner is such a satisfying, cozy experience! Each motif adds a little vignette of texture and color until the whole piece feels like a tiny crocheted harvest. The layered petals and wheat sprigs bring a three-dimensional warmth to any table, and the freeform joining means each runner will be uniquely yours. Happy stitching and enjoy the autumn glow you create! 🍁🧶