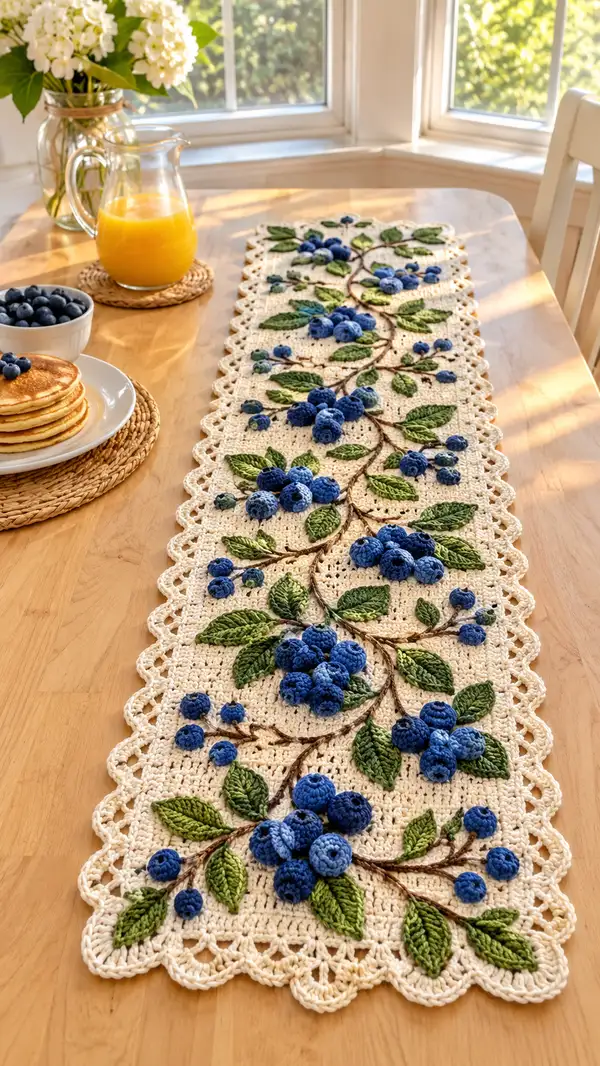
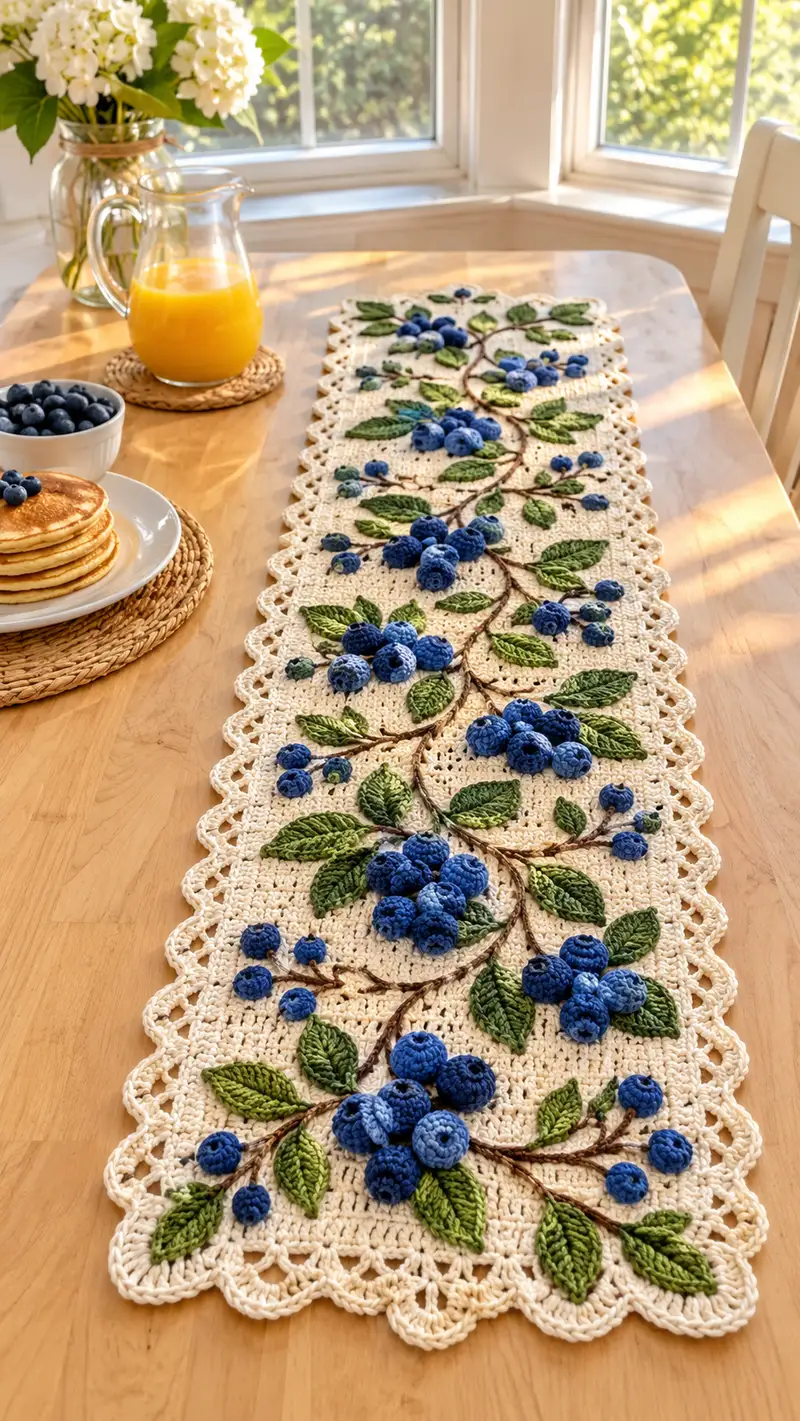
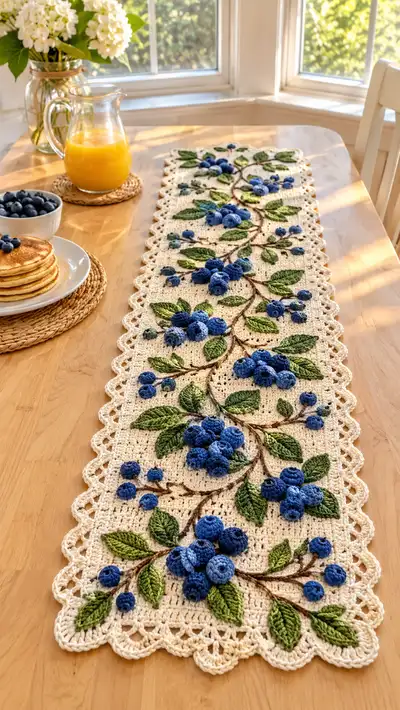
A charming, nature-inspired table runner featuring raised crochet blueberries, sculpted leaves, and delicate scalloped edges. Worked in a neutral cream base with lush green leaves and multi-tonal blue berries, this runner adds cottage-core elegance to any table. The pattern includes clear instructions for the rectangular base, scalloped border, 3D berries in three sizes, layered leaves, and embroidered vine branches. Perfect for gifting or seasonal table styling, the finished runner is a collectible handmade accent that becomes a table centerpiece.
Progress Tracker
0% Complete
— Materials & Gauge :
Info :
Gauge is not critical for this decorative runner but will affect finished size. With worsted cotton and 4.0 mm hook, 10 cm (4") = approx 12 dc across, 8 rows of dc = 5 cm (2"). The pattern is written for a runner approximately 32 cm (12.5") wide and 120-140 cm (47-55") long depending on base row count; adjust chain count to change length.
— Base Panel (worked flat in rows) :
Round 1 :
Using cream yarn, ch 121. (This foundation chain creates a working width of 120 stitches; adjust in multiples of 4 if you want a different width.)
Round 2 :
Ch 3 (counts as first dc), dc in 4th ch from hook and in each ch across. Turn. (120 dc)
Round 3 :
Ch 2, hdc in first st, *ch 1, skip next st, hdc in next st; rep from * across to last 2 sts, hdc in each of last 2 sts. Turn. (120 hdc equivalent placement; ch-1 mesh creates subtle holes)
Round 4 :
Ch 3, dc across in each st and ch-1 space across. Turn. (120 dc)
Round 5 :
Ch 3, dc in next 3 sts, *ch 2, skip 2 sts, dc in next 4 sts; rep from * across finishing with dc in last 4 sts. Turn. (Pattern repeats every 6 sts; still 120 sts plus ch spaces)
Round 6 :
Ch 2, hdc in each dc and in each ch-2 space across. Turn. (Textured grid forms)
Round 7-12 :
Repeat Rounds 2-6 once to create a 6-row block. Maintain stitch placement so each block stacks neatly. (Each 6-row block = 120 stitches wide)
Info :
If you prefer a denser background for heavy applique, use hdc or sc rows instead of alternating dc rows. The instructions below assume the airy textured base shown in the photo.
Round 13-60 :
Work 8 more 6-row blocks (R2-7 repeated) for a total of 10 blocks = 60 rows (adjust number of blocks for desired length). Keep edges straight by ending each block consistently. (Final width remains 120 sts across; row count controls final length)
Info :
Place temporary pins or a washable marker along the center line to help position the main vine later. Block the panel flat before adding border or appliques to stabilize stitches and set measurements.
— Scalloped Shell Border (worked around entire rectangle) :
Info :
Work border after base is blocked. You will work along all four sides in one continuous round joining corners with shells. Use 3.5 mm hook for a slightly firmer edge if desired.
Round 61 :
With RS facing and cream yarn, join with a sl st anywhere along one long edge. Ch 1, sc evenly around the entire perimeter placing approx 1 sc per row end or 1 sc every 2 dc along long edges and 1 sc in each end turning chain. Join with sl st to first sc. (Approx stitch count around perimeter will be roughly proportional to size; aim for even spacing, about 240 sc total)
Info :
Mark corner points with a stitch marker and count sc on each side so scallops will be evenly distributed. For this runner expect to place a scallop every 6 sc along long edges and every 3 sc around ends.
Round 62 :
*Skip next 2 sc, shell in next sc: (5 dc, ch 2, 5 dc) all in same sc, skip next 2 sc, sl st in next sc; rep from * around adjusting at corners so shells sit symmetrical. Join with sl st to first sl st. (Shell count approx = perimeter/6)
Round 63 :
Ch 1, sc in each stitch including sl st and in ch-2 spaces between shells to create a neat inner row; join with sl st. End off and weave in ends.
Info :
For a higher scallop like the photo, add a second shell row: in each ch-2 space, work (5 dc, ch 2, 5 dc) and then a final single crochet round for tidy finish. Block again lightly to shape scallops.
— Leaf (make 12-16 leaves in two sizes) :
Info :
Leaves are worked flat in rows then seamed down the center to form a raised rib. Use 3.5 mm hook and held single green or two-tone green to mimic natural variation. Each leaf begins at the tip and increases to center then decreases to the base.
Round 1 :
With green yarn, ch 8. (This chain makes a medium leaf; for a larger leaf ch 10-12.)
Round 2 :
Row 1: Sc in 2nd ch from hook, sc in next 5 ch, 3 sc in last ch (turn to work down opposite side), sc in next 5 ch. (Total = 16 sc for medium leaf)
Round 3 :
Row 2: Ch 1, sc in first st, inc in next st, sc in next 5 sts, (sc, inc, sc) in center 3 sts, sc in next 5 sts, inc in next st, sc in last st. (Increase row to shape; total approx 20 sc)
Round 4 :
Row 3: Ch 1, sc in each st across. Turn. (Maintain approx 20 sts)
Round 5 :
Row 4: Ch 1, sc2tog over first 2 sts, sc in next 6 sts, sc2tog centered over 3 central sts to shape tip slightly, sc in next 6 sts, sc2tog over last 2 sts. (Decrease row; total approx 16 sc)
Round 6 :
Row 5: Ch 1, sc in each st across. Fasten off leaving long tail for sewing. Fold leaf along center, align edges and sew a running stitch down the center with tapestry needle to create a raised central vein. Gently pull to make leaf cup slightly. Press lightly with steam or spray and pin to hold shape.
Info :
For a stronger central ridge, use a contrasting thread and blanket stitch the center, or use a strand of brown yarn to create a thin ridge. For smaller leaves reduce foundation chain to 6 and follow same shaping (final approx 10-12 sc).
— Small Leaf (make 10-14) :
Round 1 :
Ch 6. Sc in 2nd ch from hook and across, 3 sc in last ch, sc across opposite side. (Total approx 12 sc)
Round 2 :
Ch 1, sc across, shape by single decreases at tip row center, fasten off leaving tail and sew center to shape.
Info :
Vary sizes by stretching or adding/subtracting 2 chains; two-tone leaf effect made by carrying a lighter green along the FLO on one side while changing to dark green for the other side.
— 3D Berry - Small (Make 24-30 for scattered buds) :
Info :
Use 3.0-3.25 mm hook and blue yarn. Work very tight to achieve a firm small sphere. Tiny buds often have no stuffing; larger berries receive a pinch of stuffing as noted.
Round 1 :
Mr, 6 sc in magic ring. (6)
Round 2 :
Inc x6 evenly (12)
Round 3 :
(1 sc, inc) x6 (18)
Round 4 :
(2 sc, inc) x6 (24)
Round 5 :
1 sc in each st around (24). Fasten off leaving tail. Pull tail to close slightly to form a small bud — do not overclose. Weave tail through bottom and secure. No stuffing required for smallest buds.
Info :
For color variation, alternate two blues held together for a marled look in some buds and single strands in others.
— 3D Berry - Medium (Make 18-24) :
Round 1 :
Mr, 6 sc in magic ring. (6)
Round 3 :
(1 sc, inc) x6 (18)
Round 4 :
(2 sc, inc) x6 (24)
Round 5 :
(3 sc, inc) x6 (30)
Round 6 :
1 sc in each st around (30)
Round 7 :
(3 sc, dec) x6 (24)
Round 8 :
(2 sc, dec) x6 (18)
Round 9 :
Begin stuffing lightly with a small pinch of fiberfill. (1 sc, dec) x6 (12)
Round 10 :
Dec x6 (6). Fasten off leaving a 20 cm tail, close hole and weave tail through remaining sts, pull tight, and secure under surface. Attach a tiny brown sl st at base to represent stem point.
Info :
For pebbled natural look, work last 1-2 rounds in a lighter blue to create highlight. Use tapestry needle to make a small gathered dimple at center if desired.
— 3D Berry - Large (Make 8-10 clusters of 4-6 berries each as focal clusters) :
Round 1 :
Mr, 6 sc in MR. (6)
Round 3 :
(1 sc, inc) x6 (18)
Round 4 :
(2 sc, inc) x6 (24)
Round 5 :
(3 sc, inc) x6 (30)
Round 6 :
1 sc in each st around (30)
Round 7 :
(4 sc, inc) x6 (36)
Round 8 :
1 sc in each st around (36)
Round 9 :
(4 sc, dec) x6 (30)
Round 10 :
(3 sc, dec) x6 (24)
Round 11 :
Stuff lightly to keep plump but not rock-hard. (2 sc, dec) x6 (18)
Round 12 :
(1 sc, dec) x6 (12)
Round 13 :
Dec x6 (6). Fasten off leaving long tail for sewing. Close and weave tail inside berry. Optionally, add a small French knot or surface tunisian dab of a darker blue at the top to mimic calyx.
Info :
Large berries can be made by working to row 8+ and then adding a short chain and sl st loop to attach them to each other in clusters before sewing to panel for stability.
— Berry Cap / Calyx (optional) :
Round 1 :
With dark blue or navy, ch 6 and join into ring. Work 6 sc in ring, sl st to join. (6)
Round 2 :
Ch 1, (sc, ch 2, sc) in each st around to make 6 tiny picot calyx points. Fasten off and sew to tops of large berries.
Info :
These caps are optional but add a realistic finish. Use same color as berry base or darker for contrast.
— Bud (very small) :
Round 1 :
Mr, 5 sc in MR (5). Fasten off, pull. These are used as tiny filler blueberries.
Info :
Make many of these to fill between clusters; they do not need stuffing and are quick to work.
— Twig/Vine Embroidery (surface chain or sl-st vines) :
Info :
Use a single strand of brown worsted cotton or hold two strands for a thicker vine. The method below uses surface slip stitch (also called surface crochet) to create a raised continuous vine with branching points. Mark the main spiral line lightly on RS with a water-soluble marker following the center pinned guide.
Round 1 :
Thread long length of brown yarn onto tapestry needle, leaving a long tail. Bring yarn up at one end of the runner where the first cluster will sit, and sew a running stitch path along the marked vine line securing every 1-2 cm with a tiny stitch through the fabric on the WS; this anchors yarn so it won't pull through when surface crocheting.
Round 2 :
With hook, pick up a loop of brown yarn at the starting point and work surface chain/sl st as follows: insert hook into fabric where next vine point is marked, pull up a loop, yarn over and pull through both loops on hook (surface sl st). Continue along marked path creating smooth, slightly raised chain. For small branch forks, chain a short spur of 5-8 surface sl st and tie off discreetly under leaf placement.
Info :
Work vines slightly loose so they lie flat but are visible. For textured twigs, occasionally wrap a thin strand of darker brown around the vine and tack down. Make the vine meander naturally with subtle width changes.
— Assembly & Placement Planning :
Info :
Lay the blocked base on a flat surface and pin the vine in place first. Arrange leaves and berry clusters around the vine — photo shows alternating clusters on both sides with the largest clusters placed near ends and smaller clusters in between. Take a photograph of your arrangement before sewing to preserve layout.
Round 1 :
Position 1 large cluster (3-5 large berries grouped) about 12 cm from each short end, and 2 medium clusters between those; fill gaps with small berries and buds. Place leaves in pairs around each cluster, with at least one large leaf per large cluster and 1-2 small leaves per medium/small cluster.
Info :
Use pins to anchor pieces; ensure leaves' veins face outward (raised side up) and berries sit slightly above leaves. Balance on both sides of runner so the visual weight feels even.
— Sewing Appliques (securely attaching leaves & berries) :
Round 1 :
Sew each berry at its base using the long tail left when finishing berry. Use whip stitch through base of berry and into a couple of fabric rows on the runner; take 6-8 small stitches per berry for stability. For large berries, sew through 2-3 rounds down into the fabric and overwrap with a few decorative stitches to secure cluster.
Round 2 :
Sew leaves by using the long tail through the center back seam. Tack the leaf at its base and then in the middle to create a natural raised curve. Add a few invisible ladder-stitches under the leaf edge to secure without visible thread.
Info :
When sewing clusters, sew the berry that rests closest to the vine first and stitch the berry to the vine for extra security. Cross-stitch or make a few wraps of brown yarn around the base of the cluster and tack to the vine for organic attachment.
— Decorative Surface Details :
Round 1 :
Use dark green yarn and a 3.0 mm hook to add textured veins on leaves using surface slip stitch: follow the central seam and add 2-3 diagonal veins on each side with short surface sl st segments. Secure ends under leaf roots.
Round 2 :
Add small french knots or tiny embroidered seed dots in navy at random berry tips to mimic natural bloom (use a large-eyed tapestry needle and 2-ply yarn looped for knot)
Info :
For an extra realistic finish, block the runner once more after appliques are sewn to make everything settle into place. Light steam with a cloth over cotton yarn will relax stitches into natural-looking shapes.
— Finishing Touches :
Round 1 :
Weave in all yarn tails on WS using tapestry needle. For any visible long threads on RS, tie off and bury thread ends into nearest berry or leaf base to hide. Trim excess ends closely.
Round 2 :
Optional: Add a light coat of fabric stiffener under clusters if you want them to remain very upright. Allow to dry fully before use.
Info :
Store runner flat or rolled to avoid creases in appliques. Spot clean as needed; hand wash cotton items gently and reshape while damp.
This blueberry branch table runner turns a simple table into a storybook scene — delicate scallops, 3D berries, and sculpted leaves bring a cottage garden straight to your tabletop. Each stitch adds character and charm, and assembling clusters is delightfully meditative. 🧶 Arrange clusters to suit your style, serve brunch with a smile, and let this handmade runner be the centerpiece of many sunny mornings. Happy stitching and enjoy the cozy, botanical finish! 🌿🫐