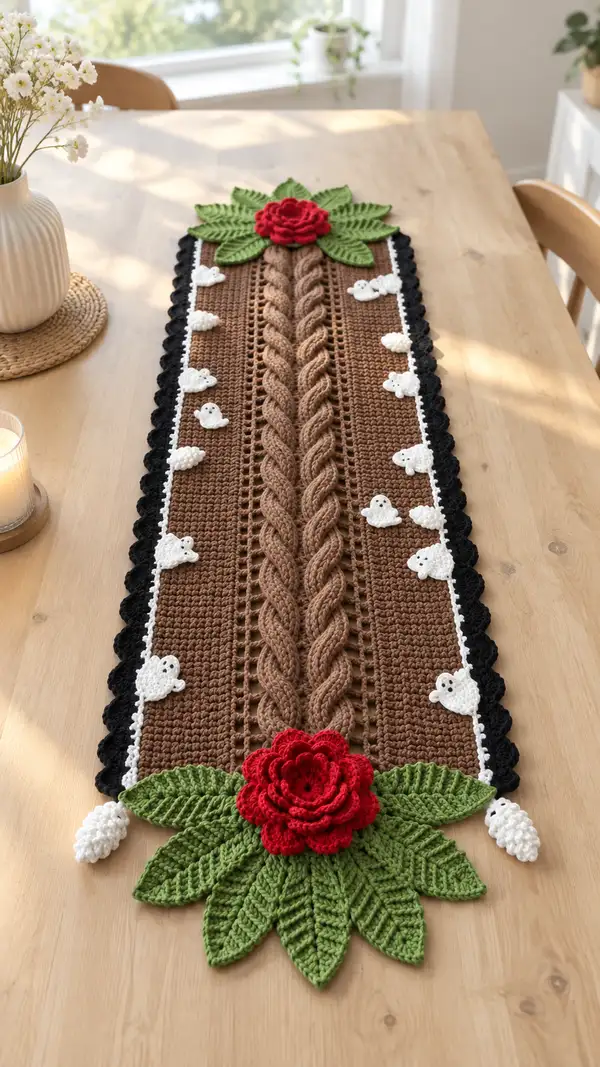
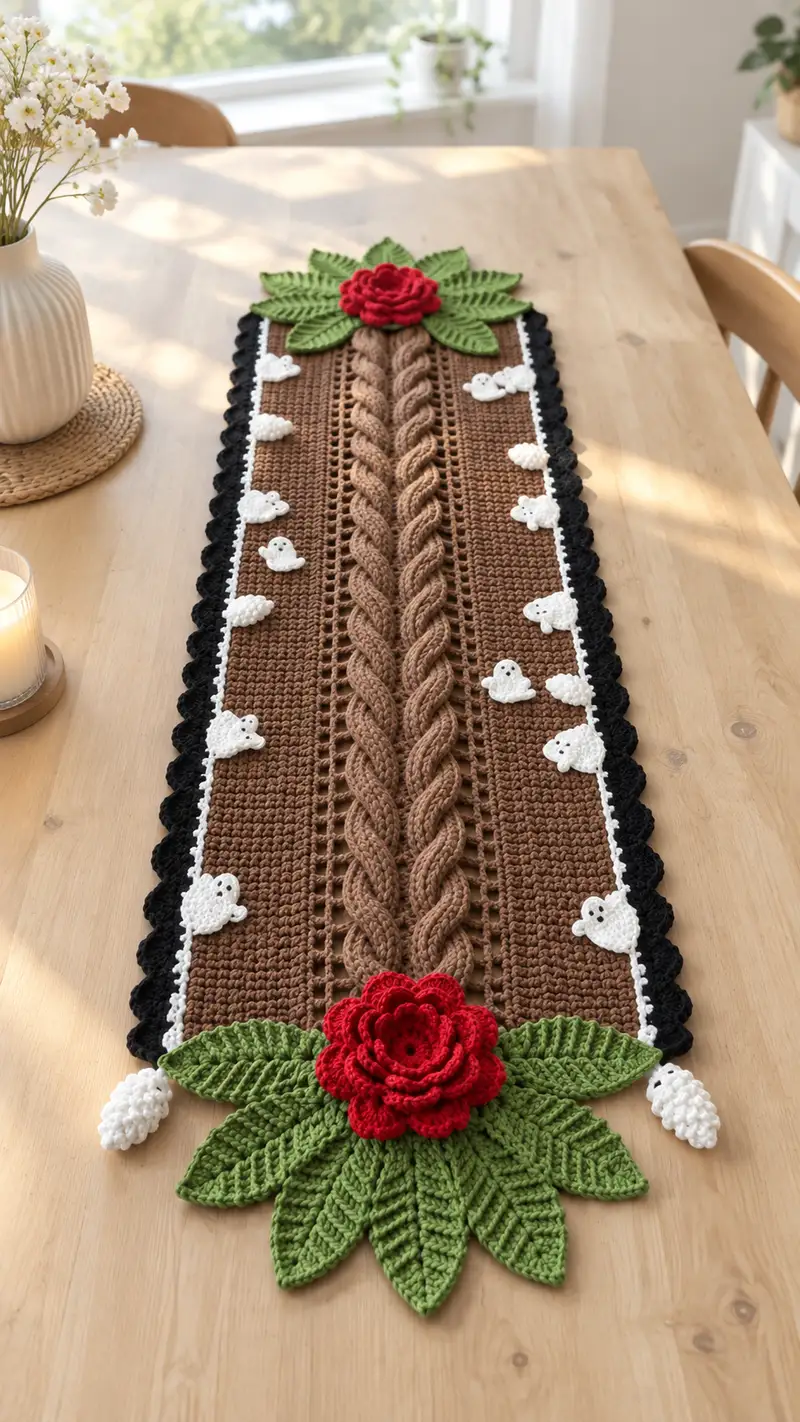
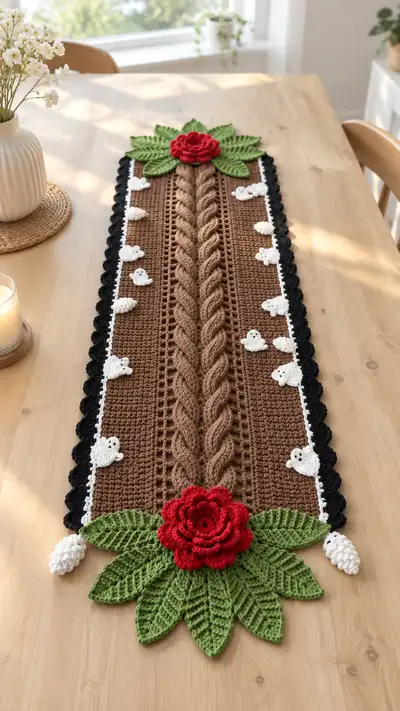
A rich, nature-inspired table runner featuring a central braided trunk motif, textured brown panels, tiny white ghost accents, scalloped black edging, and dramatic leaf-and-rose end clusters. This pattern combines flat panel crochet, front-post cabling for the braid, layered floral pieces, and small applique9 motifs to create a statement centerpiece for your table.
Progress Tracker
0% Complete
— Notes & Gauge :
Info :
This table runner is worked flat across rows. Gauge is approximate due to decorative elements: 16 sc = 4 in (10 cm) in sc rows with 4.0mm hook. Final runner measures approximately 36 in (length before adding floral clusters) x 10 in wide; length can be adjusted by repeating the central panel rows.
Info :
You will work a long foundation chain that divides into three panels across each row: left side panel (42 sts), central cable panel (36 sts), right side panel (42 sts) for a total of 120 stitches. All row counts below assume this 120-st width. If you change gauge, adjust counts proportionally.
— Foundation Row & Base Panel :
Round 1 :
Ch 121. Sc in 2nd ch from hook and in each ch across — 120 sc (120)
Round 2 :
Ch 1, turn. Sc in each st across (120)
Round 3 :
Ch 1, turn. Sc in each st across (120)
Round 4 :
Ch 1, turn. Sc in each st across (120)
Round 5 :
Ch 1, turn. Sc in each st across (120)
Info :
Work these first 5 rows to establish the base fabric and compress any curl. Keep tension consistent; this background will frame the cable and applique9 placement.
Round 6 :
Ch 2 (counts as hdc), turn. Hdc in first 3 sts, *hdc in next 36 sts (central cable area reserved), hdc in next 42 sts (right panel)* — 120 hdc (120)
Round 7 :
Ch 1, turn. Sc in each st across maintaining 42 | 36 | 42 division visually (120)
Round 8 :
Ch 1, turn. Sc in each st across (120)
Round 9 :
Ch 1, turn. Sc in each st across (120)
Info :
At the end of Round 9 you have a stable base. From here we will begin the cable sequence in the center 36 sts while keeping the side panels in consistent sc rows for texture. Place a stitch marker in the 1st st of the row (start of left panel) to mark the row start. Keep it in the same stitch each row.
— Cable Braid Center (36 sts center) :
Round 10 :
Ch 1, turn. Sc in first 42 sts (left panel). Now for central 36 sts: *[Sc in next 2 sts, FPdc around next st, BPdc around next st, sc in next 2]* repeat across center 36 sts (3 repeats of 12). Sc in last 42 sts (right panel) — 120
Round 11 :
Ch 2, turn. Hdc in first 42 sts (left panel). Central 36 sts: *hdc in each st across but replacing the FPdc/BPdc with regular hdc to stabilize the row*. Hdc in final 42 sts — 120
Round 12 :
Ch 1, turn. Sc in each st across (120)
Round 13 :
Ch 1, turn. Sc in first 42 sts. For central 36: Work cable setup row for crossing: *[sc 2, FPdc around next 4 sts as a group (work FPdc, FPdc, FPdc, FPdc), BPdc around next 4 sts]* repeat so the 36 sts are organized in two 12-st halves to allow crossing in following rows. Sc in last 42 sts (120)
Round 14 :
Ch 2, turn. Hdc in each st across entire 120 sts (120)
Info :
The cable motif is created by crossing groups of FPdc/BPdc every 8-12 rows. These post stitches do not change stitch count. Keep yarn tails hidden inside or weave as you go. Practice the FPdc/BPdc stitch if new: yarn over, insert hook from front to back around post, yarn over and complete dc around post.
Round 15 :
Ch 1, turn. Sc in first 42 sts. Central 36 sts: work the first cable cross — (for each 12-st repeat: [skip next 3 sts, FPdc around next 3 sts, return to skipped sts and work FPdc around them crossing left over right] then BPdc across following 6 sts to anchor). Sc last 42 sts — 120
Round 16 :
Ch 2, turn. Hdc in each st across (120)
Round 17 :
Ch 1, turn. Sc in each st across (120)
Round 18 :
Ch 1, turn. Sc in each st across (120)
Round 19 :
Ch 1, turn. Sc in first 42 sts. Central 36 sts: Repeat cable row pattern as Round 15 (120)
Round 20 :
Ch 2, turn. Hdc across (120)
Round 21 :
Ch 1, turn. Sc across (120)
Info :
We will now enter the principal cable repeat. A 12-row cable repeat (Rounds 15-26) produces one complete braided pass. To achieve the length shown in the photo, repeat the 12-row cable sequence 8 times (96 additional rows) or until runner reaches desired length. Below we list the full 12-row cable repeat as Rounds 22-33 to be repeated.
Round 22 :
Ch 1, turn. Sc across entire row (120)
Round 23 :
Ch 2, turn. Hdc across (120)
Round 24 :
Ch 1, turn. Sc across (120)
Round 25 :
Ch 1, turn. Sc in first 42 sts. Central 36 sts: Cable cross row — for each 12-st center repeat: [FPdc 3, FPdc 3 crossing over the next group (use cable cross technique: hold 3 FPdc on stitch holder or use stitch marker, work next 3 FPdc, then work held FPdc) then BPdc 6 to anchor]. Sc in last 42 sts (120)
Round 26 :
Ch 2, turn. Hdc across (120)
Round 27 :
Ch 1, turn. Sc across (120)
Round 28 :
Ch 1, turn. Sc across (120)
Round 29 :
Ch 1, turn. Sc in first 42 sts. Central 36 sts: Repeat cable cross as Round 25 to continue twist. Sc in last 42 sts (120)
Round 30 :
Ch 2, turn. Hdc across (120)
Round 31 :
Ch 1, turn. Sc across (120)
Round 32 :
Ch 1, turn. Sc across (120)
Round 33 :
Ch 1, turn. Sc across (120)
Info :
End of one 12-row cable repeat. Repeat Rounds 22-33 as many times as needed to reach desired runner length — each 12-row repeat forms a section of the braid. For the pictured runner, repeat these 12-row repeats 8 times (96 rows) in addition to the base rows for a comfortable 36 in length. If you want a longer runner, add more repeats.
Round 34-129 :
Repeat Rounds 22-33 for 8 full repeats (96 rows). Maintain 120 sts each row. After completing repeats, proceed to finish the central cable and prepare for edging (120)
Round 130 :
Ch 1, turn. Sc in first 42 sts. For central 36 sts: work a calming row of sc to stabilize: sc in each of 36 center sts. Sc in final 42 sts (120)
Round 131 :
Ch 2, turn. Hdc across entire row (120)
Info :
Now that the central length is completed to your desired measurement, we will create the inner white picot edging and then the outer black scallop border. Place the runner flat and align edges before working the border to ensure even spacing. We will work around the runner without changing the stitch count for the side rows; turning at corners requires careful increases to keep corners flat.
— Inner Picot Border (White) :
Round 132 :
With white yarn join by inserting hook in the first st at one short end corner (right side), ch 1. Work sc evenly along short end across 10 sts, then continue along long side: sc in each side-row edge stitch (these are the end stitches of each row) working 120 sc down the long side (this counts sc across each row end). When you reach the far short end, work 10 sc across short end, sc in every end st of the return side across, finishing with sl st to join under the first join — approximate count varies by length; work evenly without pulling.
Round 133 :
Ch 1, sc in same st, *ch 3, skip 1 st, sc in next st* around the entire runner edge (including corners). This creates a chain-lace effect inside the scallop border. Keep corners as (sc, ch3, sc) to keep them flat.
Info :
Picot details: For a more pronounced inner edge, replace 'ch 3' with 'ch 3, sl st in first ch (picot)' at every 6th picot. Keep the ch-spacing even and use blocking pins to shape before adding the outer scallop.
— Outer Scallop Border (Black) :
Round 134 :
With black yarn join at a corner into the edge sc. *Work (sc in next ch-sp, skip ch-sp, (5 dc in next ch-sp) sl st into the middle dc to anchor shell), sc in next ch-sp* repeat along edge to form scallops. At corners work (sc, ch 2, 5 dc in corner space, ch 2, sc) to keep corner roundness. Continue evenly around entire runner. Count scallops — aim for an equal number down both long edges (for pictured runner, approx 22 scallops per long side depending on final length).
Round 135 :
Ch 1, sl st into each dc of shells across to flatten shells as desired, or leave shells popped. Fasten off and weave ends.
Info :
Blocking the whole runner at this point is recommended: pin flat on blocking board, steam lightly or wet-block according to yarn manufacturer to set edges and make shells and picots neat.
— Ghost Applique9s (Make 16 total, 8 per side) :
Round 1 :
With white yarn and 3.5mm hook make magic ring, ch 1. Work 6 sc in MR (6)
Round 2 :
Inc in each st around (12)
Round 3 :
(Sc 1, inc) x 6 (18)
Round 4 :
Sc in each st around (18)
Round 5 :
Ch 1, *sc 2, ch 2, sc 2* to create little arm lobes: work across to make a small flattened teardrop shape — approximate: 5 groups across, finishing with sl st to base (18)
Round 6 :
Fasten off leaving long tail for sewing. Embroider two small black eyes using black embroidery thread/yarn, place roughly at round 3 of motif spaced 3-4 sts apart. Flatten slightly and secure with small running stitches on backside. Make 16 motifs total.
Info :
Ghost placement: pin ghosts along the white inner picot edge spaced evenly between scallops (for pictured runner, about one ghost between each scallop). Use small whip-stitches to attach firmly. Slightly bend the bottom edge when sewing to make the ghost appear to float off the runner surface.
— Pinecone Buds / White Cluster (Make 4) :
Round 1 :
With white yarn and 3.5mm hook, ch 6, sl st to form a small ring (or MR). Work 6 sc in ring (6)
Round 2 :
Work popcorns: [5 dc in next st, remove hook, insert in first dc of group, pull loop through] repeat around inserting popcorns into 6 sts to create a pinecone texture. After each popcorn sl st to next base st to anchor. Fasten off leaving tail. Stuff lightly with fiberfill as you go to create rounded pinecone bud. Make 4 (two per end) or as pictured.
Info :
Use the pinecone buds at the two short ends' corners as small white textural accents. Sew into place with long tail, then weave tail through center and trim close.
— Leaves (Make 10 total for end clusters; pictured shows 7 per end but pattern suggests 5 large leaves per end) :
Round 1 :
With green yarn and 3.5mm hook ch 21. Sc in 2nd ch from hook, sc across to end (20)
Round 2 :
Ch 1, turn. Sc in first 2 sts, hdc in next 2, dc in next 4, tr in next 6 (center peak), dc in next 4, hdc in next 2, sc in last 2 (20)
Round 3 :
Ch 1, turn. Work 1 sc in first 2 sts, 1 sc in next 2 sts BLO, 1 hdc in next 2 BLO, 1 dc in next 4 BLO, 1 tr in next 6 BLO, reverse across to mirror the shaping back to start. Fasten off leaving long tail for sewing. Trim tail to shape leaf if needed and use light blocking to flatten and define central ridge.
Info :
Leaves are worked flat and then folded slightly along center when sewing to produce natural curvature. For pronounced ribbing, embroider a line of sc or surface slip stitches down the leaf center using contrasting green or same green.
— Layered Rose (Make 2, one for each end) :
Round 1 :
With red yarn and 3.5mm hook, ch 6, sl st to form a ring. Ch 3 (counts as dc), 11 dc in ring. Sl st to top of ch-3 — 12 dc (12)
Round 2 :
Ch 3, dc in same st, *2 dc in next dc* around — 24 dc (24)
Round 3 :
Ch 1. *Sc in next dc, ch 3, sl st into 2nd ch from hook (picot) to form petal tip, sc in next dc* around. This forms a frilly petal base. Fasten off an leave long tail for sewing.
Round 4 :
Make petal layers separately: ch 8, sc in 2nd ch from hook, hdc next, dc next 2, hdc next, sc next, sl st into base — make 6 petals and join to a small circle. Repeat to create 2-3 tiers of petals, each tier slightly larger (use ch 10, ch 12 sequences for 2nd and 3rd tiers). Stack tiers concentrically, sewing through center with long red tail.
Round 5 :
Secure petals to round center and sew rose firmly to leaf cluster center at each end. Add a few stitches to anchor the rose through multiple layers of leaves and runner fabric for durability.
Info :
Create a dense, cupped rose by offsetting petal tiers so that inner small petals tuck under outer larger petals. Block each tier lightly to open petals before assembly.
— Assembly & Placement :
Round 1 :
Lay runner flat and position floral clusters at each short end. Arrange 5 large leaves radiating under rose: 3 full leaves across the bottom edge and 2 slightly tucked under the sides to create a fan. Pin in place.
Round 2 :
Place two pinecone buds near the outermost edges adjacent to leaf tips and pin. Position ghost applique9s evenly down both long sides between the white picot loops and the black scallops, about 1 ghost per scallop.
Round 3 :
Sew each leaf to the runner along its central spine using a ladder stitch or whip stitch with green yarn. Make sure to distribute tension so leaf curves slightly upward without pulling the runner edge. Sew rose to center of leaves with multiple passes through runner for stability.
Round 4 :
Sew pinecone buds using white tail, then embroider small black seed eyes on each ghost using small straight stitches. Weave all tails into runner fabric and trim close.
Info :
For extra durability, sew through the black scallop border and underlying runners when attaching heavy floral cluster to ensure the stress is spread across multiple layers of fabric. Use matching thread or thin yarn for near-invisible attachment stitches.
— Finishing Touches :
Round 1 :
Block the entire runner and applique9s: pin flat on blocking mat to desired measurements and spray lightly with water or steam carefully. Allow to dry fully before removing pins.
Round 2 :
Trim any stray fibers and double-check all sewn attachments. Optionally add a layer of thin fabric glue under rose base if extra adhesion is desired (test glue compatibility with yarn first).
Info :
To customize length, simply add or remove repeats of the 12-row cable sequence. To create a runner for a longer table, repeat Rounds 22-33 additional times in pairs to maintain symmetry at both ends.
This braided trunk table runner brings nature and texture to your table with layered leaves, a bold red rose, and tiny ghosted accents — a wonderful blend of rustic charm and playful detail. Once finished it makes a dramatic centerpiece that warms any room and invites compliments. I hope you enjoy every calming repeat of the cable braid and the satisfying stitch-work of the final floral assembly. 🧶🌹✨