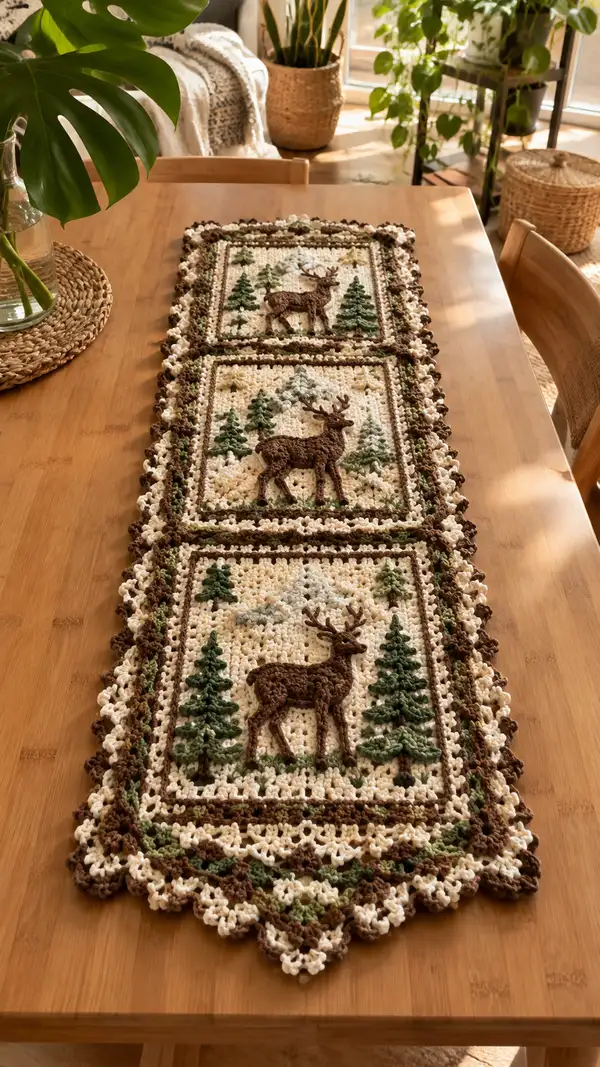
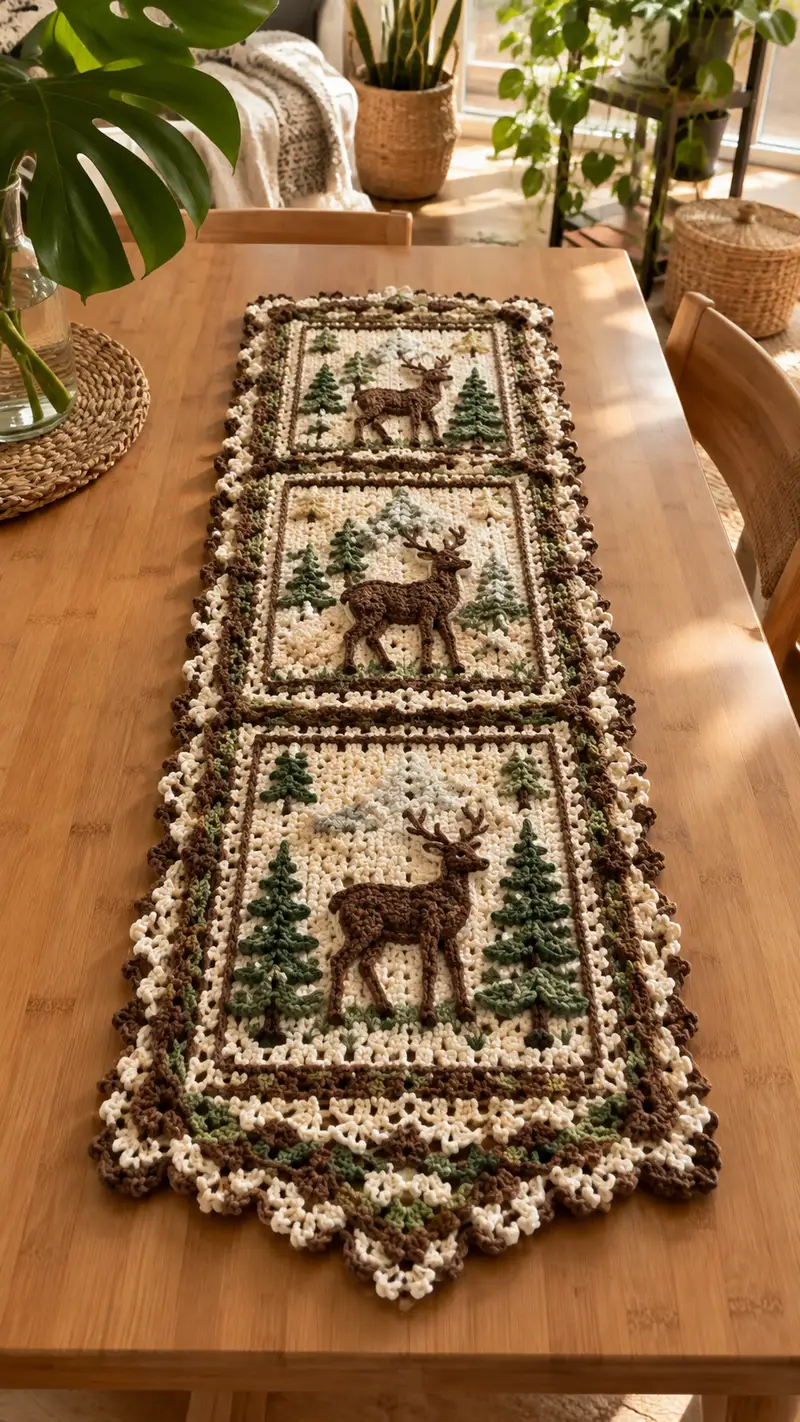
A rustic woodland table runner composed of three framed square panels featuring textured 3D deer appliques and layered evergreen trees. Rich cream background with warm brown and moss green accents, finished with a decorative scalloped border. Perfect for autumn and winter tabletops or a cozy nature-inspired centerpiece. This pattern focuses on texture, applique, and assembly for a heirloom-quality runner.
Progress Tracker
0% Complete
— Notes & Gauge :
Info :
Gauge is not critical for this table runner, but for consistency and to match finished dimensions, aim for about 18 sc x 18 rows = 10 cm in worsted weight with 4.0mm hook when working dense sc fabric. Work tightly enough that background texture is firm and appliques sit cleanly on top.
Info :
Each square panel is constructed as a textured round-worked square (worked in joined rounds). Three identical panels are made and 3D deer, layered trees, and small snow/sky accents are crocheted separately and sewn on. Finally panels are joined and a multi-row scalloped border is added.
— Panel (Make 3 identical panels) :
Round 1 :
6 sc in magic ring (6)
Round 3 :
(1 sc, 1 inc) x 6 (18)
Round 4 :
(2 sc, 1 inc) x 6 (24)
Round 5 :
(3 sc, 1 inc) x 6 (30)
Round 6 :
(4 sc, 1 inc) x 6 (36)
Round 7 :
(5 sc, 1 inc) x 6 (42)
Round 8 :
(6 sc, 1 inc) x 6 (48)
Info :
At this stage you have a circular disk. The increases created even expansion; we will maintain an even circumference and then begin texture rounds. Use stitch marker to mark first stitch of each round.
Round 9 :
1 sc in each st (48)
Round 10 :
1 sc in each st BLO (48)
Round 11 :
1 sc in each st (48)
Round 12 :
1 sc in each st (48)
Info :
Rounds 9-12 build a firm background. Place small removable markers where you expect the deer center to be: from the marker, count 8 stitches to left and right to mark approximate deer placement. These temporary markers help align appliques later.
Round 13 :
Change to cream if not already. 1 sc in each st (48)
Round 14 :
1 sc in each st BLO (48)
Round 15 :
1 sc in each st (48)
Info :
Eye the motif area: the deer applique will be centered approx at rounds 10-16. Mark top/bottom midlines on your panel with pins to help later during assembly.
Round 16 :
1 sc in each st (48)
Round 17 :
(11 sc, inc) x 4 (52)
Round 18 :
(12 sc, inc) x 4 (56)
Round 19 :
(13 sc, inc) x 4 (60)
Round 20 :
(14 sc, inc) x 4 (64)
Info :
These increases (4 evenly spaced incs) begin to square the round into a more angular, blockable shape. After Round 20 you will have 64 stitches per round. Block the panel square at this point to set the shape before moving on to texture and frame rounds.
Round 21 :
1 sc in each st (64)
Round 22 :
1 sc in each st BLO (64)
Round 23 :
1 sc in each st (64)
Round 24 :
1 sc in each st (64)
Info :
Now we create the framed inner border that will sit around the applique. Work two rounds of contrasting thin inner line using brown (or accent color) to create the frame line.
Round 25 :
Change to brown. 1 sc in each st (64)
Round 26 :
1 sc in each st BLO (64)
Round 27 :
Change to cream. 1 sc in each st (64)
Round 28 :
1 sc in each st (64)
Info :
Rounds 25-28 create the inner frame that visually separates the center panel from the outer border. Keep tension consistent; the frame should lie flat after blocking.
Round 29 :
Change to moss green. Working every 6th stitch, make a single puff cluster (yarn over, insert hook, pull up loop twice, yarn over and pull through 6 loops) - treat each puff as 1 st; overall: (5 sc, puff) x 10 + 4 sc to equal 64 total (64)
Round 30 :
Change to cream. 1 sc in each st (64)
Info :
Puff clusters here are decorative to create low-relief texture reminiscent of shrubs under the trees. If you prefer simpler texture, substitute a 3rd loop dc cluster in the same spacing.
Round 31 :
1 sc in each st (64)
Round 32 :
1 sc in each st BLO (64)
Round 33 :
1 sc in each st (64)
Info :
Finish background rounds. Fasten off and weave in ends. Repeat this entire panel sequence to make 3 identical panels. Block each panel carefully to a square block measuring approximately 9.5 - 11 inches per side depending on your gauge.
— Deer Applique (Make 3 deer, one for each panel) :
Info :
The deer is worked in several pieces: body, head/neck, 4 legs (make 4), and antlers. All pieces are worked in warm brown and sewn together to form a low-relief applique. Work tightly (3.5mm hook optional) for a neat edge. Optional light stuffing inside body adds slight 3D effect — use very small amounts so the applique remains flat enough to sew.
— Deer Body :
Round 1 :
6 sc in magic ring (6)
Round 3 :
(1 sc, inc) x 6 (18)
Round 4 :
(2 sc, inc) x 6 (24)
Round 5 :
(3 sc, inc) x 6 (30)
Round 6 :
1 sc in each st (30)
Round 7 :
(4 sc, inc) x 6 (36)
Round 8 :
1 sc in each st (36)
Round 9 :
(5 sc, inc) x 6 (42)
Round 10 :
1 sc in each st (42)
Info :
We will elongate the body by working several even rounds to create an oval shape. Use stitch count markers to mark front and back where neck and legs will join later.
Round 11 :
1 sc in each st (42)
Round 12 :
1 sc in each st (42)
Round 13 :
(5 sc, dec) x 6 (36)
Round 14 :
(4 sc, dec) x 6 (30)
Round 15 :
Change to BLO and work 1 sc in each st BLO (30)
Round 16 :
1 sc in each st (30)
Info :
If you like a slightly padded body, stuff lightly now with a pinch of fiberfill — do not overstuff or applique will bulge. Leave tail end open for sewing to panel later.
Round 17 :
(2 sc, dec) x 6 (24)
Round 18 :
(1 sc, dec) x 6 (18)
Info :
Fasten off leaving a long tail for sewing to the panel. We will attach legs and head separately to create the standing pose as seen in the picture. Ensure the belly curve faces the correct way by laying the body on the blocked panel to confirm placement.
— Deer Head & Neck :
Round 1 :
6 sc in magic ring (6)
Round 3 :
(1 sc, inc) x 6 (18)
Round 4 :
(2 sc, inc) x 6 (24)
Round 5 :
1 sc in each st (24)
Round 6 :
(3 sc, inc) x 6 (30)
Round 7 :
1 sc in each st (30)
Round 8 :
(3 sc, dec) x 6 (24)
Round 9 :
(2 sc, dec) x 6 (18)
Round 10 :
1 sc in each st (18)
Info :
Before closing the head completely, place it on the body to judge the neck length. You may elongate the neck by adding one or two even rounds at this point. Fasten off leaving a long tail for sewing. Lightly stuff head if desired.
— Deer Legs (Make 4) :
Round 1 :
6 sc in magic ring (6)
Round 2 :
(1 sc, inc) x 3 (9)
Round 3 :
1 sc in each st (9)
Round 4 :
1 sc in each st (9)
Round 5 :
(2 sc, dec) x 3 (6)
Round 6 :
1 sc in each st (6)
Info :
Legs should be narrow and slightly elongated. Lightly stuff feet only if you want slightly rounded hooves; legs are sewn to the underside of the body so that the deer stands in profile. Fasten off leaving long tails for sewing.
— Antlers (Make 2) :
Round 1 :
Ch 6, sc in 2nd ch from hook and across (5), turn (5)
Round 2 :
Ch 1, sc across (5)
Round 3 :
Ch 2, sk next st, sc in next 2 sts, ch 2, sl st in last st to create forked branch (2 forks plus stem)
Round 4 :
Fasten off leaving long tail for sewing. You may create additional tiny branches by adding small picot loops (ch 3, sl st back into base) where desired for naturalistic antler shape.
Info :
Antlers are deliberately small and worked flat to keep the applique light. Sew them to the head with embroidery-style stitches and secure well; if desired, place a dab of fabric glue and then sew for extra security.
— Deer Assembly :
Info :
Sew the head to the body at the neck opening aligning the stitches so the head sits at a slight forward angle. Sew legs to the underside: two legs near the front for the forelimb positions and two legs toward rear for hindlimbs. Space legs to match pictured stance (about 6-8 stitches apart on the 42-st body rows). Sew antlers to head atop placement and embroider a small eye dot with black thread/maker.
— Layered Evergreen Trees (Make 6 per panel - mix of two sizes) :
Tree Small - Round 1 :
Ch 4, join to form loop, ch 3 (counts as dc), 2 dc in loop, ch 2, 3 dc in loop, sl st to top of ch-3 (6 dc clusters)
Round 2 :
Ch 3, 2 dc in space, ch 1, 3 dc in next space, ch 2, 3 dc in next space. Fasten off (creates a small triangular cluster)
Tree Large - Round 1 :
Ch 4, join, ch 3, 2 dc in loop, ch 2, 3 dc in loop, sl st (same as above)
Round 2 :
Ch 3, 2 dc in space, ch 1, 3 dc in next space, ch 1, 3 dc in next space, ch 2, 3 dc in last space
Round 3 :
Ch 3, 3 dc in each ch-1 space across to widen triangle, sl st to join, fasten off. Weave in ends, leaving long tail for sewing.
Info :
Trees are layered: stack one smaller triangle in front of a slightly larger triangle to create depth. Use darker moss green for the base triangle and lighter sage for front triangle. Sew to panel anchoring at the lowest row area to mimic growth on ground level.
— Snow/Cloud Accents (Make small clusters as needed) :
Round 1 :
Ch 5, sl st to form ring, ch 2, 3 hdc in ring, ch 1, sl st (small puff/blossom)
Round 2 :
Work 3-4 more tiny picot clusters randomly in light grey to simulate distant trees or snow puffs. Fasten off leaving tails for sewing.
Info :
Position a few of these small clusters above and behind trees to simulate mist or snowy sky as pictured. Less is more here — they are background accents, not focal points.
— Panel Border & Joining :
Round 1 :
With panels blocked and appliques sewn in place, prepare to join panels. Place three panels in a row with right sides up and align motifs. Using brown yarn, whip stitch or single crochet join the panels along their side edges - join using sc through both loops of both panels. For each seam: sc through both panels across 64 sts (approx) per side.
Info :
To join panels using single crochet: hold two panels wrong sides together, insert hook through corresponding stitches on both panels, sc to join. This creates a raised seam line that visually becomes part of the runner's frame. Alternatively, mattress stitch gives a flatter seam.
Round 2 :
After joining the first and second panels, join the second and third in the same way. You now have one long strip of three joined panels with raw edges along the long sides and at both short ends.
Round 3 :
Change to cream. Work 1 sc evenly around the entire outside edge of the joined panels, placing (sc, ch 2, sc) in each corner point to keep corners square (total count will vary depending on seam joins but aim for an even number of stitches per long or short side).
Info :
Measure the long runner now; after joining, it should be approximately 30-36 inches long depending on your gauge. Adjust border stitch counts slightly if you need to preserve symmetry and scallop alignment for the next rounds.
— Outer Decorative Border (Scalloped Layered Edge) :
Round 1 :
With cream: 1 sc in each st around (work 3 sc in each corner ch-2 space) (count will vary; keep consistent)
Round 2 :
Change to brown. 1 sc in each st BLO around to create inner ridge (same stitch count as previous round)
Round 3 :
Change to moss green. *Ch 3, skip 2 sts, sl st in next st* repeat along the edge to create a scallop chain (evenly space across sides and put extra scallops into corners)
Round 4 :
Change to cream. Working into each ch-3 scallop, make (5 dc) to form a pronounced scallop shell. Sl st between scallops to anchor (shells should be evenly spaced around edge).
Round 5 :
Change to brown. Working behind the shells in the base row, make a small popcorn cluster between each scallop for a layered, ruffled look: *(ch 1, 5 dc in next sl st base, remove hook, insert hook into first dc, pull loop through to form popcorn) - anchored with sl st* repeat.
Info :
The scalloped layered edge mirrors the photo's frilly edging. Work slowly and count shells per side to keep symmetry. If you have an odd number of shells on a side, reduce/expand the number in the next side so corners align evenly.
Round 6 :
Change to cream. Finish with 1 sc in each st around to tidy and anchor shells. Fasten off and weave in all ends carefully. Block the entire runner flat, pinning shell points to hold shape while drying.
— Final Finishing Touches :
Info :
Inspect seams and appliques. Use small neat whip stitches to resew any appliques that feel loose. Add a few invisible stitches beneath deer legs to secure them flat to the panel so the runner sits evenly. If desired, use a tiny dab of fabric glue under antler base for extra security, then reinforce with thread stitches.
Info :
Press lightly with a steam iron through a damp cloth if needed to flatten any uneven spots, or re-block before displaying. Trim any stray ends and tuck them into the back of the runner for a clean finish.
This Brown Cream Deer Forest Table Runner brings cozy woodland charm to your home with charming 3D deer and layered evergreens. Each panel is a miniature textile scene that becomes even more beautiful when joined and edged with a scalloped border. The process is meditative, and the results are a seasonal heirloom you will love to display. 🧶🍂 Display it proudly down the center of your dining table or on a console for instant cozy vibes. Happy crocheting — enjoy every stitch and share your finished runner with friends! 🎨✨