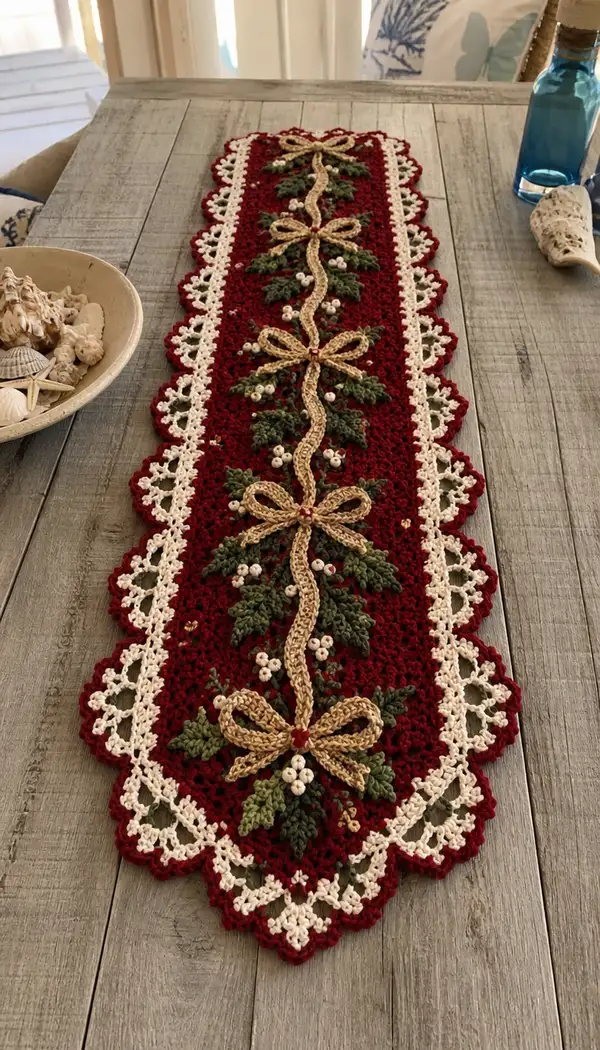
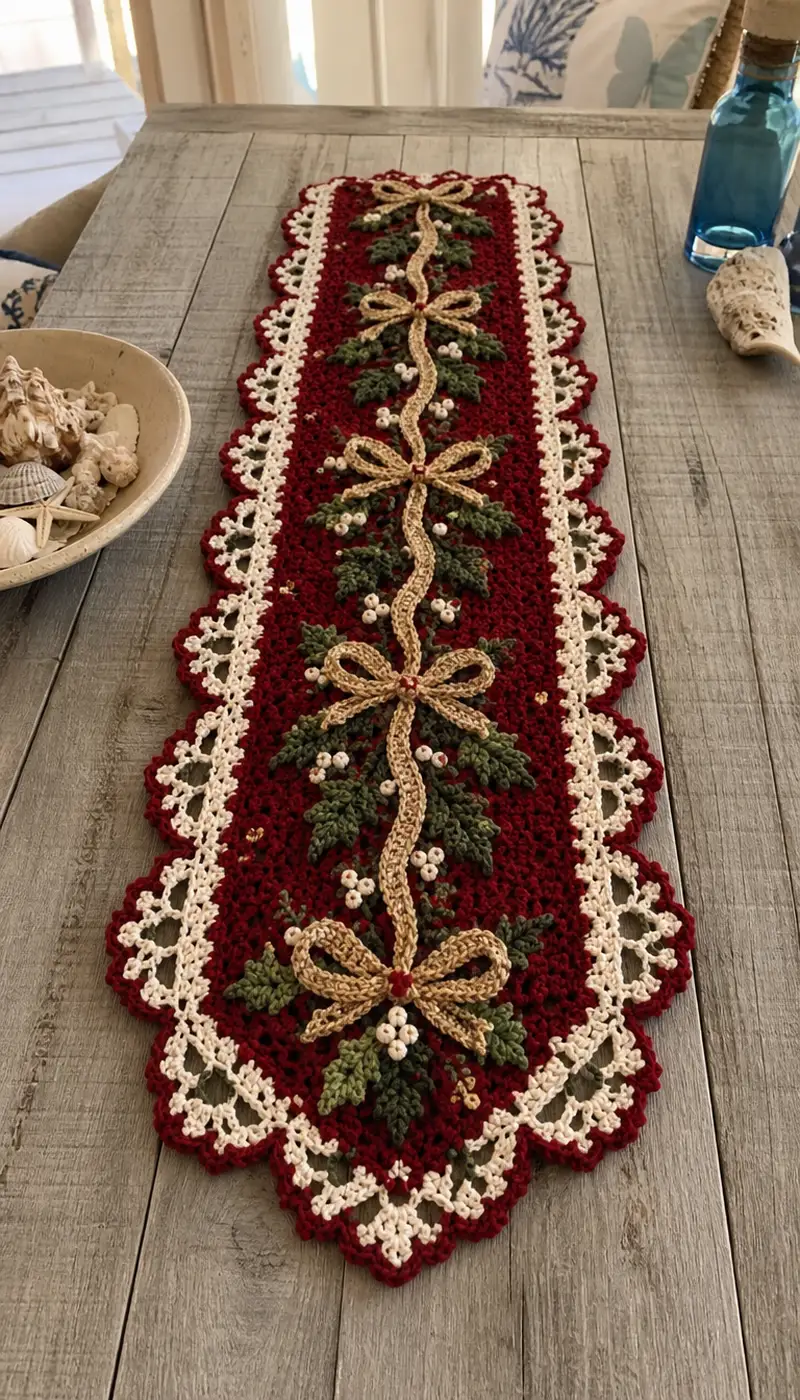
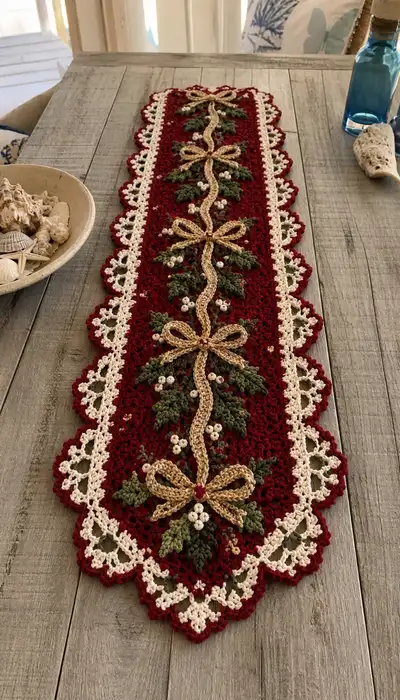
Bring warm holiday cheer to your table with this burgundy holly bow crochet runner. Deep wine-red textured central panel is framed by a soft cream lacy scalloped border, with layered green holly leaves, clusters of white berry stitches and gilded ribbon bows running down the center. The runner is richly detailed yet practical — perfect as a focal seasonal accent for dining or console tables.
Progress Tracker
0% Complete
— Notes & Gauge :
Info :
Gauge (unblocked): 14 sc x 16 rows = 4 in (10 cm) in single crochet. Runner in sample measures approximately 10 inches (25 cm) wide at the widest point and ~48 inches (122 cm) long including pointed ends. Adjust starting chain and number of increase rows to make shorter or longer runners. Use blocking to flatten and square edges prior to attaching border and appliques.
— Materials Recap :
Info :
Colors used in pattern: Color A = Burgundy (main panel), Color B = Cream/Ivory (edge and accents), Color C = Forest Green (leaves), Color D = Gold/Tan (ribbon/bow), Color E = White (berry bobbles). Use worsted weight yarn and hooks listed. Work tightly enough that stuffing will not show through appliques.
— Main Panel (worked flat from one pointed end to the other) :
Round 1 :
With Color A ch 3, sc in 2nd ch from hook and in next ch — 3 sc (3)
Round 2 :
Ch 1, turn, 2 sc in first st, sc in next st, 2 sc in last st — 5 sc (5) (increase row: +2 sts)
Round 3 :
Ch 1, turn, 2 sc in first st, sc in each st across until last st, 2 sc in last st — 7 sc (7) (increase row)
Round 4 :
Ch 1, turn, sc in each st across (7)
Round 5 :
Ch 1, turn, 2 sc in first st, sc in each st across until last st, 2 sc in last st — 9 sc (9)
Round 6 :
Ch 1, turn, sc in each st across (9)
Round 7 :
Ch 1, turn, 2 sc in first st, sc in each st across until last st, 2 sc in last st — 11 sc (11)
Round 8 :
Ch 1, turn, sc in each st across (11)
Round 9 :
Ch 1, turn, 2 sc in first st, sc in each st across until last st, 2 sc in last st — 13 sc (13)
Info :
Continue this increase pattern adding two stitches every other row (one increase at each end) until your panel reaches the desired widest point. In the sample size we increase until we reach 49 sc across. Each increase cycle is two rows: one increase row, one even row. Place a stitch marker in the first stitch of each row to help identify ends when shaping.
Round 10 :
Ch 1, turn, sc in each st across (13)
Round 11 :
Ch 1, turn, (2 sc in first st), sc in next 11 sts, (2 sc in last st) — 15 sc (15)
Round 12 :
Ch 1, turn, sc in each st across (15)
Round 13 :
Ch 1, turn, (2 sc in first st), sc in next 13 sts, (2 sc in last st) — 17 sc (17)
Round 14 :
Ch 1, turn, sc in each st across (17)
Round 15 :
Ch 1, turn, (2 sc in first st), sc in next 15 sts, (2 sc in last st) — 19 sc (19)
Round 16 :
Ch 1, turn, sc in each st across (19)
Round 17 :
Ch 1, turn, (2 sc in first st), sc in next 17 sts, (2 sc in last st) — 21 sc (21)
Round 18 :
Ch 1, turn, sc in each st across (21)
Round 19 :
Ch 1, turn, (2 sc in first st), sc in next 19 sts, (2 sc in last st) — 23 sc (23)
Round 20 :
Ch 1, turn, sc in each st across (23)
Round 21 :
Ch 1, turn, (2 sc in first st), sc in next 21 sts, (2 sc in last st) — 25 sc (25)
Round 22 :
Ch 1, turn, sc in each st across (25)
Round 23 :
Ch 1, turn, (2 sc in first st), sc in next 23 sts, (2 sc in last st) — 27 sc (27)
Round 24 :
Ch 1, turn, sc in each st across (27)
Round 25 :
Ch 1, turn, (2 sc in first st), sc in next 25 sts, (2 sc in last st) — 29 sc (29)
Round 26 :
Ch 1, turn, sc in each st across (29)
Round 27 :
Ch 1, turn, (2 sc in first st), sc in next 27 sts, (2 sc in last st) — 31 sc (31)
Round 28 :
Ch 1, turn, sc in each st across (31)
Round 29 :
Ch 1, turn, (2 sc in first st), sc in next 29 sts, (2 sc in last st) — 33 sc (33)
Round 30 :
Ch 1, turn, sc in each st across (33)
Round 31 :
Ch 1, turn, (2 sc in first st), sc in next 31 sts, (2 sc in last st) — 35 sc (35)
Round 32 :
Ch 1, turn, sc in each st across (35)
Round 33 :
Ch 1, turn, (2 sc in first st), sc in next 33 sts, (2 sc in last st) — 37 sc (37)
Info :
If you'd like a wider or narrower runner change the number of increase cycles. Each increase cycle (two rounds) adds 2 stitches to the total width. Use stitch markers at the first and last stitch of rows when shaping to ensure clean edges for later border work.
Round 34 :
Ch 1, turn, sc in each st across (37)
Round 35 :
Ch 1, turn, (2 sc in first st), sc in next 35 sts, (2 sc in last st) — 39 sc (39)
Round 36 :
Ch 1, turn, sc in each st across (39)
Round 37 :
Ch 1, turn, (2 sc in first st), sc in next 37 sts, (2 sc in last st) — 41 sc (41)
Round 38 :
Ch 1, turn, sc in each st across (41)
Round 39 :
Ch 1, turn, (2 sc in first st), sc in next 39 sts, (2 sc in last st) — 43 sc (43)
Round 40 :
Ch 1, turn, sc in each st across (43)
Round 41 :
Ch 1, turn, (2 sc in first st), sc in next 41 sts, (2 sc in last st) — 45 sc (45)
Round 42 :
Ch 1, turn, sc in each st across (45)
Round 43 :
Ch 1, turn, (2 sc in first st), sc in next 43 sts, (2 sc in last st) — 47 sc (47)
Round 44 :
Ch 1, turn, sc in each st across (47)
Round 45 :
Ch 1, turn, (2 sc in first st), sc in next 45 sts, (2 sc in last st) — 49 sc (49) — widest point reached in sample
Info :
Mark this row as the widest point (RS). From here work even rows for the body. The sample works 60 even rows to form the central textured band and spacing for appliques. If you want a shorter runner use fewer even rows; longer runner use more even rows. The even rows form the area where appliques will be attached.
Round 46-105 :
Repeat: Ch 1, turn, sc in each st across — 49 sc (49) — work 60 rows even (46 through 105 inclusive = 60 rows)
Info :
Place stitch markers to indicate rows where you will attach the holly clusters; sample attachment rows (counting from start) are Rows 30, 45, 60, 75 and 90. These are approximate — adjust to taste based on length of your runner. Mark the RS so appliques are all sewn on the same face.
Round 106 :
Ch 1, turn, sc2tog at beginning (work a decrease over first two sts), sc in next 45 sts, sc2tog at end — 47 sc (47) (begin decrease row)
Round 107 :
Ch 1, turn, sc in each st across (47)
Round 108 :
Ch 1, turn, sc2tog at beginning, sc in next 43 sts, sc2tog at end — 45 sc (45)
Round 109 :
Ch 1, turn, sc in each st across (45)
Round 110 :
Ch 1, turn, sc2tog at beginning, sc in next 41 sts, sc2tog at end — 43 sc (43)
Round 111 :
Ch 1, turn, sc in each st across (43)
Round 112 :
Ch 1, turn, sc2tog at beginning, sc in next 39 sts, sc2tog at end — 41 sc (41)
Round 113 :
Ch 1, turn, sc in each st across (41)
Round 114 :
Ch 1, turn, sc2tog at beginning, sc in next 37 sts, sc2tog at end — 39 sc (39)
Round 115 :
Ch 1, turn, sc in each st across (39)
Round 116 :
Ch 1, turn, sc2tog at beginning, sc in next 35 sts, sc2tog at end — 37 sc (37)
Round 117 :
Ch 1, turn, sc in each st across (37)
Round 118 :
Ch 1, turn, sc2tog at beginning, sc in next 33 sts, sc2tog at end — 35 sc (35)
Round 119 :
Ch 1, turn, sc in each st across (35)
Round 120 :
Ch 1, turn, sc2tog at beginning, sc in next 31 sts, sc2tog at end — 33 sc (33)
Round 121 :
Ch 1, turn, sc in each st across (33)
Round 122 :
Ch 1, turn, sc2tog at beginning, sc in next 29 sts, sc2tog at end — 31 sc (31)
Round 123 :
Ch 1, turn, sc in each st across (31)
Round 124 :
Ch 1, turn, sc2tog at beginning, sc in next 27 sts, sc2tog at end — 29 sc (29)
Round 125 :
Ch 1, turn, sc in each st across (29)
Round 126 :
Ch 1, turn, sc2tog at beginning, sc in next 25 sts, sc2tog at end — 27 sc (27)
Round 127 :
Ch 1, turn, sc in each st across (27)
Round 128 :
Ch 1, turn, sc2tog at beginning, sc in next 23 sts, sc2tog at end — 25 sc (25)
Round 129 :
Ch 1, turn, sc in each st across (25)
Round 130 :
Ch 1, turn, sc2tog at beginning, sc in next 21 sts, sc2tog at end — 23 sc (23)
Round 131 :
Ch 1, turn, sc in each st across (23)
Round 132 :
Ch 1, turn, sc2tog at beginning, sc in next 19 sts, sc2tog at end — 21 sc (21)
Round 133 :
Ch 1, turn, sc in each st across (21)
Round 134 :
Ch 1, turn, sc2tog at beginning, sc in next 17 sts, sc2tog at end — 19 sc (19)
Round 135 :
Ch 1, turn, sc in each st across (19)
Round 136 :
Ch 1, turn, sc2tog at beginning, sc in next 15 sts, sc2tog at end — 17 sc (17)
Round 137 :
Ch 1, turn, sc in each st across (17)
Round 138 :
Ch 1, turn, sc2tog at beginning, sc in next 13 sts, sc2tog at end — 15 sc (15)
Round 139 :
Ch 1, turn, sc in each st across (15)
Round 140 :
Ch 1, turn, sc2tog at beginning, sc in next 11 sts, sc2tog at end — 13 sc (13)
Round 141 :
Ch 1, turn, sc in each st across (13)
Round 142 :
Ch 1, turn, sc2tog at beginning, sc in next 9 sts, sc2tog at end — 11 sc (11)
Round 143 :
Ch 1, turn, sc in each st across (11)
Round 144 :
Ch 1, turn, sc2tog at beginning, sc in next 7 sts, sc2tog at end — 9 sc (9)
Round 145 :
Ch 1, turn, sc in each st across (9)
Round 146 :
Ch 1, turn, sc2tog at beginning, sc in next 5 sts, sc2tog at end — 7 sc (7)
Round 147 :
Ch 1, turn, sc in each st across (7)
Round 148 :
Ch 1, turn, sc2tog at beginning, sc in next 3 sts, sc2tog at end — 5 sc (5)
Round 149 :
Ch 1, turn, sc in each st across (5)
Round 150 :
Ch 1, turn, sc2tog at beginning, sc in next 1 st, sc2tog at end — 3 sc (3)
Round 151 :
Ch 1, turn, sc in each st across (3)
Round 152 :
Fasten off color A. Weave in tails. Block main panel flat and pin into shape to ensure points are neat and edges are straight. Allow to dry before adding border and appliques.
Info :
Blocking is essential for this pattern. Use a damp cloth or gentle steam and pin the runner to the exact shape. Blocking evens the stitches and makes attaching the lacy edge much easier and more accurate.
— Side Lace Border (worked in Color B - cream)
Info :
We work the lace border around the entire edge. With Color B join at corner point (RS). Work in rounds along long edges and scalloped shells at triangular ends. Choose a starting point at the tip and work counterclockwise. For even spacing count and place 1 stitch marker every 6 sts along long edges if needed.
Round 1 :
Join Color B with sl st to RS at the tip of one pointed end (center of 3 sts). Ch 1, sc evenly around the edge working 3 sc in each end point and 1 sc in each row end along long sides (approximate count varies based on your gauge). Slip stitch to first sc to join. (Work continuous around; count will vary — aim for even coverage.)
Round 2 :
Ch 3 (counts as dc), *sk 1 sc, (dc, ch1, dc) in next sc (V-stitch)* rep along side; at corner points work (dc, ch2, dc, ch2, dc) to form roomy corner V. Join with sl st to top of ch-3.
Round 3 :
Ch 1, sl st into ch-1 spaces along side edging, *ch 3, sl st in next ch-1 space* rep to create small looped scallops along edge. At ends create 5 loops across corner V: (ch3, sl st) x5 filling corner. Join with sl st.
Info :
These rounds create the open lace motif seen on the runner side. If your stitch count along the side yields an uneven number of ch-3 scallops, add or remove sl st spacing in Round 1 to re-balance. Keep the border symmetrical; block again after border is crocheted to open the lace.
Round 4 :
Ch 1, sc in each sl st and in each ch-3 loop: (sc, ch 2, sc) in each ch-3 loop to form picot-laced edging along the side. Along corner shells work (sc, ch3, sc) in each corner loop to give a fuller scallop. Join and fasten off leaving long tail for weaving.
Round 5 :
Optional decorative picot: With Color B and smaller hook, work sl st into center of each ch-2 space and make (sc, picot, sc) where picot = ch3, sl st in 3rd ch. This creates the raised shell points seen in the cream scalloped edge.
Info :
Work slowly around the triangular ends to keep shell symmetry. Use blocking pins to shape each scallop so they line up evenly on both sides of the runner.
— Decorative Center Rope (Color D gold/tan) :
Info :
The gold ribbon element that snakes down the center is worked as a narrow crocheted cord (i-cord style) and then shaped into bows and sewn in the center of each holly cluster. Work the cord long enough to create the central spiral plus loops for bows — about 4 times the runner length if creating bulky ribbon; sample uses cord approx 150-160 inches finished before loops are formed.
Round 1 :
With Color D ch 120 (or longer if desired for extra roomy bows). Turn, sl st in 2nd ch from hook and each ch across to create a narrow, twisted cord. Fasten off leaving long tail for sewing. Alternative: work tubular i-cord by crocheting sc in back loop only along chains and folding and slip stitching to make a rounded cord. Both give a neat ribbon look.
Info :
For a plumper ribbon, use a chain of 150 and sc across with a smaller hook, then twist and tack into place. Keep cord fairly flat for easy bow shaping. You may optionally string a length of thin floral wire inside the cord for poseable ribbon; fold ends inward so wire is not exposed.
— Bows (Make 5 for sample) :
Info :
Each bow is formed by looping the gold cord and securing the center with a small wrapped band of Color D. The bows sit at the center of each holly cluster and are attached with sewing to prevent shifting. Alternatively, crochet small ribbon loops by chaining and joining into loops and layering.
Round 1 :
Cut 2 lengths of cord approx 22 inches each. Shape each length into two loops by folding the length into thirds; pinch center and tie with a 6-inch tail of Color D yarn or wrap center tightly several times with matching D yarn and secure with a few stitches on WS. Repeat for 5 bows.
Round 2 :
Use long tails to sew the bow center to the runner at the noted rows (sample rows 30, 45, 60, 75, 90 counted from start Row 1). Secure tightly so bows lay flat but full. Tuck and weave tails to WS.
Info :
If you prefer a crocheted bow instead of cord, Chain 30, sl st into a ring, sc 30 in ring, fold ring in half and sew center with a different color band to form bow. This produces neater, flat bows but with less dimensional rope effect.
— Holly Leaf Motifs (Make 15 small leaves grouped into 5 clusters) :
Info :
Each holly cluster in the photo has 3 layered leaves (slightly offset) and 5 small white berries clustered around the bow center. Leaves are worked in Color C. Make 3 leaves per cluster and sew them together before attaching to the runner.
Leaf Round 1 :
With Color C, ch 8, sc in 2nd ch from hook, hdc in next, dc in next 2, tr in next, dc in next, hdc in next, sc in last — leaves measured across approx 2.5 in. Fasten off and leave long tail for sewing.
Leaf Round 2 :
Optional additional texture: With RS facing, pick up at base and sc around base of leaf: sc 7 across base to create a slight cup, turn and work 2 rows sc across base to stiffen leaf. Fasten off.
Leaf Round 3 :
Alternate leaf (slightly smaller): ch 6, sc in 2nd ch, hdc, dc, hdc, sc. Fasten off. Make two small leaf shapes to layer under a larger leaf for each cluster for depth.
Info :
To add definition, use BLO on the second round of the leaf to create a raised midrib. Steam-block the leaves slightly to shape a natural curved leaf. Pin into position on the WS while sewing to ensure correct curl direction.
Assembly for Each Cluster :
Layer three leaves: one larger center, two slightly smaller side leaves. Pin in place on RS of runner with center at the core location (see placement rows). Sew through the base of leaves to anchor securely using Color C tail. Add a few tacking stitches behind the leaf tops so they flare like holly.
Info :
When sewing leaves, leave enough slack to let leaves have a natural lifted look — do not flatten them completely to the panel; small stitches at the base are sufficient to hold position.
— Berry Clusters (White bobble beads or crochet bobbles) :
Round 1 :
Option A Beads: Thread three small 6mm white beads onto a short length of strong thread or fishing line and knot. Sew bead cluster to center of leaves and around bow center. Option B Crochet bobble: With Color E, in a single stitch work (draw up loop 5 times, yo and pull through 6 loops) to create a 5-loop bobble, yo and pull through and secure with sl st into same stitch — makes a raised bell-shaped berry. Make 3-6 berries per cluster depending on appearance desired.
Round 2 :
Sew berries in slightly asymmetrical bunches around bow center. Use a red seed bead or small red French knot of embroidery thread at the bow center if you want the red accent shown in the photo.
Info :
Place berries intentionally with some on top of leaves and some tucked under for a natural clustered look. Secure bead clusters with multiple stitches; glue optional but sewing is most secure for washability.
— Small Gold Accent Beads and Embellishments :
Info :
Scatter small gold seed beads lightly across the burgundy background to mimic the tiny reflective accents shown in the photo. Sew each bead individually using short lengths of thread so they catch light but do not pull fabric.
Round 1 :
Plan bead locations before sewing. Use a ruler for uniform spacing between clusters along the runner center. In sample, small gold accents are placed between leaf groups and near scallop edges.
Info :
Test bead placement on a scrap piece first to ensure beads do not distort the fabric when pulled tightly. If using wooden beads, pre-drill if needed and match yarn tail color when sewing.
— Finishing Touches & Weaving In :
Info :
After all appliques are sewn on and beads attached, give the entire runner a final blocking. Lay flat, pin scallops into even shapes and lightly steam without touching metallic yarn directly (use a pressing cloth). Allow to fully dry. Weave in and trim all tails on the WS carefully to hide ends inside border shells.
Round 1 :
Trim any excess ribbon cord and tuck inner wire ends (if used) inward before final tacking. Ensure all beads are secured and no sharp wire ends are exposed.
Info :
For machine washing: spot clean recommended. If you must wash, use gentle hand wash in cool water and lay flat to dry. Metallic yarns can tarnish or shed — test a swatch first.
This elegant burgundy holly bow table runner elevates holiday decor with textured stitchwork and layered appliques. Each carefully stitched holly cluster and handcrafted bow adds dimensional charm, turning a simple runner into a seasonal centerpiece you'll be proud to display. The pattern balances classic colors with detailed finishing techniques for a heirloom-ready look you can gift or keep. 🧶✨ May every stitch bring holiday warmth and joy as you create this special tabletop accent. 🌟