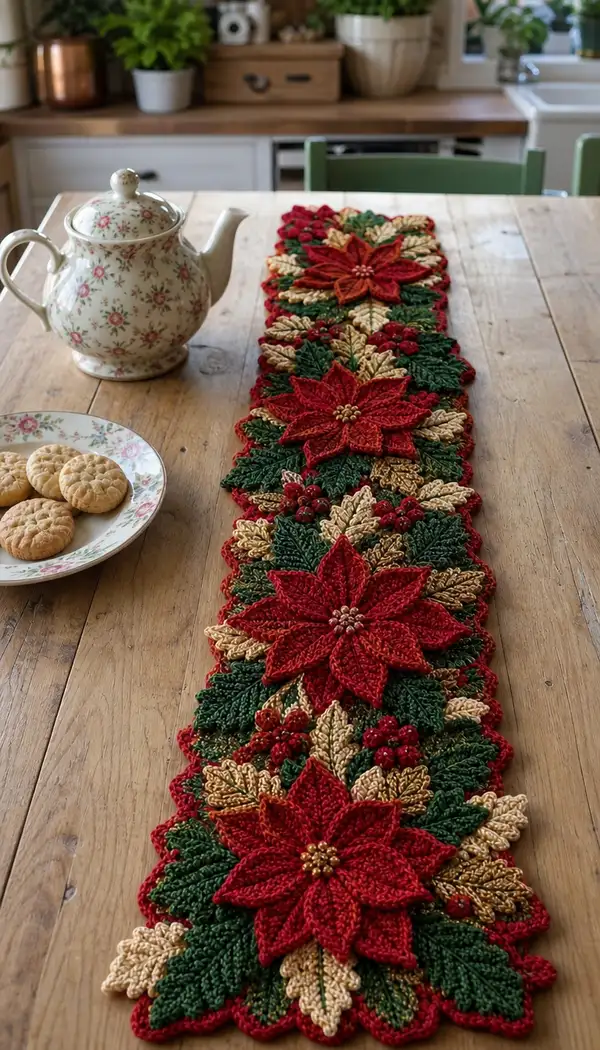
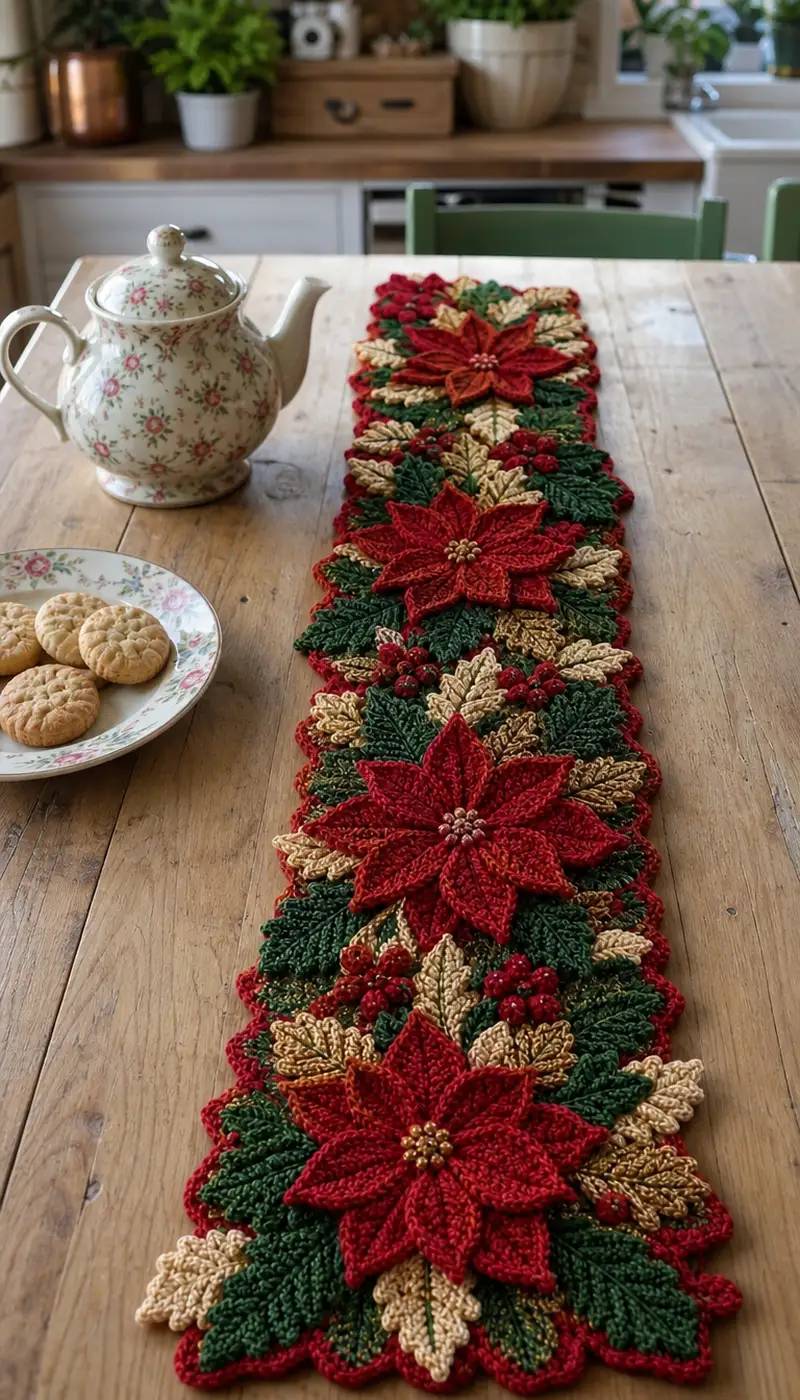
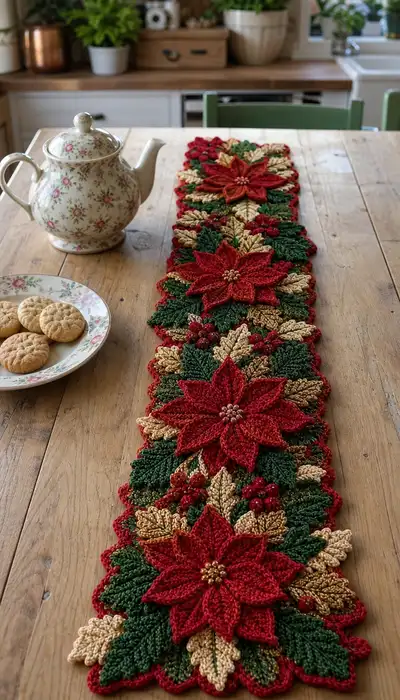
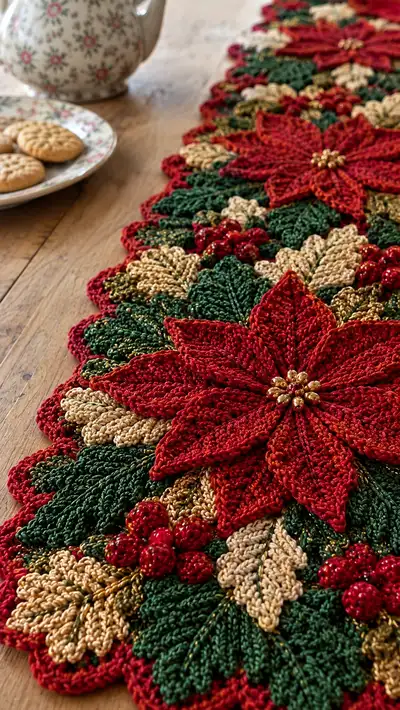
A rich, layered holiday table runner inspired by classic poinsettias and evergreen foliage. This long runner features bold red layered flowers, gold and green sculpted leaves, and glossy bead berries for a handcrafted festive centerpiece. The design uses textured stitches and strategic layering to create depth and a luxurious look. Perfect for special-occasion tables or seasonal decor, this pattern is detailed and decorative with a beautiful scalloped edge.
Progress Tracker
0% Complete
— Overview :
Info :
This pattern constructs a long table runner from repeating modules: a large layered poinsettia flower, several leaf modules (large green leaves and smaller gold leaves), berry clusters, and a decorative scalloped border. Work modules flat, block them to shape, then join in sequence with whip stitch and decorative slip-stitch joins. The pattern uses standard US crochet terminology and assumes experience with short rows, post-stitches, and blocked assembly. Maintain consistent tension and use stitch markers to mark points where petals and leaves will meet.
Info :
Gauge is flexible; the recommended hook is 3.5mm (E). If your petals look loose, go down one hook size. If fabric is too stiff, go up one size. Colors shown: Rich Red, Deep Forest Green, Metallic Gold. Metallic gold is plied with the main yarn (tread lightly to avoid catching).
— Poinsettia Center (Bead Cluster) :
Round 1 :
ch 2, 6 sc in 2nd ch from hook (6)
Round 2 :
inc in each st around (12)
Round 3 :
(1 sc, inc) x 6 (18)
Round 4 :
1 sc in each st (18)
Info :
Use tiny seed beads threaded onto fine beading thread. Sew beads into center by weaving through the center rounds and knotting securely on the WS. You will make two clusters of beads: a small inner cluster of 6-8 gold seed beads, and an outer ring if desired. Fasten off leaving long tail for sewing.
— Poinsettia Petal Module (Make 8 per flower) :
Info :
Each petal is worked in rounds to form a sculpted teardrop shape with a central ridge worked using post-stitches. Work petals tightly so edges remain crisp. You will make 8 identical petals and join them around the center. Work in Rich Red.
Round 1 :
mr, ch 1, 6 sc in mr; do not join; place marker in first st (6)
Round 2 :
inc in each st around (12)
Round 3 :
(1 sc, inc) x 6 (18)
Round 4 :
1 sc in each st (18)
Round 5 :
FLO: (2 sc, inc) x 6 (24) - work this round in FLO to create a thin front ridge
Round 6 :
1 sc in each st BLO (24) - this forms a base ridge for sculpting the petal
Round 7 :
ch 2, hdc in next 4 sts, 2 hdc in next, hdc in next 4, 2 hdc in next, hdc in remaining sts to end (26)
Round 8 :
ch 2, (hdc in next 5, inc) x 3, hdc remaining (30)
Info :
Work post stitches down the center line next to create the raised vein. Insert hook around post of previous row to create defined ridge. Use a stitch marker to mark the tip stitch so shaping stays consistent across petals.
Round 9 :
ch 1, 1 sc in first 3 sts, dc2tog over next 2 sts, 1 sc in next 8 sts, dc2tog over next 2 sts, 1 sc in remaining sts (26)
Round 10 :
FLO: (1 sc, sk1, 2 sc in next) x 9 (30) - creates slight scallop at petal edge
Round 11 :
ch 2, 1 hdc in each st around working BLO on this round to create a subtle fold at petal center (30)
Round 12 :
ch 1, dec across top edge to shape tip: (4 sc, dec) x 5 (25)
Round 13 :
(3 sc, dec) x 5 (20)
Round 14 :
(2 sc, dec) x 5 (15)
Round 15 :
ch 1, sc around edge evenly creating 1 sc in each st and 3 sc at tip to round it gently (15)
Info :
Fasten off leaving a long tail for sewing. Press/steam or lightly block each petal flat along the center ridge with pins, gently curving the petal tip upward for natural shape. Make 8 petals per flower.
— Secondary Red Petal Layer (Smaller, Make 8) :
Info :
This inner layer provides depth; work smaller petals with similar shaping but fewer rounds. Work 8 and layer under the larger petals, offsetting between larger petals.
Round 1 :
mr, ch 1, 6 sc in mr (6)
Round 2 :
inc in each st (12)
Round 3 :
(1 sc, inc) x 6 (18)
Round 4 :
1 sc in each st (18)
Round 5 :
ch 2, 1 hdc in next 6, 2 hdc in next, 1 hdc in next 6, 2 hdc in next (20)
Round 6 :
ch 1, 1 sc in each st, finishing with an evenly spaced edge of 1 sc per st (20)
Info :
Fasten off leaving long tail for sewing. Block flat. These will be placed under the large petals and slightly rotated to fill the flower footprint.
— Large Leaf Module (Deep Forest Green) (Make 20 for runner) :
Info :
Large leaves are worked flat as an elongated teardrop using post-stitches to create a pronounced ridge and texture. Each leaf is symmetric and worked in rounds with short rows to shape the tip. Make 20 or as needed to fill gaps between flowers.
Round 1 :
ch 8, sc in 2nd ch from hook and across to last ch, 3 sc in last ch, working back down the other side of chain 1 sc in each ch (approx 14) - join to form a small oval base (14)
Round 2 :
Work around oval: inc in each end 3-st group to expand tip and base: (1 sc, inc) across each straight side, 2 sc in each end stitch (20)
Round 3 :
1 sc in each st (20)
Round 4 :
FLO: (2 sc, inc) x 5 (25) - FLO used for a textured front edge
Round 5 :
BLO: 1 sc in each st BLO (25) - base ridge for center vein
Round 6 :
ch 2, dc in next 5 sts, fpdc around post (front post dc) in next 3 sts, dc in next 5, fpdc in next 3 (25)
Round 7 :
ch 1, sc dec along sides toward tip to narrow leaf: (3 sc, dec) x 5 (20)
Round 8 :
ch 1, (2 sc, dec) x 5 (15)
Round 9 :
1 sc in each st, finishing with 3 sc at the tip to create a soft rounded point (15)
Info :
Add a central vein by sewing a contrasting strand of metallic gold along the center using backstitch. Lightly block leaves to measured length so that pairing leaves lay flat when joined.
— Small Gold Leaf Module (Make 24) :
Round 1 :
mr, ch 1, 8 sc in mr (8)
Round 2 :
inc in each st around (16)
Round 3 :
(1 sc, inc) x 8 (24)
Round 4 :
1 sc in each st (24)
Round 5 :
FLO: (3 sc, inc) x 6 (30)
Round 6 :
Working back: dec along tip to shape: (4 sc, dec) x 5 (25)
Round 7 :
(3 sc, dec) x 5 (20)
Round 8 :
1 sc evenly around edge, add a small picot every 6 sts for texture (20)
Info :
Metallic gold used here is a single strand plied or held together with base yarn for shimmer. Small gold leaves tuck under poinsettia petals and peek out between larger green leaves.
— Berry Cluster (Make multiple clusters for each flower) :
Round 1 :
ch 2, 6 sc in 2nd ch from hook (6)
Round 2 :
inc in each st (12)
Round 3 :
1 sc in each st (12)
Round 4 :
ch 1, sl st around forming small tight ball; leave long tail for sewing (12)
Info :
Sew a glossy red bead over the berry and add 3-5 small berries grouped together. Stuff lightly with a tiny pinch of fiberfill for roundness before closing. Secure with small stitches through the berry and bead to hold in place.
— Background Mini-Leaf (Fillers) :
Round 1 :
mr, ch 1, 6 sc in mr (6)
Round 2 :
inc in each st (12)
Round 3 :
1 sc in each st (12)
Round 4 :
ch 1, (sc, sk1, sc) around to create tiny lacey edge (12)
Info :
These tiny leaves fill gaps and create the illusion of dense foliage. Use leftover yarn colors to mix green and gold in small clusters for depth.
— Joining Flower Assembly :
Info :
Assemble a poinsettia by centering bead cluster, sewing the secondary small red petals first around the cluster, then sewing the larger red petals overlapping between small petals. Use mattress stitch or whip stitch with matching yarn tails. Space petals evenly; use pins to hold in place before sewing.
Round 1 :
Lay bead center flat and pin the 8 smaller petals around it with equal spacing, tips pointing outward. Sew each petal base to the bead cluster with 3-4 secure passes (no counts required).
Round 2 :
Offset and place each large petal between two small petals, pin in place, and baste them to the inner petals with 6 secure stitches at the base of each large petal.
Info :
Sew through only the base layers so the front remains clean. Add a few reinforcing stitches that go through all petal layers and the bead cluster to anchor petals firmly. Hide tails by threading them into the underside and weaving several stitches on the WS.
— Motif Layout & Repeat :
Info :
For the pictured runner, the motif sequence along the length is: Flower - Leaf Cluster - Flower - Leaf Cluster - Flower. Each flower sits in the center of a rectangular repeat composed of 3 large leaves, 4 small gold leaves, and 2-3 berry clusters. Adjust the number of repeats to the desired runner length.
Round 1 :
Plan motif spacing so that flower centers fall approximately 30-34 cm apart (12-13 inches) for the pictured scale. Use a measuring tape and blocking to get consistent spacing.
Info :
Block all motifs to consistent dimensions. On your blocking mat, measure and pin each motif to the same width (approximately 22-24 cm / 8.5-9.5 inches for the flower footprint) and length, so joins are flat and even.
— Joining Motifs into Runner :
Info :
Join motifs using decorative slip-stitch seams visible on the RS or a whip stitch invisible from the RS. For a more tactile surface, use a raised join with single crochet through both motif edges, then hide tail on the WS. Pin motifs in the desired order: begin by laying one flower, then pin leaves and small motifs around it, then pin next flower so edges overlap slightly. This overlap creates depth without large gaps.
Round 1 :
Align two motifs RS facing up with slight overlap, insert hook through edge stitch of motif A and edge stitch of motif B, sc through both loops across join to seam together (approx 12-18 seamless sc depending on overlap).
Round 2 :
For decorative joins, follow with a RS sl st edge: with RS up, sl st through front loop only of joined seam to create a ridge. Work evenly across length.
Info :
Reinforce joins at stress points (where beads or heavy motifs sit) with an extra pass of yarn on the WS. Verify the runner lays flat—if cupping occurs, steam-block joined area again and re-adjust tension on joins.
— Scalloped Border Edge (Red) :
Info :
The scalloped border unifies the runner and provides a finished silhouette. Work a continuous scallop along both sides and both ends after all motifs are joined. Work with Rich Red for contrast and uniform edge.
Round 1 :
With RS up, join red yarn at one end edge of runner, ch 1, sc evenly around entire perimeter spacing to maintain shape (work approximately 1 sc per 6 mm of edge length; adjust for tension).
Round 2 :
*ch 4, 4 dc in next st, ch 4, sl st in next st; rep from * around to create open scallops. At corners, work ch 6, 5 dc to form rounded end.
Round 3 :
Working into the 4-ch spaces of each scallop: (sl st, ch 1, 7 sc) in each scallop space to build a fuller shell; sl st to join between shells (shell = 7 sc) - creates decorative filled scallop (approx shells = count of scallops)
Round 4 :
1 sc in each st around to finish and neaten edge; fasten off and weave in ends securely.
Info :
If border pulls in, add an extra sc round before scallops to stabilize. If border flares, reduce shell size from 7 sc to 5 sc per scallop. Blocking the entire runner after edging is essential for final shaping.
— Final Embellishments :
Round 1 :
Sew gold seed beads into the center cluster again if needed for additional sparkle. Add a few gold sequins tucked among leaves for extra shimmer if desired.
Info :
Secure each bead with two passes of thread and a small knot. Tuck knots into the underside of the runner and cover with a small dab of fabric glue when necessary for pieces that will be handled frequently.
Round 2 :
Inspect the runner for loose ends, re-enforce joins that appear light, and steam/block the whole runner flat. Dry completely on blocking mats before using on a table to protect the finish.
Info :
Store your runner flat or rolled in tissue paper to preserve shape. Avoid placing hot objects directly on metallic yarn sections as they may be more delicate.
Finishing this poinsettia table runner is a joy — every layered petal and textured leaf comes together into a festive masterpiece. The bead centers and metallic accents catch the light beautifully, elevating your holiday table with handmade warmth. Enjoy the slow, satisfying work of blocking and joining; the final scalloped border gives the runner a polished, professional look. 🧶✨ Serve smiles and memories with each season it graces your table. 🎄