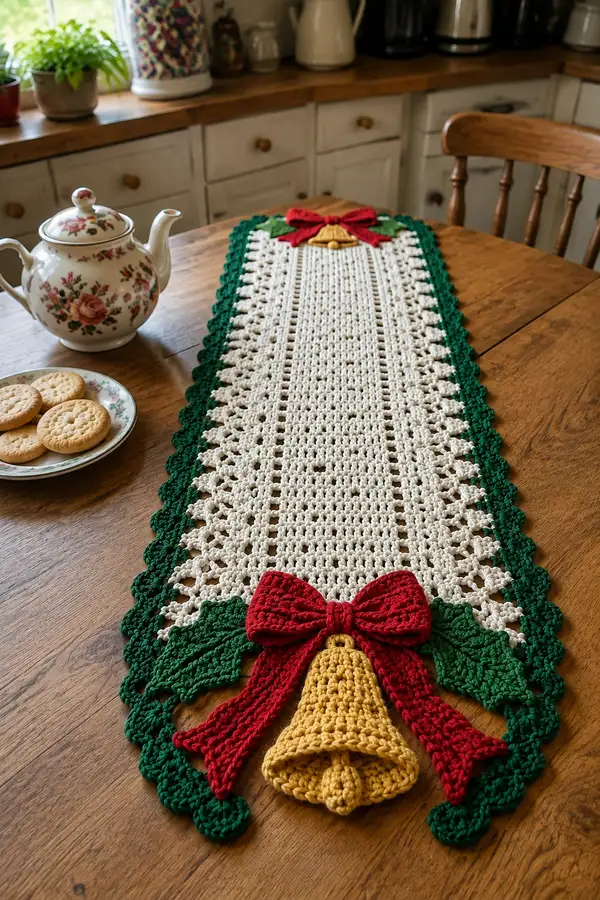
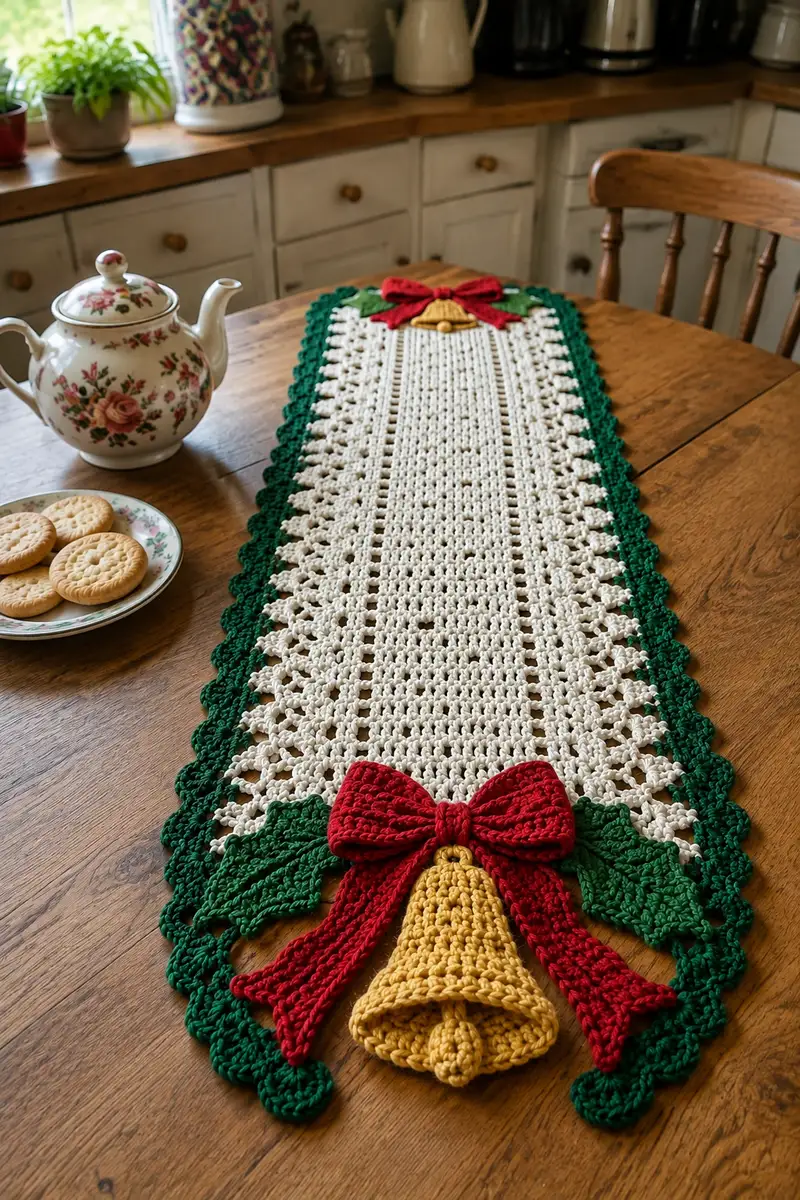
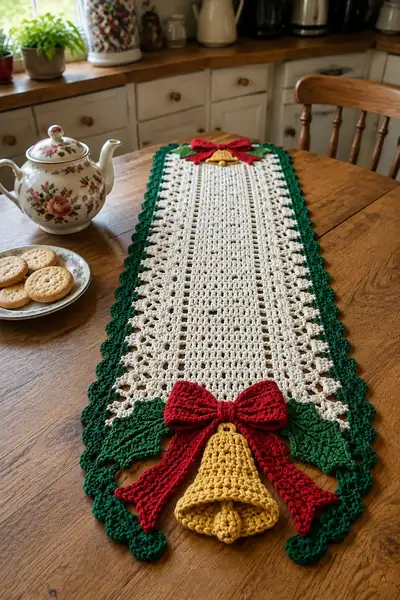
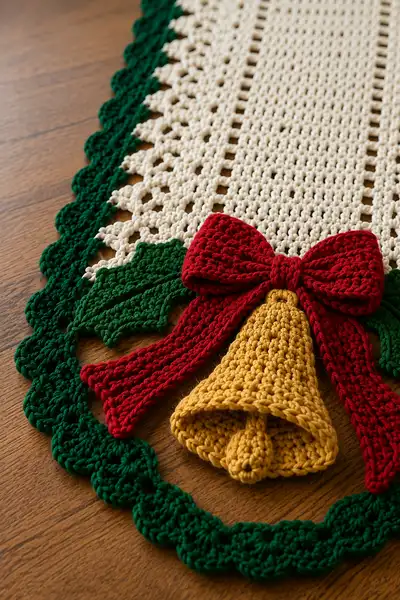
A festive crocheted table runner featuring a classic holiday bell, bold red ribbon bow, and scalloped evergreen border. The center panel is a delicate cream filet with openwork rows that let the wood grain show through. Finished with three-dimensional bell and bow appliques for charming seasonal detail.
Progress Tracker
0% Complete
— Materials & Gauge :
Info :
Gauge is not critical for width adjustment but aim for approx 4 dc = 1 inch in worsted cotton. Using recommended hook 4.0mm the sample runner measures approx 12" wide and 30" long for the center panel before borders and appliques. Adjust chain length to change runner length.
— Center Panel (worked lengthwise in rows) :
Row 1 :
Ch 126. Dc in 4th ch from hook and in each ch across. Turn. (124)
Row 2 :
Ch 3 (counts as dc), dc in each st across. Turn. (124)
Row 3 :
Ch 3, dc in each st across. Turn. (124)
Row 4 :
Ch 3, dc in each st across. Turn. (124)
Info :
These first rows establish the solid foundation. Maintain even tension so the fabric lays flat. Use a stitch marker at the first st of each row to count easily.
Row 5 :
Ch 3, *dc 6, ch 2, sk 2, dc 6; rep from * across ending with dc in last st. Turn. (pattern produces small ch-2 openwork columns)
Row 6 :
Ch 3, dc in each st and dc in each ch-2 space across to re-establish full row of dc. Turn. (124)
Row 7 :
Ch 3, *dc 4, ch 2, sk 2, dc 4, dc 2; rep from * across. Turn. (124)
Row 8 :
Ch 3, dc in each st and in each ch-2 sp; turn. (124)
Info :
The pattern alternates between solid dc rows and openwork rows to create the lacy filet look seen in the photos. Keep counts constant — each row should finish with 124 stitches (count each ch-2 space as one stitch when indicated).
Row 9 :
Ch 3, dc in each st across. Turn. (124)
Row 10 :
Ch 3, *dc 3, ch 2, sk 2, dc 3, dc 3; rep from * across. Turn. (124)
Row 11 :
Ch 3, dc in each st and each ch-2 sp across. Turn. (124)
Row 12 :
Ch 3, dc in each st across. Turn. (124)
Info :
At this point you have an alternating texture. Keep the runner flat by occasionally blocking a small area before proceeding to more rows. If your edges ripple, try tightening your first and last stitches of each row slightly.
Row 13 :
Ch 3, *dc 6, ch 2, sk 2, dc 6; rep across. Turn. (124)
Row 14 :
Ch 3, dc across including ch-2 spaces. Turn. (124)
Row 15 :
Ch 3, dc in each st. Turn. (124)
Row 16 :
Ch 3, *dc 4, ch 2, sk 2, dc 4, dc 2; rep across. Turn. (124)
Info :
If you prefer a longer runner, add additional multiples of 4 extra rows in the same alternating pattern until you reach desired length. The appliques will be worked and attached to the short ends.
Row 17 :
Ch 3, dc across. Turn. (124)
Row 18 :
Ch 3, *dc 3, ch 2, sk 2, dc 3, dc 3; rep across. Turn. (124)
Row 19 :
Ch 3, dc across including ch-2 spaces. Turn. (124)
Row 20 :
Ch 3, dc across. Turn. (124)
Info :
Mark the short end centers now; count 62 sts from each side to find the short-end center for applique placement later. This placement aligns the bell and bow centrally at each end.
Row 21 :
Ch 3, *dc 6, ch 2, sk 2, dc 6; rep across. Turn. (124)
Row 22 :
Ch 3, dc across. Turn. (124)
Row 23 :
Ch 3, dc across. Turn. (124)
Row 24 :
Ch 3, *dc 4, ch 2, sk 2, dc 4, dc 2; rep across. Turn. (124)
Info :
Continue in established alternation until you have completed a total of 50 rows (or your chosen runner center length). Finish the final center panel row with a WS row of dc and do not fasten off; proceed immediately to border join.
Row 25-50 :
Repeat Rows 1-24 pattern sequence to reach Row 50, keeping each row at (124). At Row 50 finish with a dc row (124).
— Joining Border & First Round Along Edges :
Info :
Rotate work so short edge with center marker is facing you. We will work rounds along the perimeter. Join evergreen yarn with sl st in the last row corner st on RS. Work blanket-style around. Place a stitch marker at the start of round.
Round 1 :
With green, ch 1, work 1 sc evenly into each dc across the short edge (count approximately 124 sc across the short end), place (3 sc, ch 2, 3 sc) in each corner to turn. Continue to long edges: work 1 sc in the side of each row (approx 50 sc per long side). Fasten off and join at opposite short end. (Perimeter approximate total 348 sc)
Info :
When stitching into sides, insert hook under both loops of the turning chain or the first stitch at the row edge. Work evenly so the border lies flat. If you need to adjust, add or omit a few sc along the long edges to prevent rippling.
Round 2 :
Join green in any sc, ch 3 (counts as dc), dc in each st around working 2 dc in corner ch-2 spaces. Work evenly to maintain shape. Sl st to top of ch-3 to join. (Perimeter approx 348 dc)
Round 3 :
Ch 1, sc in same st, *ch 2, sk 1, sc in next st; rep around to create small picot-like spacing along edge. Sl st to join.
Info :
This row sets up the openwork that the scalloped outer border will attach to. If you prefer a denser edge, work sc around without ch-2 spaces.
— Scalloped Outer Border (worked in rounds) :
Round 4 :
Join green in any ch-2 space, ch 1, (sc, hdc, 3 dc, hdc, sc) all in same ch-2 space to form scallop shell. Skip next sc and sl st into next ch-2 space. Rep shell in each ch-2 space around. Join with sl st to first sc.
Round 5 :
Ch 1, work (sc, hdc, 5 dc, hdc, sc) into each shell to enlarge scallop. Join and fasten off. This creates a deep scalloped edge as pictured. (Number of scallops equals number of ch-2 spaces along perimeter)
Info :
Block the runner flat after the scallop round. Pin each scallop slightly outwards to give that lifted scalloped look seen in the photos. Allow to dry fully before attaching appliques.
— Bell Applique (Make 2, one for each end) :
Info :
Bell is worked in the round from the base up in golden yarn. Work tightly to keep bell shape. A small clapper is made separately and attached inside, then bell sewn onto runner with a few secure stitches. Use 3.5-4.0mm hook for a firm fabric.
Round 1 :
With gold, make a magic ring. 6 sc in mr. (6)
Round 2 :
Inc in each st around. (12)
Round 3 :
(1 sc, inc) x6. (18)
Round 4 :
(2 sc, inc) x6. (24)
Round 5 :
(3 sc, inc) x6. (30)
Round 6 :
(4 sc, inc) x6. (36)
Round 7 :
1 sc in each st around. (36)
Info :
From Round 7 the bell begins to form a cup. Work these rounds fairly tightly so the bell holds shape. Begin stuffing lightly from Round 9 onward to shape the bell mouth if desired.
Round 8 :
1 sc in each st around. (36)
Round 9 :
(4 sc, dec) x6. (30)
Round 10 :
1 sc in each st around. (30)
Round 11 :
(3 sc, dec) x6. (24)
Round 12 :
1 sc in each st around. (24)
Round 13 :
(2 sc, dec) x6. (18)
Round 14 :
1 sc in each st around. (18)
Round 15 :
(1 sc, dec) x6. (12)
Info :
Fasten off leaving a 12" tail for sewing. Turn bell right side out if inside out and push remaining stuffing lightly so the bell mouth retains openness. The small hole at bottom is excellent for attaching clapper.
— Bell Clapper :
Round 1 :
With gold, make a magic ring. 6 sc in mr. (6)
Round 2 :
(1 sc, inc) x3. (9)
Round 3 :
1 sc in each st around. (9)
Round 4 :
(1 sc, dec) x3. (6)
Info :
Fasten off leaving a long tail. Stuff lightly and use tail to sew clapper to inside top center of bell so it hangs and moves slightly.
— Bow (Make 2 large bows, one for each bell) :
Info :
Bow is worked as two identical loop rectangles seamed together and a narrow wrap for the center. The bow tail pieces are worked separately and attached. Use red yarn and 3.5-4.0mm hook for firm stitch definition.
Loop Section 1 :
Ch 30, dc in 4th ch from hook and in each ch across. Turn. (28)
Round 1 :
Ch 3, dc across in each st for 10 rows total, do not fasten off. (28)
Round 2 :
Fold rectangle in half lengthwise and whipstitch the short edges together to form a tube. Flatten and fold into a loop shape. Repeat for Loop Section 2. Join both loops by sewing backs together to form a double-loop bow. (Assembly)
Bow Tail (make 2) :
Ch 6, hdc in 2nd ch from hook and each across (5 hdc). Turn. Continue straight for 20 rows to form long tails. Fasten off leaving long tails for sewing. Create a slight v notch at ends by folding and sl st or by making a short sc decreases to create the tapered look.
Bow Center Wrap :
With red, ch 6, sc in 2nd ch and next 4 sts (5 sc). Turn, sc across for 6 rows, fasten off leaving 10" tail. Wrap center tightly around seam of loops and sew ends together at back to secure bow shape. Tuck and stitch in place.
Info :
Optionally stuff the loops lightly with small amounts of fiberfill before seaming to keep them rounded. The bow in photo is slightly flattened in center for a neat presentation; do not overstuff.
— Holly Leaves (Make 4 for each end cluster) :
Round 1 :
With green, ch 12. Sc in 2nd ch from hook and in next 2 ch. Hdc in next 2 ch. Dc in next 3 ch. Hdc in next 2 ch. Sc in last ch. (11)
Round 2 :
Rotate and work on the opposite side of the chain: sc in first ch from base, sc next 2, hdc next 2, dc next 3, hdc next 2, sc in last. Join to base with sl st. (22)
Round 3 :
Ch 1, sc across the base stitches increasing at the tip to form point: sc in next, (sc, inc) in center tip st, sc in next. Continue symmetrical along other side. Fasten off. (approx 22)
Round 4 :
With green, embroider central veins using surface slip stitch: attach yarn at base and work 3 short slip stitch veins toward tip, secure and fasten off. This creates realistic leaf texture.
Info :
Leaves in the photo are slightly cupped; to cup leaves, block them over a small curved surface or add a couple of stitches in the center to draw the fabric inward slightly. Make 2 leaves per end cluster or 3 for fuller look.
— Decorative Loops and Small Details :
Round 1 :
Small braided loop to hang bell (optional): Ch 20, sl st back along chain to create a short chain cord. Attach one end to bell top when sewing bell to runner.
Info :
If you prefer to knot the bell to the runner for a vintage look, use a length of yarn to stitch through the bell top and tack it to runner fabric in three stitches across the center marker for a secure hold.
— Finishing & Assembly :
Info :
Block the center panel and scalloped border fully. Press only with steam and pins; cotton will take blocking well and hold scallops outwards. Assemble appliques only after runner is fully dry to ensure correct placement.
Step 1 :
Place each bell centered on the short ends of the runner (marked earlier at 62 stitches from side). Pin in place so the bell lip aligns with the border scallops and the bow sits above the bell mouth. Check symmetry front and back.
Step 2 :
Sew the bell to the runner by stitching through the topmost rounds of the bell and the runner edge using the 12" tail left from the bell. Use small whip stitches placed every 4-6 sts to secure. Fasten off and weave tail inside bell.
Step 3 :
Position the bow above the bell and sew the bow center wrap to the runner's top of the bell. Sew tails of the bow to lay over the scallop so they look natural. Use hidden stitches behind the bow center.
Step 4 :
Arrange 2-3 holly leaves on either side of the bow and stitch them down through the base only to keep tips lifted. A few stitches through leaf centers will secure them without flattening their shape.
Info :
Weave in all ends on the back of the runner and trim close. If desired, add a few small stitches of the same green yarn to the scallops to further secure any lifted points.
— Care Instructions :
Info :
Handwash gently in cool water with mild detergent. Reshape while damp and lay flat to dry. Avoid twisting the decorative appliques. Cotton may be ironed on low with a pressing cloth once dry and blocked back into shape.
This Christmas Bell and Ribbon Table Runner brings a timeless holiday accent to your home with handcrafted charm and dimensional appliques. The scalloped evergreen border frames the creamy openwork center perfectly, while the golden bells and bright bows add seasonal cheer. It makes a wonderful heirloom piece or a heartfelt gift for friends and family. 🧶🎄 Enjoy creating and displaying your handmade holiday centerpiece!