About This Chunky chain Pattern
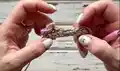
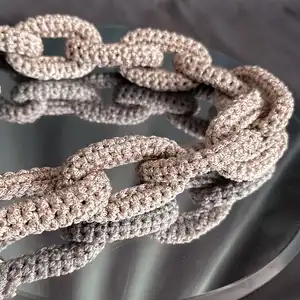
This pattern teaches you how to crochet a chunky linked chain using 2 mm cord and basic single crochet stitches to create decorative links for bags or necklaces. The instructions include how to form the circular link, work the rows, finish the base trim, and link subsequent chain pieces. It is designed with clear step-by-step directions and supporting photos to help you complete each link neatly. The finished chain can be used as a bag handle or worn as a stylish accessory.
Ideal for beginners, this pattern uses only CH, SlSt, and SC to make strong and attractive links. The tutorial also explains finishing touches like hiding ends and attaching to snap hook rings.
Why You'll Love This Chunky chain Pattern
I absolutely love this pattern because it transforms a simple cord into a fashionable, functional accessory you can use on bags or wear as jewelry. I enjoy how quickly each link grows — it gives fast, visible progress that keeps you motivated. The technique is straightforward, but the result looks professional and polished, especially once the ends are hidden and the links are joined. I also love that you can customize the length, color, and use to match your personal style or project needs.
Switch Things Up
I love customizing this chain by changing cord color to match a bag or outfit, and it always gives a fresh look.
Try using a thicker or thinner cord and adjust the hook size; bulky cord will make oversized, statement links while thinner cord creates delicate chains.
I often mix two cords twisted together for a two-tone effect that adds texture and strength to each link.
For a dressier finish, weave a metal chain through the crochet links or attach small charms between links for added personality.
I sometimes add beads to the chain before closing a link to create subtle sparkle; slide them onto the cord and position before crocheting the rows.
Consider making longer or shorter chains depending on use — reduce or increase the number of links for bracelets, necklaces, or bag straps.
I like to experiment with cotton, polyester, or mixed-fiber cords; each material behaves differently when melted, so test a scrap first.
When I want a sturdier handle, I make a lining or reinforce the inside with a thin leather strip glued inside the link before closing.
Try changing the stitch pattern for a decorative edge: replace the base SlSt round with HDC or picot for a different look.
I recommend making one practice link to dial in tension, then produce a full set of matching links for the cleanest, most consistent finished chain.
Common Mistakes & How to Fix Them
✗ Not counting the foundation chain correctly can produce a misshapen link; recount your 25 CH before joining and ensure the chain lays flat before connecting.
✗ Forgetting to place or move the stitch marker will cause misaligned rows; place a marker in the first SC of each row and rearrange it every row to keep track.
✗ Working with inconsistent tension makes the links uneven and floppy; maintain steady, even tension throughout and practice a test row if needed.
✗ Cutting the cord too short when finishing will make it hard to hide the ends; leave a generous tail, pull it through several loops, then trim and process with fire as instructed.
✗ Inserting the hook into the wrong loop for the base trim will spoil the neat edge; be sure to insert the hook into the back loop only of the last row when making the base SlSts.