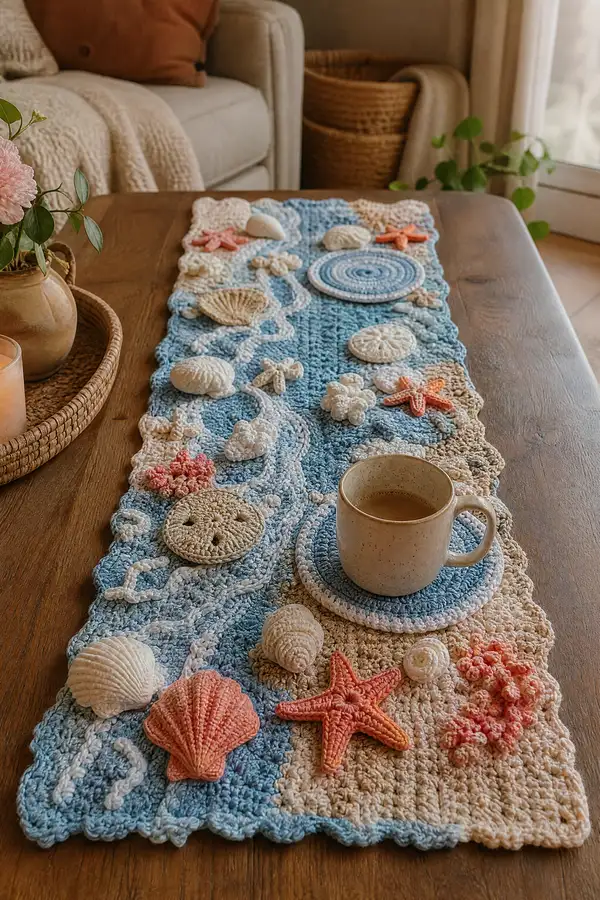
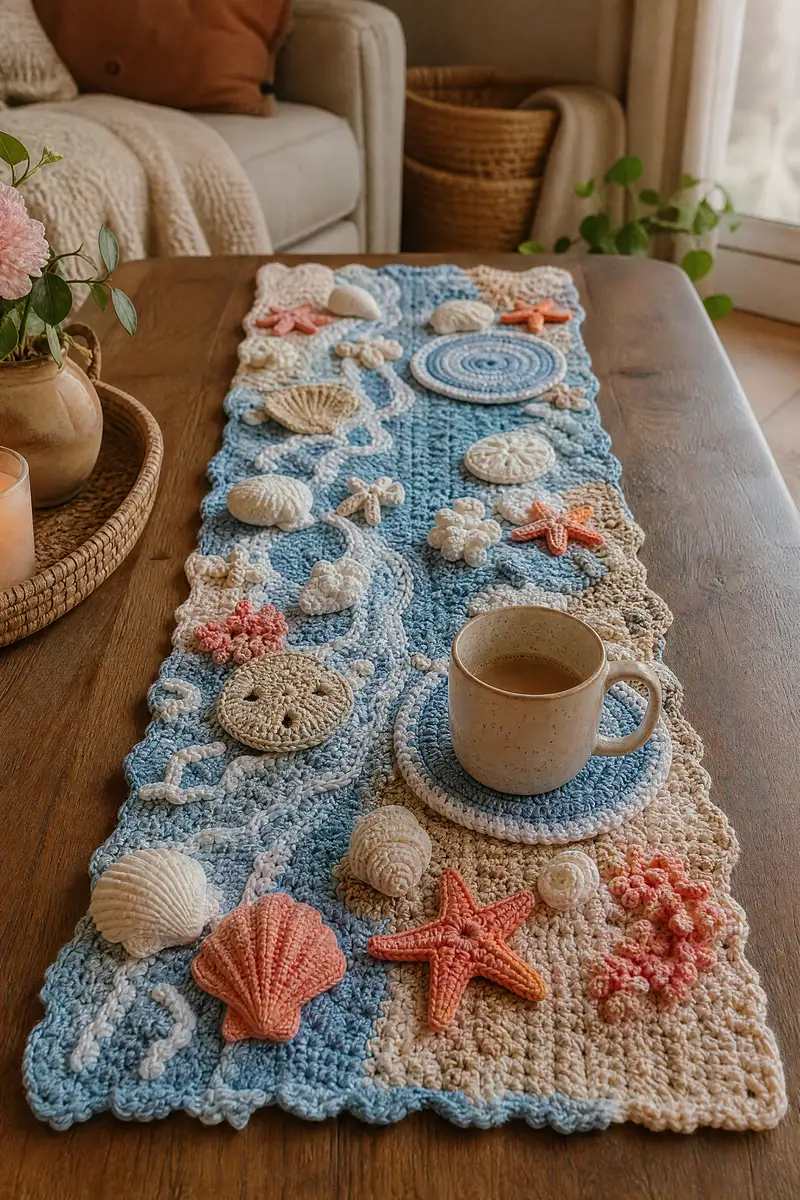
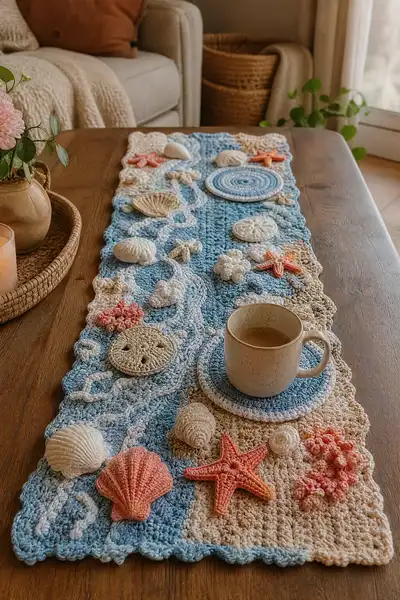
Bring the beach to your table with this coastal shell table runner pattern. The long ombre blue base mimics gentle waves and is embellished with 3D shells, starfish, sand dollars and coral clusters in soft sandy, cream and coral tones. Finished with a scalloped sandy border, this runner adds a handmade seaside accent to any dining or coffee table.
Progress Tracker
0% Complete
— Materials & Gauge :
Info :
Gauge is not critical for decorative runners but keeping consistent tension produces the cleanest edge and applique placement. Suggested gauge: 16 sc and 18 rows = 4 inches using 4.0mm hook in worsted weight. Finished runner shown approx 14" wide x 48" long.
— Base Panel (worked in rows) :
Info :
Base is worked in long rows using a multiple of 6 + 4 for a shell-pattern repeat. The sample uses a foundation chain of 132 (multiples of 6 = 22 repeats, giving an approximate 14" width). Adjust chain length to desired width, keeping multiple of 6 + 4.
Round 1 :
Foundation: ch 132, plus 1 turning ch (or use foundation sc method) (132)
Round 2 :
Row 1: sc in 2nd ch from hook and in each ch across. Turn. (132)
Round 3 :
Row 2: ch 2 (counts as hdc), hdc in each st across. Turn. (132)
Round 4 :
Row 3: ch1, sc in BLO in each st across to create a ridge/texture. Turn. (132)
Round 5 :
Row 4: Ch 3 (counts as dc), *sk next 2 sts, 3 dc in next st (shell made into a single base stitch), ch 1, sk next 0 sts, sc in next 2 sts; rep from * across finishing with sc in last 2 sts. Turn. (132)
Info :
The shell stitch sequence above keeps the stitch count constant because each shell is worked into one stitch; counts remain 132 each row. Use stitch markers at the first and last stitch every 10 rows to confirm width hasn't altered.
Round 6 :
Row 5: ch1, sc in first 2 sts, *3 dc in next st (shell), ch1, sc in next 2 sts; rep from * to last 2 sts, sc in last 2 sts. Turn. (132)
Round 7 :
Row 6: ch2, hdc in each st across. Turn. (132)
Round 8 :
Row 7: ch1, sc in BLO in each st across. Turn. (132)
Round 9 :
Row 8: Repeat Row 4 pattern (create alternate row of shells offset by one repeat to create woven texture). Turn. (132)
Round 10-22 :
Rows 9-21: Repeat Rows 5-9 three times to build texture and depth in the sea field. Maintain stitch markers. (132)
Info :
Change yarn color every 8-12 rows to create the ombre sea effect — work lighter blue for 8 rows, then medium blue for ~12 rows, then darker blue for 12 rows across the central field, then reverse towards sandy color near edges. Carry color up the side or fasten off and join new color at the end of a row for cleaner stripes.
Round 23-36 :
Rows 22-35: Continue shell/hdc/BLO repeats, alternating shell placement every other shell-row to produce a wave-like texture. Change color as desired following ombre plan. (132)
Round 37 :
Row 36: ch1, sc in each st across in cream or light blue to start transition towards shore (132)
Round 38-44 :
Rows 37-43: Switch to sand/beige yarn. Work the same shell and hdc texturing for the sandy band (7 rows). This band will become the beach edge. (132)
Info :
To make the shoreline more organic, stagger the transitions by changing color mid-row every few repeats or float a thin strand of cream over two stitches for a wavy color fade.
Round 45-52 :
Rows 44-51: Repeat textured rows in sand/beige, reducing the use of shells and introducing more sc and puff stitches (see puff stitch instructions below) to suggest sandy texture. Work 8 rows. (132)
Round 53-56 :
Rows 52-55: work 4 rows of sc in sand to create an even area for scalloped border joining. (132)
Info :
At this stage the panel length is flexible — for a longer runner add more repeats of the central wave section before switching to sand. The sample reaches approx 48" with the counts above.
Round 57-60 :
Rows 56-59: Finish base with 4 rows of sc in sand to give a firm edge for appliques and to prepare for border. Fasten off and weave in ends if you plan to block before attaching motifs. (132)
— Scalloped Border (worked around entire runner) :
Info :
Border is worked after blocking. Join sand/beige at one corner, work even along edge and around the long sides, making scallops at each short end corner to mimic shore curves.
Round 1 :
With sand yarn join with sl st into a corner stitch, ch1, sc evenly along the short edge placing approximately 1 sc every 2 rows of the panel until you reach the long side. Place 3 sc in corner base to turn. Continue along long side.
Round 2 :
Into each sc along border work: *sk next sc, 5 dc in next sc (scallop), sk next sc, sl st in next sc; rep across entire runner. At corners work 5 dc in the corner sc for smooth curve. Join with sl st and fasten off. (scalloped edge all around)
Info :
If your scallops look too large or too small, adjust by making 3 dc scallops instead of 5 dc; maintain even spacing.
— Applique: Large Round Shell / Sand Dollar (Make 3) :
Round 1 :
MR, ch2 (does not count), 8 hdc into MR, pull tight, join with sl st to first hdc (8)
Round 2 :
Ch2, 2 hdc in each st around (16)
Round 3 :
Ch2, *hdc in next st, 2 hdc in next st; rep around (24)
Round 4 :
Ch2, hdc in next 2 sts, 2 hdc in next st; rep around (32)
Round 5 :
Ch1, sc in each st around for a neat edge (32)
Info :
For sand dollar texture: after Round 5 embroider 5 radial lines from center with matching yarn using a yarn needle to create the star-shaped petal markings. Alternatively, to create a raised central boss work 5 puff stitches in a ring by making clusters of 5 partial dc pulls, yo and draw through all loops, join and tighten.
Round 6 :
Optional - create raised rim: ch1, sc in BLO around to give a slight rim. Fasten off leaving tail for sewing. (32)
Info :
Stuff lightly in the center to create a puffy sand dollar. Use small amounts of fiberfill - very light - as the motif should sit flat yet have texture.
— Applique: Scallop Shell (Make 4) :
Round 1 :
MR, ch1, 6 sc in ring (6)
Round 2 :
Ch1, inc in each st around (12)
Round 3 :
Ch1, (sc in next st, inc in next) x 6 (18)
Round 4 :
Ch1, sc in next 2 sts, inc in next st; rep around (24)
Round 5 :
Ch1, sl st in next st to move to front edge, ch3, (2 dc, ch1, 3 dc) all into same st (creates first scallop), skip 1 st, sl st in next st; rep across to form 6 scallops. Fasten off leaving tail for sewing. (6 scallops)
Info :
To give defined ridges like a real scallop, after making scallops take the work and embroider lengthwise ridges from base to tip using slip-stitch surface crochet or simple running stitch with yarn.
— Applique: Conch / Ridged Shell (Make 2) :
Round 1 :
MR, ch1, 6 sc in ring. (6)
Round 2 :
Inc in each st around (12)
Round 3 :
(1 sc, inc) x 6 (18)
Round 4 :
Ch1, sc in BLO around to create an elongated ridge; this will form the start of the conch shape. (18)
Round 5 :
Ch2, hdc in same st, hdc in next 8 sts, dec over next 2 sts, hdc in next 6 sts; shaping gives an oval profile (18)
Round 6 :
Ch1, sc around in BLO only to accentuate ribs. Fasten off leaving tail for sewing. Stuff lightly if you want a puffy conch. (18)
Info :
For deep ridges, make surface slip-stitch ridges every second rib or use single crochets worked in front loop only and then in back loop only alternately to create contrasted ribbing.
— Applique: Starfish (Make 3) :
Round 1 :
MR, ch1, 5 sc into ring, sl st to join (5)
Round 2 :
Ch1, [sc in next st] around to tidy (5)
Round 3 :
Form arms: *ch6, sc in 2nd ch from hook, hdc in next ch, dc in next ch, tr in next ch, sl st into base st (first arm made); rep from * 4 more times to create 5 arms. Fasten off and weave tail through base to secure. (5 arms)
Info :
To make arms more three-dimensional, before finishing each arm, work short rows adding extra dc or tr at arm midpoints then decrease toward tip so arms taper naturally. Add small amount of stuffing in each arm if you want a plump effect.
Round 4 :
Optional: With contrasting yarn embroider small french knots or puff stitches on top of arms to add texture and a natural look.
— Applique: Tiny Coral Clusters (Make 6) :
Round 1 :
MR, ch1, 6 sc into ring, pull tight, do not join (6)
Round 2 :
*In each stitch make a popcorn/puff: (yo, insert hook in st, draw up loop, repeat 4 times total, yo and pull through all loops), secure with sl st into same st; rep for 6 puffs around. Fasten off leaving tail for sewing.
Info :
These little clusters are the coral accents. Use bright coral/pink yarn and make several sizes by starting with 4 sc instead of 6 for smaller clusters.
— Applique: Small Ridges & Pebbles (Make multiple) :
Round 1 :
Chain 6, sl st back along chain to make a short rope; fasten off leaving tail. (6)
Round 2 :
Alternatively, make tiny discs: MR, ch1, 8 sc in ring, join, fasten off. (8)
Info :
Use these ropes to create winding seaweed or tidal lines across the runner. Sew them down with small stitches and stagger them to create natural curves.
— Applique: Deep Spiral Circle (Coaster-like motif, Make 2) :
Round 1 :
MR, ch2, 8 hdc into ring, sl st to join (8)
Round 2 :
Ch2, 2 hdc in each st around (16)
Round 3 :
Ch2, hdc in next st, 2 hdc in next st; rep around (24)
Round 4 :
Ch1, sc in each st around, join, then surface crochet a spiral by working sl sts in a spiral from center outward. Fasten off leaving long tail to couch spiral onto panel later. (24)
Info :
This motif is intentionally flat but with a raised spiral when couching. Use a contrasting color for the spiral or the same color as the base for subtle texture.
— Puff Stitch Instructions (used for sand texture and coral) :
Info :
Puff stitch: yo, insert hook in indicated st, draw up loop, yo and repeat insert/pull up 3-4 times (total 4-5 loops on hook), yo and pull through all loops on hook, ch1 to close puff. Secure with sl st if desired. Use tight pulls to avoid large gaps.
— Placement & Attachment Guide :
Info :
Lay blocked base on flat surface. Arrange large round sand dollars and spiral disc coasters towards center sections as focal points. Scatter scallop shells and conch shells near sandy edge. Place starfish prominently — one near each end and one mid-body. Coral clusters should gather in small groups near shells to look natural.
Round 1 :
Pin each applique with sewing pins. Stand back and adjust spacing; allow 1-2" between most motifs to keep balanced negative space. Use masking tape on table to mark the runner centerline for symmetry reference.
Round 2 :
Sew each motif on using a yarn needle and matching yarn: use whip stitch or ladder stitch along the base stitches of each applique. For items like the spiral disc, use couching: with a yarn needle and long contrasting yarn, make long stitches across spiral and secure through the base at 6 evenly spaced points.
Info :
When sewing on raised motifs, catch only a couple loops of the base fabric at each stitch to avoid pulling the border or distorting the panel. Keep stitches hidden on the underside when possible.
— Finishing Touches :
Round 1 :
Weave in all tails on the underside. Trim any excess. Lightly steam or block again to ensure motifs sit flush and the runner lays flat.
Info :
For extra permanence on pieces that will be handled frequently, tack motifs with a few small stitches through the center as well as the perimeter. Optionally attach a thin felt backing for extra stability (not usually necessary if seams are secure).
Round 2 :
Optional: Attach small non-slip dots on underside if runner will be used on smooth surfaces to avoid sliding.
This coastal runner pattern invites you to create a little piece of shoreline in your home. Each textured row and 3D shell you stitch brings seaside charm and handmade warmth to your table. The modular appliques allow playful customization and endless combinations. Enjoy every step of this tactile, calming project and share your finished runner — it’s a beautiful gift and a joyful centerpiece. 🧶🌊✨