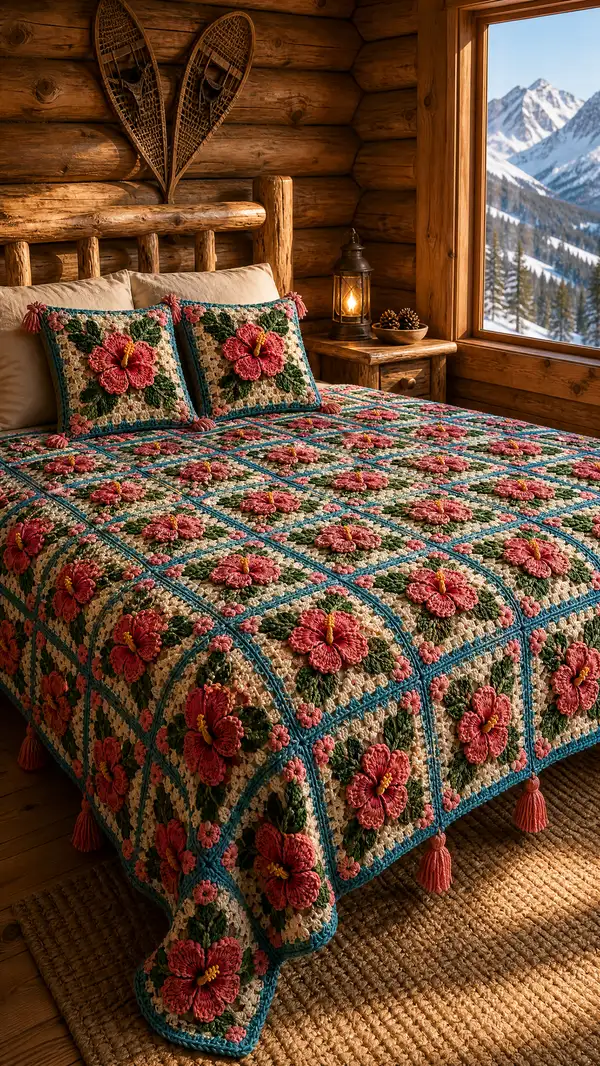
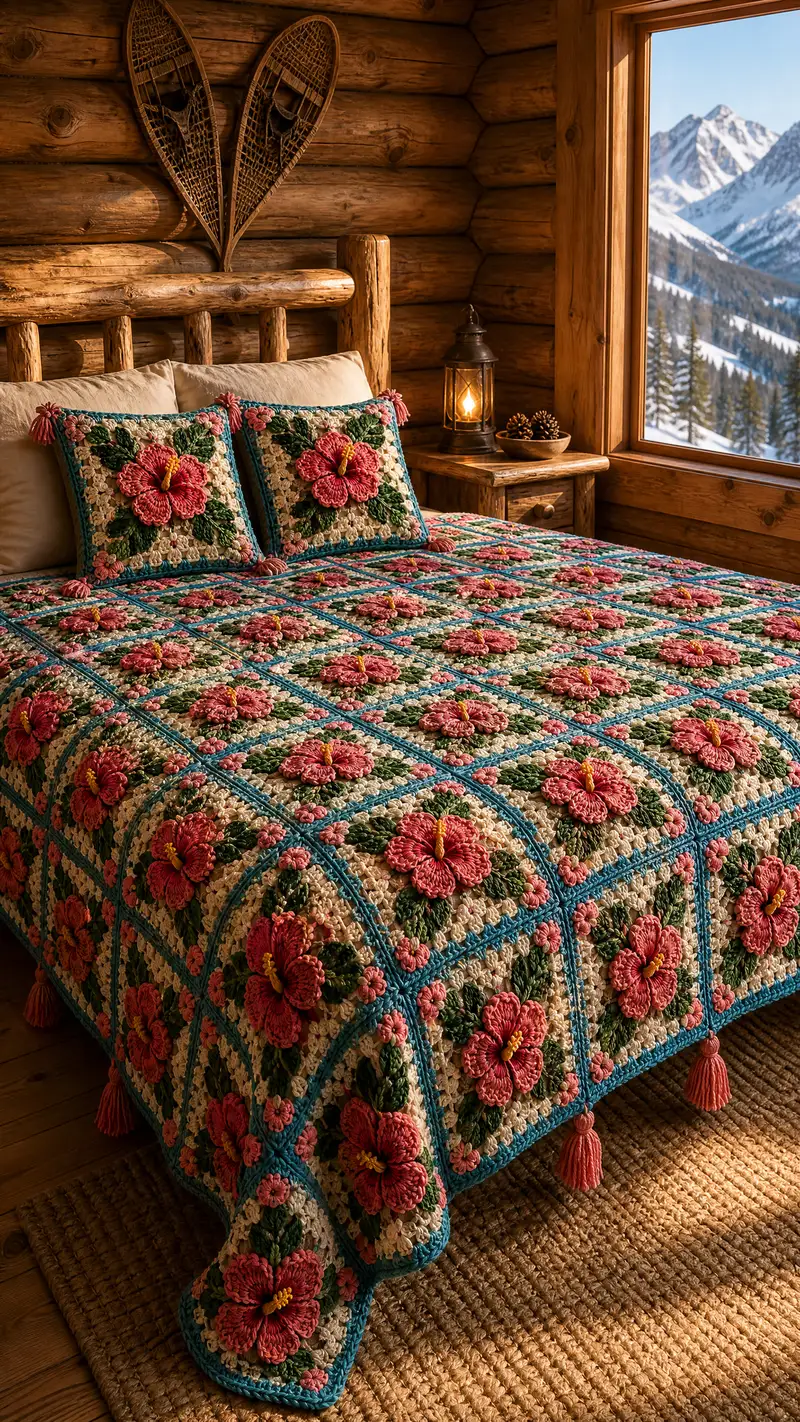
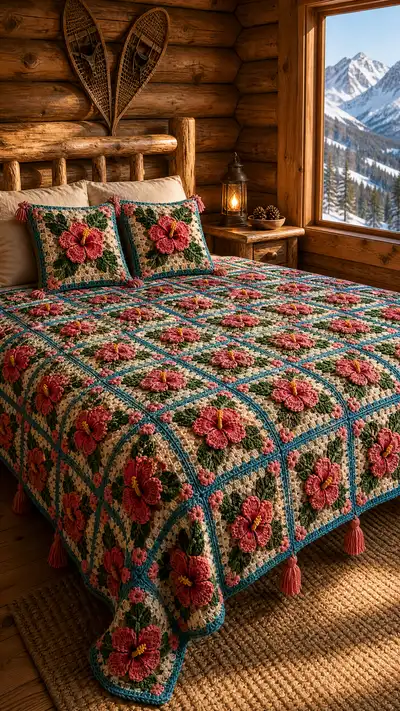
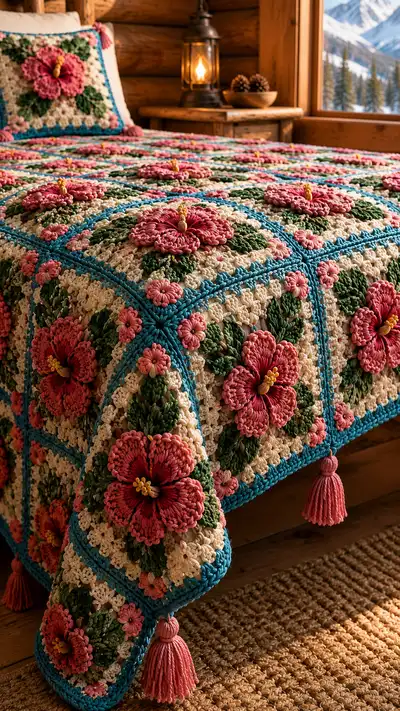
A richly textured bedspread made of large floral granny squares featuring dimensional coral hibiscus blooms, lush leafy clusters, and contrasting teal join-as-you-go borders. This pattern recreates the layered, sculptural flower centers and delicate buds for a cozy, statement bedcover that pairs perfectly with matching pillow shams. Clear instructions guide you through making each 12" (approx.) square and assembling them into a full bedspread with a decorative tassel edge.
Progress Tracker
0% Complete
— Overview and Gauge :
Info :
Gauge is measured after completing one full 12" floral square (before blocking). With 5.0mm hook and worsted cotton, you should have approximately 12" (30.5cm) square. If your square is larger, use a smaller hook for the major rounds; if smaller, use a larger hook. Each finished floral square contains one large 3D hibiscus, four leaves, four corner buds and a textured cream granny background; exact counts below guide blanket size.
Info :
For a twin bed ~ 48"x72" you will need 18 squares (3x6), for full/queen ~ 60"x80" 30 squares (5x6), and for king ~ 90"x108" 56 squares (7x8). This pattern shows a modular square and join method; multiply as required.
— Flower Center (Stamen) :
Round 1 :
With yellow, ch 2, work 8 sc into second ch from hook (8). Join with sl st to first sc and leave tail for sewing if you prefer a sewn center. (8)
Round 2 :
Ch 1, (2 sc in each st) around to form small raised ring: 8 inc (16). Sl st to first sc. (16)
Info :
Optional: for a taller stamen base, add one round of hdc in each st (16) before proceeding to stamen cluster. Use an extra small hook (4.5mm) if you want the center compact.
Round 3 :
Ch 1, *sc in next st, ch 3, sl st in same st (picot bud)* repeat around into each st to create 8 tiny picot loops; sl st to join. Fasten off leaving 6" tail for sewing to petals.
Info :
Stitch counts are forgiving here; the center attaches later to the petal assembly by couching the picot loops slightly toward the inside of the petals.
— Petal Base & First Petal Layer :
Round 1 :
With coral A, make magic ring, ch 1, 6 sc into ring (6). Pull ring closed. (6)
Round 2 :
(Inc) x 6 — 6 inc (12). Sl st to join. (12)
Round 3 :
(1 sc, inc) x 6 — 6 inc (18). Join. (18)
Round 4 :
(2 sc, inc) x 6 — 6 inc (24). Join. (24)
Info :
This base forms the foundation that the petal clusters will be worked around. Keep the base flat and well blocked later to avoid cupping.
Round 5 :
Ch 1, *skip 1 st, (dc3 cluster in next st—yo, insert, pull up, yo, pull through 2 loops three times to form cluster of 3 dc tight), ch 1, sc in skipped st* rep around to create alternating clusters and anchors: total clusters 12, anchors 12. Join. (24 occupied stitch positions)
Round 6 :
Ch 1, bring puff-based texture: *in front loop only of cluster base, make 5-loop puff (yo, insert, pull up loop; repeat 5 times total; yo and pull through all loops; ch 1 to close puff), ch 2, sc in ch-1 sp between clusters* around. You will have 12 large puff petals. Join. (12 petals)
Info :
To make a strong, sculptural petal, use a slightly smaller hook (4.5mm) for the puff/petal rounds. Keep each puff relatively even in height; pull the loops to the same length. After each petal, chain 2 to give the petal room to curve outward.
Round 7 :
In BLO of previous puff foundations, work 1 sc in each sc anchor (24) to stabilize the row and prepare for the next petal layer. Join. (24)
Round 8 :
Ch 2 (counts as first hdc), *hdc in next sc, (3 dc, ch 1, 3 dc) in top of each puff petal to create full fan petal, hdc in next sc* repeat resulting in 12 fan petals. Sl st to top of ch-2 to join. (visual: 12 large petals arranged around center)
Info :
Block this layer flat and give each petal a gentle curve by pinning the outer edge slightly upward during blocking; this encourages the layered look when the next petal row nests above it.
— Petal Layering and Shaping (Upper Petals) :
Round 9 :
Change to coral B (a slightly lighter/darker shade for depth). Ch 3 (counts as dc), *sk 3 sts into fan (work into space between fans), (dc, dc, tr, dc, dc) into center of fan petal, ch 2, sl st into base between fans* rep around to create 12 sculpted upper petals. Join. (12)
Round 10 :
Ch 1, sc in same st, *sc down side of upper petal (about 6 sc evenly spaced to follow petal curve), sl st at tip to create a small ridged edge. Return to base with sl st and sc into next base anchor* repeat 12 times to reinforce each petal. Join. (approx 72 sc worked across petal edges)
Round 11 :
In FLO around the previously worked base, work crab stitch (reverse sc) around the petal bases to create a defined ridge that separates petals from background: 1 sc FLO in each st around. Join. (approx 96)
Info :
Working crab stitch (reverse sc) creates a decorative ridge; keep tension even and use small hook if fabric looks loose. The ridge also provides a seam line to attach the stamen base later.
Round 12 :
With coral A, work a decorative popcorn-round at petal tips: *into tip sl st from Round 10, work 5 dc cluster (yo, insert, pull up loop x5, yo and pull through all), ch 2, sl st into next tip* around (12 popcorns). Fasten off and weave ends neatly. (12)
Info :
If using only one coral shade, skip the shade change; contrast is optional. Secure and weave ends on WS to hide them within the central base.
— Attaching Stamen to Petal Assembly :
Info :
Place flower face-up. Position the yellow picot stamen center directly into the small central ring created by Round 4 of the petal base. Using a long yellow tail and blunt tapestry needle, couch the stamen tail through the inner front loops of Round 6 puffs to anchor. Make sure the picot loops are elevated upward for realistic stamen detail.
Round 1 :
Sew the stamen ring to the petal base with a mattress/couching stitch, taking care not to pull petal centers inward; keep a slight dome for depth. Fasten off and hide tails. (Info: this is a sewing step, not crocheting)
Info :
Optionally add a tiny dab of fabric glue under the stamen ring for extra security on a bedspread expected to be washed; allow glue to fully dry before blocking.
— Large Leaf Unit (Make 4 per Square) :
Round 1 :
With dark green, ch 6. Row 1 foundation: sc in 2nd ch from hook, hdc in next, dc in next, hdc in next, sc in last. Turn to begin shaping leaf tip by working along opposite side of foundation chain: sc, hdc, dc, hdc, sc into remaining chain stitches. Join into first sc with sl st to form a flat oval leaf base. (12 sts around)
Round 2 :
Ch 1, work 1 sc evenly around leaf base (12). Join. (12)
Round 3 :
Ch 2, (hdc, dc, hdc) in tip to add height, then continue down opposite side with 1 hdc in each st to create slightly peaked tip; total approximate st count 16-18 depending on exact spacing. Join. (16-18)
Info :
Leaf counts vary slightly by tension — aim for a symmetrical leaf about 3.5" long after blocking. Use blocking to shape a pronounced central ridge later.
Round 4 :
Working in FLO to create vein texture: 1 sc in each st around (16-18). Join. (16-18)
Round 5 :
With lighter green, embroider a central vein: using tapestry needle and contrasting light green strand, stitch a running satin stitch down center from base to tip anchoring at both ends. This is an embroidery step rather than crochet. Secure and weave ends on WS.
Info :
For dimension, add a single row of surface slip stitches along both sides of the vein to make leaves sculptural. Use long tail and small needle for neatness.
Round 6 :
Edging: with dark green, work crab stitch (reverse sc) around leaf edge for a firm, neat surround. Join. Fasten off leaving 6" tail for sewing to square. (16-18)
Info :
Make four leaves per square: two larger side leaves and two slightly smaller for the diagonal positions. For smaller leaves, reduce Round 3 peak to just hdc, dc, hdc with fewer foundation chains.
— Small Corner Bud (Make 4 per Square) :
Round 1 :
With pink, magic ring, ch 1, 6 sc in ring (6). Pull tight. (6)
Round 2 :
(Inc) x 6 — 6 inc (12). Join. (12)
Round 3 :
Ch 1, make 6 small petals around: *in next st make (hdc, dc, hdc), sl st into next* repeat 6x. Fasten off and leave a tail for sewing. (6 small petals)
Info :
These small buds are decorative and sit in the corner joins between adjacent squares; make 4 per square. Use lighter pink for contrast with coral hibiscus if desired.
— Background Granny Square (Cream Base) :
Round 1 :
With cream, ch 4, join to form ring. Ch 3 (counts as first dc), 2 dc into ring, ch 2, (3 dc into ring) x 3, join to top of ch-3. This creates a basic 4-cluster granny center. (12 dc clusters)
Round 2 :
Slip into next ch-2 sp, ch 3, (2 dc, ch2, 3 dc) in same ch-2 sp; *skip to next ch-2, (3 dc, ch2, 3 dc)* repeat around for total 4 corners. Join. (corner clusters maintained)
Round 3 :
Slip to side space, ch 3, 2 dc in same sp, ch 1, *(3 dc, ch1) in each side sp between corners; (3 dc, ch2, 3 dc) in corner ch2s* complete around. This adds side clusters for square shaping. Join. (square begins to form)
Info :
Work evenly spaced granny cluster rounds until square measures approximately 12" across from corner to corner before petal attachment. Typically you will work 4-6 of these granny rounds depending on yarn and tension. For our sample square we will go to Round 6 to provide a firm background.
Round 4 :
Continue: slip to ch-1 space, ch 3, 2 dc, ch1, (3 dc, ch1) along each side; (3 dc, ch2, 3 dc) in corners. Join. (square larger)
Round 5 :
Repeat Round 4. After this round the square background should be robust and slightly larger than the flower base to allow placement of leaves into surrounding clusters. Join. (square grows)
Round 6 :
One last plain granny round: ch3, 2 dc in each side space, ch1 between side clusters, corner (3 dc, ch2, 3 dc). Join. Fasten off cream leaving long tail for weaving if desired. (6 rounds total including center)
Info :
Make sure the flower and leaf assembly will sit on the surface of this background without distorting the background clusters. You will sew the flower to the square with invisible mattress or whip stitch through the inner base only. Block square flat before final assembly.
— Assembling Flower and Leaves onto Square :
Info :
Lay a blocked cream square RS up. Position the large hibiscus centrally so that its base overlaps roughly the middle 4 clusters of the granny square. Pin in place with T-pins if available, aligning petals so that 12 petals fall evenly across the central area.
Round 1 :
Using long coral tail from petal base and tapestry needle, whip stitch through the outer chain or back loops of the base rounds (not through puff loops) to secure flower. Use small tight stitches to hold dome without flattening. Work around entire petal base. Fasten off. (Sewing step)
Round 2 :
Attach four leaves: position one leaf at each of the four quadrants around the flower, tucking their bases slightly under the outer petals. Using green tails, sew leaves securely by sewing along leaf bases into the cream cluster junctions. Each leaf receives 6-8 small stitches. Fasten off. (Sewing step)
Round 3 :
Sew four small corner buds into the corner ch-2 spaces of the square using pink tails. Place one bud into each corner and make a few small anchor stitches. Fasten off. (Sewing step)
Info :
Check square for loose tails — weave all ends into the cream granny or into the back of petals/leaves to hide them. If any petals feel floppy, add tiny anchoring stitches under petal tips to the cream background clusters.
— Joining Squares (Join-As-You-Go Method) :
Info :
Join-as-you-go (JAYG) makes assembly cleaner and avoids a bulky seam. We recommend joining squares into rows first, then joining rows. Use teal yarn for join to create grid lines that frame each square.
Round 1 :
Place two finished RS together (one completed square and one new square to be joined) with RS facing. Attach teal to corner ch-2 sp of the new square and ch 1, sc into same corner, work across side: *sc into next side-sp of new square, sl st into corresponding side-sp of finished square* repeat until corner; at corner work (sc, ch2, sc) in corner to join, continue along next side. This creates a neat ladder-like join. (Join one side)
Round 2 :
Continue joining across the row until you have your desired number of squares joined into a horizontal row. For vertical joins, flip work and join rows the same way aligning corner ch-2 spaces. Repeat for full blanket layout. (JAYG completed)
Info :
When joining many squares, keep tension relaxed to avoid pulling squares into waves; place a stitch marker every 6" to maintain straight edges. Alternatively, seam with mattress stitch if you prefer hidden joins, then cover seams with a decorative slip-stitch ridge.
— Internal Grid Decorative Rope (Teal Raised Ridge) :
Round 1 :
With teal, after joining adjacent squares, work 1 round of single crochet around the entire assembled blanket along every join line to emphasize the grid. Insert hook into the join spaces and sc evenly; this will create a raised cord effect. Bind off at corners neatly with 3 sc in corner ch-2 spaces. (visual: raised teal lines)
Round 2 :
Work an additional row of HDC in teal into the back loop only (BLO) of the sc row to create a defined rope. Join and fasten off. (2-row ridge)
Info :
Blocking the blanket after this step helps the rope settle into a crisp rectangle and lets seams relax. Pin each corner square at 90 degrees and spray-block to shape.
— Outer Border Rounds :
Round 1 :
With teal, join yarn at any corner ch-2, ch 1, work 3 sc in corner, *sc evenly along side across join ridges (approx 3 sc per small square side — keep counts consistent), 3 sc in corner* around. Join. (border base round)
Round 2 :
Ch 2, (dc, ch1, dc) in corner sc set to create a framed picot corner, *1 dc in each sc along side, ch1 between every 6th dc to avoid crowding* repeat around. Join. (framing round)
Info :
The number of side stitches depends on blanket size; distribute increases evenly so corners keep 90-degree shape. Add or reduce ch-1 spaces to maintain smooth edges.
Round 3 :
With coral, work decorative scallop: *skip 2 dc, (5 dc) in next dc, skip 2 dc, sl st* around for a scalloped decorative finish. Adjust stitch repetition to fit edge length. Fasten off and weave ends. (scallop border)
Info :
Alternatively, repeat a granny-style final round in cream for a softer finish. The coral scallop ties the petal color into the edge for cohesion.
— Tassel Finishing :
Info :
Tassels are optional but create a custom, retro-bedspread look. Make tassels in coral sized 4" long (folded 8" before trimming) and attach at each outer corner and at the midpoint of each outer square for visual balance.
Round 1 :
Make tassels: wrap coral yarn 30-40 times around a 4" cardboard template for a plush tassel. Cut one end, tie tightly at the top with a 6" length of yarn, then tie another 1/2" down and trim bottom to even length. Add a small yarn 'cap' by wrapping a small amount of teal around the top and securing with glue or a few stitches.
Round 2 :
Attach tassels by threading the top tail through the corner ch-2 space and knot inside the corner; hide knot with woven tail and apply a dot of fabric glue if desired. Make tassels at every corner and at side midpoints if desired. (Attachment)
Info :
Make tassels consistently; create a template and use the same wrap count for every tassel to keep uniform weight and look. Trim tassels once all are attached to match length.
— Pillow Sham Adaptation (Optional) :
Round 1 :
To make pillow shams, create 4 floral squares for each sham (2x2 layout) and join as described. Add 6-8 rows of teal border to form a flap. For an envelope back, add three rows of cream granny panels on the back pieces and stitch sides, leaving opening for an insert.
Info :
Use the same 3D flower centers on sham fronts; omit tassels or add small corner tassels to match bedspread scale. For pillow inserts, choose size 1-2" larger than finished sham for a plump look.
— Blocking, Care, and Finishing :
Info :
After full assembly, block the bedspread flat on a large surface. Pin each square edges straight and spray-block or steam-block according to yarn recommendations. Allow to dry fully before unpinning. Use gentle machine wash on cold or hand wash depending on yarn fiber; reshape and dry flat.
Round 1 :
Final weaving: go through entire piece and weave in all remaining tails at least 1.5" into the fabric so they do not work free. For high-use items, add a few hidden stitch reinforcements at join corners with matching yarn to prevent wear.
Info :
If you plan to launder frequently, consider using a cotton-blend rather than pure cotton for increased softness and wrinkle resistance; always retest gauge when switching fibers.
Finishing this Coral Hibiscus Granny Bedspread is pure joy — every square feels like a tiny flower garden stitched together into a warm, tactile statement piece. The 3D petals and braided teal grid give it both vintage charm and modern structure. It’s a project that rewards patience with a coverlet you’ll treasure for years. 🧶🌺 Add matching shams to complete the look and enjoy the cozy, hand-crafted warmth in your bedroom! ✨