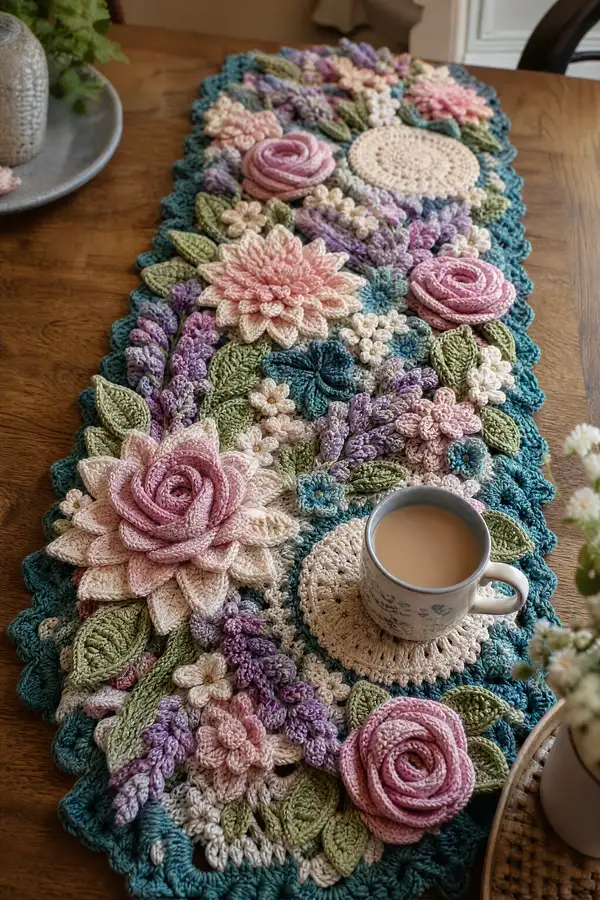
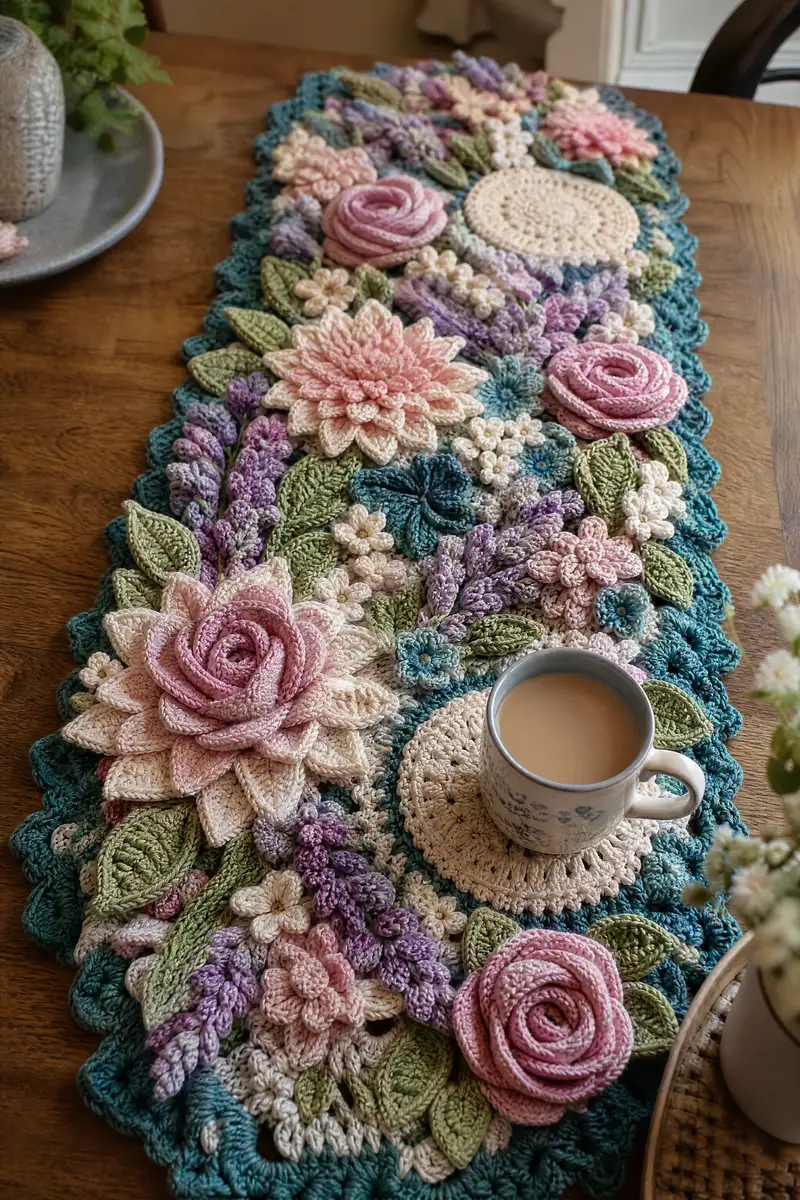
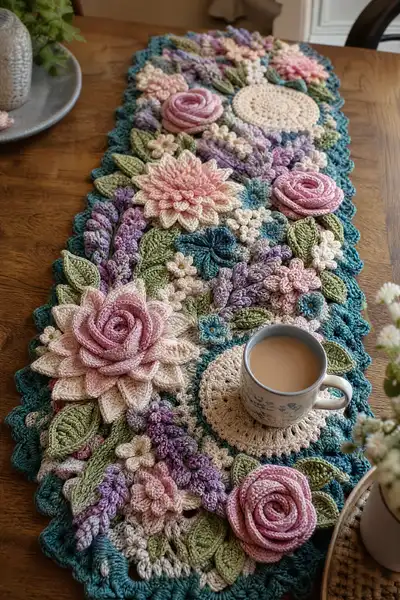
A lush, romantic table runner full of three-dimensional roses, layered dahlias, lavender sprays and leafy accents. This cottage-inspired runner features soft pastel pinks, greens, creams and teal scalloped edges that create a vintage floral centerpiece. Perfect for filling a dining table or dresser with handmade charm and texture.
Progress Tracker
0% Complete
— Overview :
Info :
This pattern is modular: motifs are made separately then appliqued and joined onto flat circular bases to build the runner. Work each motif with tight tension for much better 3D texture. Numbers given are for each motif; make the quantities listed in the assembly notes. Use stitch markers for round starts and a stitch counter for repeated even rounds.
— Center Doily Base (Make 6 identical bases) :
Round 1 :
6 sc in magic ring (6)
Round 3 :
(1 sc, inc) x 6 (18)
Round 4 :
(2 sc, inc) x 6 (24)
Round 5 :
(3 sc, inc) x 6 (30)
Round 6 :
(4 sc, inc) x 6 (36)
Round 7 :
1 sc in each st (36)
Info :
Change to cream or blush yarn for these bases. Work with slightly tighter tension; keep circles flat by blocking if necessary. These form the flat placemat-like platforms for many flowers to sit on.
Round 8 :
(5 sc, inc) x 6 (42)
Round 9 :
1 sc in each st (42)
Round 10 :
sl st to join, fasten off leaving long tail for sewing (42)
— Large Layered Dahlia (Make 3) :
Round 1 :
6 sc in magic ring (6)
Round 3 :
(1 sc, inc) x 6 (18)
Round 4 :
(2 sc, inc) x 6 (24)
Round 5 :
1 sc in each st (24)
Info :
This central round creates the dome beneath the petal layers. Use a soft blush or gradient yarn. You will work several petal rounds that are partly worked into loops or BLO to produce layered petals.
Round 6 :
Work petals round: *ch4, skip 1, sl st in next st* around to create 12 loops (24)
Round 7 :
In each loop: (sc, hdc, 3 dc, hdc, sc) fasten to base with sl st under loop to form first petal (12 petals)
Round 8 :
1 sc in each st across base round (24) working behind the petals to secure them
Round 9 :
Create second petal layer in front loop only (FLO): *ch4, sk 1, sl st* around into FLO of base round to form overlap loops (24)
Round 10 :
In each loop: (sc, hdc, 5 dc, hdc, sc) to form larger petal, offset to sit between previous petals (12 larger petals)
Info :
Stuff the center dome slightly if you prefer a raised center; use only a tiny amount of stuffing to keep petals viewable and flat. Pin petals in place before stitching down to control shape.
Round 11 :
Work small picot edging around outer petals: *sl st, ch3, sl st in 3rd ch from hook, sl st in next petal base* around (72 picots approx)
Round 12 :
Fasten off, leave long tail for sewing to a base circle. Block petals slightly outward for fuller look.
— Rolled Rose (Spiral) (Make 4-5) :
Round 1 :
ch 42, join to work in rows for a spiral strip (or adjust chain length for larger/smaller rose)
Round 2 :
Row 1: sc in 2nd ch from hook and across (41)
Round 3 :
Row 2: ch1, turn, sc in each st across (41) for 3 rows total to give a stable strip
Round 4 :
Optional edge: work sc evenly along both long sides of the strip to neaten before rolling
Info :
To create the spiral rose, begin at one short end and roll the strip tightly for the inner core, then loosen the roll to create concentric outer petals. Use a running stitch along the base of the roll to secure as you go. Stuff lightly between folds if you want the rose to have a puffy look.
Round 5 :
Roll tightly 4-6 turns then secure with yarn needle and long tail by whip-stitching through the base at 2-3 mm intervals until the rose is tightly attached and won't unwind
Round 6 :
Fasten off and weave tail through the bottom to hide. Leave another tail to sew the finished rose to a base.
— Small Rolled Rose Variation (Make 4) :
Round 1 :
ch 28, sc in 2nd ch from hook and across (27)
Round 2 :
ch1, turn, sc across (27) for 2 rows
Round 3 :
Edge with sc along both sides, then roll and secure as above (smaller spiral)
Info :
Use a variegated pink for interesting shading. Roll with the right-side facing outward so the strip's texture reads as petals. Sew onto a larger base or directly onto runner fabric.
— Lavender Spike Motif (Make 12-14) :
Round 1 :
mr, ch2, 8 hdc into ring, sl st to join (8)
Round 2 :
(ch3, sl st in next) x 8 to create 8 small loops for buds
Round 3 :
In each loop: sl st, sc, hdc to form tiny petal bud; fasten off leaving tails for sewing
Round 4 :
For spike stem: ch 18, join to base with sl st at the center to form a stem. Fasten off and weave in tails
Info :
Use a variegated purple yarn or alternate lilac and mauve to create depth. Sew several small buds in staggered rows along a central stem for a realistic lavender spike effect. Slight stuffing of the buds is optional but helps maintain shape.
— Mini Five-Petal Flower (Make 10-14) :
Round 1 :
mr, (ch3, dc, ch3, sl st in ring) x 5 to create 5 loops (5)
Round 2 :
In each loop: *sc, hdc, dc, hdc, sc* to form small rounded petals (5 petals)
Round 3 :
Fasten off and embroider small French knot center or attach a small bead
Info :
These are used as filler flowers between large blooms. Make several in cream and blush, then tack them in clusters for a natural look.
— Puff Cluster Flower (Make 8 clusters) :
Round 1 :
ch6, sl st to form a small ring, ch2
Round 2 :
*(yarn over, insert, pull up loop) x 4, yarn over pull through all loops, ch1, sl st in next ch* repeat around to create 6 small puff petals (6 puffs)
Round 3 :
sl st to join, fasten off leaving tail for sewing
Info :
Puff stitches create clusters similar to baby's breath or tiny buds. Use these densely to visually fill gaps and create contrast between larger petals.
— Leaf Small (Make 18) :
Round 1 :
ch 8, sc in 2nd ch from hook, hdc in next, dc in next, tr in next, dc, hdc, sc down other side, sl st to first sc, fasten off (approx 14 sts total)
Round 2 :
Optional: work 1 sc around leaf edge for sturdiness and neater look
Info :
Work these in sage green. For a slightly curved leaf, block on a small form or sew a running stitch down center and pull gently to shape.
— Leaf Large (Make 12) :
Round 1 :
ch 14, sc in 2nd ch from hook, hdc in next 2, dc in next 3, tr in next 3, dc in next 2, hdc in next, sc in last, continue along other side symmetrical, sl st to first sc (approx 26 sts)
Round 2 :
Work 1 sc around edge, or *sc, picot (ch3 sl st in top) every 6th st* for decorative edge
Info :
For ribs: embroider with hdc or surface slip stitch down the center to give raised vein effect. Slight steam blocking will set the curve and veins nicely.
— Small Five-Petal Layered Blossom (Make 6) :
Round 1 :
mr, ch3, 10 dc in ring, sl st to join (10)
Round 2 :
*ch4, sl st in next st* around to create 10 loops
Round 3 :
In each loop: sc, hdc, 3 dc, hdc, sc to form small rounded petal (10 petals)
Info :
Make this in contrasting pastel to tuck under larger petals and provide depth. Sew these to the doily bases before adding large applied blooms so they act as an under layer.
— Tiny Center Rosette (Make 6) :
Round 1 :
ch10, sl st to first to form ring, ch1, sc in each ch (10)
Round 2 :
Fold ring and whip stitch through base every 2 sts to create a tiny rosette, secure and fasten off
Info :
These are perfect for the centers of open flowers or to add a clustered look to the runner. Use cream or pale yellow for contrast.
— Joining Mat and Background Filler (Work 1 long base or multiple small connectors) :
Round 1 :
ch 150 (or chain to desired runner length), sc in 2nd ch from hook across for foundation strip. Make 4 parallel strips and join with sl st or whip stitch to create a rectangular base if desired
Round 2 :
Work 2 rounds of 1 sc in each st along the perimeter to create a neat edge for attaching motifs
Info :
Alternatively, you may skip a flat fabric base and arrange motifs directly on a backing fabric or join motifs edge-to-edge. The pictured runner seems to combine many overlapping bases and motifs with a teal scalloped frame; choose the method that best suits your assembly skills.
— Scalloped Border (Worked After Assembly) :
Round 1 :
Attach teal to outermost perimeter: *ch3, skip 1, sc in next 4 sts, (5 dc in next st for scallop), sc in next 4 sts, ch3, sl st* repeat around to create large scallops
Round 2 :
Work smaller picot or shell into each scallop: *sl st into center dc of scallop, ch3, 3 dc in center dc, ch3, sl st* repeat across
Info :
Work the border with a larger hook or looser tension to create a soft rounded scallop. If working the motifs without a backing, the scalloped edge can be worked into the outer petal joins and leaves, joining them into one solid edge.
— Assembly and Applique (Extensive Notes) :
Info :
Lay out your bases first: place large doily bases at staggered positions along the runner template. Next, arrange large dahlias and rolled roses on top, overlapping edges slightly. Fill gaps with lavender spikes, small flowers and puff clusters. Pin each motif in place. For a secure attachment, use a tapestry needle and the long tail to whip stitch through at least two rounds of the base and the motif. Sew through the base circle and the underside of petals where they meet to hide stitching. Where motifs meet, sew through both base rounds for invisible joins.
Round 1 :
Sew large dahlia to one of the center bases by aligning the base rounds and whip-stitching through round 8 and 9 of the dahlia to rounds 6-8 of the circle base. Use 8-12 stitches spaced evenly to secure.
Round 2 :
Place rolled rose at the edge of a dahlia or atop a base circle, then hand-stitch with running stitches through the rose base into the underlying circle at 3-4 points to hold in place (do not pull too tight or it will flatten petals).
Round 3 :
Attach leaves by sewing through the base of each leaf onto the runner. Tuck leaf tips beneath petals and stitch them down through both leaf and petal for stability. Use small invisible stitches.
Round 4 :
Secure lavender spikes by sewing through their base into a fold between petals or directly into the long background strip. Add multiple stitch points so they cannot flip up.
Info :
Weave tails through several motifs and knot if needed. Trim excess yarn closely and apply a dot of fabric glue to knots if you expect heavy handling or frequent laundering. If washing is desired, hand-wash gently and reshape while damp; avoid machine washing to preserve 3D structure.
— Decorative Finishing Touches :
Round 1 :
Add small bead centers by stitching a single bead into the center of mini rosettes or five-petal flowers. Use thread/wire through bead and secure at back with knot hidden under petals.
Round 2 :
Optionally embroider veins on leaves with a contrasting shade of green using surface slip stitch or raised hdc for realistic texture.
Round 3 :
Block the entire runner on a large blocking board if possible: pin motifs and gently steam (do not press iron directly) to set shapes, then leave pinned until completely dry.
Info :
Final trimming: check for stray loops or tails and weave them to the back or snip flush after securing. For a flat bottom, you may attach a fabric backing with hand-stitching to keep the runner stable on tables; choose a neutral linen or cotton fabric and whip-stitch around perimeter and between some motifs for extra hold.
Completing this cottage rose table runner is an incredibly rewarding process — from making each small petal to watching them bloom into a lush tapestry on your table. The layered petals and delicate lavender spikes create a soft, vintage feel that elevates any room. Enjoy the slow, meditative rhythm of making and arranging each motif; the finished piece is worth every stitch. 🧶🌷✨