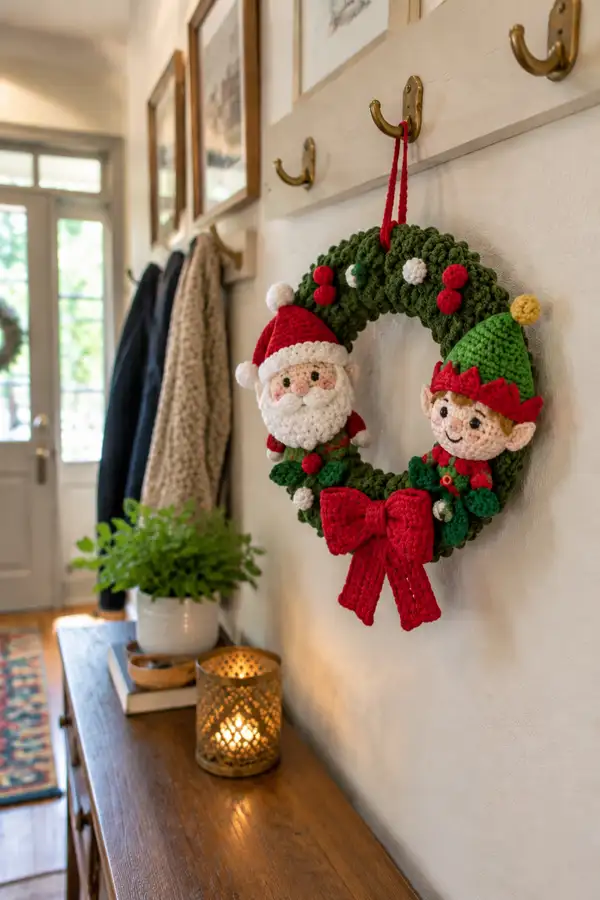
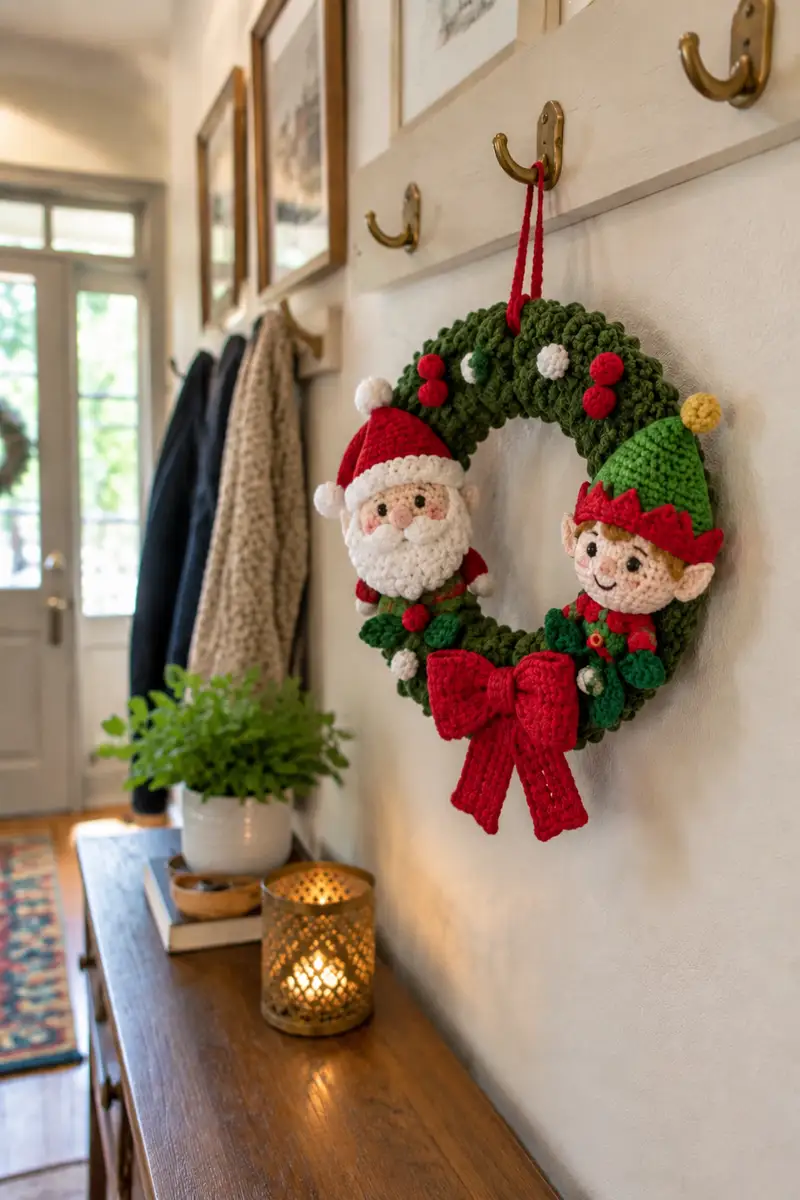
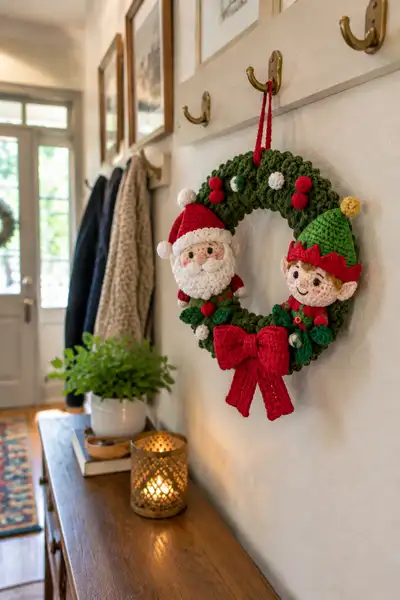
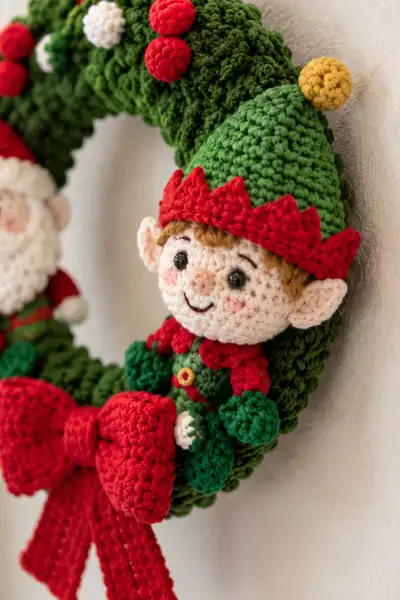
Create a charming holiday wreath featuring a textured green wreath base, a cheerful crocheted Santa and a playful elf, plus a large red bow and decorative berries. This pattern uses worsted weight yarn and simple amigurumi shaping to build detailed faces, hats, and accessories. Great for seasonal decor, it hangs from a sturdy loop and adds handcrafted warmth to your entryway. Includes step-by-step instructions, assembly tips, and plenty of Info sections for stuffing and placement.
Progress Tracker
0% Complete
— Wreath Front Disc (Make 2 identical discs for front and back) :
Round 1 :
6 sc in magic ring (6)
Round 3 :
(1 sc, 1 inc) x 6 (18)
Round 4 :
(2 sc, 1 inc) x 6 (24)
Round 5 :
(3 sc, 1 inc) x 6 (30)
Info :
These two discs form the front and back faces of the wreath. Use forest green worsted weight yarn. Keep tension consistent so discs match exactly.
Round 6 :
(4 sc, 1 inc) x 6 (36)
Round 7 :
(5 sc, 1 inc) x 6 (42)
Round 8 :
(6 sc, 1 inc) x 6 (48)
Round 9-10 :
1 sc in each st (48)
Info :
Fasten off leaving a long tail (about 30-40cm) for later joining. Make an identical second disc. Keep both discs flat and identical in size for a neat join.
— Joining Discs to Create Tubular Wreath Body :
Info :
Place the two discs together with right sides out. We will crochet through both layers to create a tube. Use the long tail of one disc to begin joining, working sc through both layers around to create a single round of 96 sts.
Round 1 (Join) :
Working through both layers, sc in each st around to join (48+48 = 96)
Round 2-24 :
1 sc in each st (96)
Info :
Rounds 2-24 build the depth of the wreath. Stuff lightly as you go after round 6 of the join; use small amounts of fiberfill and distribute evenly so the tube remains flexible but full. Do not overstuff—wreath should be compressible enough to hang flat against a door.
Round 25 :
(11 sc, 1 dec) x 8 (88)
Round 26 :
(10 sc, 1 dec) x 8 (80)
Info :
We will keep a slight inner gap by leaving the center of discs intact. The decreases tighten the seam slightly; they help shape the circular tube edge so the wreath sits smoothly. If your wreath looks too squat, omit one decrease round.
Round 27 :
1 sc in each st (80)
Round 28 :
1 sc in each st (80)
Info :
At this stage you can create a hanging loop: ch 30 with red yarn, attach to top of wreath using sl st and weave tail neatly to inside. Alternatively, braid yarn for a thicker loop.
— Wreath Surface Texture (Cluster Rows) :
Info :
To mimic the chunky evergreen texture seen in the photo, we'll add multiple short cluster 'bobs' worked in FLO and using short puff/clusters in random placement across the outer rounds. Work small clusters spaced evenly around the wreath front.
Round 1 (Cluster Placement) :
*sc 4, (yo, insert, pull up, yo, insert, pull up, yo, insert, pull up) draw through all loops, sl st to secure cluster* rep around until you have placed 18-22 clusters across the outer edge (adjust to preference)
Round 2 :
1 sc in each st around to tidy clusters (80)
Info :
Place clusters in slightly random intervals—some closer, some further apart—to create a natural evergreen look. If your clusters pull big loops, tighten your tension or use fewer loops per cluster.
— Small Leaves (Make 10-14) :
Round 1 :
ch 6, sc in 2nd ch from hook, hdc next, dc next, hdc next, sc last (5 sts across chain)
Round 2 :
Turn, sl st in first st, sc in next, hdc in next, dc in next, sc in last; fasten off, leaving tail for sewing
Info :
Sew leaves around the wreath in small clusters of 2-3 leaves for a layered look. Use darker and lighter greens to add depth.
— Berries and Pom-poms (Make various sizes) :
Small Berry Round 1 :
6 sc in magic ring (6)
Round 3 :
1 sc in each st (12)
Info :
Fasten off leaving a long tail for sewing. Make berries in red and white. For tiny yellow pom-pom detail, use round 1 only (6 sc) and tighten ring firmly.
— Large Bow (Main Bow) :
Bow Loop Foundation Round 1 :
Using red yarn, ch 24, join with sl st to form loop (24)
Round 2 :
ch1, 1 sc in each ch around (24)
Round 3 :
1 sc in each st BLO (24)
Round 4-8 :
1 sc in each st (24)
Info :
Make two identical loop pieces for the bow. These will be flattened and sewn together to make the signature bow loops. Keep tension firm so loops hold shape.
Bow Tail (Make 2) Round 1 :
ch 6, turn, sc in 2nd ch from hook and in each ch across (5)
Round 2-18 :
Turn, ch1, sc in each st (5)
Bow Center:
ch 6, work 6-8 rounds sc in each st to create a band. Wrap around the middle of the loops and sew in place tightly. Fasten off and weave ends.
Info :
Stuff a little into the loop pieces' centers before sewing to create the plump bow shape. Arrange tails beneath loops and sew to the wreath base using matching thread for an invisible finish.
— Santa Head :
Round 1 :
6 sc in magic ring (6)
Round 3 :
(1 sc, 1 inc) x 6 (18)
Round 4 :
(2 sc, 1 inc) x 6 (24)
Round 5 :
(3 sc, 1 inc) x 6 (30)
Round 6 :
(4 sc, 1 inc) x 6 (36)
Round 7 :
(5 sc, 1 inc) x 6 (42)
Round 8 :
(6 sc, 1 inc) x 6 (48)
Round 9-13 :
1 sc in each st (48)
Info :
Place 8mm safety eyes between rounds 11 and 12, approximately 8-9 stitches apart for the cute expression seen in the photo. Add small embroideries for eyebrows later.
Round 14 :
(6 sc, 1 dec) x 6 (42)
Round 15 :
(5 sc, 1 dec) x 6 (36)
Info :
Begin stuffing the head firmly but not over-packed. Use small amounts of fill so facial shaping remains smooth and round. Ensure eyes are locked before stuffing further.
Round 16 :
(4 sc, 1 dec) x 6 (30)
Round 17 :
(3 sc, 1 dec) x 6 (24)
Round 18 :
(2 sc, 1 dec) x 6 (18)
Round 19 :
(1 sc, 1 dec) x 6 (12)
Info :
Fasten off leaving a long tail for sewing. Stuff final amount then close using needle and tail with a ladder stitch. Embroider a small smile and rosy cheeks with blush pencil or a touch of pink yarn around cheeks.
— Santa Ear (Make 2) :
Round 1 :
6 sc in magic ring (6)
Round 2 :
inc in each st (12)
Round 3 :
1 sc in each st (12)
Round 4 :
1 sc in next 8 sts, sl st to shape slight cup (8)
Info :
Flatten lightly and sew to sides of head at rounds 9-10, slightly below the eye line. Curving the ear forward gives the friendly Santa expression.
— Santa Hat :
Round 1 :
6 sc in magic ring (6)
Round 3 :
(1 sc, 1 inc) x 6 (18)
Round 4 :
(2 sc, 1 inc) x 6 (24)
Round 5-9 :
1 sc in each st (24)
Info :
To create the white brim, change to cream yarn. Work 3 rounds of textured stitches (bobble or cluster) around the hat base to mimic fluffy trim before folding brim outward and sewing into place.
Round 10 :
Change to cream, work (1 sc, bobble) around to create a fluffy trim (24)
Round 11-14 :
Switch back to red and work 1 sc in each st (24) decreasing slightly every 3-4 rounds to create cone shape: Round13 (2 sc, 1 dec) x 6 (18), Round14 (1 sc, 1 dec) x 6 (12)
Info :
Make a small white pom-pom by making a 6-sc magic ring piece and securing at tip. Sew hat onto head, lining brim neatly above eyes and beard. Add a few stitches to secure hat so it sits firmly on the head.
— Santa Beard and Mustache Set :
Beard Piece Round 1 :
Using cream yarn, ch 11, sc in 2nd ch from hook and across (10)
Round 2 :
Turn, ch1, FLO sc across (10)
Round 3 :
Turn, ch1, *3 dc in next st, sl st in next* across to create textured scallops (approx 5 scallops)
Round 4 :
Fasten off leaving long tail for sewing. Slightly curve the beard and sew across lower face from rounds 13-17 to cover the lower half of the face. Add extra little looped hairs by pulling small loops of yarn through and knotting then trimming.
Mustache (Make 2) Round 1 :
ch5, sc in 2nd ch from hook and next 3 (4)
Round 2 :
Turn, sc in each st, fasten off (4)
Info :
Sew mustache halves above beard and under nose. Slight threading of extra yarn adds fluff for Santa's signature beard fullness.
— Santa Body (Small Decorative Torso) :
Round 1 :
6 sc in magic ring using red (6)
Round 3 :
(1 sc, 1 inc) x 6 (18)
Round 4-9 :
1 sc in each st (18)
Round 10 :
Change to green for belt area, work 1 sc in each st (18)
Round 11 :
Attach a small yellow circle button (6 sc in magic ring, fasten off) and sew to center of torso over green belt
Info :
Body is a decorative element sewn to wreath at the side of Santa. Stuff lightly and keep proportions small so wreath balance is preserved.
— Santa Arms (Make 2 small arms) :
Round 1 :
6 sc in magic ring using flesh color (6)
Round 3-4 :
1 sc in each st (12)
Round 5 :
Change to red for sleeve, 1 sc in each st (12)
Round 6-10 :
1 sc in each st (12) - stuff hand portion firmly and arm lightly
Info :
Sew arms to either side of Santa body near rounds 4-6 to make them hug the wreath. Pin to check placement and tilt slightly forward to look natural.
— Elf Head :
Round 1 :
6 sc in magic ring (6)
Round 3 :
(1 sc, 1 inc) x 6 (18)
Round 4 :
(2 sc, 1 inc) x 6 (24)
Round 5 :
(3 sc, 1 inc) x 6 (30)
Round 6 :
(4 sc, 1 inc) x 6 (36)
Round 7 :
(5 sc, 1 inc) x 6 (42)
Round 8 :
(6 sc, 1 inc) x 6 (48)
Round 9-13 :
1 sc in each st (48)
Info :
Position 8mm safety eyes between rounds 11-12 about 7-8 sts apart for youthful elf look. Add small nose by embroidering later or by making a 3-sc bump.
Round 14 :
(6 sc, 1 dec) x 6 (42)
Round 15 :
(5 sc, 1 dec) x 6 (36)
Info :
Begin stuffing head slightly firmer than Santa to help elf maintain a rounder face shape. Leave opening large enough for hat placement.
Round 16 :
(4 sc, 1 dec) x 6 (30)
Round 17 :
(3 sc, 1 dec) x 6 (24)
Round 18 :
(2 sc, 1 dec) x 6 (18)
Round 19 :
(1 sc, 1 dec) x 6 (12)
Info :
Fasten off leaving a tail for sewing. Add embroidered smile with brown yarn and blush to cheeks with a touch of gentle pastel or pink yarn smudged slightly for rosy cheeks.
— Elf Ears (Make 2) :
Round 1 :
6 sc in magic ring (6)
Round 3 :
1 sc in next 8 sts, sl st next 4 to create point (8)
Info :
Pin ears at rounds 9-11 to give the whimsical pointed elf ear placement; sew securely with small stitches at the base so ears flare out slightly.
— Elf Hat with Zigzag Brim :
Round 1 :
6 sc in magic ring using bright green (6)
Round 3 :
(1 sc, 1 inc) x 6 (18)
Round 4 :
(2 sc, 1 inc) x 6 (24)
Round 5-12 :
1 sc in each st (24)
Info :
Change to red for the zigzag brim. Work a small picot/zigzag edging by alternating sc and sl st peaks: *sc 2, picot (ch3 sl st in 1st ch), sc 2, sl st* across to form pointed edge.
Round 13 :
Change to red and work zigzag: *sc 2, (ch3, sl st in 2nd ch from hook) forming small point, sc 2* across (approx 24)
Round 14 :
Change back to green and work 1 sc in each st to cover brim join (24)
Round 15 :
Decrease toward tip: (2 sc, 1 dec) x 6 (18)
Round 16 :
(1 sc, 1 dec) x 6 (12)
Info :
Make a small yellow pom-pom (6 sc magic ring) and sew to hat tip. Sew hat on at rounds 9-11 so the brim frames the elf's face and allows hair to peek out under the zigzag edge.
— Elf Hair (Fringe) :
Info :
Use light brown yarn. Cut 10-14 lengths of 7-10 cm each. Fold in half and knot through a row beneath the hat brim to form a fringe. Trim and shape bangs to look like the photo.
— Elf Body (Small Decorative Torso) :
Round 1 :
6 sc in magic ring using dark green (6)
Round 3 :
(1 sc, 1 inc) x 6 (18)
Round 4-8 :
1 sc in each st (18)
Round 9 :
Change to red for collar detail, work 1 sc in each st (18)
Info :
Sew small gold button or embroidered circle in center of torso as a buckle-like detail. Keep torso lightly stuffed and proportionate to head size.
— Elf Arms (Make 2) :
Round 1 :
6 sc in magic ring using flesh color (6)
Round 3 :
1 sc in each st (12)
Round 4 :
Switch to green for sleeve, 1 sc in each st (12)
Round 5-12 :
1 sc in each st - stuff hands fairly firm, arms lightly
Info :
Sew elf arms to the torso and position so elf looks like it's gently holding the wreath or perched inside the bow as seen in the photo.
— Small Legs/Shoes (Optional, Make 2) :
Round 1 :
6 sc in magic ring using shoe color (red) (6)
Round 3-4 :
1 sc in each st (12)
Round 5 :
Change to flesh, 1 sc in each st (12)
Round 6-10 :
1 sc in each st - stuff lightly and sew to bottom of torso if you want a dangling shoe look
Info :
If attaching legs, position them at the base of the torso and angle slightly outward. For a perched elf look, tuck legs under the body when sewing to wreath.
— Decorative Berries & Tiny Rounds (Extra Embellishments) :
Round 1 :
6 sc in magic ring (6)
Round 3 :
1 sc in each st, fasten off (12)
Info :
Make a mix of white and red berries. Sew clusters of 2-3 berries around the wreath, and add white berry clusters to break up color. Use long tails to position and sew securely close to clusters of leaves.
— Final Assembly Instructions (Info Heavy) :
Info :
Before attaching any larger pieces, arrange them on the wreath to test placement. The Santa sits on the left side of the wreath with hat tip leaning slightly upward; the elf sits on the right with hat tip leaning toward the wreath center. The large red bow is positioned at the bottom center, slightly overlapping the wreath tube.
Info :
Use pins to hold each piece in place. When sewing faces and bodies, stitch through inner rounds of the wreath (rounds 10-14 of the joining rounds) to anchor pieces into the tube and prevent sagging. Reinforce by sewing at least 6-8 passes through the wreath and the body base for larger pieces.
Info :
Weave in all tails as you go, but leave longer tails for final secure sewing. Use small, tight stitches to attach pieces and hide knots inside the stuffed body where possible. Apply fabric glue sparingly if you need extra hold for small decorative pieces.
Info :
Use a darning needle to embroider eyebrows and mouth. For the elf's smile, use brown yarn and a backstitch to create a sweet curve. For Santa's nose, add a small flesh-colored bump or embroider a simple circle.
Completing this wreath is such a satisfying holiday project — each stitched leaf, berry and button adds personality and warmth. The juxtaposition of Santa and the elf with the lush green wreath and bold red bow creates a welcoming piece for any doorway. Enjoy the assembly process and the way small details bring your characters to life — the smile, the beard, and the zigzag hat make all the difference. 🧶✨ Hang it proudly and share your handmade holiday cheer! 🎁