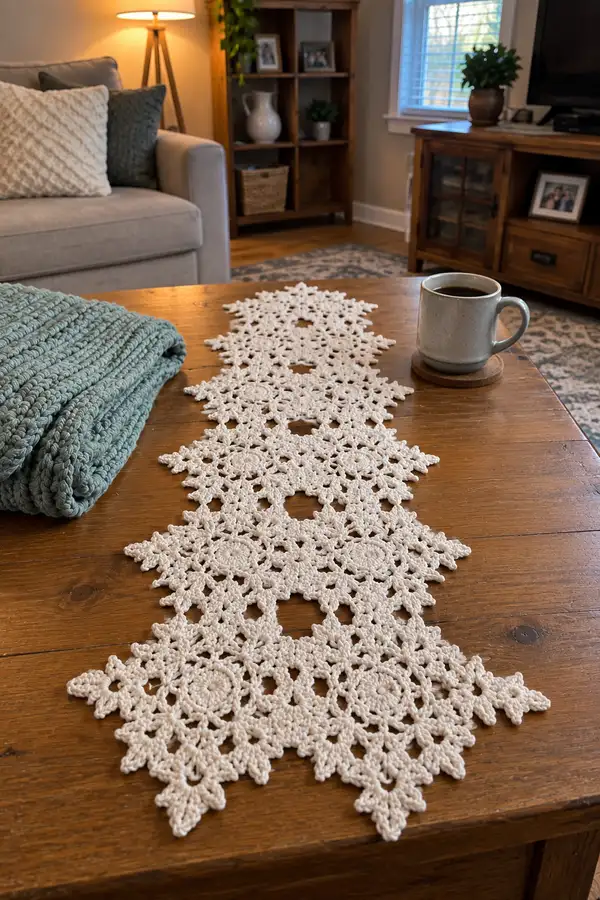
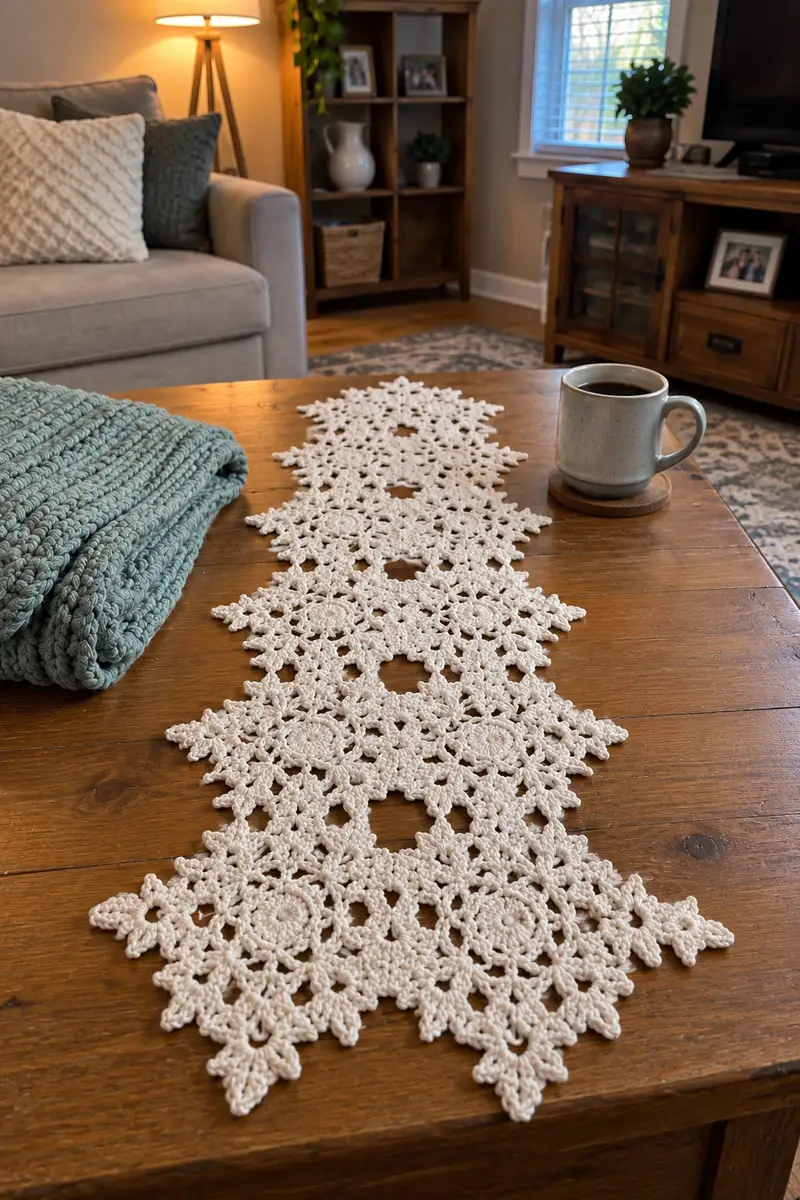
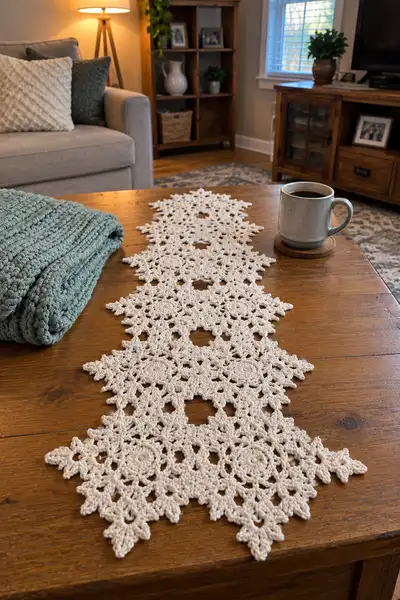
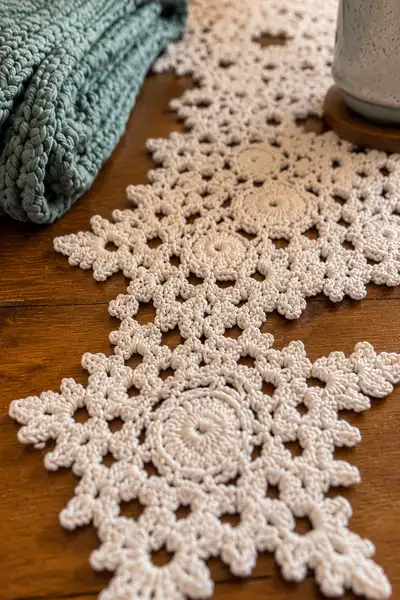
Create an elegant snowy white table runner made from delicate crochet snowflake motifs joined into a long runner. This pattern uses crisp cotton yarn and lacy stitchwork to form star-like snowflakes with pointed edges and openwork centers. The finished runner lays beautifully on a wooden table as shown, lending a handmade festive touch to holiday decor. Detailed motif, connector and edging instructions guide you step-by-step through assembly and finishing.
Progress Tracker
0% Complete
— Snowflake Motif (make 7 large medallions) :
Round 1 :
MR, ch1, 12 sc in magic ring, sl st to first sc to join (12)
Round 2 :
Ch1, inc in each st around (12 inc) (24)
Round 3 :
Ch1, (1 sc, inc) x 12 (36)
Round 4 :
Ch1, (2 sc, inc) x 12 (48)
Round 5 :
Ch1, (3 sc, inc) x 12 (60)
Info :
Maintain consistent tension through these increase rounds. Place a stitch marker at the first stitch of each round if helpful. These rounds create the solid center that the later snowflake points radiate from.
Round 6 :
Ch1, 1 sc in each st around (60)
Round 7 :
Ch1, *sc in next st, ch5, skip next 4 sts* x 12, sl st to first sc to join (60 base sts used, creates 12 ch-5 loops)
Info :
Each repeat uses a block of 5 base stitches (1 sc anchor and 4 skipped) so the 60-st base matches 12 loops. Count loops as you go to be sure you have 12.
Round 8 :
Work into each ch-5 loop: sl st into loop, ch1, (sc, hdc, 3 dc, hdc, sc) in same loop, sl st to base sc to finish petal - repeat for each of the 12 loops (petal clusters attached to 12 loops)
Round 9 :
Ch2 (counts as hdc), *hdc in top of petal 3rd dc, ch3, sl st into the base sc between petals* x 12, sl st to top of starting ch2 to join (creates small arches between petals)
Info :
Work the 3-dc center of each petal firmly so the petals project slightly. Keep petals uniform by maintaining same tension when working into chain loops.
Round 10 :
Ch1, sc in each hdc around the previous round and into the top of each petal (count visually as 12 petal tops plus join points). Maintain 12 repeat anchors rather than counting total sts—this round stabilizes petals.
Round 11 :
Ch4 (counts as tr), *skip to next petal top, (2 tr, ch2, 2 tr) in petal top to create a shell point, ch4, sl st into base join between petals* x 12, sl st to starting ch4 to join (12 star points)
Info :
This round creates the first outward-pointing star points. Keep shells even by placing the middle ch2 directly over the petal center for symmetry. If you prefer a smaller point, use ch3 spacing instead of ch4 in future repeats.
Round 12 :
Ch1, sc in each tr around each star shell and in each sl st join point, working 1 sc in each tr and 1 sc in each ch-4 arc to stabilize (work evenly across shells)
Round 13 :
Ch3 (counts as dc), *in the center ch-4 arc: (3 dc, ch3, 3 dc) to form a picot-tipped cluster, sl st to next shell base* x 12, sl st to top of starting ch3 to join (12 larger clusters)
Info :
These larger clusters are the basis of the elongated snowflake points. When working 3 dc groups, stitch firmly so the point holds its shape during blocking.
Round 14 :
Ch1, sc in each dc and through the ch3 picot of each cluster and into shell join points to bind clusters to the motif. Work evenly around so each cluster is secured (count 12 clusters)
Round 15 :
Ch5 (counts as tr+ch2), *in space over cluster top: (2 tr, ch3, 2 tr) - form elongated tip, ch5, sl st into the next cluster base* x 12, sl st to join (12 pronounced snow points)
Info :
These are your snowflake tips—if you like a more delicate look, use ch3 instead of ch5 for the spacing chains. Keep loops consistent across all repeats so points line up when joining motifs.
Round 16 :
Ch1, sc evenly across the tops of the elongated tips: 1 sc in each tr, 1 sc in ch spaces, and 1 sc in the sl st joins. This creates a continuous edging across the points and prepares the motif for outer picots.
Round 17 :
Ch3, *sc in next top stitch, ch4, pic (ch3 sl st into first ch) at peak of each point, sc in next stitch to anchor* x 12, sl st to join. This adds decorative picots at each outer point.
Info :
Make sure each picot is centered on the point for an even snowflake outline. If your yarn splits during picots, reduce to ch2 picot for durability with thicker cotton.
Round 18 :
Ch1, 1 sc in each stitch around, inserting extra sc in picot bases to keep the motif flat. Working sc around finishes the motif and tidies the points (counts held as 12 repeat points)
Round 19 :
Ch6, sl st into the space between two outer points to create secondary chain connectors: *ch6, sl st in next inter-point space* x 12 to create 12 chain arches around outer edge (these will be used for join-as-you-go)
Info :
These ch6 arches are the anchor points for join-as-you-go connections. For a tighter join use ch4; for looser lacy joins use ch8. Keep consistent across all motifs so connectors line up.
Round 20 :
Ch1, into each ch6 arch work: (sl st, ch3, sc) to form small loops; sl st to the top of the stitch that anchors the arch to finish the round. This creates small loops on outer edges for easy joining (12 loops)
Round 21 :
Ch1, sc evenly around, working 2 sc in the base of any slightly loose arches to keep the motif flat. Secure finish with sl st and fasten off leaving 20-24 inch tail for join-as-you-go (motif complete)
Info :
Weave tail through a tapestry needle, but do not weave in yet if you will use it for join-as-you-go. Make all large motifs identical for consistent joins. Block each motif lightly before assembly for best results.
— Mini Connector Motif (make 6-8 small motifs) :
Round 1 :
MR, ch1, 8 sc in magic ring, sl st to join (8)
Round 2 :
Ch1, inc in each st around (8 inc) (16)
Round 3 :
Ch1, (1 sc, inc) x 8 (24)
Round 4 :
Ch1, 1 sc in each st around (24)
Round 5 :
Ch3, *skip 2, sc in next st, ch3* around to create 6 small arches, sl st to join
Info :
These mini motifs are used to tuck between large snowflakes and stabilize the runner. Keep tension slightly tighter on these so they don't sag in joins.
Round 6 :
Into each ch3 arch work (sc, pic, sc) - pic = ch3 sl st to base - sl st to join (6 little points)
Round 7 :
Ch1, 1 sc around entire mini motif to tidy edges, sl st to join, fasten off leaving 12-16 inch tail for joining
Info :
Make enough mini connectors to fit between each pair of large motifs in your layout. The connectors will be joined at specific outer arches (motif round 19 loops) when assembling.
— Motif 1 (large) :
Round 1 :
MR, ch1, 12 sc in magic ring, sl st to join (12)
Round 2 :
Ch1, inc in each st around (24)
Round 3 :
Ch1, (1 sc, inc) x 12 (36)
Round 4 :
Ch1, (2 sc, inc) x 12 (48)
Round 5 :
Ch1, (3 sc, inc) x 12 (60)
Round 6 :
Ch1, 1 sc in each st around (60)
Round 7 :
Ch1, *sc in next st, ch5, skip next 4 sts* x 12, sl st to join
Round 8 :
Work into each ch-5 loop: sl st into loop, ch1, (sc, hdc, 3 dc, hdc, sc), sl st to base sc - repeat (petals created)
Round 9 :
Ch2, *hdc in petal center, ch3, sl st into base sc between petals* x 12, sl st to join
Round 10 :
Ch1, sc across petals and joins to stabilize (work evenly)
Round 11 :
Ch4, *(2 tr, ch2, 2 tr) into petal centers, ch4, sl st into next base join* x 12, sl st to join
Round 12 :
Ch1 sc in each tr and join stitch to tidy shells
Round 13 :
Ch3, *(3 dc, ch3, 3 dc) over the ch4 arcs to form larger clusters* x 12, sl st to join
Round 14 :
Ch1 sc around clusters and shell joins to secure motif
Round 15 :
Ch5, *(2 tr, ch3, 2 tr) in cluster tops to elongate points, ch5, sl st into next cluster base* x 12, sl st to join
Round 16 :
Ch1 sc evenly across elongated points to create smooth outer row
Round 17 :
Ch3, sc in the tops of points with ch4 picots at each outer tip to add finials
Round 18 :
Ch1 1 sc in each stitch around, adjusting to keep motif flat, sl st to join
Round 19 :
Ch6, sl st into the inter-point space to create 12 ch6 arches for joining
Round 20 :
Ch1, into each ch6 arch work: sl st, ch3, sc; sl st to base to form loops for join-as-you-go
Round 21 :
Ch1, sc around tidying any joins from previous round, sl st to join, fasten off leaving long tail for joining
Info :
If making multiple motifs, create a template by marking one of the ch6 arches as your 'join arch' reference so all motifs are oriented the same when assembling the runner.
— Motif 2 (large) :
Round 1 :
MR, ch1, 12 sc in magic ring, sl st to join (12)
Round 2 :
Ch1, inc in each st around (24)
Round 3 :
Ch1, (1 sc, inc) x 12 (36)
Round 4 :
Ch1, (2 sc, inc) x 12 (48)
Round 5 :
Ch1, (3 sc, inc) x 12 (60)
Round 6 :
Ch1, 1 sc in each st around (60)
Round 7 :
Ch1, *sc in next st, ch5, skip next 4 sts* x 12, sl st to join
Round 8 :
Into each ch-5 loop: sl st, ch1, (sc, hdc, 3 dc, hdc, sc), sl st to base - repeat x 12
Round 9 :
Ch2, *hdc in petal center, ch3, sl st to base* x 12, sl st to join
Round 10 :
Ch1, sc across petals and joins to stabilize
Round 11 :
Ch4, *(2 tr, ch2, 2 tr) in petal centers, ch4, sl st into next base join* x 12, sl st to join
Round 12 :
Ch1, sc in each tr and join stitch to tidy shells
Round 13 :
Ch3, *(3 dc, ch3, 3 dc) over ch4 arcs* x 12, sl st to join
Round 14 :
Ch1, sc around clusters and shell joins
Round 15 :
Ch5, *(2 tr, ch3, 2 tr) in cluster tops, ch5, sl st into next base* x 12, sl st to join
Round 16 :
Ch1 sc across elongated points
Round 17 :
Ch3, sc in tops with ch4 picots for outer tips
Round 18 :
Ch1, 1 sc around, sl st to join
Round 19 :
Ch6 arches: ch6, sl st into inter-point space x 12
Round 20 :
Ch1, into each ch6 arch: sl st, ch3, sc; sl st to base to make joining loops
Round 21 :
Ch1, sc around to tidy, fasten off leaving tail for joining
Info :
Make Motif 2 identical to Motif 1. Consistency is critical for a straight runner—use the same tension and hook for each motif.
— Repeat Motifs 3 through 7 :
Note :
Make five more large motifs identical to Motif 1 and Motif 2 (Motifs 3, 4, 5, 6, 7). Each motif follows Rounds 1-21 as listed above. Ensure all motifs have long tails left after Round 21 for join-as-you-go.
Info :
Total large motifs: 7 (this creates a runner with seven snowflake medallions in a straight line; adjust motif count to lengthen or shorten runner).
— Join-As-You-Go Assembly (joining large motifs and small connectors) :
Step 1 :
Lay out your motifs in desired order on a flat blocking board: large motif, connector, large motif, connector, repeating until you have a straight line of motifs. Orient each motif so its ch6 joining arch (motif round 19) faces the side where it will join the next piece.
Step 2 :
With the long tail left from Round 21 of Motif 1, insert hook from front to back through the first ch3 loop of Motif 2's corresponding ch6 arch and perform sl st to attach at the mid point; continue slip stitching through the loops of both motifs to join along the arch points: *sl st in join loop of Motif A, sl st in corresponding loop of Motif B*, repeat across 6 anchor loops to create a stable seam. Fasten off and weave tail.
Info :
When joining, use a slip stitch or single crochet join depending on desired look: slip stitch creates a flatter invisible join; single crochet join gives a visible ridge. Keep tension even and use pins to hold motifs in perfect alignment as you join.
Step 3 :
Insert a mini connector motif between two adjacent large motifs where the pattern calls for a tiny hexagonal spacer: align the mini connector's outer sc round to the ch6 loops of both large motifs and work sl st through both pieces to secure. Use the 12-16 inch tail from the mini motif to complete the join.
Step 4 :
Continue joining motifs down the length of the runner: join Motif1 to Mini1, Mini1 to Motif2, Motif2 to Mini2, etc. If you prefer fewer visible joins, you may join large motifs directly at alternate ch6 arches without using mini connectors.
Step 5 :
For additional stability, after all motifs are slip-stitched together, go back with matching yarn and a tapestry needle and sew discreet whip stitches through the backs of adjacent motif bases (where the motifs meet at round 6 or 7) to strengthen the join without adding bulk to the front.
Info :
If you plan to launder the runner frequently, reinforce join points with small stitches on the back. Use a shuttle of matching yarn to avoid color differences showing through delicate lacework.
— Edging and Final Finish :
Round 1 (Edging) :
With runner assembled and laying flat, attach yarn at one end outermost point. Ch1, sc around the entire outer perimeter of the assembled runner, placing 3 sc at each outer tip point to form a sturdy corner, and 1 sc in edge spaces between join arches. Continue around entire runner to form a uniform base for scallops.
Round 2 (Edging) :
Ch3, *sk 1 sc, (5 dc in next sc) forming a shell, sk 1 sc, sl st into next sc* repeat along the long sides until you reach an outer tip: at tips work (3 dc, ch3, 3 dc) to preserve point shape. Fasten off and weave in ends.
Info :
The edging ties motifs together visually and gives the runner a finished scalloped outline. If you prefer a more subtle finish, use (3 dc shell) everywhere rather than larger tip shells.
Round 3 (Optional Decorative Picot Row) :
Attach yarn to each outer picot and work a round of picots (ch3, sl st to same st) separated by 2 sc to add delicate snow-like finials on each tip. Fasten off and weave tails.
Info :
For a firmer edge, work a round of sc in BLO before shells; this lifts the scallop and helps it hold shape after blocking.
Blocking :
Wet-block or steam-block the entire runner: pin each outer point over a blocking mat, stretching gently to open lace and align points. Use rustproof pins and shape each scallop equally. Allow to dry completely before removing pins (overnight recommended).
Info :
Block all motifs individually before joining for best results, or block the assembled runner for a final even silhouette. For crisp points, use a light spray starch or fabric stiffener if desired; test on a small swatch first.
Care Instructions :
Handwash in cool water with mild detergent and lay flat to dry. Machine washing may cause distortion over time; if you must machine wash, place in a mesh laundry bag on gentle cycle and reshape immediately while damp.
This snowy white table runner transforms simple cotton yarn into a lacy, elegant centerpiece full of seasonal charm. Each snowflake medallion builds on the last to create a rhythmic, handmade cascade that looks stunning on wood or under a tray. The join-as-you-go method keeps seams neat and the scalloped edging finishes the runner beautifully. Pick up your hook, enjoy the meditative rhythm of repeating motifs, and create something you'll use and admire for many winters to come. ❄️🧶