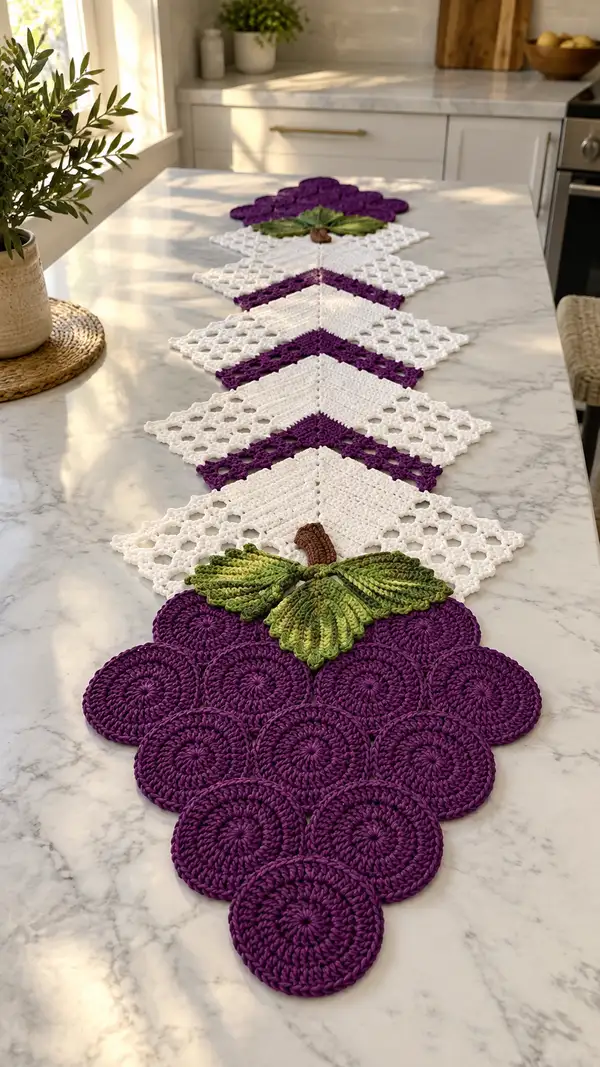
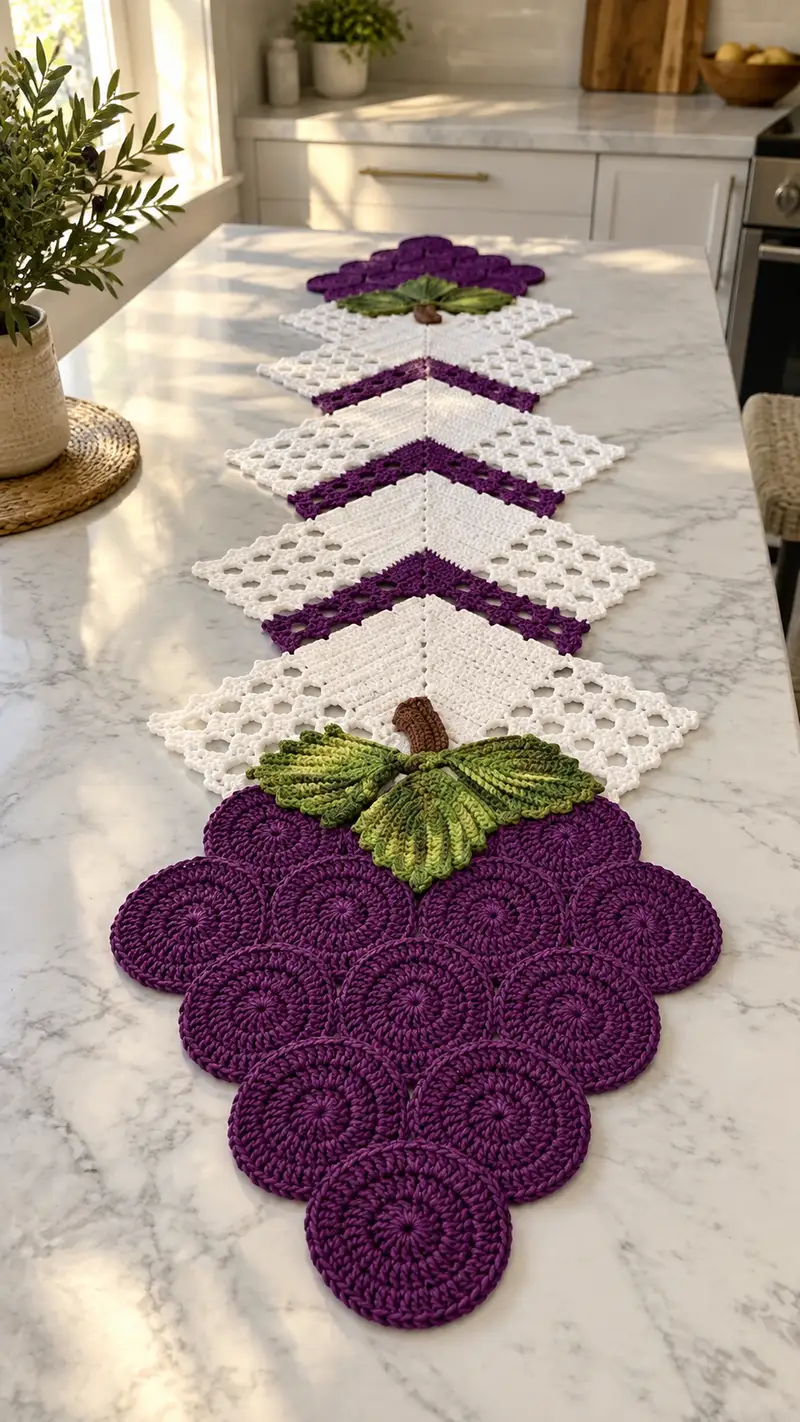
Bring a touch of vineyard charm to your dining table with this handcrafted Grape & Lattice Table Runner. The design features layered purple grape discs, textured green leaves, a small brown stem, and alternating white lattice diamond panels for a light, airy contrast. Worked in worsted weight cotton with a crisp, clean edge, this runner lays flat and makes a striking centerpiece. Detailed joining and edging instructions ensure a neat finish and long-lasting structure.
Progress Tracker
0% Complete
— Notes & Gauge :
Info :
This runner is modular: you will crochet grape discs, leaves, a small stem, and lattice diamonds then join them in the layout shown in the photo. Gauge is not critical for flat table runner projects but is important for matching motif sizes. Using worsted cotton and a 4.0mm hook, one grape disc (finished) should measure approximately 3.25"/8.5cm across before blocking. Adjust hook if needed.
Info :
Throughout the pattern, maintain consistent tension. We use US terms. Join motifs with slip stitch or whip stitch as directed. Block pieces gently to flatten before final joining. Keep stitch counts consistent; all round counts below are mathematically checked.
— Grape Disc - Make 11 (label discs G1 through G11) :
G1 - Round 1 :
6 sc in magic ring (6)
G1 - Round 3 :
(1 sc, 1 inc) x 6 (18)
G1 - Round 4 :
(2 sc, 1 inc) x 6 (24)
G1 - Round 5 :
(3 sc, 1 inc) x 6 (30)
G1 - Round 6 :
(4 sc, 1 inc) x 6 (36)
G1 - Round 7 :
1 sc in each st (36)
G1 - Round 8 :
1 hdc in each st (36)
G1 - Round 9 :
Join with sl st, ch1, work 1 round of reverse single crochet (crab stitch) around to create a defined edge (36)
Info :
Fasten off leaving long tail for joining. Make 11 identical grape discs (G1-G11). Use deep purple. Block lightly to flatten discs before joining. If discs cup, add one extra round of sc evenly (increase 6 across) to flatten the center.
G2 - Round 1 :
6 sc in magic ring (6)
G2 - Round 3 :
(1 sc, 1 inc) x 6 (18)
G2 - Round 4 :
(2 sc, 1 inc) x 6 (24)
G2 - Round 5 :
(3 sc, 1 inc) x 6 (30)
G2 - Round 6 :
(4 sc, 1 inc) x 6 (36)
G2 - Round 7 :
1 sc in each st (36)
G2 - Round 8 :
1 hdc in each st (36)
G2 - Round 9 :
Work reverse single crochet around edge (36)
Info :
Repeat the exact same 9-round sequence for G3 through G11. Make sure each disc measures consistently; if one disc measures slightly smaller, block it with damp cloth and pin to correct size.
— Grape Cluster Assembly at Each End :
Info :
The cluster at each runner end is assembled by overlapping discs in a triangular cluster: bottom row 3 discs, middle rows 4, then 3, then 1 toward the top depending on pictured shape. The photo shows 11 discs arranged in a tapered triangular / grape cluster shape. Lay discs flat and arrange before sewing.
Assembly Step 1 :
Place discs right side up. Overlap discs approximately 12-15% of their diameter so edges nest. Use yarn tail and whip stitch or mattress stitch to join overlapped edges, sewing through the final reverse single crochet edge for a flatter join.
Assembly Step 2 :
Sew discs row by row. For the lower rounded edge, join three discs in an arc (G1-G3), then join the next row of four discs along the top edges of the bottom row with symmetric spacing, then join three, then one at the top to match photo. Leave topmost center area free for leaf and stem attachment.
Info :
Use pins to secure disc positions before sewing and make small, even stitches to avoid visible seams on the purple surface. Weave tails through several stitches to secure.
— Leaf (Make 2 for each cluster; total 4 leaves) :
Leaf - Round 1 :
Ch 12, sc in 2nd ch from hook, sc across (11), ch1, rotate to work on opposite side of foundation chain: sc 10, sl st to first sc to form a flat loop (21)
Leaf - Round 2 :
Ch1, 2 sc in first st, sc next 9, (hdc in next), (dc in next 2), (tr in next 3), (dc in next 2), (hdc), sc next 9, 2 sc in last st, sl st to join (27)
Leaf - Round 3 :
Ch1, sc in first 2 sts, (hdc in next), (dc in next 4), FPdc around previous row treble groups to create raised ribs: FPdc in next 5, BPdc in following 5, FPdc in final 5, sc in final 2, sl st join (27)
Leaf - Round 4 :
Ch1, sc in each st BLO to create a defined ridge around the leaf (27)
Leaf - Round 5 :
Ch1, work a decorative scallop: *skip 1, 5 dc in next st, skip1, sl st* across for 4 scallops per side; mirror on other side; sl st to join (approx 24 decorative points)
Info :
Work leaf in variegated green or alternate light and medium green to produce a realistic tonal effect. Use FPdc and BPdc to create pronounced central ribs. Block each leaf gently and apply very light starch if you want firm shaped leaves.
Leaf - Round 6 :
Emphasize veins: Using darker green held with needle, embroider three to five veins from base to tip with backstitch, blending with yarn ends and securing inside leaf center (no additional rounds)
Info :
Make 2 identical leaves for each cluster (4 leaves total). Sew two leaves to the top center of the grape cluster overlapping slightly so veins appear natural. Leaves should face outward and slightly overhang the top disc row.
— Stem :
Stem - Round 1 :
Ch6, sc in 2nd ch from hook across (5)
Stem - Round 2 :
Ch1, turn, sc in each st back across (5)
Stem - Round 3 :
Fold piece in half lengthwise and sc through both layers along the long edge to create a tube: sc 5 (5)
Stem - Round 4 :
Ch1, work 1 sc around top to close, fasten off leaving tail for sewing
Info :
Use brown and lightly stuff stem with a tiny bit of fiberfill for a small rounded look. Sew stem to the top center of the grape cluster between the two leaves. Secure with a few extra stitches and weave in end.
— Diamond Lattice Panel - Make 6 (alternate between grape ends) :
Panel - Round 1 :
Ch4, sl st to form ring, ch3 (counts as dc), work 11 dc into ring, sl st to top of ch3 (12)
Panel - Round 2 :
Ch3, dc in same st, 2 dc in each st around (24)
Panel - Round 3 :
Ch3, *dc in next 2, inc (2 dc in next)* rep around (32)
Panel - Round 4 :
Ch3, 1 dc in next 3, inc, rep (40)
Info :
These rounds create a solid center to anchor lattice sections. Work tightly so panels keep shape. Switch to white cotton for an airy look.
Panel - Round 5 :
Switch to white. Ch1, sc in each st around (40)
Panel - Round 6 :
Ch3, *skip 2, (3 dc) in next st, skip2, sl st in next st* repeat to create open lacy arches; adjust repeats so panel forms a diamond-shaped square when blocked (work systematic spacing and counts to total 10 motif groups)
Panel - Round 7 :
Ch1, sl st into each arch space, then ch5, sl st into next arch, repeat to form mesh rows until diamond dimension equals approximate 8" tip-to-tip.
Info :
Make 6 lattice diamonds total. Each diamond is made slightly larger than a grape disc so edges align when alternating. Blocking is important to get clean diamond shapes — pin to dimensions before final joining.
— Joining Diamond Panels with Purple Accent Rows :
Info :
The runner alternates diamond panels and narrow purple chevrons that echo the grape color. After making each diamond, add a narrow chevron join strip worked in purple that nests into the diamond points.
Chevron - Round 1 :
With purple, ch 30, turn
Chevron - Round 2 :
Row 1 (foundation): sc in 2nd ch from hook and across (29)
Chevron - Round 3 :
Row 2: ch3 (counts as dc), *dc2tog over next 2, (dc) in next 3, (inc) in next, (dc) in next 3, dc2tog over next 2*, repeat until you reach end; shape will create a subtle 'V' — adjust repeats to center chevron
Info :
Make 5 chevrons to go between diamonds as shown. Each chevron attaches to diamond points with slip stitches along the tapered edges; do a trial layout to verify spacing and adjust chain length or stitch counts for perfect symmetry.
— Detailed Step-by-Step Diamond Panel Large Lattice (Alternate Construction) :
Large Lattice - Round 1 :
Ch5, join to form ring, ch3 (counts as dc), 11 dc in ring, sl st to top of ch3 (12)
Large Lattice - Round 2 :
Ch3, dc in same, (inc) in each st around (24)
Large Lattice - Round 3 :
Ch3, dc across following increase pattern placing 1 dc in next, inc, repeat to total 36
Large Lattice - Round 4 :
Switch to white. Ch1, sc in each st around (36)
Large Lattice - Round 5 :
Ch4, skip 2, sc in next, *ch4, skip2, sc in next* repeat to create long chain loops; end with sl st
Large Lattice - Round 6 :
Working into chain loops, sl st into center of loop, ch3, dc3, ch3, sl st to same loop to create lacy diamonds across the panel; repeat to form a grid effect
Info :
Block to diamond shape. Trim any long tails. Make 6 panels total; alternate with chevron rows and the grape cluster ends to form the full runner layout.
— Edge Border & Joining (Final Runner Construction) :
Info :
Layout order from one end to other: grape cluster end, diamond panel, purple chevron strip, diamond panel, purple chevron, diamond panel, purple chevron, diamond panel, grape cluster end. Pin pieces to table or blocking surface in final layout before joining.
Joining - Method 1 (Slip Stitch Join) :
With right sides facing and purple yarn (or white as desired), align edges and work slip stitch joins through both edges: sl st through last reverse single crochet round of grape disc to corresponding diamond/chveon edge, spacing evenly. For lattice sides, join at chain points so mesh sits flat.
Joining - Method 2 (Whip Stitch Invisible) :
Use tapestry needle and matching yarn color; align motif edges and ladder stitch under loops for almost invisible seam. Weave tail back through seam to secure. Use this method for grape discs to maintain smooth purple surface.
Edge Round 1 :
Once all motifs are joined, with white yarn ch1, sc evenly around entire runner working 1 sc in each exposed stitch including through junctions; for scalloped regions around grape clusters, work *(skip 1, 5 dc in next st, skip1, sl st)* to create decorative scallops along curved edge
Edge Round 2 :
Ch1, sc in each st BLO to create a subtle ridge and finished look; for a firmer edge work 1 round of hdc instead of sc if preferred
Info :
Work edging with a slightly smaller hook (3.5mm) to ensure a snug border that keeps the runner lying flat. If the runner ripples, add a blocking round of single crochet with a larger hook to smooth. Weave in all ends and block the entire runner to final dimensions.
— Alternative Flattening & Adjustments :
Info :
If grape discs tend to cup, reduce hook size for later discs or add an extra outer round of sc to add weight. If lattice diamonds want to lose diamond shape, re-block and add a restraining edge stitch to each point before joining.
— Care Instructions :
Info :
Recommend hand wash in cool water with mild detergent. Reshape and lay flat to dry. Avoid tumble drying to preserve shape and cotton integrity. Light starch can be applied to leaves if desired for crispness.
— Troubleshooting & Notes :
Info :
If two discs differ in size, steam-block the smaller one carefully or add a thin round of slip stitch to the smaller disc to match diameters. Always measure disc diameters during production before proceeding to assembly to ensure consistent fit when joining.
Info :
When joining openwork diamond panels, align chain spaces carefully; count chain spaces at each edge before joining to avoid skewed diamonds. Use pins liberally during assembly.
Info :
For a runner of different length, add or remove diamond panels and chevrons in matching pairs to keep symmetry; add grape clusters only at each end for balance.
This grape and lattice table runner is a beautiful labor of love that adds instant charm to any table setting. Each grape disc and leaf comes together to form a lively centerpiece that is both decorative and practical. The modular construction makes it satisfying to work on and easy to customize with your favorite colors. Display it for special dinners or everyday elegance — it will become a treasured piece with every stitch. 🧶🍇