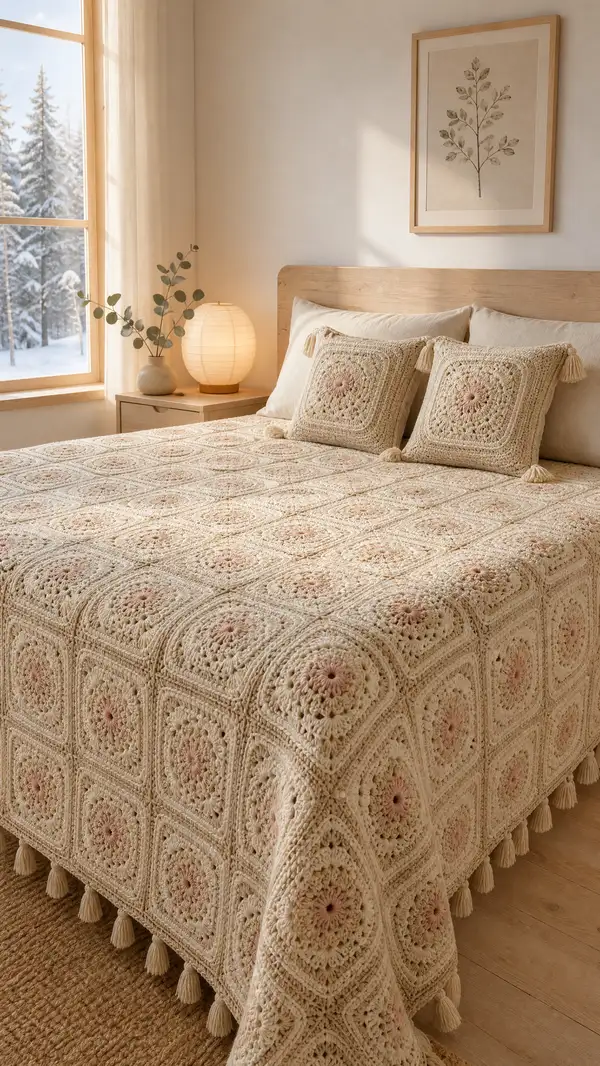
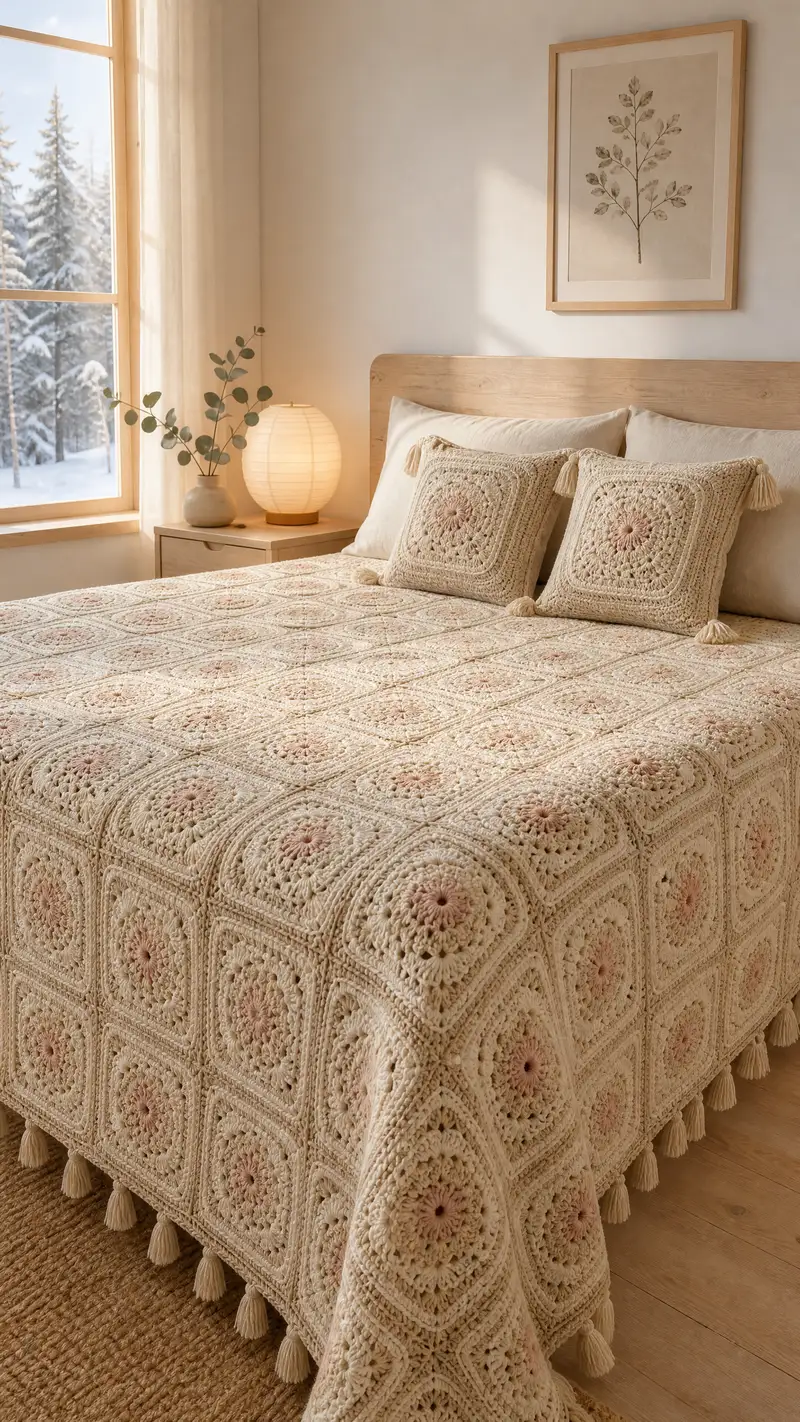
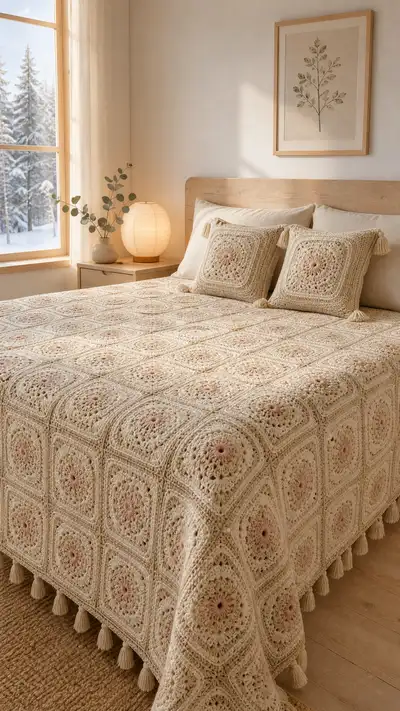
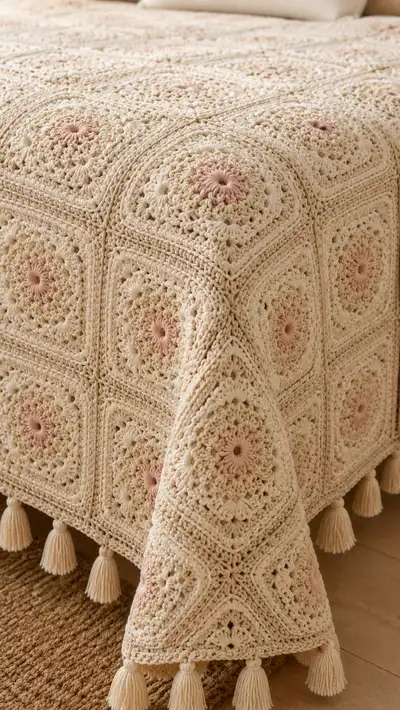
A warm, textured bedspread worked from crocheted granny squares in soft cream and subtle blush centers. This pattern features a raised floral center, layered textured rounds, a neat join-as-you-go seam, and a multi-row border with tassel fringe. Suitable for creating a cozy, neutral statement piece for bedroom decor—each square shows deep stitch definition and a soft vintage-inspired palette.
Progress Tracker
0% Complete
— Square Motif :
Round 1 :
Make a magic ring. Ch3 (counts as dc), 11 dc into ring. Join with sl st to top of ch3. (12 dc)
Round 2 :
Ch1, *fpdc around next st, ch1; rep from * to end, join with sl st to first st. This creates a textured band of front-posts and ch spaces to start building height. (12 fpdc, 12 ch1 spaces)
Round 3 :
Change to Accent Color A (pale blush) using Info technique below. Ch1, in each ch1 space work: (yo, insert, pull up loop x4, yo, pull through all loops) - a 5-loop puff worked into every ch1 space. Ch1 between puffs where shown. Join with sl st. (12 puff clusters)
Info :
Change to pale blush yarn by finishing the last pull-through of the previous stitch with the new color. Carry tails inside and weave later. Puffs are worked as 5-loop puffs for a tall petal-like center.
Round 4 :
Ch3 (counts as dc), 2 dc in same st, *ch1, skip next puff cluster base, 3 dc into next puff base; rep from * around so you make groups of 3 dc that radiate from the center. Join with sl st to top of ch3. (12 groups of 3 dc; total 36 dc)
Round 5 :
Ch3, dc in next 2 sts (fill first 3-dc group), *ch2, (3 dc, ch2, 3 dc) in next ch1 space to begin corners; rep from * across working four corner clusters spaced evenly to begin squaring the motif. Work 3-dc clusters into each 3-dc group. Join to top of ch3. (This round transitions the round motif toward a square shape. Total dc approx 48-52 depending on how you space corners)
Info :
When making the first corner, treat it as (3 dc, ch2, 3 dc). Place the first corner so that the square will have four distinct corners at approximately the 12, 3, 6 and 9 o'clock positions.
Round 6 :
Ch3, 2 dc in same st, *dc in next 3 dc, (3 dc, ch2, 3 dc) in corner ch2 space; rep from * around. Join with sl st. (Corners: 4 corner clusters; side clusters will be groups of dc that increase stitch count evenly)
Round 7 :
Ch3, dc in next 5 sts, (3 dc, ch2, 3 dc) in next ch2 corner, rep around. Join. (This round expands side length; count per side depends on number of 3-dc groups; expect ~72-84 dc total)
Info :
Check your work on a flat surface: the motif should begin to form a clear square. If rounding occurs, add an extra ch2 into each corner on the following round to help square it up.
Round 8 :
Ch3, 2 dc in next 2 sts, *dc in next 6 sts, (3 dc, ch2, 3 dc) in corner; rep around. Join. (Side stitch counts stabilized; estimate around 84-96 dc)
Round 9 :
Ch1, sc evenly in each st across a side in BLO to create a defined square edge line. Work (sc, ch2, sc) in each corner ch2 space. Join. (This round gives a firm, squared band for later texture)
Round 10 :
Info: Change to Main Color (cream/oatmeal). Carry blush inside or fasten off and rejoin main color here. Ch3, dc in BLO across each st to create a raised ridge on the face of the square; in corners work (dc, ch2, dc). Join. (Keeps square dimension stable)
Round 11 :
Ch1, sc in each st BLO for one round (this creates a defined frame). Work (sc, ch2, sc) in corners. Join. (Use this as a 'frame' since later join rounds will align here)
Round 12 :
Ch3, *dc in next st, puff into next st (3-loop puff), dc in next st; rep across each side; in corners work (dc, ch2, dc) then continue. Join. (Adds texture band outside the framed edge)
Info :
If you prefer a flatter motif, substitute hdc or sc for puff stitches in Round 12. Keep counts matched so the squares remain consistent.
Round 13 :
Ch1, sc evenly across each stitch in BLO to define the outside edge. (This is a stabilizing round; counts remain even from previous round)
Round 14 :
Ch3, dc around working 2 dc in each corner ch2 space, and dc in each st along sides. Aim to add 1 or 2 dc per side evenly without changing the number of corners. Join. (This gives extra depth for the joining rounds.)
Round 15 :
Ch1, work 1 sc in each st for a clean edge, and (sc, ch2, sc) in corners. Finish this motif by doing two final rounds of sc all around to square up and bring the motif to exact final dimension. Join and fasten off, leaving a 20-30cm tail for blocking/weaving. (Final stitch count per side should be consistent across all motifs.)
Info :
Block each completed motif to exact dimensions before joining—pin the square to size measured by gauge. Blocking will open textured stitches and ensure even joining later.
— Alternate Raised Motif (variation) :
Round 1 :
MR, ch4 (counts as tr), 11 tr in ring; join. (12 tr)
Round 2 :
Ch1, *3 ch, skip 1 tr, 3 tr cluster in next tr base; rep making 12 clusters with ch spaces between. Join. (Creates a looser, lacy center)
Round 3 :
Ch3, (tr) twice into each cluster, add (tr, ch3, tr) at corner points to start the square form. Join. (This variation yields a taller, open center and slightly different counts than main motif)
Info :
Use this version to mix visual interest across the bedspread by alternating motifs in a checkerboard layout. Keep gauge and blocking consistent so variations match in size.
— Motif Finishing Details & Size Guidance :
Info :
Each finished blocked motif should measure approximately 22-24cm (8.5-9.5 in) square with worsted weight yarn and 5.0mm hook. Make a swatch motif and block to confirm measurement before making full quantity. Adjust hook size +/- 0.5mm to get correct dimension.
— Quantity & Layout :
Info :
For a double bedspread sized approximately 220cm x 240cm (86 x 94 in), arrange motifs in a grid of 10 motifs across by 11 motifs down (110 motifs). Smaller or larger beds will require fewer or more motifs—plan layout on floor before joining.
— Join-As-You-Go (JAYG) Method :
Round 1 :
Work the motif through Round 11 and stop where the 'frame' round is complete (the round of sc in BLO). Keep the last round unfastened to allow joining as you work the next motif.
Round 2 :
When you are ready to join a new motif to an existing block, align the new square's right-side to the left-side of an already-placed square. Working the final round: ch1, sc in first st, *sc in next st across until you reach a corner; at each side stitch that meets an existing square's corresponding stitch, insert hook into both loops of new motif and the corresponding stitch of the placed motif and sc through both (join). Continue across side and finish corner as (sc, ch2, sc). Join and fasten off for that edge. Repeat other sides as you add more squares.
Info :
Work the join so that seams sit neatly on the RS; join with single crochet to create a visible but sturdy ridge. For an invisible join, use mattress stitch or whipstitch with yarn needle after all squares are blocked and positioned.
Round 3 :
When joining on two adjacent sides (L-shape join), work one side first, then rotate and join the second side ensuring corners align and that corner ch2 spaces of both motifs meet snugly. If exact stitch counts differ slightly, ease with a small adjustment in tension during the final rounds.
Info :
Pin joined motifs on a flat surface while you continue JAYG to ensure rows remain straight. Work slowly at corners to keep grid alignment crisp. Use locking stitch markers at corner ch2 points if needed.
— Edge Join Round (after entire blanket assembled) :
Round 1 :
Once all motifs are joined in the planned grid, work 1 round of sc all around the entire assembled bedspread to even out seam ridges and create a uniform starting line for the outer border. Where seams lie, work sc into seam holes to create a continuous edge. (This helps tidy any minor misalignment)
Info :
Walk the edge of the blanket with your palm as you crochet to feel for lumps and adjust stitch placement slightly to accommodate seams or mismatched corner alignment.
— Main Border (deep textured border) :
Round 1 :
Join main yarn to any corner. Ch3 (counts as dc), (2 dc, ch2, 3 dc) in corner ch2 space; *dc in each st along side for the measured count of that side (work 1 dc in each st and 1 dc into each seam hole where motifs are joined), when you reach next corner work (3 dc, ch2, 3 dc); rep around. Join. (Corner clusters keep square corners deep)
Round 2 :
Ch1, sc in each st across sides; in corner ch2 spaces work (sc, ch2, sc). Join. (Creates a tidy frame for more texture)
Round 3 :
Info: For added depth do 2 rounds. Ch3, dc in each st for two rounds adding 1 dc extra at each corner to keep corners flat. Join. (This increases border depth and ensures tassels have a strong anchor)
Round 4 :
Ch1, *fpdc around next st, bpdc around next st; rep across for a ribbed textured band. In corner ch2 spaces, work (fpdc, ch2, bpdc). Join. (This alternating post band gives a carved, frame-like look)
Round 5 :
Ch3, *2 dc in next st, skip next st, dc in next st; rep across each side and work (3 dc, ch2, 3 dc) in corners. Join. (Creates a decorative scalloped-ish band when blocked)
Round 6 :
Ch1, sc evenly in each st for one round to flatten and tidy the band. Join. (This is a finishing frame; counts should remain steady from previous round)
Round 7 :
Ch4 (counts as tr), tr in next 2 sts, ch1, skip 1, *(3 tr cluster, ch1, skip 1) across each side; in corners work (3 tr, ch3, 3 tr). Join. (Adds a tall lace band which looks elegant on bedspreads)
Round 8 :
Ch1, sc in each st and ch-sp across; in corner ch3 work (sc, ch3, sc). Join. (Stabilizes the lace)
Round 9 :
Info: Repeat Rounds 3-8 once more for a deep border if you prefer a chunky framed look. If you want a narrower border, stop after Round 6. For the pictured bedspread the border repeats textured rounds twice to create depth.
Round 10 :
Ch1, work 1 sc in each st across for a final tidy row. Work (sc, ch3, sc) in each corner. Fasten off leaving long tail for weaving. (This final tidy round should bring the border to a clean edge ready for tassels.)
— Tassels :
Round 1 :
Prepare tassels before attaching: Wind main color yarn around a 6cm wide cardboard 40 times for a full tassel. Slide off, tie a 20cm length of yarn tightly across top wraps to secure. Fold and trim the bottom to even. Repeat to make tassels equal in size. Make one tassel for each corner and one at even intervals along the long edges (for 10x11 grid, place tassels every motif center along edges = 10 tassels long sides and 11 tassels short sides; pictured bedspread shows tassel at each corner and at each motif across both sides).
Info :
Secure tassels through the border with a strong overhand knot using the long tail left on your border. Sew the knot and weave ends into the border for extra strength. Trim tassel ends even and comb lightly for fullness.
— Pillow Covers (2 matching pillows) :
Round 1 :
Make 4 motifs per pillow following main motif rounds 1-15. Block and join 2x2 motifs for a cushion front. Back can be a single square of plain sc rounds or two motifs joined. Join with 1 round sc all around leaving an opening for a zipper or envelope overlap.
Round 2 :
Info: For pictured look, add tassels to each corner of the pillow with 2-3 small tassels per corner. Insert a cushion pad after sewing or crocheting the back closed. Ensure seams are secure with extra whipstitches at corners.
— Alternate Joining: Invisible Mattress Stitch :
Round 1 :
After blocking, place two motifs RS together and use a length of matching yarn threaded on a yarn needle. Use mattress stitch by inserting the needle under the bar between the final two loops on each motif, alternately pulling through opposite motifs. Tighten gently to pull seams together invisibly. Repeat for all joins where a flat look is desired instead of raised sc join.
Info :
Invisible joining is time consuming but gives a seamless fabric ideal for a refined finish. Use this where motifs will be highly visible like pillow fronts or the bedspread center.
— Final Blocking & Trimming :
Round 1 :
Once joining and border are complete, block the entire blanket again pinned to final dimensions. Use steam or wet blocking appropriate for your yarn—cotton benefits from wet blocking and timed drying. Ensure corners are squared and tassels hang evenly; trim tassels and ends while damp for neat finish.
Info :
Weave in all ends thoroughly into motifs and border rows (at least 6-8cm of tail woven across several stitches) to avoid future unraveling. For durability, use a small dab of fabric glue inside tassel knots if the blanket will be heavily used or laundered frequently.
— Troubleshooting & Tips :
Info :
1) If edge is wavy, add or remove a single sc between corner clusters along the border to correct tension. 2) If the blanket appears too small after joining, add one more full border repeat. 3) If motifs vary in size, re-block and add a single sc or ch-sp to smaller motifs during the final motif finishing rounds to equalize size.
Info :
4) Keep motifs numbered or arranged in a box with layout mapping so you can place alternate motifs (if using the raised variant) in a balanced checkerboard. 5) Use consistent hand tension and the same hook for every motif to maintain uniformity.
— Stitch Count Reference Table (approximate) :
Round 1 :
Center circle: 12 dc
Round 3 :
Puff clusters: 12 clusters
Round 4 :
Radiating 3-dc groups: approx 36 dc
Round 7 :
Transitional rounding to square: side counts stabilized between 20-24 sts per side
Info :
Actual stitch counts will vary slightly by stitch type (puffs and post stitches) but keep relative symmetry: same number of corner ch2 spaces and same number of clusters per side across all motifs.
Round 12 :
Final texture band prior to framing: consistent cluster counts across sides to maintain square geometry
Info :
Record your exact counts for a single motif and use that as the template for all motifs so joining is matched precisely.
This Cream Oatmeal Granny Square Bedspread is a true labor of love—its textured motifs, soft blush centers, and generous tassel fringe make it a timeless statement piece. Each square builds into a cozy whole that adds warmth and handmade charm to any bedroom. Enjoy the slow, rewarding process of making something that will be treasured for years. 🧶✨😊