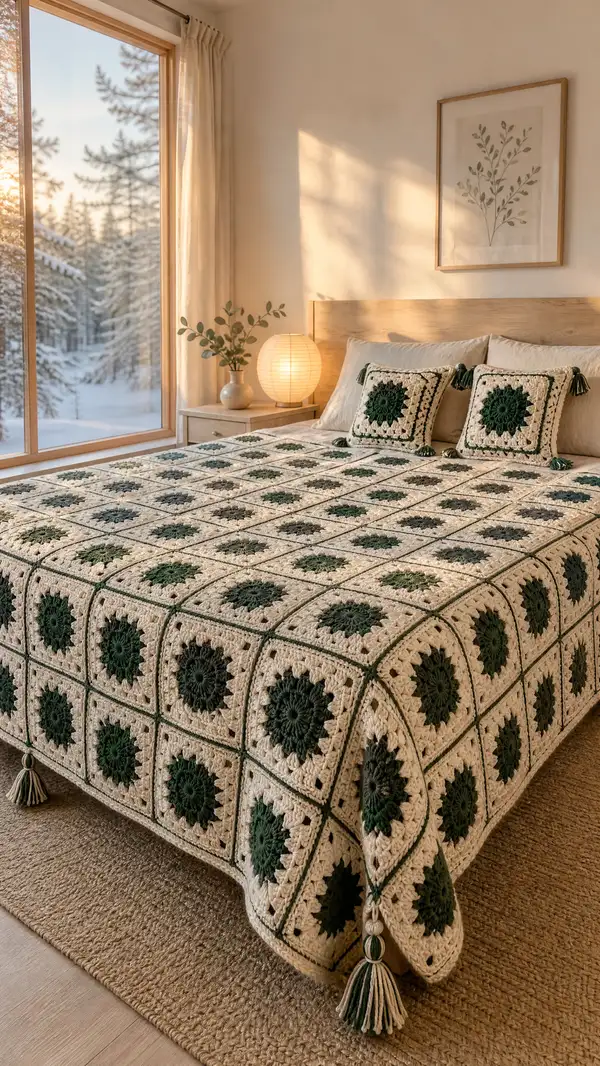
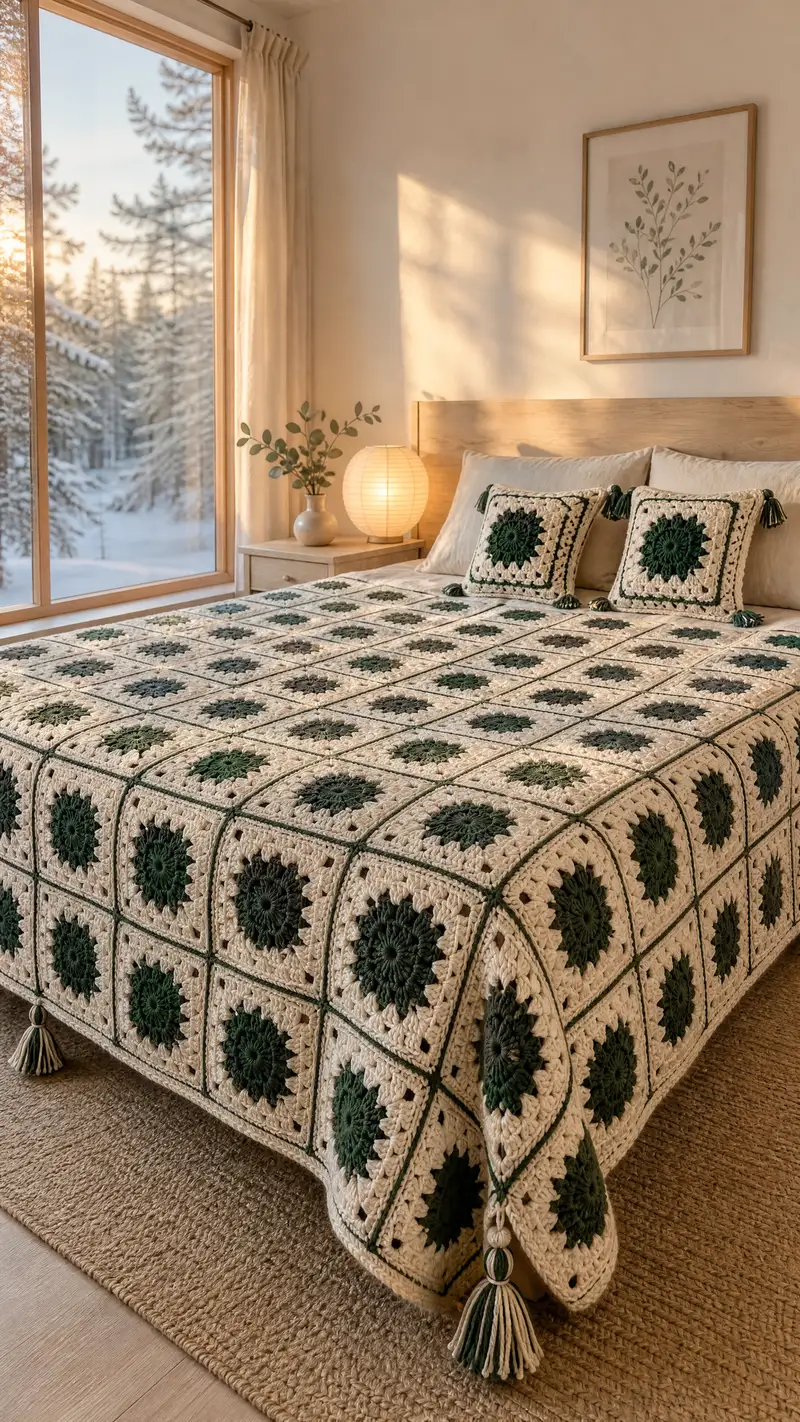
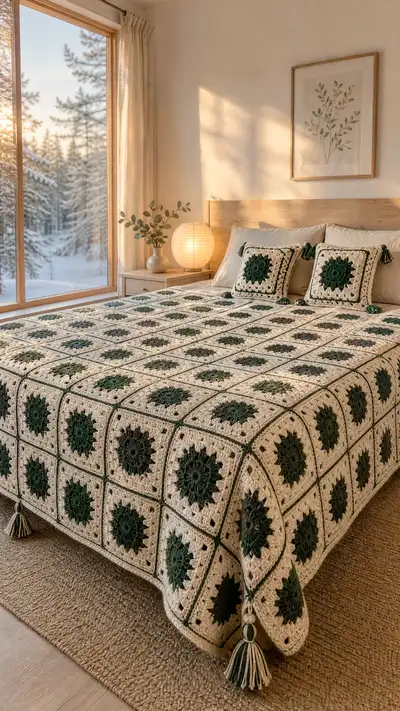
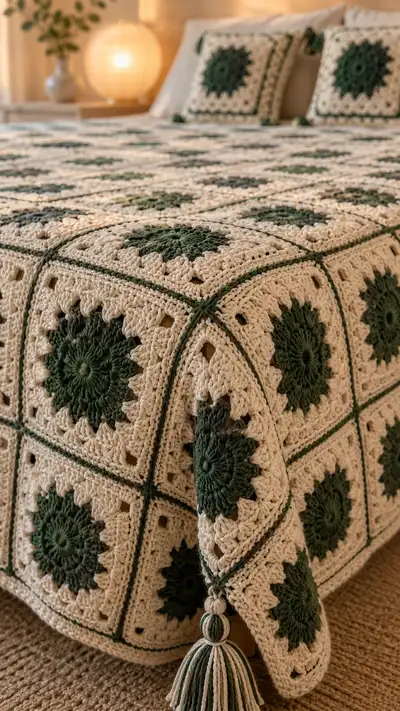
A cozy, vintage-inspired bedspread made from sunburst granny squares in deep forest green and warm cream. This pattern teaches you to crochet textured puff/petal centers, square them off with classic granny clusters, join with a neat raised seam and finish with a framed border and tassels. Ideal for a decorative bedspread or large throw — the finished set in the photos includes matching pillow covers with tasseled corners.
Progress Tracker
0% Complete
— Overview :
Info :
This pattern creates a bedspread from repeated Forest Sunburst Granny Squares. Each motif is a textured sunburst center made with puff clusters, squared with granny-cluster rounds, and joined into an array. We give full round-by-round instructions for a standard motif, an optional larger motif variant, join-as-you-go method, full border with layered ridges, tassel finishing and matching pillow covers. Stitch counts are provided each round and Info sections appear frequently to guide color changes, blocking and assembly.
— Motif (Standard Sunburst Square) :
Round 1 :
Start with forest green. Make a magic ring, ch 3 (counts as dc), work 11 dc into ring. Join with sl st to top of ch-3. (12)
Round 2 :
Ch 3, dc in same st, *ch 1, 2 dc in next st; rep from * around to end, sl st to top of ch-3. (12 groups, 24 dc with 12 ch-1 spaces)
Round 3 :
Info : Switch to darker green if you are adding subtle two-tone centers. Otherwise continue with forest green. Ch 1, sc in same st, *ch 3, (puff, ch 1) in next ch-1 space; rep from * around to form 12 puff clusters separated by ch-3 arches, ending with ch 1, sl st to first sc. (12 puffs)
Round 4 :
Info : Puff technique - yarn over, insert hook in sp, yarn over and pull up loop (repeat 3 or 4 times depending on desired puff height), yarn over and pull through all loops on hook, ch 1 to close puff. Each puff is counted as 1 stitch for counts below.
Round 4 :
Ch 2 (counts as hdc), hdc in same st, *ch 2, hdc in top of next puff, ch 2, (3 dc) in next ch-3 sp; rep from * around ending with ch 2, sl st to top of first hdc. This round spaces the center and begins rounding out the medallion. (12 sets of 3 dc and 12 hdc placement, working evenly)
Round 5 :
Ch 3, dc in same st, dc in next st (work evenly to maintain circular medallion), *in next ch-2 sp work 3 dc, ch 1; in next puff-top work 2 dc; rep from * around. Join with sl st to top of ch-3. (Approx 36-40 dc depending on puff placement)
Info :
Check diameter now — your center medallion should measure approximately 4.5-6 cm across depending on yarn and hook. Adjust by adding an extra round of even dc if you prefer a larger center before starting the square rounds.
Round 6 :
Change to cream color. Ch 3 (counts as dc), (2 dc, ch 2, 3 dc) in the same st to form corner 1, *skip next 10-12 sts of medallion (work looks for even spacing), (3 dc, ch 2, 3 dc) in next st to make corner 2; rep around total 4 corners. Join with sl st to top of ch-3. (4 corner clusters; counts vary but pattern forms a square outline)
Round 7 :
Ch 3, dc in each dc across until you reach ch-2 corner space, work (3 dc, ch 2, 3 dc) in corner space, continue dc across next side. Repeat around. Join with sl st. (maintain even dc count per side, target 24-28 dc per side including corners)
Round 8 :
Ch 1, sc in same st, *ch 3, skip next 2 dc, sc in next dc; rep to corner, in ch-2 space make (sc, ch 3, sc) to form corner arch; rep around. Join. (This creates small openwork for later squaring)
Info :
By Round 8 your square should visually look square with four distinct corners. If your sides are bulging, work one additional round in cream of 1 sc per st around to stabilize before continuing with outer granny rounds.
Round 9 :
Ch 3, work 2 dc in same st, *ch 1, skip ch-3 sp and work 3 dc into next side space, repeat until corner, in corner work (3 dc, ch 2, 3 dc). Continue around. Join. (This establishes the granny-cluster body. Count about 3 clusters per side plus corners)
Round 10 :
Ch 3, in next ch-1 space work 3 dc, ch 1, 3 dc (corner), continue repeating 3 dc clusters into each ch-1 space, with (3 dc, ch 2, 3 dc) in corners. Join. (Square should expand; target 48-56 dc clusters total depending on side cluster count)
Round 11 :
Info : For additional texture, work this round in BLO to create a subtle ridge. Change to cream if not already. Ch 1, sc in same st, *ch 3, skip next 2 dc, sc in next dc across to corner; in corner work (sc, ch 3, sc). Join.
Round 12 :
Ch 3, dc in same st, dc into next 2 sts, *(3 dc) cluster into next ch-3 space, rep across, (3 dc, ch 2, 3 dc) in corners. Join. (Square steady at approximately 10-12 cm depending on yarn/hook; this is our standard motif size)
Round 13 :
Info : If you prefer a slightly larger motif for a thicker spread, add an extra granny round now: ch 3, work 3 dc in each ch-1 or ch-2 space, corners as usual. If not, slip to next section to finish with border rounds.
Round 13 :
Ch 1, sc evenly around working 1 sc in each cluster top, 2 sc in each corner (over the ch-2), join and fasten off. (This gives a tidy edge.)
Info :
Weave in the green tail neatly to the back of center. For a neater front, weave cream ends on the right side and hide them under the next join round. Block each motif gently to a square with edges straight before joining — use pins and a damp press to set the shape.
— Motif Variant (Larger Sunburst Square) :
Round 1 :
Start with forest green. Magic ring, ch 3, 15 dc in ring. Join. (15)
Round 2 :
Ch 1, sc in same st, *ch 2, (puff) in next dc, ch 2, sc in next dc; rep around. (15 puffs arranged inside)
Round 3 :
Ch 3, dc in same st and next 2 sts, *in next ch-2 space work (3 dc, ch 1) for spacing and shape; rep around. Join. (expands medallion noticeably)
Round 4 :
Change to cream. Ch 3, (2 dc, ch 2, 3 dc) in same st to start corner, *work 3 dc groups evenly along side spaces, corner clusters in ch-2 spaces. Join. (Creates larger square shell for jumbo motifs)
Round 5 :
Ch 3, 3 dc clusters into each side gap, (3 dc, ch 2, 3 dc) in corners. Join. (This larger motif will reach approximately 14-16 cm; use these when you want fewer larger squares for a more vintage look.)
Info :
Use these larger squares sparingly and keep track of how they tile with standard motifs — for a consistent layout alternate rows or use as corner/border motifs for visual interest.
— Blocking and Gauge :
Info :
After making motifs, wet-block each one to the same measurement. For the standard motif target approx 12.5 cm (5") square after blocking. Use rust-proof pins and a blocking mat. Allow to dry fully before joining. Consistent blocking ensures straight edges and tidy joins.
— Join-As-You-Go (JAYG) Main Array Method :
Info :
You can either sew squares together after making them, or use Join-As-You-Go to attach each new square to the existing blanket on the final round. Below is a JAYG-friendly final round that creates a raised ridge seam when worked in contrasting yarn.
Round 1 (JAYG Attach Round) :
With cream, ch 1, sc in same st, *ch 3, skip 2 dc, sc in next dc across - when you reach the side that touches an existing joined square, instead of sc in the next dc, sl st into the adjacent square's edge (in corresponding stitch), ch 1, sc into next st of new square and continue. Continue the pattern across sides, joining where necessary. End at corner with (sc, ch 3, sc) into corner and connect to joining squares as required.
Round 2 (JAYG Ridge) :
Info : Change to a thin contrasting line of dark green if you want the raised ridge seen in the photo. Work sc around the whole square in dark green, but when you are on edges already joined to neighbors, work a surface slip-stitch in the seam to create a raised cord effect—see surface crochet technique below.
Round 2 :
Ch 1, sc in same st, sc evenly across top of square; when you reach a joined seam, work sc through both the current square and the adjacent square (through one loop each) creating a neat seam; continue around and join with sl st. (This creates a neat but slightly inset seam.)
Info :
Surface slip-stitch technique: with contrast yarn, insert hook from front to back through the post of the stitch along the seam, yarn over and pull up a loop, then sl st in place; continue along seam to create a raised line. Do this carefully to keep tension even.
— Joining Sequencing (Layout Plan) :
Info :
Decide the blanket layout before joining. The shown bedspread has a grid of 7 squares across and roughly 8-9 down for a full/queen depending on motif size. For planning: standard motif ~12.5 cm: 7 across = 87.5 cm width of motif field; with borders add width until it fits bed top. Count motifs needed: width x length = approx 7 x 9 = 63 motifs. Make 70 motifs to allow for border and spares.
Round 1 (Join order suggestion) :
Make one full row of motifs (7 motifs) then join subsequent rows to the top of the existing row using the JAYG attach round. Work left to right or right to left consistently. When joining, align counts and keep seam tension firm but not tight to avoid pulling.
Info :
When joining, pin motifs in place at 4 corner points and midpoints of each side to ensure even spacing. Re-check blocked measurements before finalizing join seams.
— Border (Layered Framed Edge) :
Round 1 :
Info : The border has three main passes: a narrow frame in dark green to define squares, a larger cream scallop/granny band to create depth, and a final framed piped line for neat finishing. Start with dark green sc ridge around entire assembled blanket.
Round 1 :
With dark green, join at any corner, ch 1, work 1 sc in each stitch along the blanket edges; in each corner work (sc, ch 2, sc) to maintain square corners. Work evenly around until you complete the lap. Join with sl st. (Edge sc count equals perimeter stitches; maintain uniform tension.)
Info :
Keep corner increases consistent (sc, ch2, sc) to maintain square corners. If the blanket edge cups or waves, adjust by adding or removing 1 or 2 sc evenly per side to flatten.
Round 2 :
Change to cream. Ch 3 (counts as dc), *skip next st, in next st work (3 dc, ch 2, 3 dc) to form larger corner shells on every 6-8 stitches (space evenly). Repeat around forming shell clusters. Join with sl st. (This creates a layered granny scallop.)
Round 3 :
Ch 1, sc in same st, *ch 3, skip 2 dc, sc; rep to corner where you do (sc, ch 3, sc); rep round. Join. (Creates consistent diamond eyelets that mirror motif edges)
Info :
For a heavier drape at the edges add one or two extra rounds of the shell pattern in cream to make a wide scalloped border. Each extra shell round increases the width by approx 2-3 cm.
Round 4 :
With dark green work a final piped line: join yarn and work a surface slip-stitch along the cream shell ridges to define them. Then ch 1, sc around entire border front loop only to create a piped edge that hugs the scallops. Fasten off and weave ends.
— Corner Tassels :
Info :
Each corner gets a large tassel built from both cream and forest green yarn for the striped, bundled look in the photo. Make tassels after finishing the border and attaching top and bottom tassel loops before trimming to final shape.
Round 1 (Tassel instruction) :
Cut approximately 60-80 strands of yarn double length of desired tassel (for thick tassels use 100+ strands). Arrange 50% cream and 50% green strands alternately. Fold strands in half and loop through corner point using a lark's head knot. Repeat for all four corners. Trim evenly and secure with yarn wrapped tightly around the top of tassel for a neat bobbin. Add decorative yarn-wrapped beads if desired.
Info :
Trim tassels to desired length — in the photo they measure approx 10-12 cm finished. Keep tassels balanced by weighing multiple tassel bundles on a scale or measuring by counts per tassel to ensure uniformity.
— Pillow Cover (Square Motif Pairing) :
Round 1 :
Make two matching standard motifs that will form front/back of cushion or make four motifs for a framed cushion front with a solid back. Use same motif rounds 1-13 as above and block to identical sizes.
Round 2 :
Join two motifs together with cream single crochet around three sides leaving one side open for pillow insert. When joining across sides work sc through both loops of both motifs (or use mattress stitch for invisible join). For framed front, join four motifs by seaming internal edges and add a cream backing panel sized to fit.
Round 3 :
Info : Add tasseled corners to pillow by attaching four small tassels (approx 20-30 strands) to each corner, securing them to the seam with extra wraps. Insert pillow and close opening with slip stitches or whip stitch and weave ends inside.
Round 4 :
Optional Pillow Border: With dark green, work 2 rounds of reverse single crochet (crab stitch) around the outer edge for a subtle frame. Fasten off and weave ends.
Info :
Pillow height in photos appears around 45 x 45 cm finished. Use an insert 2-3 cm larger than finished pillow to achieve the plump look.
— Assembly Details & Layout (Detailed Sequencing) :
Round 1 :
Info : Lay out blocked motifs on the floor following your chosen grid. Photo shows a roughly symmetrical pattern with green centers aligned to create a matrix. For a queen bed layout plan 7 x 9 motifs; adjust counts for mattress size. Keep spare motifs for final trimming and corner fit.
Round 2 :
Join first row motifs edge-to-edge using JAYG or whip-stitch. To whip-stitch, place two motifs right sides together and use a tapestry needle with cream yarn to whip every stitch at the edge, spacing evenly and pulling gently. Continue until a full row is formed.
Round 3 :
Attach subsequent rows by aligning and sewing each motif to two neighbors (above and left) to create a stable lattice. Work corner connections first to ensure grid alignment, then fill in side seams. Keep seam tension even to avoid gaps or puddling between squares.
Info :
If using JAYG, join each new square to previously joined neighbors on two sides for support — this method is fastest and yields a clean front right away. When seaming after the fact, hide ends inside seams for a tidy finish.
Round 4 :
Trim and square corners carefully. If needed, add a small escutcheon or extra stitch at the corner seam to square block points. Block the assembled blanket gently to settle seams and flatten edges before adding the border.
— Finishing Techniques and Tips :
Info :
Weave all ends securely — for heavy-use items, double weave tails by threading them back along two different stitch paths. Use a matching thread in a yarn needle and run ends through 8-12 stitches before trimming. The blanket will be washed occasionally; use cotton-blend yarns that soften but maintain shape.
Round 1 :
Tip: If you notice slippage in puff clusters over time, add a small securing stitch at the top of the puff by weaving in an invisible tail behind the puff and knotting slightly to keep puff height consistent.
Info :
Label your motif counts and keep a notebook: row number, motif count, and join status will keep you organized for a large project like a bedspread. Photograph layout before joining to reference alignment during assembly.
— Alternate Joining: Mattress Stitch Method :
Round 1 :
Work mattress stitch for invisible joins: place squares wrong sides together. Thread tapestry needle with cream, insert needle under the two bars between the corner clusters on first square, then into corresponding bars on second square. Pull snug but not tight — mattress stitch creates a nearly invisible seam on right side when done neatly.
Info :
For a stronger seam, go through both loops of the edge single crochets. For a decorative ridge, use contrasting yarn and couch a chain or sl st over the seam with surface crochet.
— Care Instructions :
Info :
Machine wash on gentle cycle in cool water if yarn manufacturer permits; otherwise hand wash. Reshape and dry flat. For cotton yarns, avoid high-heat drying to prevent shrinkage. Block after washing to return blanket to original shape.
— Troubleshooting and Adjustments :
Info :
If your blanket edges ripple, identify which rows have extra stitches. Unpick the final seam area, rediscover the row with extra stitches and remove or add 1-2 stitches evenly across the side to flatten. If the blanket cups, add an additional round of single crochet around the whole blanket to stabilize the edge.
— End Notes :
Info :
Enjoy the process — large projects are rewarding because you see steady progress as motifs build into the full bedspread. Keep tension consistent and block motifs before joining for best results.
This Forest Sunburst Granny Square Bedspread is an absolute joy to make and a stunning statement when finished. Each textured motif blooms like a tiny sunburst and the cream framing gives it an heirloom quality you'll love to display. The matching tasseled pillows create an elegant, coordinated look for your bedroom. 🧶🛏️ Enjoy every motif, savor the blocking, and celebrate the slow craft of making something truly special — then wrap up in it with pride. ✨