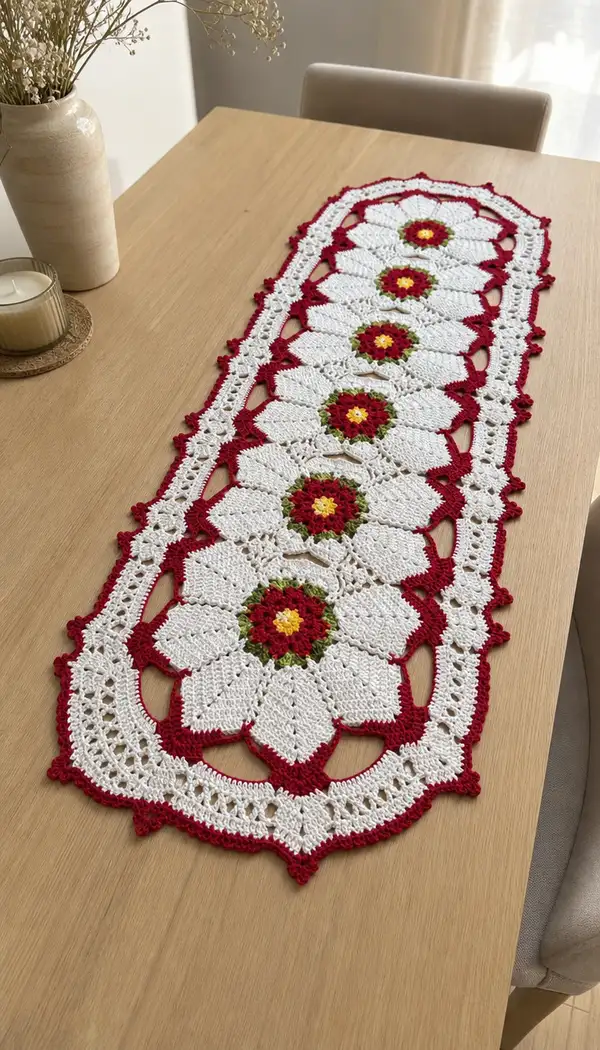
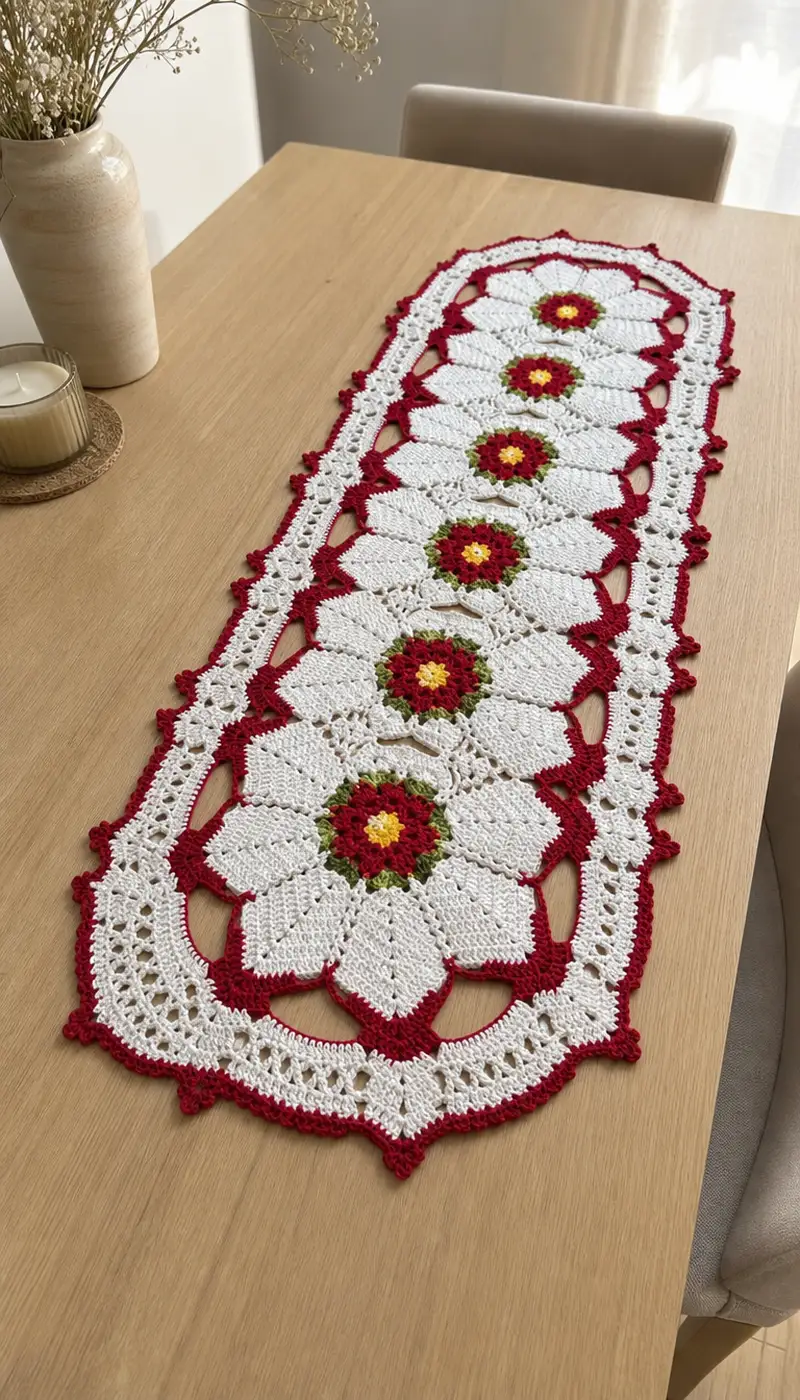
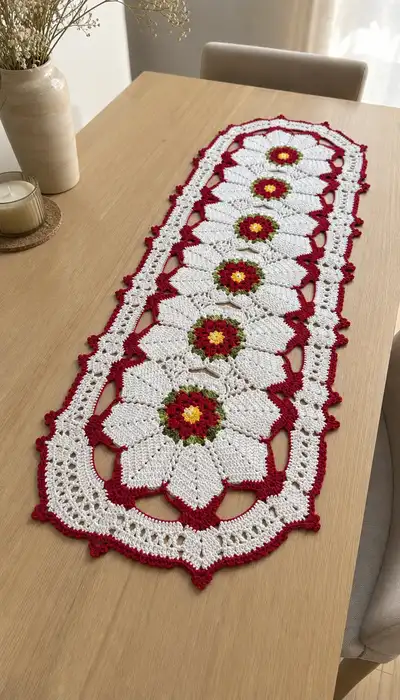
A delicate daisy-chain crochet table runner featuring a repeating floral motif with crisp white petals, warm red edging and green/yellow centers. This runner lays flat with a lacy connecting panel and a scalloped red border to create a classic, handmade accent for your dining table. The design is modular — crochet motifs, join them in a row, then finish with an elegant lace border for a polished look.
Progress Tracker
0% Complete
— Floral Motif (Make 5) :
Round 1 :
Work 8 sc into a magic ring. Pull tight. (8)
Round 2 :
Inc in each st around - 2 sc in each st (16)
Round 3 :
(1 sc, inc) x 8 (24)
Round 4 :
(2 sc, inc) x 8 (32)
Round 5 :
(3 sc, inc) x 8 (40)
Round 6 :
(4 sc, inc) x 8 (48)
Info :
Change to leaf green yarn. This round forms the small green ring around the center. Leave tail to weave later. Keep tension relaxed to allow the ring to sit flat.
Round 7 :
With green: *sc in next 3 sts, ch 3, sk 1* repeat around to create small chain spaces: (sc3, ch3) x 12 (48 with 12 ch-3 spaces)
Round 8 :
Into each ch-3 space work: sc, hdc, dc (3-st mini shell), sl st into next sc. Repeat in each ch-3 space (12 mini shells). Keep counts: total st count across round perceived as 48 plus shell clusters.
Info :
Change to red yarn for a shallow ruffle; this red ring will anchor the petal base. Fasten color securely and carry ends to weave later.
Round 9 :
With red: *ch 1, (sc in top of shell, ch 2, 3 dc in same st as sc) ch 2, sc in next sc* around to create 12 small red clusters between shells. End with sl st to first sc. This creates textured definition (counts vary because of clusters).
Round 10 :
Change to yellow. Work 8 sc evenly spaced on top of earlier increases to form a solid small centre disk: join yellow into one of the original 8 division points noted at rounds 1-6, *2 sc in each of next st, sc in next 4* adjust to make a round, finish with sl st and fasten off yellow. (About 16-20 sts depending on placement)
Info :
Weave in the yellow tail now or leave to weave later. Center should be small and slightly raised compared to green ring. Block the center slightly if needed to stabilize the petal base.
Round 11 :
Change to white. Join with sl st to a red cluster point. Ch 3 (counts as dc), work 3 dc in same st, *sk next cluster, 6 dc in next cluster* repeat around to form 12 tall dc groups which will become the base for petals. After last group sl st to top of ch-3. (12 groups)
Round 12 :
Into each tall dc group work: ch 2, (tr, dtr, tr) all into center of the group, ch 2 and sl st into the top of the group - this begins petal shaping (12 petals forming but we will shape to 8 large petals by pairing groups). Info added next will describe pairing details.
Info :
To achieve 8 large petals rather than 12 small ones, we will combine groups in the next rounds: join every 3 groups into a single petal unit by crocheting across intervening stitches so each petal spans multiple cluster anchors. Pin each petal flat to check symmetry before continuing.
Round 13 :
(Petal shaping start) *Identify group A (current group), group B (next group), group C (skipone) - in practice: ch2, sc in top of group A, ch2, (3 tr, 1 dtr, 3 tr) across groups A and B combined, ch2, sc into group B top* repeat to create 8 larger petal arches. These manipulations keep total stitch columns consistent; the perceived st count remains anchored to 48 base points.
Round 14 :
Work 1 sc evenly around the base of each formed petal into designated anchoring sts (48 sc equivalent). This anchors petal bases and evens the round. (Count: 48 equivalent anchor points)
Round 15 :
Petal fill: For each petal work: into the central arch of petal: (ch 1, sc, hdc, 3 dc, hdc, sc) working over the arch to make a filled petal section. Repeat for each petal (8 petals total). Maintain even spacing by placing each petal fill into previously made petal arch tops.
Info :
This sequence builds the broad, flat white petals. Make sure petals are blocked flat before proceeding to outer rounds to avoid twisting. Use pins and a little steam or damp blocking if necessary on cotton yarn.
Round 16 :
Work a round of sc around entire motif in white: 1 sc in each petal stitch and in the small gaps between petals. Aim for an even count of 64 sc around after smoothing shape. (Approx 64)
Round 17 :
Work (3 sc, ch 3, sk 3) around to create small arch spaces between broad petal edges to prepare for the joining panels. Maintain count to have 8 arches (one between each petal). (8 ch-3 arches, plus sc anchors)
Info :
Change to red for the strong outline seen in the photo. The red will trace petal outer edges and form small diamond joins between motifs.
Round 18 :
With red: Work along petal edges: *sc in next 2 sts, (sc, picot, sc) in outermost point of petal, sc in next 2 sts, ch 4, sl st into base of next petal outer tip* Repeat around creating a scalloped outline. Count will be anchored by 8 outer points with four-chain linking spaces (counts variable due to picots).
Round 19 :
Reinforce red border: 1 sc in each st and 3 sc into each picot cluster to make the outline substantial. Aim for even tension so motifs will sit flat when joined. (Approx 80 sc equivalent across round)
Info :
Fasten off red and weave ends or leave tails for joining to the connecting lace later. Make 5 identical motifs. Blocking now will facilitate neat joining and a flat final runner.
— Motif Repeat Note :
Make 5 motifs total for the sample runner. You can increase or decrease number of motifs to lengthen or shorten runner — ensure you make an odd number to center motifs or adjust connector panels accordingly.
— Joining Motifs into a Row :
Info :
Position 5 motifs face up in a straight line. Each motif has 8 outer linking points; the runner pictured uses adjacent petal sides overlapped by small red diamond joins and white thinned panels to create open diamonds between motifs. We'll join motifs using red chain loops and white lace panels that slip stitched through designated chain spaces on motifs.
Round 20 :
Place motif A and motif B adjacent: with red, join at the ch-4 linking spaces created in Round 18 by joining with sl st through both motif ch-4 spaces: into ch-4 space of motif A sl st, ch 4, sl st into corresponding ch-4 space of motif B and sl st back into motif A; repeat for each adjacent pair to make 4 diamond joins across the overlap area. (Do this for each pair across the runner).
Info :
Work joins loosely to preserve laceiness; pin motifs flat while joining to keep edges aligned. Leave tails for weaving if preferred instead of crocheting the join; both methods are acceptable.
Round 21 :
With white yarn, step back and fill the small open spaces created between joined petals with: into each small open diamond work: sl st into diamond corner, ch 5, (3 dc, ch 1, 3 dc) into the middle to form a small open fan, sl st to opposite corner. This forms a decorative connector that echoes the photo's lacy white panels. Repeat across all inter-motif openings. The count per opening will be one fan stitch assembly.
Round 22 :
Return to red and outline each red diamond join by working 1 sc into each side of the red chain and 3 sc in the corner joins to stabilize. This creates the small red diamonds visible along the runner edges. Repeat across all joins. (Varies by join count)
Info :
After joining motifs into a continuous row, press lightly and pin the entire assembly flat. Check for alignment of top edges — small adjustments can be made by easing or tightening join stitches before weaving ends.
— Central Lace Connector (Between Motifs) :
Round 23 :
With white, join at the center top of the runner where the motifs have an inner 8-way opening. Ch 6, sl st into the opposite motif center ch-space to create a chain arch across the center; continue along the whole runner making arches that run down the middle line between motifs. Each arch will be ch-6 anchored at two opposite petal bases. Repeat across entire runner to create continuous lace spine. (Number of arches = number of motif gaps, typically 4 for 5 motifs)
Round 24 :
Work into each ch-6 arch: sc, ch 2, (2 dc, ch 2) x 3 to make a lacy shell within the arch, sl st to anchor. This will create a tall openwork pattern along the runner center reminiscent of the photo's middle lacework.
Info :
Use stitch markers to mark the center of each arch before working shells. This ensures symmetry across the runner line and reduces skewing.
Round 25 :
Work 1 sc around each connecting shell area, smoothing the transition to the petal edges. Adjust counts to keep runner straight — aim for roughly 6-8 sc anchors per arch area. (Approx 6-8 sc per arch area)
Round 26 :
Edge reinforcement: With white, 1 sc in each exposed stitch along both long sides of the motifs including small connectors and arch edges. This helps create a uniform edge ready for outer border work. Keep tension even. (Stitch count will vary by runner length.)
Info :
At this point the runner should be one flat piece made of motifs and central lace connectors. Press flat and count total stitches along the long side to help with border repeat calculations.
— Outer Lace Border Base (First White Border Rounds) :
Round 27 :
With white, starting at one short end, ch 1 and work evenly distributed sc around the entire perimeter of the assembled motifs: 3 sc for each wide petal indentation, 1 sc for each narrow gap and 2 sc in corners to maintain shape. This creates a stable base for the lace border. (Total sc will depend on runner dimension — approximate 300-380 sc for a 5-motif runner.)
Round 28 :
In each sc around: *ch 5, sk 2 sc, sl st into next sc* repeat creating a series of chain arches around the entire perimeter. Where there are larger open side windows (between petals), increase the chain length to ch 7 to bridge the space neatly. Aim for symmetrical repeats on both long sides. (Maintain count: number of ch-arches equals number of peripheral anchor points marked previously.)
Info :
If your perimeter stitch count differs, adjust ch arch counts to keep border repeats consistent. Use pins to check border symmetry before proceeding to shell rounds.
Round 29 :
Work into each chain arch: sl st into base, ch 3, (2 dc, ch 1, 2 dc) into arch to form shell fans, sl st to finish shell. This creates the openwork repeated shell motif visible near the edges. Repeat around. (Shells per side will equal number of arches.)
Round 30 :
Return to base sc round and work 1 sc in each dc and ch-space to anchor shells. Aim to have an even flat border line. (Anchor count will match earlier approximations.)
Info :
This establishes the white scalloped area seen inside the final red border. Verify shells lie flat and do not ripple — if rippling occurs, adjust by adding or subtracting sc anchors in the previous round.
— Detailed Lace Rows (White) :
Round 31 :
Work a more open lace round: *ch 6, sk shell, sl st into next anchor* across each long side; in short ends use ch 4 arches to maintain proportion. This row builds airy lace sections visible in the photo's inner border area.
Round 32 :
Turn these chain arches into small fans: into each ch-6 space work (sc, hdc, 3 dc, hdc, sc). Repeat across. This fills the arches with lacy fans and provides points for the red outer border to attach to.
Info :
Use a soft blocking now to shape the lace; the white interior will contrast strongly with the red outermost edge so blocking ensures the lace reads as delicate and precise.
Round 33 :
Work 1 sc around all newly formed fans to tidy edges and prepare for red edging. Count will be higher now as the border accumulates anchors — keep a running tally if you plan an exact repeat for the red border.
Round 34 :
In the small windows between motifs, where the photo shows short bars of decorative chains, work: ch 1, sc into corner, ch 3, sc into opposite corner to create short bridged openings. Do this symmetrically on both long sides of the runner. (Number of bridged openings equals motif side windows.)
Info :
Check that both long sides are symmetrical by folding runner in half lengthwise — adjust anchors if necessary so the final red border will match on either side.
— Red Outer Border Setup :
Round 35 :
Change to red yarn. Join at a short end corner. Work 1 sc into every anchor stitch around the perimeter to create a red frame base. On long sides, work 2 sc in anchor points that align with motif petal tips to emphasize the red diamonds visible in photo. (Total red base sc approx 320-420 depending on prior counts.)
Round 36 :
Work scallops: *sk 2 sc, (5 dc) in next sc, sk 2 sc, sl st in next sc* around long sides to form bold scallops. At motif corners and short ends, increase to (7 dc) shells to create slightly larger points as seen in the picture. This is the moment those pronounced red scallops are defined. Count shells to be equal on both sides.
Info :
Check shell spacing by laying runner on table and ensuring scallops center over each petal and motif gap. Adjust with small sc anchors if a scallop falls slightly off-center.
Round 37 :
Work edging picots and small bobble points: Into each 5-dc shell center, work: (sc in 2nd dc from edge, ch 3, sl st into ch-3 to form picot), then sc across shell arc to next shell base. On short end larger shells add a small 3-st picot cluster evenly spaced. This yields the small beaded dots visible along runner edges.
Round 38 :
Reinforce border: 1 sc in every st across red shells and picots. When finishing at corners, work 3 sc into point peaks to maintain shape. Fasten off red when complete and weave ends neatly on the wrong side.
Info :
If you prefer a less pronounced red edge, substitute a narrower shell (3 dc instead of 5 dc) in Round 36. For the pictured look, 5-dc shells on long sides and 7-dc corners provide the correct rhythm.
— Decorative Short-end Points and Final Picot Row :
Round 39 :
Short-end detail: On each short end, with red, create pointed caps by working sequence: (ch 1, sc, ch 4, sl st into next anchor, repeat) across the short end then work 1 sc in each sl st to form a small ladder. This creates the scalloped short end visible in photo with a centered point.
Round 40 :
Into each short-end ladder space work a 5-dc fan and finish with a decorative triple picot at the apex: (dc, dc, dc, ch 3, sl st into top of last dc) to present a pronounced pointed finish. Repeat on both ends symmetrically.
Info :
Pin short ends on blocking board to exact desired length and apex height. Slightly steam-block red border to set picots and keep points crisp.
Round 41 :
Optional brightening round: With a thinned strand of white held with red, work an opinionated slip-stitch outline across the red scallops to add a tiny white beaded highlight which echoes the white lace interior. This is optional and purely decorative.
Info :
Weave in all ends securely on the wrong side. Use small, even stitches and bury yarn tails through a few motifs to help secure color changes against wear. Block entire runner to final dimensions stretching gently until scallops and petals are even.
— Finishing & Blocking :
Round 42 :
Lay runner flat on blocking mat. Using pins place pins at each petal tip and each scallop apex. Spray lightly with water or use gentle steam. Allow to dry fully. Adjust pins if any sections curl or are uneven.
Info :
Blocking is critical for this pattern — it opens lace and allows scallops to sit crisp. For cotton yarn, you may press lightly with a cloth over the work if necessary. Do not overstretch — aim to preserve original proportions.
Round 43 :
Final check: inspect for loose ends. Using yarn needle, weave ends in with mattress stitch technique across several stitches, then cut flush. Trim any stray fibers and re-pin if needed for a last light spritz and dry.
Round 44 :
Optional stiffening: If you want the runner to sit very flat on a table, apply a light starch or diluted fabric stiffener on the wrong side and allow to dry. This will keep scallops crisp for festive occasions.
Info :
Congratulations — your Daisy Chain Table Runner is complete. Adjust motif count to lengthen/shorten runner; all join and border rounds scale proportionally. For a wider runner consider creating two parallel rows of motifs and joining them with an expanded central lace panel following the same principles.
Completing this runner is so rewarding — the floral motifs and bold red scallops create a classic handmade accent that really transforms a table. The modular structure makes it easy to customize length and color, and the lace border gives a beautiful polished finish. I hope you enjoy each careful stitch and the satisfying blocking process. 🧶🌸✨