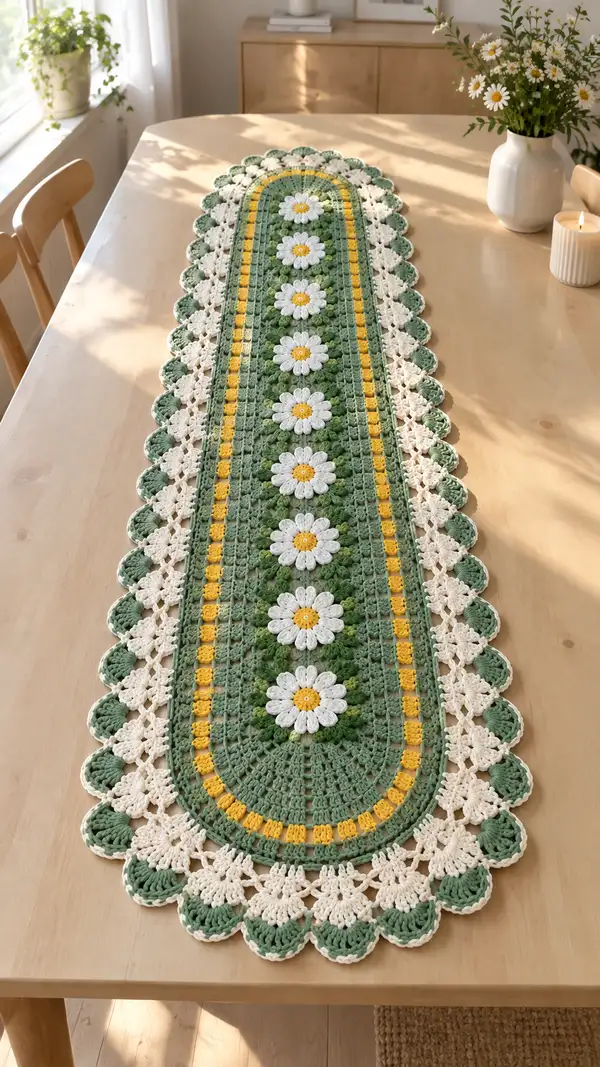
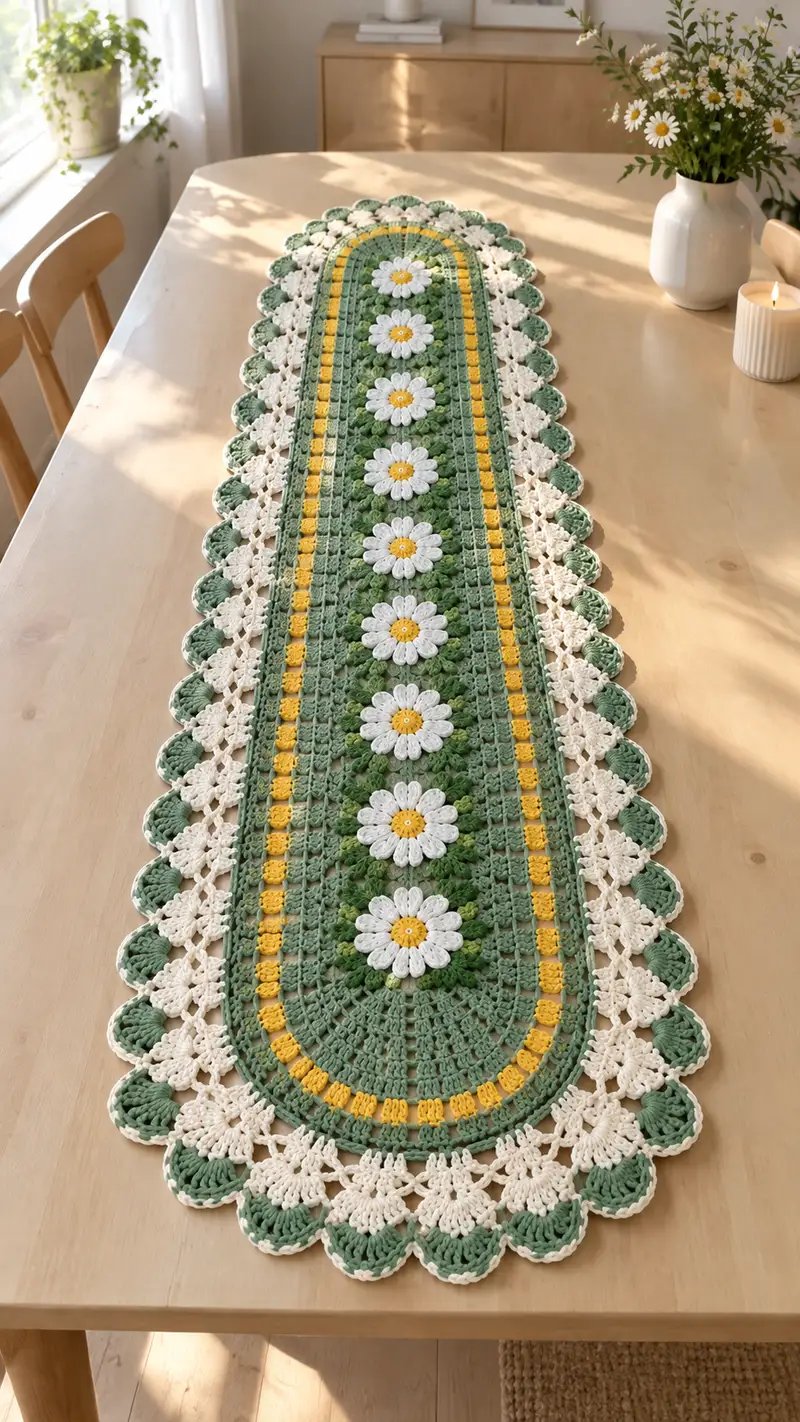
A long, elegant table runner featuring a row of textured daisy motifs on a soft green oval field, framed by bright yellow stripes and a delicate cream scalloped lace edge. This pattern uses worsted-weight cotton to create a sturdy yet decorative runner perfect for dining tables, sideboards, or a sunny windowsill. The central daisies, layered petals, and open lace border give a handmade vintage charm with modern color contrast.
Progress Tracker
0% Complete
— Overview :
Info :
This table runner is constructed as a wide oval central panel worked in rounds, with seven separate daisy motifs made and attached on top of the central field, then trimmed with a bright yellow inner stripe and finished with a layered cream scalloped lace edge. Work tension consistently and use stitch markers to mark the two shorter ends (the oval 'corners') on the foundation so increases and shell placements remain symmetrical. The pattern sections below include center panel rounds, daisy motif instructions (make 7), joining and filler rounds, inner stripes, outer rounds and final scallops. Rounds and stitch counts are math-checked and given for the sample size shown; adjust number of daisy repeats or add rounds to lengthen/shorten the runner.
— Center Field (Foundation Oval) :
Info :
Use Sage/Green yarn. We begin with a foundation chain to create a true elongated oval. Mark the two short ends (where the chain turns) as corner clusters — these are where increases will be worked evenly each round to keep the oval flat.
Round 1 :
Ch 40, sc in 2nd ch from hook and in each ch across (39 sc), 3 sc in last ch, continue around working in opposite side of foundation chain 39 sc, 3 sc in first ch (84)
Info :
Join with sl st to first sc. Place stitch markers at the center stitch of each 3-sc corner group to denote the short ends/corners. From now on you will work in continuous rounds (or join and ch1 at the start of each round if you prefer joined rounds) keeping the two corner markers as reference points for increases and decorative stitches.
Round 2 :
1 sc in each st around, working 3 sc in each corner group (84)
Round 3 :
1 sc in each st around (84)
Round 4 :
1 sc in each st around (84)
Info :
The panel is establishing a stable oval base. We'll keep the circumference constant for several rounds to build height and a stable platform for daisies to sit on.
Round 5 :
1 sc in each st around (84)
Round 6 :
1 sc in each st around (84)
Round 7-8 :
1 sc in each st around (84)
Info :
At the end of round 8, the oval width is established. We'll begin to add gentle texture and grid-like openwork which both lightens the fabric and provides visible boxes where daisies will be placed later.
— Center Field Texture Rounds :
Round 9 :
Ch 3 (counts as dc), *sk 1 st, dc in next st, ch 1; rep from * around, in corner clusters work ch1 between each corner sc as needed to keep pattern even; join to top of starting ch3 (84 grid spaces approx)
Info :
This creates a subtle open grid of dc and chain-spaces. If you prefer a denser center, substitute dc clusters with hdc rows. Keep stitch markers at corner groups to ensure symmetrical expansion later.
Round 10 :
Sl st to the first ch-1 space, ch 1, *sc in ch-1 sp, ch 1; rep from * around, sc in top of starting ch3 as last stitch (84 sc in chain-spaces)
Round 11 :
Ch 2, dc in same st, *dc in next st, dc in next sc (work 2 dc over two sc to create broader panels); rep around smoothing any difference at corners (84 or slight variation to keep tension even)
Info :
These three rounds create a subtle checker texture suitable to accept sewn daisy motifs. Use # stitch markers or small safety pins to lay out the seven daisy placements before making flowers. On the sample runner the daisies are spaced roughly every 12–14 rows in the finished fabric, but we will create their placement after a few more rounds so the daisies sit centered along the long axis.
Round 12 :
1 sc in each st around (84)
Round 13 :
1 sc in each st around (84)
Round 14-16 :
1 sc in each st around (84)
Info :
Work even for several rounds so you have a wide, stable field. This area is where we will temporarily pin daisy motifs to check spacing before permanently sewing.
— Add Central Guideline Rounds (for Daisy Positioning) :
Round 17 :
Change to slightly lighter sage if desired, ch1, 1 sc in each st around (84)
Round 18 :
Ch3 (counts as dc), *sk 1 st, dc in next st, ch1; rep from * around (84), join
Info :
These decorative dc-and-chain rounds create subtle ridges and visual guidelines down the runner. Count and mark positions along the center (long axis) for seven evenly spaced daisies. For a runner ~120cm long, place daisies about 12-15cm apart center-to-center; measure your work to keep symmetry.
— Daisy Motif (Make 7) :
Info :
Each daisy is made as a layered motif: a yellow center, green leaf layer, then white petals worked as petals that are attached to the center. Make 7 motifs identical, blocking each flat before attaching. Work each daisy motif with White and Yellow as listed. Petal technique uses puff/clusters for rounded petal texture.
Round 1 :
With Bright Yellow, magic ring, 6 sc in ring; pull tight (6)
Round 2 :
Inc in each st around (12)
Round 3 :
*Ch 2, 3 dc cluster in next st, ch 2, sl st in next st; rep from * 6 times around to create small raised cluster texture around center — this forms a ring to sew petals onto (12 clusters)
Info :
Fasten off Yellow leaving tail for sewing. Block the center flat to keep it circular. The cluster round provides a raised seat for petal placement and helps the daisy read clearly when sewn onto the panel.
Round 4 :
With White, join in any cluster gap, *make petal: (yarn over, insert hook into center ring, pull up long loop; yarn over, pull through 2 loops) repeat 3 times to make a 4-loop puff, yarn over and pull through all loops, ch1, sl st into next sl st to anchor petal; rep around to make 12 petals total (12 petal puff clusters)
Round 5 :
Switch to White if not already, rotate motif and in the back of each petal work a small sc or hdc to tidy and flatten petals: *sc behind petal base, ch1; rep around 12 sc
Info :
Optionally we can add a small green leaf layer under petals for a more dimensional look: with Sage Green, join under each petal base and ch3, 3 dc in same st, ch3, sl st into same st to make mini leaves. Make 12 small leaves if you want that full look — these are optional and will be mostly hidden when sewn.
Round 6 :
Weave in ends but leave 10–12cm tail of white and yellow to sew the motif to the runner. Block lightly by pinning flat on blocking board to shape petals evenly.
Info :
Make 7 identical daisies. If you prefer a flatter daisy, use sl st petals instead of puff petals and reduce petal count to 8 for a simpler look. The sample uses 12 puff petals for a full rosette effect.
— Placement & Pinning :
Info :
Lay the central field flat. Using a tape measure, mark seven equally spaced centers down the long axis. On the sample runner the daisies are centered over the textured grid so each daisy center sits in a small square formed by the dc-and-chain texture rounds created earlier. Pin each daisy in place with T-pins. Ensure distance from ends is equal by measuring 2–3cm from both short ends to the first/last daisy as a guide.
— Sewing Daisy Motifs to Center :
Round 1 :
With thread/yarn tail from Yellow center, using tapestry needle, sew center of daisy to panel by stitching through the yellow center round only around 6–8 evenly spaced stitches; secure tightly but do not pull petals flat (this gives raised appearance)
Info :
Use small whip stitches through the yellow ring and through the underlying grid round on the panel. Then use white tails tucked under petals to sew petal bases down with invisible stitches around each petal base. Weave in ends on the wrong side.
— After-all Daisies Attached (Continue Panel Rounds) :
Round 19 :
With Sage/Green, join anywhere, ch1, 1 sc in each st around across the entire panel (including areas under daisies) (84)
Info :
Work two even sc rounds to lock motifs into place and create a continuous surface for the yellow stripe to sit on. Sew carefully; do not catch petal tips in mattress stitches — sew only through petal bases if attaching petals separately.
Round 20 :
1 sc in each st around (84)
Round 21 :
1 sc in each st around (84)
Info :
Now that daisies are secured and the central field is stable, we will add an inner yellow accent stripe by working a row of tall stitches to create a visual frame on both long sides of the daisies.
— Inner Yellow Stripe (Both Long Sides) :
Info :
We create two parallel yellow ridges running the length of the runner by working front-loop only stitches in a defined band along either side of the central axis. This produces a subtle raised stripe that frames the daisy strip.
Round 22 :
With Bright Yellow, join at the long-side row approximately 6 sts away from center, ch2 (counts as hdc), hdc in next 4 sts, *ch2, skip 2 sts, hdc in next 5 sts; repeat along and mirror on the opposite side so you have two continuous yellow bands. End by joining to starting hdc. (Counts vary slightly based on positioning — keep bands symmetrical to center)
Info :
To keep math simple, place the bands visually: on the sample the band occupies a 6–7 stitch-wide path on each side; if you prefer a narrower band do 4 hdc wide. Carry yellow across short rows behind the daisies neatly or fasten off and rejoin at opposite side for cleaner color breaks.
Round 23 :
With Bright Yellow, ch2, 1 hdc in each hdc across band, sl st to join (band solidified)
Round 24 :
Change back to Sage/Green, ch1, 1 sc in each st around across entire piece (including edges of yellow bands) to integrate the stripe with the central field (84 to 96 depending on band width)
Info :
Adjust counts by adding or removing a few sc on either side to maintain flatness. If the runner begins to ripple or cup, experiment with one round of BLO sc to create a subtle ridge that flattens the fabric.
— Outer Panel Rounds (Build to Edge) :
Round 25 :
Ch3 (counts as dc), dc in each st around, adding 1 extra dc in each corner 3-sc group to maintain oval (approx 96)
Round 26 :
1 dc in each st around (96)
Round 27 :
BLO 1 sc in each st around to create a transcript ridge (96)
Info :
These rounds transition from the flat central field to a supportive edge that the lace border will attach to. Add or omit a round if you want a slightly narrower or wider lace attachment area.
Round 28 :
Ch1, sc in each st around (96)
Round 29 :
Ch3, dc in next 2 sts, *ch2, sk 2 sts, dc in next 3 sts; rep around to create small arch foundations for lace (96 arched positions)
Info :
If you prefer a more open lace, increase ch-arches to ch3 between clusters. Keep your stitch markers at the corner points so shell placements align across the short ends.
— Lace Border - Cream Scallop Base :
Round 30 :
Change to Cream/Ivory. Join in any arch ch-2 space, *work (5 dc, ch2, 5 dc) in arch space (a large shell), sl st to next arch space; rep around to create scallops (96 large shells)
Info :
These large shell scallops create the rounded lace effect. At short ends, if spacing requires, split a shell into 2 smaller shells to preserve even spacing. Count shells so both long edges have equal numbers; small adjustments in the dc counts inside shells will keep shells perfectly flat.
Round 31 :
Ch1, sc in top of each shell cluster and in the spaces between to anchor shells (approx 192 sts because each shell has many stitches — work evenly)
Round 32 :
*In each shell: (sl st, ch3, 3 dc, ch3, sl st) into top of shell to create a decorative fan; rep around (96 fans)
Info :
These fan rounds add airy lace and make the scalloped edge visually light. Work slowly to ensure each fan is anchored at the same height to keep a straight overall edge.
Round 33 :
Sc around to tidy the connecting row (work 1 sc in each fan peak and in each sl st between fans) — this evens the edge and prepares for outer scallop accent (approx 192)
— Outer Scallop Accent (Green Shells) :
Round 34 :
Change to Sage/Green. Join at the base of any fan, *work shell: (7 dc) into fan peak, sl st to base between fans; rep around to create a second row of rounded petals/half shells (96 shells)
Info :
The green shells peek out from under the cream scallops for a layered scallop effect visible in the photo. If the gauge differs on your sampler, decrease to 5 dc per shell to avoid flaring.
Round 35 :
Ch1, sc in each st around to secure shells (maintain evenness across rounded points)
Round 36 :
Change to Cream/Ivory, *in each green shell work (sl st, ch4, picot: ch3, sl st in 3rd ch from hook, ch1, sl st) to add delicate picot edging on cream peaks; rep around for final lace finish
Info :
Picots and small loops give that fine scalloped white border that frames each green scallop and creates the finished frilly look. Be mindful of tension on picots; if they pull too tight they tuck shells inward.
— Final Edge Stabilization :
Round 37 :
Work 1 sc evenly around entire outer scallop edge to stabilize and hide tails from picot row (weave them in as you go). Fasten off and weave ends securely on wrong side.
Info :
Block the entire finished runner: pin scallops to true shape on a blocking board or large towel, spray lightly with water or use a gentle steam, allow to dry completely. Blocking evens out scallops and smooths stitches — do not skip.
— Optional Finishing Rounds (If You Want Extra Weight or Sturdiness) :
Round 38 :
If your runner feels too floppy, work a final round in Sage/Green with 1 hdc in each sc around (this adds body). Alternatively add a lining to the underside by sewing fabric with matching thread.
Info :
To achieve a table-friendly drape that sits flat under centerpieces, weigh the runner lightly with decorative non-slip backing or add a thin interfacing stitch to the wrong side; test first to ensure it doesn't distort lace.
— Notes on Adjusting Length and Daisy Count :
Info :
To lengthen: add additional even sc rounds in the central field before adding daisies and/or add more daisies spaced evenly. To shorten: omit one or more center texture rounds and reduce the number of daisies. The modular construction allows straightforward changes: each extra 4–6 rounds of sc adds about 5–7 cm depending on your tension and yarn.
— Care & Blocking :
Info :
Machine-washable cotton yarn: wash on gentle cycle in cold water and lay flat to dry to preserve the lace edge. Always pin and reshape scallops while damp if you wash it. Avoid tumble drying on high which can distort the scalloped edges.
This Daisy Meadow Table Runner brings vintage charm with modern color clarity — each hand-stitched daisy and scallop adds personality to your tabletop. The layered motifs and lace edge make it a standout accent for sunny brunches or quiet dinners. Enjoy the meditative rhythm of rounds turning into a long, elegant runner you’ll be proud to display. 🧶🌼💛