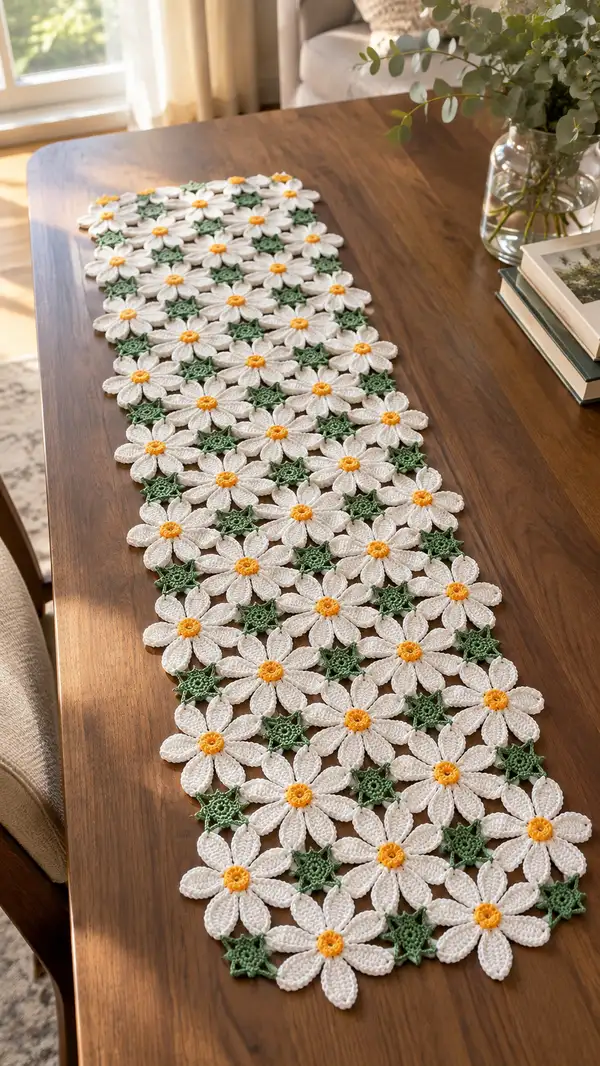
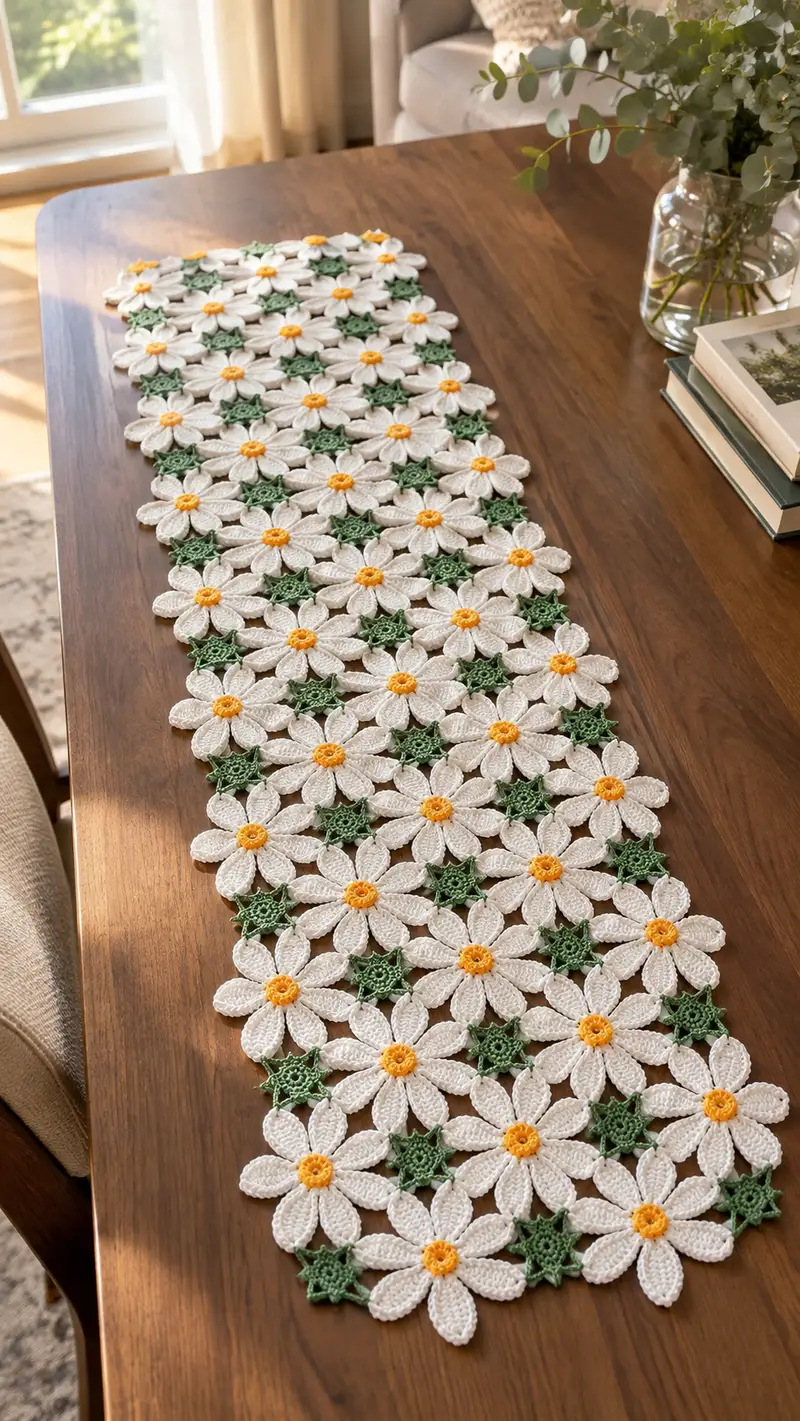
Bright and airy daisy motifs joined into a long, elegant table runner featuring crisp white petals, sunny yellow centers, and delicate green star connectors. This versatile pattern uses small motifs worked in rounds and joined as you go to create a lacy, floral runner that drapes beautifully across a dining table or console. The runner pictured measures approximately 12" x 48" and is perfect for seasonal decorating or a handmade gift.
Progress Tracker
0% Complete
— Overview :
Info :
This pattern is modular: you will make Daisy Motifs (white petals with yellow centers) and Small Star Connectors (green). Motifs are joined as you go using slip-stitch joins and small sewing where necessary. The sample runner is made with 8 columns of daisies in width and 24 daisies in length (arranged in a staggered grid) to produce a long runner approximately 12" x 48" using DK yarn and a 3.5mm hook; adjust the number of motifs to change length and width.
Info :
To achieve crisp petals I recommend working centers with the 3.5mm hook and switching to a slightly smaller 3.0mm hook for the petal loops if you notice the petals getting loose. Block motifs flat before joining for best results.
— Daisy Motif (Make multiple) :
Round 1 :
With yellow yarn. 6 sc in magic ring (6)
Round 3 :
(1 sc, inc) x 6 (18)
Round 4 :
(2 sc, inc) x 6 (24)
Info :
By round 4 you have 24 stitches which will act as anchors for the 8 petals (24/8=3 anchor stitches per petal). Fasten off yellow leaving a 10-12" tail for sewing if you prefer to stitch center later to secure. If you'd like a slightly raised center, add a short round of puff clusters before changing color.
Round 5 :
Change to white in any stitch at the back loop of an anchor stitch. Ch 1, 1 sc in same st and around to maintain continuity (24)
Round 6 :
Creating petal base loops: *(Ch 7, sl st) into next stitch of round 5 to create a loop that spans three anchor sts; move to the next stitch after slip stitch; rep from * 8 times (8 loops made around center). Note: work each ch7 loop into the next base st so loops are evenly spaced (no overall stitch count change)
Info :
Make sure loops are not twisted; keep tension even. These loops will be worked in the next round to form petals. Using a slightly smaller hook here tightens loops for sturdier petals.
Round 7 :
Working into each ch7 loop to form petals (work entire round in white): Into first loop: sl st into loop, ch1, (sc, hdc, 3 dc, hdc, sc) all into the loop; sl st to base st to close petal. Repeat into each of 8 loops to create 8 petals. Each petal consists of 7 stitches creating a raised elongated petal. (8 petals total)
Round 8 :
Surface ridge on petals: Working behind petals on RS, *fpdc around the base of petal center (work 3 fpdc evenly spaced across petal base) then sl st to center base; rep from * around to define petal ridge. This round adds texture; no overall count.
Info :
If you'd like more texture, repeat a shallow row of bpdc behind the petals for contrast. Use stitch marker to mark first petal to avoid losing your place.
Round 9 :
Edge tidy-up: With white, sc in each base stitch along the center round (24) and also sc evenly along the back of each petal where it meets the center, placing 2 sc between petals for neatness. This may result in approx 40-48 total sc when counting petal-base sc; count visually per motif and keep consistency across motifs. Fasten off leaving a 10" tail for joining.
Info :
Sew the yellow center in place if you fastened it off earlier: use the yellow tail to stitch around the center ring, pulling slightly to create a recessed center if desired. Weave in ends neatly on the WS.
Round 10 :
Optional: Add short surface embroidery lines along petals with a contrasting white/soft gray to accent veins. Use a yarn needle and duplicate stitch method: run the needle under the front loops along the petal center line. Do not add heavy embroidery that will distort motif shape.
Info :
Block motifs flat: Pin each daisy to a blocking mat, stretch gently so petals are all flat and circular, and mist lightly or use steam blocking according to yarn instructions. Blocking will ensure motifs line up neatly when joined.
Round 11 :
Optional decorative picot edge on petals: With white, attach to tip of a petal and *ch3, sl st into same stitch for picot; sl st to next petal tip; rep around tips for a gentle scallop. Fasten off and weave ends. This does not change stitch counts but creates a lacy outline.
Info :
Repeat Daisy Motif until you have the required number for your runner. The sample uses a staggered placement where small green star motifs will occupy the gaps between daisies; plan layout before joining.
— Small Star Connector (Make multiple) :
Round 1 :
With green yarn. 6 sc in magic ring (6)
Round 3 :
(1 sc, inc) x 6 (18)
Round 4 :
Change to star-forming round. *(Ch 4, sl st) into every third stitch to create 6 loops for points; move to next base st; rep from * 6 times producing 6 ch4 loops evenly spaced. (6 loops)
Info :
These loops will become star points; keep them small (ch4) to ensure connectors fit snugly between petals. The star occupies the gaps between daisies so accuracy in loop spacing matters.
Round 5 :
Working into each ch4 loop: sl st into loop, ch1, (sc, hdc, 3 dc, hdc, sc) into loop then sl st to base. Repeat into all 6 loops to produce 6 pointed mini-petals (6 points total).
Round 6 :
Point definition: into each point work sl st at tip then ch2 and a picot (ch3, sl st into first ch) to give star-points a crisp tip. Fasten off leaving a 6-8" tail for joining.
Info :
If you prefer a flatter connector use ch3 loops on round 4 and sc-only in round 5, skipping dc for a lower-profile star. Ensure all stars are identical in size for even joins.
Round 7 :
Optional: Add a small sc round around the entire star center to strengthen the connector for use as a join point; sc evenly into base stitches (18 sc). Fasten off.
Info :
Make as many star connectors as required; sample runner uses a star in every gap between four daisies, so plan quantity accordingly. Count your daisy grid: for a staggered grid of 8 across and 24 long, you'll use approximately 7 columns of interstitial stars times number of rows - estimate before starting.
— Petal Reinforcement & Detail Rounds (Optional, per Daisy) :
Round 1 :
With white, on RS and working around each petal: attach to petal base, ch1, work 6 sc evenly across the underside of petal (per petal). This reinforces the petal and creates a neat underside finish. (6 sc x 8 petals = 48 sc total underpetal)
Info :
These rounds are worked as short arcs over each petal and do not form a continuous round around the motif. Use removable stitch markers to track petal starts.
Round 2 :
Front ridge accent: Using fpdc, work 3 fpdc per petal across the central ridge (per petal). This deepens the petal texture and makes petals catch light attractively.
Info :
Work these reinforcement rounds only if your yarn and tension produce floppy petals; otherwise these are optional to preserve the delicate open look.
— Joining Motifs As You Go (Core Technique) :
Info :
We recommend joining motifs 'as you go' rather than creating a pile and sewing later. This produces a cleaner join and maintains flatness. Join daisies to stars (and daisies to adjacent daisies) by aligning petal tips and using slip-stitch or whip stitch in green to produce an invisible join. Alternate joining directions so seams are balanced.
Round 1 :
To join a Daisy to an adjacent Star: hold Daisy RS up and Star RS up; align star point tip into gap formed by petal bases (the small triangular space); with green tail from star, insert hook through star tip and corresponding point on daisy (use the white tail or a new green tail) and sl st to attach. Work 3-4 sl sts across the small contact area for a secure join. Repeat at both contact points where the star touches the daisy.
Info :
When joining two daisies directly (in places where petals overlap), use a neat whip stitch through the petal tips using a yarn needle and white tail so the join is nearly invisible from the RS. Use small, even stitches and avoid pulling tight to prevent puckering.
Round 2 :
Joining sequence for sample staggered grid: Row A: Make a line of daisies joined side-by-side by star connectors between each two daisies. Row B: Offset daisies so petals of Row B fit into the star gaps of Row A. Join Row B to Row A using star connectors at each intersection point. Continue building rows, joining each new daisy immediately to its neighbors to maintain tension and alignment.
Info :
Always block each small section (4-6 motifs) before adding more; this helps keep the runner flat and consistent. Use pins to hold motifs in place during joining for accurate placement.
Round 3 :
To create a strong seam at intersections where four motifs meet (two daisies + two stars): after initial sl st joins, secure with a few small mattress or ladder stitches through the adjacent petal tips and star point bases on the WS. This prevents separation with use.
Round 4 :
Edge planning: leave a shallow border of half-daisies at runner edges if you prefer a scalloped edge; otherwise finish with a continuous crocheted border round after joining all motifs.
Info :
For a sample runner width, begin with a central column and build outward symmetrically for best visual balance. Keep counts of motifs per row in a notebook to prevent miscounting during joining.
— Border & Finishing Rounds :
Round 1 :
Once all motifs are joined and the runner is flat, pick up a green yarn at any outer joining point. Sc evenly around the entire perimeter into the edge stitches of outer petals and stars. Aim for approximately 1 sc per visible stitch or 2 sc per petal tip area depending on yarn. This will unify the edge. (Perimeter sc count varies by runner size)
Round 2 :
BLO ridge: Work 1 sc in each st BLO around to create a gentle raised border (this holds shape and prevents curling). This will not change overall count but adds a neat ridge.
Info :
If you prefer a scalloped edge: make a picot scallop into each petal tip: *ch3, sl st into first ch for picot, then sl st into next base; rep across perimeter to create consistent scallops. Fasten off and weave ends.
Round 3 :
Optional decorative round: change to white and work 1 round of crab stitch (reverse sc) around the entire perimeter for a tidy, slightly twisted edging that contrasts with the green border. This adds visual interest and final polish. Fasten off and weave in ends.
Info :
Block the entire runner one final time pinned to shape and allow to dry completely. If using delicate yarn, place a pressing cloth and lightly steam — do not iron directly on lace.
— Alternative Joining and Variation Rounds :
Round 1 :
Alternate join (sewn join): For a softer join, whip stitch adjacent petals together using matching yarn on the WS, catching only a few threads so the RS remains smooth. This method avoids visible slip-stitch chains on the RS and is recommended for heirloom pieces.
Round 2 :
Solid backing option: If you want a solid runner rather than a lacy one, crochet a continuous panel backing in a simple sc fabric in white and sew it to the underside of the motif layout, matching seam lines carefully. This will hide the table surface but adds weight and warmth.
Info :
When adding a backing, pre-block motifs first, then pin backing stretched slightly smaller than the joined motif perimeter to avoid sagging. Sew with small hidden stitches through the back loops only of motifs to keep RS clean.
— Assembly Steps (Detailed Sequence) :
Round 1 :
Start by making a 'seed' cluster of 4 daisies joined by 4 star connectors so you can verify spacing and tension. This small sample helps ensure consistent motif sizing before committing to the full runner.
Round 2 :
Build the runner in horizontal rows. For each new daisy, join along its left neighbor star connectors first, then the top connectors. Work each join as sl st into the star points, then secure with a whip stitch on the WS if needed for reinforcement.
Round 3 :
Continue building rows, pinning motifs down as you join to maintain straight edges. Count stitches at the end of each row to ensure consistent motif counts and avoid accidental offsets.
Info :
If you discover a mis-joined motif row, it is better to unpick the joins on that segment and re-join correctly rather than forcing a mismatch; small errors magnify in a long runner.
Round 4 :
After joining all motifs, run a perimeter round in green sc as described in Border rounds for cohesion. Then decide if you want the crab stitch or picot scallop as the final decorative detail.
Info :
Weave in all ends on the WS, taking care to bury tails inside petals or star centers where they are hidden. Trim close but not flush; leaving a little tail prevents loosening over time.
— Care, Blocking & Presentation Rounds :
Round 1 :
Blocking: Pin runner to protective blocking surface, stretching gently so petals are evenly spaced and star connectors lie flat. Mist lightly with water and let dry completely. If yarn label allows, steam lightly to set shape.
Round 2 :
Presentation: For tables in use, place a thin protective runner pad or felt under the crochet runner to prevent snagging on table finish. Remove and wash periodically following yarn care instructions — gentle hand wash and flat dry recommended.
Info :
If you plan to machine wash, choose a gentle cycle and place the runner in a mesh bag; reshape and block after washing. Natural fibers may felt slightly; synthetic-blend yarns are more forgiving for frequent washing.
— Stitch Count & Math Notes (Consistency Reference) :
Info :
Center of Daisy: rounds progress 6 -> 12 -> 18 -> 24 which creates a 24-anchor base for 8 petals (3 base stitches per petal). Star Connector: 6 -> 12 -> 18 base rounds then 6 loops for star points (one loop per 3 base stitches). Petal loops created as chain loops (ch7) and then filled creating full petal shapes. When counting petals and loops remember each petal is formed into a loop and does not contribute to the continuous central round stitch count.
Info :
When calculating runner size, measure a single finished motif laid flat then compute how motifs tessellate based on your layout. Allow for slight shrinkage/gain after blocking; always make a sample strip of three by three motifs to verify dimensions.
— Troubleshooting Rounds :
Round 1 :
Motifs curling at petal tips: re-block and press petal tips gently. If persistent, add the optional reinforcement rounds under petals (per-petal sc backing).
Round 2 :
Gaps too large between daisies: use a slightly smaller hook for star connectors to pull motifs closer; alternatively use one extra slip-stitch at joins to reduce spacing.
Round 3 :
Uneven joins across a row: unpin a portion of the row and re-position motifs using additional pins before sewing; small adjustments go a long way when the runner is long.
Info :
Record tension and hook sizes used for centers vs petals and stick to them across all motifs; varying hook sizes will create noticeably different motif sizes making joining difficult.
— Advanced Decorative Variations :
Round 1 :
Two-color petal: Instead of a single petal round, work the petal body in white and finish the petal edges with an overcast in pale cream for a soft two-tone petal. Work 1 round of sc in cream along petal edges to achieve this.
Round 2 :
Vintage center: Add a second yellow round before switching to white: after round 4 (24), work one more yellow round: sc in each st (24) and then work a round of tiny popcorns (popcorn stitch) into every third stitch to create a textured center. Then change to white for petals.
Info :
All these decorative options will change motif thickness and potentially the amount of yarn needed; account for these when planning totals.
Round 3 :
Make a shorter table runner by reducing the number of rows but keeping the same staggered layout; remove the center column and build symmetrically for a balanced shape.
Info :
For placemat-size projects, use a 3 x 3 motif square and finish with the same border rounds for a coordinated table set.
— Final Finishing Rounds :
Round 1 :
After final blocking and all joins secured, check for any loose tails by gently tugging to ensure they stay hidden. Reweave any ends that have migrated to the RS.
Round 2 :
Trim ends and store runner flat or rolled; avoid folding to preserve petal shape. If gifting, tie gently with ribbon and include care instructions card.
Info :
Enjoy your new Daisy Meadow Table Runner! Photograph it flat on a table, and consider making a matching centerpiece doily by arranging 7 daisies in a circle and finishing with a small green border.
Completing this Daisy Meadow Table Runner is such a rewarding experience — every small daisy you make becomes part of a bright, cohesive textile that brings warmth and personality to any table. The modular nature lets you control size and scale, so you can make a runner, placemats, or even a full tablecloth. I had so much fun watching each motif come together into a lovely floral field — you will too! 🌼🧶