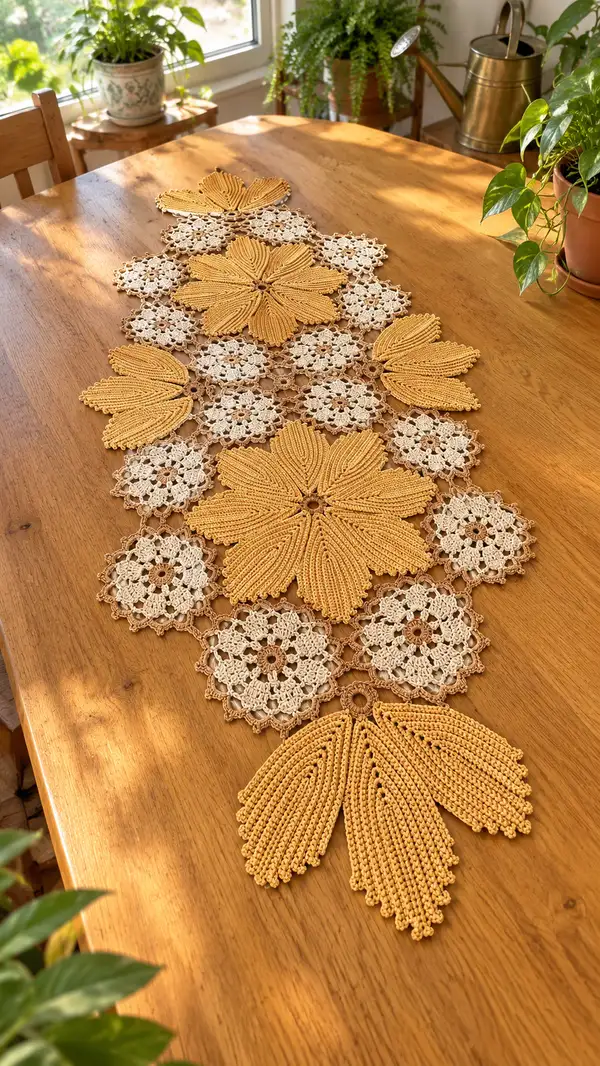
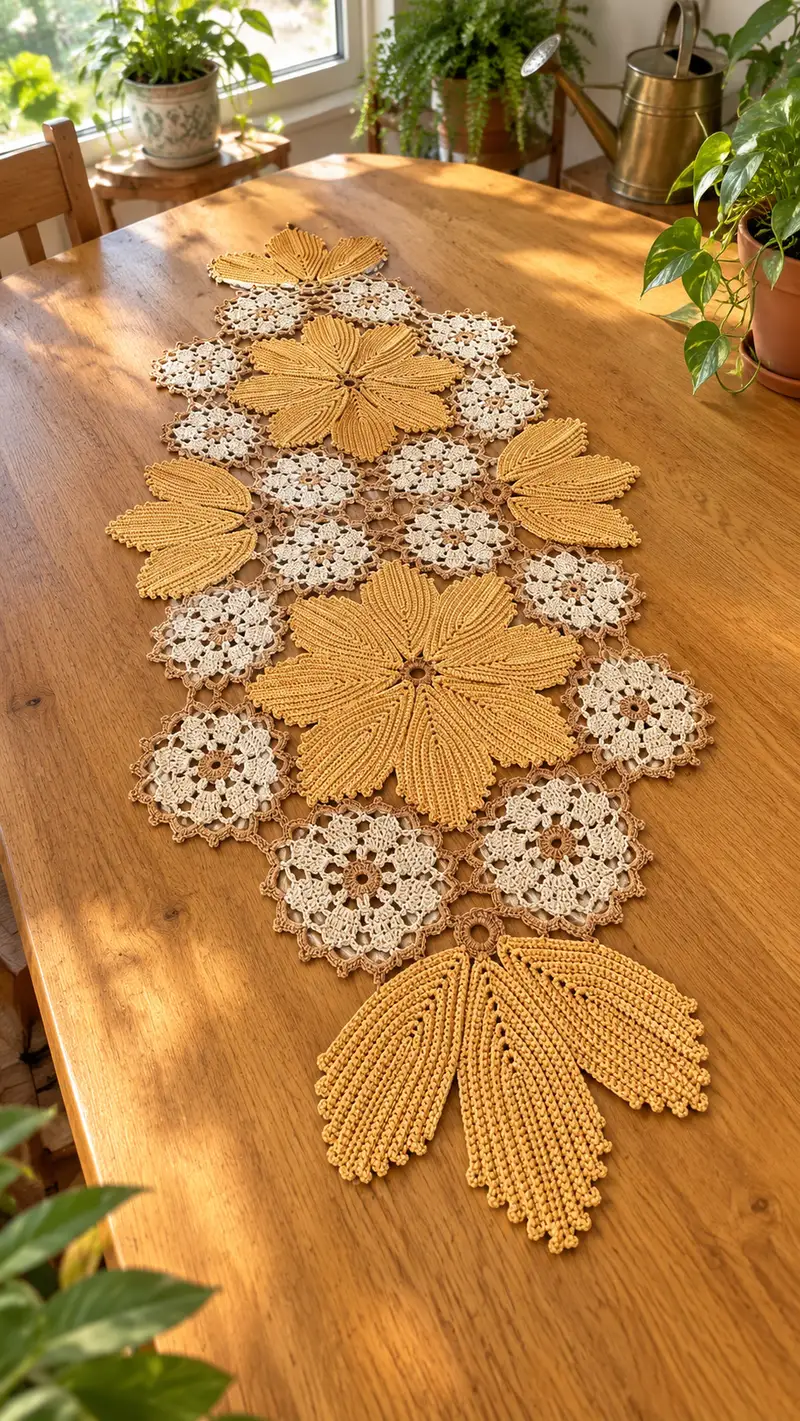
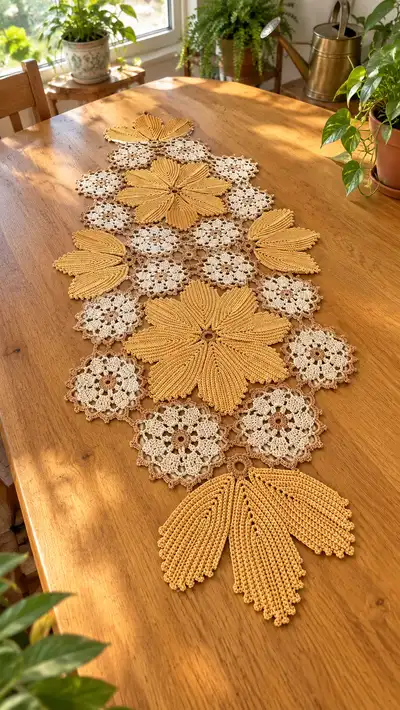
A warm, vintage-inspired table runner made from interconnected sunflower and lacy hexagon motifs. This pattern combines textured, ribbed petals in a golden mustard with delicate cream floral hexagons and soft tan linking rings to create an elegant, hand-crafted centerpiece. The runner drapes beautifully over a dining table and looks lovely styled with plants or simple tabletop decor. Clear motif-by-motif instructions make this a rewarding project for crocheters who enjoy joining motifs and textured stitchwork.
Progress Tracker
0% Complete
— Overview & Gauge :
Info :
Gauge is not critical for a table runner, but to match the photo use cotton DK with a 3.0mm hook. One large sunflower motif (finished) measures approximately 22–24cm across; small lacy hexagons measure approximately 7.5–8.5cm across. Block motifs flat after finishing for accurate joining.
Info :
Throughout the pattern rounds are written per motif (each motif section restarts Round 1). Use stitch markers to mark the start of rounds and petal anchor points. All stitch counts in parentheses are totals at the end of the round unless otherwise noted.
— Large Sunflower Motif (Make 3 for pictured runner) :
Round 1 :
6 sc in magic ring (6)
Round 3 :
(1 sc, 1 inc) x 6 (18)
Round 4 :
(2 sc, 1 inc) x 6 (24)
Round 5 :
(3 sc, 1 inc) x 6 (30)
Round 6 :
(4 sc, 1 inc) x 6 (36)
Round 7 :
(5 sc, 1 inc) x 6 (42)
Round 8 :
(6 sc, 1 inc) x 6 (48)
Round 9-10 :
1 sc in each st (48)
Info :
Place 8 stitch markers evenly around round 10 to divide the 48-stitch round into eight equal anchors (48/8 = 6 sts per petal anchor). These markers mark the start point for each petal.
Round 11 :
1 sc in each st (48)
Round 12 :
1 sc in each st (48)
Info :
We will now work each petal in rows anchored into a span of 6 stitches. You will join yarn at the marker, work the petal in rows (turning at each row), and secure the last row back into the center. Each petal's row counts expand and contract to give the petal shape. For clearer ribs, work every odd-numbered row in BLO and use tight tension.
Round 13 - Petal 1, Row 1 :
Join mustard yarn at marker, ch1, sc in the next 6 sts across (6). Turn.
Round 14 - Petal 1, Row 2 :
Work in BLO: 1 sc in each st across (6). Turn.
Round 15 - Petal 1, Row 3 :
Ch1, *(1 sc, inc)* x3 across (9). Turn.
Round 16 - Petal 1, Row 4 :
Work in BLO: 1 sc in each st across (9). Turn.
Round 17 - Petal 1, Row 5 :
Ch1, *(2 sc, inc)* x3 across (12). Turn.
Round 18 - Petal 1, Row 6 :
Work in BLO: 1 sc in each st across (12). Turn.
Round 19 - Petal 1, Row 7 :
Ch1, *(2 sc, dec)* x3 across (9). Turn.
Round 20 - Petal 1, Row 8 :
Ch1, *(1 sc, dec)* x3 across (6). Finish row, sl st into base of petal at center to secure. Leave a 20cm tail for weaving under petal or fasten off and weave in later.
Info :
Petal tips: Working the outward-facing rows in BLO gives a series of ridges across the petal. For extra sculptural ribs, you can substitute the even BLO sc rows with rows of fpdc worked around corresponding stitches in the previous row - this will make deeper vertical ribs but is slightly more advanced.
Round 21 - Petal 2, Row 1 :
Join yarn at next marker, repeat Petal Row 1 (6 sc). Turn.
Round 22 :
Petal 2 Row 2: Work in BLO 1 sc in each st (6). Turn.
Round 23 :
Petal 2 Row 3: (1 sc, inc) x3 (9). Turn.
Round 24 :
Petal 2 Row 4: Work in BLO 1 sc in each st (9). Turn.
Round 25 :
Petal 2 Row 5: (2 sc, inc) x3 (12). Turn.
Round 26 :
Petal 2 Row 6: Work in BLO 1 sc in each st (12). Turn.
Round 27 :
Petal 2 Row 7: (2 sc, dec) x3 (9). Turn.
Round 28 :
Petal 2 Row 8: (1 sc, dec) x3 (6). Sl st to center, fasten off or leave tail.
Info :
Repeat the petal sequence for Petals 3–8. Each petal repeats the same 8-row sequence; counts will mirror Petals 1–2 (6→6→9→9→12→12→9→6). Maintain consistent tension for symmetry.
Round 29 :
Petal 3 Row 1: Join at marker, 6 sc. Turn.
Round 30 :
Petal 3 Row 2: Work in BLO 1 sc each (6). Turn.
Round 31 :
Petal 3 Row 3: (1 sc, inc)x3 (9). Turn.
Round 32 :
Petal 3 Row 4: BLO 1 sc each (9). Turn.
Round 33 :
Petal 3 Row 5: (2 sc, inc)x3 (12). Turn.
Round 34 :
Petal 3 Row 6: BLO 1 sc each (12). Turn.
Round 35 :
Petal 3 Row 7: (2 sc, dec)x3 (9). Turn.
Round 36 :
Petal 3 Row 8: (1 sc, dec)x3 (6). Sl st to center.
Info :
Continue to Petals 4–8 repeating Rounds 29–36 pattern. Do not skip blocking after finishing all petals; blocking straightens ribbing and flattens the petal bases for neat joining.
Round 37-68 :
Repeat petal rows for remaining petals (each petal equals 8 rows as above). After Petal 8, ensure all petal edges are secured back into the center using sl st and weave in tails neatly on the underside of the motif.
Round 69 :
With tan yarn join in a center stitch behind one petal, ch4, *sl st into the next petal base between petals*, repeat around to create small tan connector loops between petals, finishing with sl st to first ch. You should have 8 small chain-loops for joining (8 loops).
Round 70 :
Edge round in mustard: Attach mustard, ch1, sc evenly around petal outer edge working 2 sc in larger outer corners where needed for smooth curve. Work approximate 6–8 sc along each petal outer rim to form a continuous edge (estimate total ~64–72 sc depending on how full petals are). Finish with sl st and fasten off.
Info :
Block the finished sunflower flat, pinning each petal evenly. Use light steam or spray starch for stiffer petals if desired. Allow to dry fully before joining to other motifs.
— Small Lacy Hexagon Motif (Make many) :
Round 1 :
Make a magic ring with tan center ring, ch3 (counts as dc), 11 dc into ring, sl st to top ch3 (12) (this creates a small center ring that echoes the tan connector color)
Round 2 :
Ch1, switch to cream yarn: (ch3, skip 1 st, dc in next st) x 12 to create small chain loops around center; sl st to base of first chain. (12 chain-spaces)
Round 3 :
Ch1, *(sc, ch3, sc) into chain-space* around to form little picot petals: repeat 12 times (24 sc + 12 ch3-spaces counted as openwork). Sl st to first sc.
Round 4 :
Ch1, *in each ch3 space work (sc, hdc, 3 dc, hdc, sc)*. This forms a fuller lacy petal; repeat in each of the 12 spaces. Sl st to first sc at end. (This round yields delicate petals; total stitch count will vary because of shells but the motif should lie flat.)
Round 5 :
Ch1, work a connecting round: sc in each dc and sc across shells, and ch1 between shells to create small loops for joining later. Aim to place 12 small ch1 loops around the outer edge for join points. Sl st and fasten off cream yarn leaving a long tail to weave or to use during join-as-you-go.
Info :
Small hexagon motifs are delicate. Block them flat and keep their centers slightly raised while working to achieve the lacy openwork look. Larger motifs will require more blocking pins to maintain shape while drying.
Round 6 :
With tan yarn, work a decorative edging: join in any outer loop, *(ch3, sl st into next outer loop)* around to create small chain-loops; finish and fasten off. These tan loops will act as visible connectors between motifs when you assemble the runner.
— Three-Lobed Leaf / Terminal Motif (Make 2 ends) :
Round 1 :
6 sc in magic ring with mustard (6)
Round 3 :
(1 sc, inc) x6 (18)
Info :
This small round creates the small base from which three lobes will be worked; place three markers every 6 stitches to mark the start of each lobe.
Round 4 - Lobe 1 Row 1 :
Join mustard at first marker, ch1, sc in next 6 sts (6). Turn.
Round 5 :
Work in BLO 1 sc across (6). Turn.
Round 6 :
Ch1, (1 sc, inc) x3 (9). Turn.
Round 7 :
BLO 1 sc each (9). Turn.
Round 8 :
Ch1, (2 sc, inc) x3 (12). Turn.
Round 9 :
BLO 1 sc each (12). Turn.
Round 10 :
Ch1, (2 sc, dec) x3 (9). Turn.
Round 11 :
Ch1, (1 sc, dec) x3 (6). Finish lobe by sl st into base, fasten off or leave tail. Repeat Lobe 2 and Lobe 3 in the next two marked bases. After all three lobes are made, pick up tan yarn and make a small loop at the underside center for joining (ch6, sl st to base) and block flat.
Info :
Leaves are sculptural and shallow; if you would like more pronounced ribs, use BLO rows every second row as with the sunflower petals. Block flat with slight curve if desired.
— Connector Ring (Make many) :
Round 1 :
With tan yarn ch8, sl st to first ch to form small ring (8)
Round 2 :
Ch1, 12 sc evenly around ring (12). Sl st and fasten off leaving long tail for sewing into join spaces between motifs.
Info :
These little rings are used to bridge motifs and become decorative nodes in the lace. Make one quantity per join point in layout; in the pictured runner they are used between each hexagon and at petal junctions.
— Edge & Decorative Picot Round for Motifs :
Round 1 :
When a motif is complete, you can refine the outer edge: attach cream yarn, ch1, sc around outside working 1 sc into each available stitch and (sc, ch3, sl st) picot every 6–8 stitches to create a tiny picot scallop. Count will vary (aim for 12–20 picots depending on motif size).
Round 2 :
For the large sunflower outer-most edge: with mustard yarn, join, *sc along outermost row of petals placing 2 sc in wider curves, then (picot: ch3, sl st back into top sc)* repeat around. Finish and fasten off.
Info :
Picots are optional but they help motifs nest neatly when joined and present a decorative outline. Keep picots small (ch3) for a subtle finish.
— Joining Motifs (Join-As-You-Go method recommended) :
Info :
Assemble the runner using a join-as-you-go (JAYG) method on the final round of each motif. Work the last edge round of each motif and when you reach a join point, instead of making a ch or picot, sl st into the corresponding loop on an adjacent motif. This creates flat, nearly invisible joins. Pin motifs in their final layout before joining to ensure correct spacing and orientation.
Round 1 :
Lay out sunflower motifs and small hexagon motifs following the photograph: large sunflower, a ring of small hexagons around it, connectors in tan between each hexagon, and another sunflower downstream. Use the tan connector rings where three motifs intersect.
Round 2 :
When joining a small hexagon to a sunflower petal connector loop: on the small hexagon's last round, when you reach the designated outer loop (tan loop), ch1, sl st into the designated tan loop of the sunflower (or into the tan connector ring), then continue patterning the small motif edge. Repeat for each join.
Info :
Work slowly through the first few joins to get even spacing. If joins pull the motif out of shape, unpick and rejoin with a slightly looser tension or add an extra sl st between join points for better spacing.
Round 3 :
When three motifs meet at a tan connector ring, insert the long tail of the ring into the seam and sew through the center of the ring into all three motifs to stabilize the junction. You can also place a small stitch of matching tan yarn on the underside to prevent shifting.
Info :
Joining tips: use a blunt darning needle and matching color yarn to invisibly whipstitch connections on the underside while the top remains decorative and uninterrupted. Keep joins flat so the runner sits evenly on the table.
— Layout & Final Assembly Notes :
Info :
For the layout shown: three large sunflower motifs spaced along the center with clusters of seven small hexagon motifs around and between them, plus two three-lobed leaf terminals at both ends. Use tan connector rings between every small hexagon and sunflower petal to replicate the open lace column effect.
Round 1 :
Finish every edge round, fasten off and weave ends under center spaces or along join seams. Block fully: dampen motifs and pin flat with petals fanned, allow to dry.
Info :
After blocking and final joining, inspect runner edges for symmetry and tighten any loose joins. Add small finishing stitches to underside where motifs show separation when lifted.
Round 2 :
Optional: spray fabric starch lightly for a stiffer, more table-protecting finish. Test on a scrap motif first to ensure desired stiffness.
Info :
Because motifs are joined with loops and sl st, the runner will have slight drape but remain relatively flat—ideal for decorating a table without interfering with tableware.
Finishing this runner brings big satisfaction—watching the textured sunflower petals and delicate hexagons come together is truly rewarding. Each motif is a small work of art, and joining them creates a stunning heirloom-quality centerpiece. Enjoy styling it on your table; it will add warmth and handmade charm to your home. 🧶🌼💛