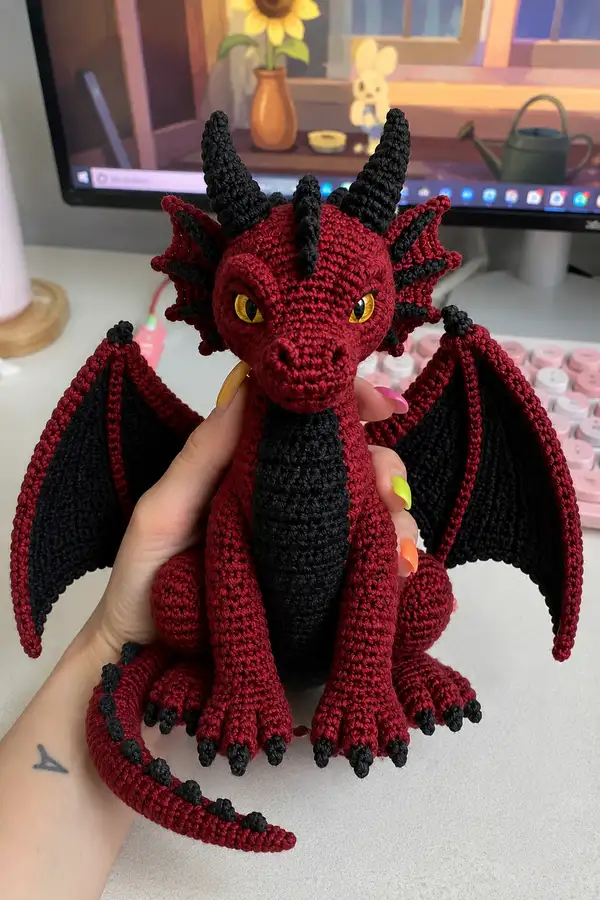
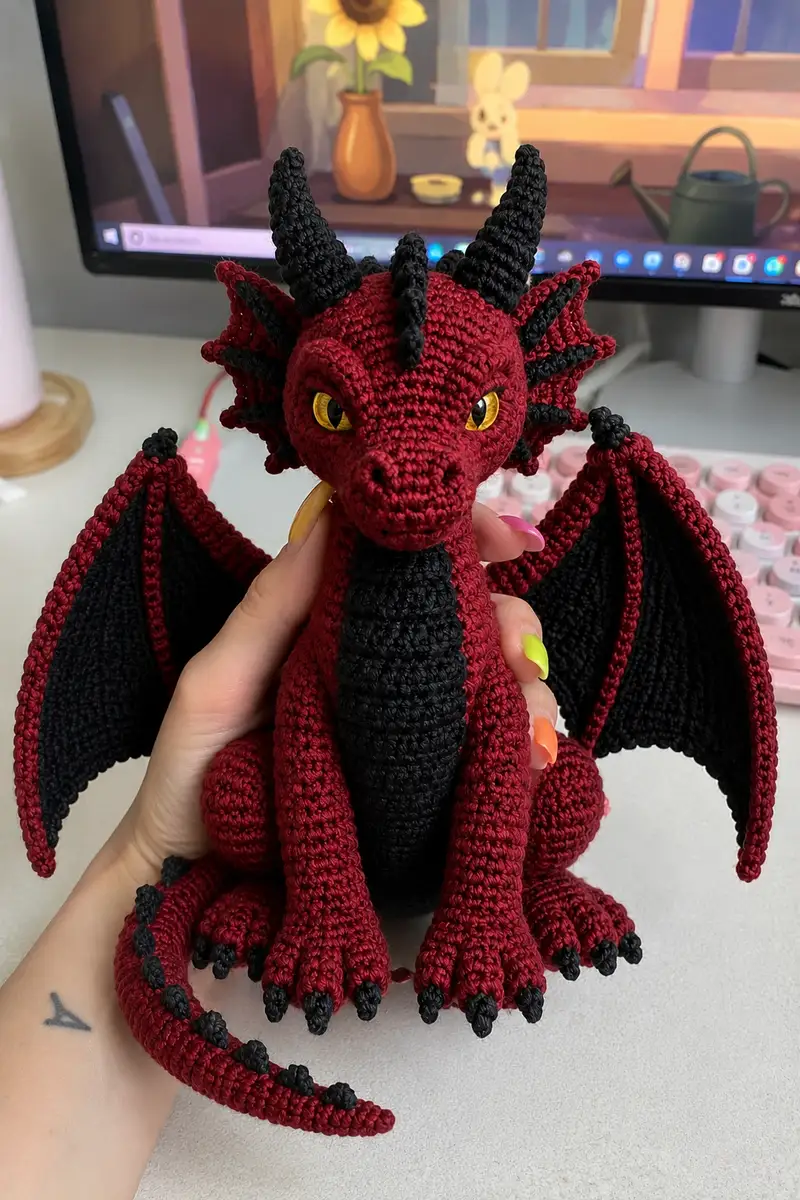
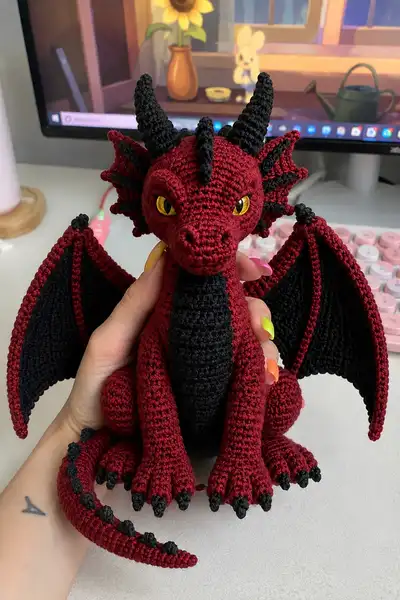
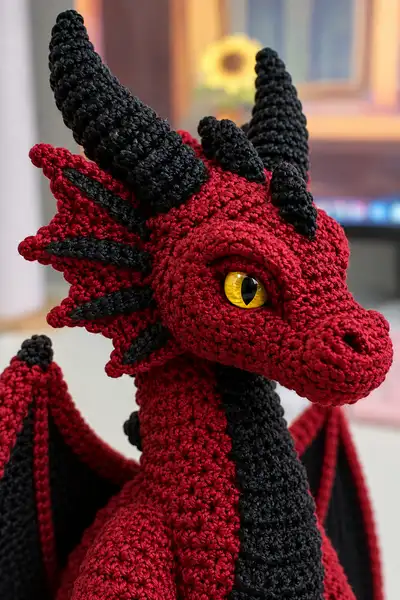
Create a fierce yet cuddly dark red demon dragon with dramatic black wings, ridged black horns, and glowing yellow eyes. This richly detailed amigurumi features layered frills, a textured black belly, articulated claws, and a long curved tail with black spike details. The pattern includes clear round-by-round instructions, color-change tips, and assembly guidance to help you recreate the exact character shown.
Progress Tracker
0% Complete
— Head :
Round 1 :
6 sc in magic ring (6)
Round 3 :
(1 sc, inc) x 6 (18)
Round 4 :
(2 sc, inc) x 6 (24)
Round 5 :
(3 sc, inc) x 6 (30)
Round 6 :
(4 sc, inc) x 6 (36)
Round 7 :
(5 sc, inc) x 6 (42)
Round 8 :
(6 sc, inc) x 6 (48)
Info :
Work tight to avoid holes, cotton yarn gives crisp shaping. Place stitch marker at start of each round and move it as you go.
Round 9 :
1 sc in each st (48)
Round 10 :
1 sc in each st (48)
Info :
Begin shaping muzzle now by keeping tension slightly tighter on the first 8-10 sts of each round to create a subtle forward curve.
Round 11 :
1 sc in each st (48)
Round 12 :
(6 sc, inc) x 6 (54)
Round 13 :
1 sc in each st (54)
Info :
Place safety eyes between Rounds 13-14: position approx 10-12 stitches apart (measured across the head), centered vertically at round 13. Use pins to preview eye placement before securing.
Round 14 :
1 sc in each st (54)
Round 15 :
(7 sc, inc) x 6 (60)
Round 16 :
1 sc in each st (60)
Round 17 :
1 sc in each st (60)
Info :
Add a couple of thin plastic safety eye washers or felt backing for a flush look. If embroidering eyelids or brows, leave long tails now to stitch later.
Round 18 :
(8 sc, inc) x 6 (66)
Round 19 :
1 sc in each st (66)
Round 20 :
1 sc in each st (66)
Info :
Begin to form the brow ridge by making the first 6-8 stitches of the round slightly tighter and optionally working them in BLO for a defined ridge effect.
Round 21 :
(8 sc, dec) x 6 (60)
Round 22 :
(7 sc, dec) x 6 (54)
Round 23 :
(6 sc, dec) x 6 (48)
Info :
Start stuffing the head lightly up to this point. Use small amounts of stuffing to keep the muzzle sculpted and reduce lumps.
Round 24 :
(5 sc, dec) x 6 (42)
Round 25 :
(4 sc, dec) x 6 (36)
Round 26 :
(3 sc, dec) x 6 (30)
Round 27 :
(2 sc, dec) x 6 (24)
Info :
Keep stuffing as you decrease; make muzzle firm but not rock-hard. Smooth stuffing toward center to avoid lumps under the eyes.
Round 28 :
(1 sc, dec) x 6 (18)
Round 30 :
Fasten off leaving long tail for sewing into the neck. Finish stuffing to desired firmness for head. (6)
Info :
Do not close head completely; instead leave the last stitches open to seam to the neck later. We will add separate muzzle shaping pieces in the next section for nostrils and defined lip.
— Snout & Nostrils :
Round 3 :
(1 sc, inc) x 6 (18)
Round 4 :
1 sc in each st (18)
Round 5 :
(2 sc, dec) x 6 (12)
Info :
Stuff snout lightly and sew into position under the head opening. Add 2 small black embroidered nostrils at the front with backstitch.
Round 6 :
Fasten off leaving long tail for attaching to head.
— Head Frills & Brow Spikes (Make 6 small frill spikes + 1 central crest) :
Frill Base Round 1 :
6 sc in mr (6)
Frill Round 2 :
6 inc (12)
Frill Round 3 :
(1 sc, inc) x 6 (18)
Info :
Work frills flat: after Round 3, chain 1 and work across in sc to make a pointed scallop if desired. Make 6 small frills to sew evenly along the temple area.
Brow Spike (Central) Round 1 :
6 sc in mr (6)
Brow Spike Round 2 :
6 sc (6)
Brow Spike Round 3 :
(1 sc, inc) x 3 (9)
Brow Spike Round 4 :
1 sc in each st (9)
Brow Spike Round 5 :
(2 sc, inc) x 3 (12)
Brow Spike Round 6 :
1 sc in each st (12)
Info :
Sew the central crest along the midline of the head from the brow to the crown. Add smaller frills to the sides, spacing evenly behind the eyes.
— Horns (Make 2) :
Round 3 :
(1 sc, inc) x 3 (9)
Round 4 :
1 sc in each st (9)
Round 5 :
(2 sc, inc) x 3 (12)
Round 6 :
1 sc in each st (12)
Round 7 :
(3 sc, inc) x 3 (15)
Round 8 :
1 sc in each st (15)
Round 9 :
(4 sc, inc) x 3 (18)
Round 10 :
1 sc in each st (18)
Round 11 :
(4 sc, dec) x 3 (15)
Round 12 :
(3 sc, dec) x 3 (12)
Round 13 :
(2 sc, dec) x 3 (9)
Round 14 :
(1 sc, dec) x 3 (6)
Info :
Horns in black are worked tightly and left slightly hollow. Insert a small wire or pipe cleaner if you want them poseable then stuff lightly and sew closed. Make the horns slightly curved by decreasing more on one side when sewing to the head.
Round 15 :
Fasten off leaving long tail for sewing (6)
— Neck :
Round 3 :
(1 sc, inc) x 6 (18)
Round 4 :
(2 sc, inc) x 6 (24)
Round 5 :
1 sc in each st (24)
Round 6 :
1 sc in each st (24)
Info :
Work the neck longer to create a graceful S-shaped posture. Stuff lightly, not as firm as head, to allow the neck to be attached and slightly bendable. Insert wire if making poseable neck.
Round 7 :
1 sc in each st (24)
Round 8 :
(3 sc, inc) x 6 (30)
Round 9 :
1 sc in each st (30)
Round 10 :
1 sc in each st (30)
Round 11 :
1 sc in each st (30)
Info :
Attach the head by placing the neck opening into the head opening; use long tail from head to sew firmly with mattress or whip stitch. Make adjustments while stuffing for smooth join.
Round 12 :
1 sc in each st (30)
Round 13 :
(4 sc, dec) x 6 (24)
Round 14 :
(3 sc, dec) x 6 (18)
Round 15 :
Fasten off leaving long tail for sewing to body (18)
— Body :
Round 3 :
(1 sc, inc) x 6 (18)
Round 4 :
(2 sc, inc) x 6 (24)
Round 5 :
(3 sc, inc) x 6 (30)
Round 6 :
(4 sc, inc) x 6 (36)
Round 7-10 :
1 sc in each st (36)
Info :
If adding the black belly panel, switch to black yarn now. We will create the belly panel as a separate strip and sew it on for neat edges. Work main rounds in red.
Round 11 :
(5 sc, inc) x 6 (42)
Round 12 :
1 sc in each st (42)
Round 13 :
1 sc in each st (42)
Round 14 :
(6 sc, inc) x 6 (48)
Round 15-18 :
1 sc in each st (48)
Info :
Begin stuffing the body from the bottom up around Round 16-18. Stuff firmly at the base to allow it to sit upright but keep the upper body slightly looser to ease neck joining.
Round 19 :
(6 sc, dec) x 6 (42)
Round 20 :
(5 sc, dec) x 6 (36)
Round 21 :
(4 sc, dec) x 6 (30)
Round 22 :
(3 sc, dec) x 6 (24)
Round 23 :
(2 sc, dec) x 6 (18)
Round 24 :
(1 sc, dec) x 6 (12)
Info :
Leave the top opening slightly open (do not close completely) if you plan to sew neck inside. Use long tail from body to attach neck with invisible stitches and blend stuffing between parts.
Round 26 :
Fasten off leaving long tail for final closing and sewing (6)
— Belly Panel (Black, Make 1) :
Panel Round 1 :
Ch 16, sc in 2nd ch from hook and across (15)
Panel Round 2 :
Ch 1, turn, sc across (15)
Panel Round 3-18 :
Ch 1, turn, sc across (15)
Info :
Make strip long enough to cover from chest to belly bottom (about 18 rows here). Sew panel onto body center front using invisible stitch, slightly stretching edges to follow body curve.
Panel Finish :
Fasten off and weave in ends.
— Arms (Make 2) :
Round 3 :
(1 sc, inc) x 6 (18)
Round 4 :
(2 sc, inc) x 6 (24)
Info :
Work the hand/toe bulb first. The front of the limb will be slightly flatter; keep first 6 stitches of each round slightly tighter to shape the wrist and paw.
Round 5 :
1 sc in each st (24)
Round 6 :
1 sc in each st (24)
Round 7 :
(3 sc, dec) x 6 (18)
Round 8 :
1 sc in each st (18)
Round 9 :
1 sc in each st (18)
Round 10 :
(2 sc, inc) x 6 (24)
Round 11-14 :
1 sc in each st (24)
Info :
Stuff the paw area firmly and the rest of the arm moderately. Leave a long tail at the top for sewing to the body. Position arm so claws face forward and seam at body rounds 16-18 for a natural sitting pose.
Round 15 :
(2 sc, dec) x 6 (18)
Round 16 :
1 sc in each st (18)
Round 17 :
Fasten off leaving long tail for sewing (18)
Claws (Make 3 per paw) :
Rnd1: 5 sc in mr (5). Rnd2: sc around (5). Fasten off leaving tail for sewing. Make 3 and sew to the toe tips of each paw.
— Legs & Feet (Make 2) :
Round 3 :
(1 sc, inc) x 6 (18)
Round 4 :
(2 sc, inc) x 6 (24)
Round 5 :
(3 sc, inc) x 6 (30)
Round 6 :
1 sc in each st (30)
Round 7 :
1 sc in each st (30)
Info :
Shape the foot by making rounds 1-7 wider and the ankle narrower. Stuff foot firmly to provide a stable base for the toy to sit upright.
Round 8 :
(4 sc, dec) x 6 (24)
Round 9 :
1 sc in each st (24)
Round 10 :
(3 sc, dec) x 6 (18)
Round 11 :
1 sc in each st (18)
Round 12 :
(2 sc, dec) x 6 (12)
Round 13 :
1 sc in each st (12)
Round 14 :
Fasten off leaving long tail for sewing (12)
Info :
Make 3 claws for each foot as for the arms and sew them around the toe edge. Sew legs into body opening at bottom rounds with spacing that allows the dragon to sit with knees forward.
— Tail :
Round 3 :
(1 sc, inc) x 3 (9)
Round 4-6 :
1 sc in each st (9)
Info :
Taper the tail gradually; every 6-8 rounds dec once to create a smooth taper. Add black spikes by making tiny mr 5 sc bumps and sewing them along the top every 4-6 rows.
Round 7 :
(2 sc, inc) x 3 (12)
Round 8-18 :
1 sc in each st (12)
Round 19 :
(2 sc, dec) x 3 (9)
Round 20 :
(1 sc, dec) x 3 (6)
Round 21 :
Fasten off leaving tail for sewing (6)
Spike Bumps (Make 8) :
Rnd1: 5 sc in mr (5). Rnd2: sc around (5). Fasten off and sew along tail top at even spacing.
— Wing Structure (Make 2) :
Wing Armature Round 1 :
Ch 25, sc in 2nd ch from hook and across (24)
Wing Armature Round 2 :
Ch 1, turn, sc across (24)
Wing Armature Round 3-6 :
Ch 1, turn, sc across (24)
Info :
This strip will form the outer edge (arm) of the wing. Work tight. The wing will be seamed to a triangular membrane worked in black.
Wing Membrane (Black) :
Work a triangular panel by starting at the wing-arm base: Rnd1: ch 3, 3 sc in 2nd ch from hook (2 stitches). Rnd2: ch1, turn, sc in first st, inc last st to widen. Continue increasing at the outer edge every other row until the triangle reaches desired depth (approx 18-20 rows). Maintain straight inner edge by working even rows along the base.
Info :
Sew the wing arm to the membrane along the sloped edge. Join red outer arm to the red body seam and edge the membrane with a row of red sc to create the red rim seen in the photo.
Wing Edge Rnd :
Work sc around entire wing assembly in red to give the red rim effect. Fasten off and weave in ends.
— Inner Wing Ridges (Make 4 per wing) :
Round 2-8 :
1 sc in each st (6)
Info :
Make 4 ridges and sew evenly into the wing membrane inner side. Use them to create the ribbed sail appearance; space them so the membrane curves naturally when attached to body.
— Dorsal Spines (Make 9 small spines) :
Round 3 :
(1 sc, inc) x 3 (9)
Round 4-6 :
1 sc in each st (9)
Round 7 :
Fasten off leaving tail for sewing (9)
Info :
Sew the spines down the center back from crown of head to tail base. Slightly stuff each spine for volume or leave hollow for a crisp ridge.
— Assembly Notes :
Info :
When sewing pieces, always pin in place first. Use mattress stitch or ladder stitch for neat joins. Reinforce limb joins with an extra round of stitches if the toy will be handled frequently.
This dark red demon dragon is a satisfying build that brings sculptural crochet and character design together into one dramatic piece. Each section — from the horns to the wing membranes and the textured black belly — adds personality and depth. The careful shaping rewards patience with a striking finished figure that looks great posed on a shelf or given as a special handmade gift. 🧶🔥🖤